編輯:初級開發
public class FixedGridLayout extends VIEwGroup {
int mCellWidth;
int mCellHeight;
public FixedGridLayout(Context context) {
super(context);
}
public FixedGridLayout(Context context, AttributeSet attrs) {
super(context, attrs);
TypedArray a = context.obtainStyledAttributes(
attrs, R.styleable.FixedGridLayout);
mCellWidth = a.getDimensionPixelSize(
R.styleable.FixedGridLayout_cellWidth, -1);
mCellHeight = a.getDimensionPixelSize(
R.styleable.FixedGridLayout_cellHeight, -1);
a.recycle();
}
public void setCellWidth(int px) {
mCellWidth = px;
requestLayout();
}
public void setCellHeight(int px) {
mCellHeight = px;
requestLayout();
}
@Override
protected void onMeasure(int widthMeasureSpec, int heightMeasureSpec) {
int cellWidthSpec = MeasureSpec.makeMeasureSpec(mCellWidth,
MeasureSpec.AT_MOST);
int cellHeightSpec = MeasureSpec.makeMeasureSpec(mCellHeight,
MeasureSpec.AT_MOST);
int count = getChildCount();
for (int index=0; index<count; index++) {
final VIEw child = getChildAt(index);
child.measure(cellWidthSpec, cellHeightSpec);
}
// Use the size our parents gave us
setMeasuredDimension(resolveSize(mCellWidth*count, widthMeasureSpec),
resolveSize(mCellHeight*count, heightMeasureSpec));
}
@Override
protected void onLayout(boolean changed, int l, int t, int r, int b) {
int cellWidth = mCellWidth;
int cellHeight = mCellHeight;
int columns = (r - l) / cellWidth;
if (columns < 0) {
columns = 1;
}
int x = 0;
int y = 0;
int i = 0;
int count = getChildCount();
for (int index=0; index<count; index++) {
final VIEw child = getChildAt(index);
int w = child.getMeasuredWidth();
int h = child.getMeasuredHeight();
int left = x + ((cellWidth-w)/2);
int top = y + ((cellHeight-h)/2);
child.layout(left, top, left+w, top+h);
if (i >= (columns-1)) {
// advance to next row
i = 0;
x = 0;
y += cellHeight;
} else {
i++;
x += cellWidth;
}
}
}
}
調用的方法也很簡單,我們在Activity的onCreate中這樣寫即可。
@Override
public void onCreate(Bundle savedInstanceState)
{
super.onCreate(savedInstanceState);
setContentVIEw(R.layout.main);
FixedGridLayout grid = (FixedGridLayout)findVIEwById(R.id.grid);
grid.setCellWidth(80);
grid.setCellHeight(80);
}
涉及到的資源如下: \res\values\attrs.XML 文件內容為
<resources>
<declare-styleable name="FixedGridLayout">
<attr name="cellWidth" format="dimension" />
<attr name="cellHeight" format="dimension" />
</declare-styleable>
</resources>
而main.XML的內容為
<?XML version="1.0" encoding="utf-8"?>
<com.android123.myGridVIEw.FixedGridLayout
XMLns:android="http://schemas.android.com/apk/res/android"
XMLns:app="com.android123.myGridVIEw"
android:id="@+id/grid"
android:layout_width="match_parent"
android:layout_height="match_parent"
app:cellWidth="80dp"
app:cellHeight="100dp"
>
<ImageVIEw
android:layout_width="wrap_content"
android:layout_height="wrap_content"
android:src="@drawable/icon"
/>
<ImageVIEw
android:layout_width="wrap_content"
android:layout_height="wrap_content"
android:src="@drawable/icon"
/>
<ImageVIEw
android:layout_width="wrap_content"
android:layout_height="wrap_content"
android:src="@drawable/icon"
/>
<ImageVIEw
android:layout_width="wrap_content"
android:layout_height="wrap_content"
android:src="@drawable/icon"
/>
<ImageVIEw
android:layout_width="wrap_content"
android:layout_height="wrap_content"
android:src="@drawable/icon"
/>
<ImageVIEw
android:layout_width="wrap_content"
android:layout_height="wrap_content"
android:src="@drawable/icon"
/>
</com.android123.myGridVIEw.FixedGridLayout>
那麼很多網友要問了,這個GridVIEw的內部元素在那裡,這裡例子懶省事直接在main.XML中往ViewGroup手動加入ImageVIEw實現n宮格的方法,Android123需要提醒網友的是,默認情況下android的GridView要比這個復雜得多,因為還需要綁定Adapter以及處理很多細節,是從AbsListView派生的,而非本例的VIEwGroup,這裡僅給大家另外一種思路去實現想要的功能。
 口袋互聯網 HTC Hero用戶自行開發Android 2.1升級包
HTC Hero作為一款硬件配置強悍的智能手機,對不同版本的android系統兼容性非常好,曾有用戶將HTC新機Espresso內的2.1版android系統和最新的S
 jocky配置使用
4、點ok後,將在項目的根目錄下生成一個jocky_build.XML文件,事實上是一個ant build文件。打開這個文件,作適當修改<?XML version
 Android之快捷方式二――向Launcher添加快捷方式
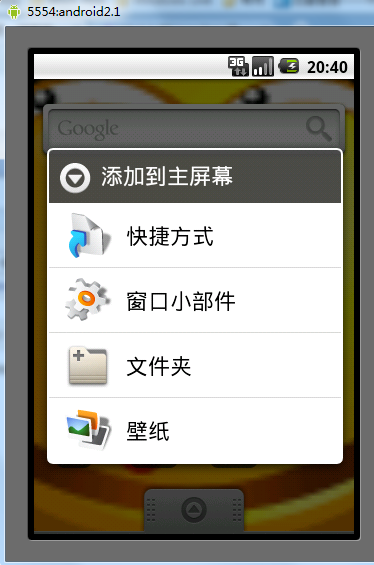
當我們在應用程序Launcher的桌面空白處長按觸摸時,會出現一個對話框,提示選擇要添加的桌面組件,如下圖所示選擇快捷方式後,會彈出一個對話框,顯示出了可添加快捷方式的
 android讀取手機通訊錄
下面展示一段在android1.5上讀取手機通訊錄的代碼1 //鏈接通訊錄數據庫 2 ContentResolver content = getContentResol