編輯:初級開發
58.List11 多選List

源碼就這些:
注意第8行 final ListView listView = getListVIEw();獲得當前List
1: @Override 2: public void onCreate(Bundle savedInstanceState) { 3: super.onCreate(savedInstanceState); 4: 5: setListAdapter(new ArrayAdapter<String>(this, 6: android.R.layout.simple_list_item_multiple_choice, GENRES)); 7: 8: final ListView listView = getListView(); 9: 10: listView.setItemsCanFocus(false);11: listView.setChoiceMode(ListVIEw.CHOICE_MODE_MULTIPLE);12: }13:
59.List12
布局由一個List+EditView組成 ,EditView正要輸入時可以自動跑到輸入法的上面。List裡顯示EditVIEw輸入的內容。並且List從最底部開始顯示
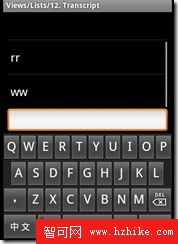
布局:
注意:第10行android:stackFromBottom="true" android:transcriptMode="normal"
通過設置的控件transcriptMode屬性可以將android平台的控件(支持ScrollBar)自動滑動到最底部
1: <?xml version="1.0" encoding="utf-8"?> 2: 3: <LinearLayout XMLns:android="http://schemas.android.com/apk/res/android" 4: android:orientation="vertical" android:layout_width="fill_parent" 5: android:layout_height="fill_parent" android:paddingLeft="8dip" 6: android:paddingRight="8dip"> 7: 8: <ListVIEw android:id="@android:id/list" android:layout_width="fill_parent" 9: android:layout_height="0dip" android:layout_weight="1"10: android:stackFromBottom="true" android:transcriptMode="normal" />11: 12: <EditText android:id="@+id/userText" android:layout_width="fill_parent"13: android:layout_height="wrap_content" />14: 15: </LinearLayout>源碼:
注意:第24行mAdapter.add(text);直接在ArrayAdapter裡加元素
1: @Override 2: protected void onCreate(Bundle savedInstanceState) { 3: super.onCreate(savedInstanceState); 4: 5: setContentVIEw(R.layout.list_12); 6: 7: mAdapter = new ArrayAdapter<String>(this, 8: android.R.layout.simple_list_item_1, mStrings); 9: 10: setListAdapter(mAdapter);11: 12: mUserText = (EditText) findViewById(R.id.userText);13: 14: mUserText.setOnClickListener(this);15: mUserText.setOnKeyListener(this);16: }17: 18: public void onClick(View v) {19: sendText();20: }21: 22: private void sendText() {23: String text = mUserText.getText().toString();24: mAdapter.add(text);25: mUserText.setText(null);26: }27: 28: public boolean onKey(VIEw v, int keyCode, KeyEvent event) {29: if (event.getAction() == KeyEvent.ACTION_DOWN) {30: switch (keyCode) {31: case KeyEvent.KEYCODE_DPAD_CENTER:32: case KeyEvent.KEYCODE_ENTER:33: sendText();34: return true;35: }36: }37: return false;38: }
59.List14
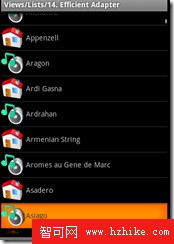
在OnCreate裡給ListActivity設置了一個自定義的Adapter
1: @Override2: public void onCreate(Bundle savedInstanceState) {3: super.onCreate(savedInstanceState);4: setListAdapter(new EfficientAdapter(this));5: }EfficIEctAdapter的構造裡直接從ListActivity獲得一個布局LayoutInflater,
注意:第3行mInflater = LayoutInflater.from(context);
1: public EfficientAdapter(Context context) { 2: // Cache the LayoutInflate to avoid asking for a new one each time. 3: mInflater = LayoutInflater.from(context); 4: 5: // Icons bound to the rows. 6: mIcon1 = BitmapFactory.decodeResource(context.getResources(), 7: R.drawable.icon48x48_1); 8: mIcon2 = BitmapFactory.decodeResource(context.getResources(), 9: R.drawable.icon48x48_2);10: }創建了一個用去存View的類VIEwHolder,
1: static class ViewHolder {2: TextView text;3: ImageView icon;4: }在EfficiectAdapter的getVIEw
注意:第13行convertView = mInflater.inflate(R.layout.list_item_icon_text, null);直接把convertVIEw 的布局設置成
R.layout.list_item_icon_text
convertView 為要顯示在Adapter中的VIEw
1: public View getView(int position, View convertView, ViewGroup parent) { 2: // A ViewHolder keeps references to children views to avoid unneccessary 3: // calls 4: // to findViewById() on each row. 5: ViewHolder holder; 6: 7: // When convertView is not null, we can reuse it directly, there is no 8: // need 9: // to reinflate it. We only inflate a new View when the convertView10: // supplied11: // by ListView is null.12: if (convertView == null) {13: convertView = mInflater.inflate(R.layout.list_item_icon_text, null);14: 15: // Creates a ViewHolder and store references to the two children views16: // we want to bind data to.17: holder = new ViewHolder();18: holder.text = (TextView) convertView.findViewById(R.id.text);19: holder.icon = (ImageView) convertView.findViewById(R.id.icon);20: 21: convertView.setTag(holder);22: } else {23: // Get the VIEwHolder back to get fast Access to the TextView24: // and the ImageView.25: holder = (ViewHolder) convertView.getTag();26: }27: 28: // Bind the data efficiently with the holder.29: holder.text.setText(DATA[position]);30: holder.icon.setImageBitmap((position & 1) == 1 ? mIcon1 : mIcon2);31: 32: return convertVIEw;33: }
60.ProgressBar1 進度條
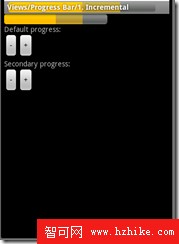
Layout布局中ProgressBar部分:
第2行是ProgressBar的style樣式,第5行為ProgressBar的最大值,第6行為默認ProgressBar的初始值,第7行為第二個ProgressBar的初始值
PorgressBar的style為style="?android:attr/progressBarStyleHorizontal"
1: <ProgressBar android:id="@+id/progress_horizontal"2: style="?android:attr/progressBarStyleHorizontal"3: android:layout_width="200dip"4: android:layout_height="wrap_content"5: android:max="100"6: android:progress="50"7: android:secondaryProgress="75" />此程序在標題欄上顯示了ProgressBar,代碼如下:
第7,8行一定要乘與100,因為// Title progress is in range 0..10000,即標題攔的進度在0到10000之間
1: // Request the progress bar to be shown in the title2: requestWindowFeature(Window.FEATURE_PROGRESS);3: setContentView(R.layout.progressbar_1);4: setProgressBarVisibility(true);5: 6: final ProgressBar progressHorizontal = (ProgressBar) findVIEwById(R.id.progress_horizontal);7: setProgress(progressHorizontal.getProgress()*100);//無這兩句標題攔裡不顯示進度條ProgressBar,一條要乘與1008: setSecondaryProgress(progressHorizontal.getSecondaryProgress() *100);加減進度條進度值的方法:
注意:progressHorizontal.incrementSecondaryProgressBy(-1); 正數為加,負數為減
1: Button button = (Button) findViewById(R.id.increase);2: button.setOnClickListener(new Button.OnClickListener() {3: public void onClick(View v) {4: progressHorizontal.incrementProgressBy(1);5: // Title progress is in range 0..100006: setProgress(100 * progressHorizontal.getProgress());7: }8: });1: button = (Button) findViewById(R.id.decrease_secondary);2: button.setOnClickListener(new Button.OnClickListener() {3: public void onClick(VIEw v) {4: progressHorizontal.incrementSecondaryProgressBy(-1);5: // Title progress is in range 0..100006: setSecondaryProgress(100 * progressHorizontal7: .getSecondaryProgress());8: }9: });
61.ProgressBar2 進度條
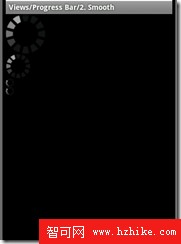
上面顯示了4個ProgressBar ,布局為:
注意:style="?android:attr/progressBarStyleLarge" style="?android:attr/progressBarStyleSmall" style="?android:attr/progressBarStyleSmallTitle"
1: <?xml version="1.0" encoding="utf-8"?> 2: 3: <LinearLayout XMLns:android="http://schemas.android.com/apk/res/android" 4: android:orIEntation="vertical" 5: android:layout_width="fill_parent" 6: android:layout_height="wrap_content"> 7: 8: <ProgressBar android:id="@+android:id/progress_large" 9: style="?android:attr/progressBarStyleLarge"10: android:layout_width="wrap_content"11: android:layout_height="wrap_content" />12: 13: <ProgressBar android:id="@+android:id/progress"14: android:layout_width="wrap_content"15: android:layout_height="wrap_content" />16: 17: <ProgressBar android:id="@+android:id/progress_small"18: style="?android:attr/progressBarStyleSmall"19: android:layout_width="wrap_content"20: android:layout_height="wrap_content" />21: 22: <ProgressBar android:id="@+android:id/progress_small_title"23: style="?android:attr/progressBarStyleSmallTitle"24: android:layout_width="wrap_content"25: android:layout_height="wrap_content" />26: 27: </LinearLayout>28: 最後在OnCreate裡
1: // Request for the progress bar to be shown in the title2: requestWindowFeature(Window.FEATURE_INDETERMINATE_PROGRESS);3: 4: setContentVIEw(R.layout.progressbar_2);5: 6: // Make sure the progress bar is visible7: setProgressBarVisibility(true);
62. ProgressBar3
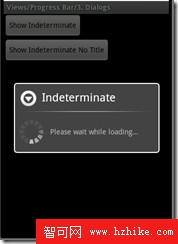
此程序為兩個按鈕,上面的激活帶標題的ProgressDialog ,下面激活不帶標題的ProgressDialog
OnCreate方法:
1: private static final int DIALOG1_KEY = 0; 2: private static final int DIALOG2_KEY = 1; 3: 4: @Override 5: protected void onCreate(Bundle savedInstanceState) { 6: super.onCreate(savedInstanceState); 7: 8: setContentView(R.layout.progressbar_3); 9: 10: Button button = (Button) findViewById(R.id.showIndeterminate);11: button.setOnClickListener(new View.OnClickListener() {12: public void onClick(View v) {13: showDialog(DIALOG1_KEY);14: }15: });16: 17: button = (Button) findViewById(R.id.showIndeterminateNoTitle);18: button.setOnClickListener(new View.OnClickListener() {19: public void onClick(VIEw v) {20: showDialog(DIALOG2_KEY);21: }22: });23: }由showDialog(DIALOG2_KEY) 激活對話框的方法:
1: @Override 2: protected Dialog onCreateDialog(int id) { 3: switch (id) { 4: case DIALOG1_KEY: { 5: ProgressDialog dialog = new ProgressDialog(this); 6: dialog.setTitle("Indeterminate"); 7: dialog.setMessage("Please wait while loading..."); 8: dialog.setIndeterminate(true); 9: dialog.setCancelable(true);10: return dialog;11: }12: case DIALOG2_KEY: {13: ProgressDialog dialog = new ProgressDialog(this);14: dialog.setMessage("Please wait while loading...");15: dialog.setIndeterminate(true);16: dialog.setCancelable(true);17: return dialog;18: }19: }20: return null;21: }
63.ProgressBar4 在標題欄顯示進度條(右上角)
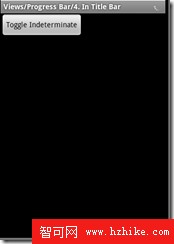
源碼:
1: private boolean mToggleIndeterminate = false; 2: 3: @Override 4: protected void onCreate(Bundle savedInstanceState) { 5: super.onCreate(savedInstanceState); 6: 7: // Request progress bar 8: requestWindowFeature(Window.FEATURE_INDETERMINATE_PROGRESS);//一定要有 9: setContentView(R.layout.progressbar_4);10: setProgressBarIndeterminateVisibility(mToggleIndeterminate);//Whether to show the progress bars in the title11: 12: Button button = (Button) findViewById(R.id.toggle);13: button.setOnClickListener(new Button.OnClickListener() {14: public void onClick(VIEw v) {15: mToggleIndeterminate = !mToggleIndeterminate;16: setProgressBarIndeterminateVisibility(mToggleIndeterminate);17: }18: });19: }
64.RadioGroup1
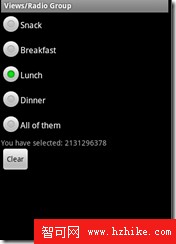
布局:一個RadioGroup裡有4個RadioButton,默認被選定的是android:checkedButton="@+id/lunch"
1: <?xml version="1.0" encoding="utf-8"?> 2: 3: 4: <LinearLayout XMLns:android="http://schemas.android.com/apk/res/android" 5: android:layout_width="fill_parent" 6: android:layout_height="fill_parent" 7: android:orientation="vertical"> 8: <RadioGroup 9: android:layout_width="fill_parent"10: android:layout_height="wrap_content"11: android:orientation="vertical"12: android:checkedButton="@+id/lunch"13: android:id="@+id/menu">14: <RadioButton15: android:text="@string/radio_group_1_breakfast"16: android:id="@+id/breakfast"17: />18: <RadioButton19: android:text="@string/radio_group_1_lunch"20: android:id="@id/lunch" />21: <RadioButton22: android:text="@string/radio_group_1_dinner"23: android:id="@+id/dinner" />24: <RadioButton25: android:text="@string/radio_group_1_all"26: android:id="@+id/all" />27: <TextVIEw28: android:text="@string/radio_group_1_selection"29: android:id="@+id/choice" />30: </RadioGroup>31: <Button32: android:layout_width="wrap_content"33: android:layout_height="wrap_content"34: android:text="@string/radio_group_1_clear"35: android:id="@+id/clear" />36: </LinearLayout>源碼:
在第9行到15行動態往RadioGroup裡addVIEw加入了一個RadioButton,
第19行設置選擇改變setOnCheckedChangeListener(this),在第28行實現了onCheckedChanged方法
1: @Override 2: protected void onCreate(Bundle savedInstanceState) { 3: super.onCreate(savedInstanceState); 4: 5: setContentView(R.layout.radio_group_1); 6: mRadioGroup = (RadioGroup) findViewById(R.id.menu); 7: 8: // test adding a radio button programmatically 9: RadioButton newRadioButton = new RadioButton(this);10: newRadioButton.setText(R.string.radio_group_snack);11: newRadioButton.setId(R.id.snack);12: LinearLayout.LayoutParams layoutParams = new RadioGroup.LayoutParams(13: RadioGroup.LayoutParams.WRAP_CONTENT,14: RadioGroup.LayoutParams.WRAP_CONTENT);15: mRadioGroup.addView(newRadioButton, 0, layoutParams);16: 17: // test listening to checked change events18: String selection = getString(R.string.radio_group_selection);19: mRadioGroup.setOnCheckedChangeListener(this);20: mChoice = (TextView) findViewById(R.id.choice);21: mChoice.setText(selection + mRadioGroup.getCheckedRadioButtonId());22: 23: // test clearing the selection24: Button clearButton = (Button) findViewById(R.id.clear);25: clearButton.setOnClickListener(this);26: }27: 28: public void onCheckedChanged(RadioGroup group, int checkedId) {29: String selection = getString(R.string.radio_group_selection);30: String none = getString(R.string.radio_group_none);31: mChoice.setText(selection32: + (checkedId == View.NO_ID ? none : checkedId));33: }34: 35: public void onClick(VIEw v) {36: mRadioGroup.clearCheck();37: }
65.
布局:
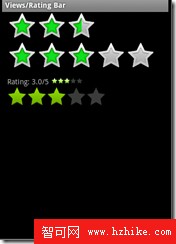
注意:第12行,18行的android:numStars="3"星數 第13行,19行的android:rating="2.5" 默認初始值
第31行,40行的樣式 style="?android:attr/ratingBarStyleSmall" style="?android:attr/ratingBarStyleIndicator"
1: <?xml version="1.0" encoding="utf-8"?> 2: 3: <LinearLayout XMLns:android="http://schemas.android.com/apk/res/android" 4: android:orientation="vertical" 5: android:paddingLeft="10dip" 6: android:layout_width="fill_parent" 7: android:layout_height="fill_parent"> 8: 9: <RatingBar android:id="@+id/ratingbar1"10: android:layout_width="wrap_content"11: android:layout_height="wrap_content"12: android:numStars="3"13: android:rating="2.5" />14: 15: <RatingBar android:id="@+id/ratingbar2"16: android:layout_width="wrap_content"17: android:layout_height="wrap_content"18: android:numStars="5"19: android:rating="2.25" />20: 21: <LinearLayout22: android:layout_width="fill_parent"23: android:layout_height="wrap_content"24: android:layout_marginTop="10dip">25: 26: <TextVIEw android:id="@+id/rating"27: android:layout_width="wrap_content"28: android:layout_height="wrap_content" />29: 30: <RatingBar android:id="@+id/small_ratingbar"31: style="?android:attr/ratingBarStyleSmall"32: android:layout_marginLeft="5dip"33: android:layout_width="wrap_content"34: android:layout_height="wrap_content"35: android:layout_gravity="center_vertical" />36: 37: </LinearLayout>38: 39: <RatingBar android:id="@+id/indicator_ratingbar"40: style="?android:attr/ratingBarStyleIndicator"41: android:layout_marginLeft="5dip"42: android:layout_width="wrap_content"43: android:layout_height="wrap_content"44: android:layout_gravity="center_vertical" />45: 46: </LinearLayout>
47: mIndicatorRatingBar mSmallRatingBar兩個變量為 這兩個RatingBar
1: // We copy the most recently changed rating on to these indicator-only 2: // rating bars 3: mIndicatorRatingBar = (RatingBar) findViewById(R.id.indicator_ratingbar); 4: mSmallRatingBar = (RatingBar) findViewById(R.id.small_ratingbar); 5: 6: // The different rating bars in the layout. Assign the listener to us. 7: ((RatingBar) findViewById(R.id.ratingbar1)) 8: .setOnRatingBarChangeListener(this); 9: ((RatingBar) findVIEwById(R.id.ratingbar2))10: .setOnRatingBarChangeListener(this);第7到第10行setOnRatingBarChangeListener(this);方法內來改變
1: public void onRatingChanged(RatingBar ratingBar, float rating, 2: boolean fromTouch) { 3: final int numStars = ratingBar.getNumStars(); 4: mRatingText.setText(getString(R.string.ratingbar_rating) + " " + rating 5: + "/" + numStars); 6: 7: // Since this rating bar is updated to reflect any of the other rating 8: // bars, we should update it to the current values. 9: if (mIndicatorRatingBar.getNumStars() != numStars) {10: mIndicatorRatingBar.setNumStars(numStars);11: mSmallRatingBar.setNumStars(numStars);12: }13: if (mIndicatorRatingBar.getRating() != rating) {14: mIndicatorRatingBar.setRating(rating);15: mSmallRatingBar.setRating(rating);16: }17: final float ratingBarStepSize = ratingBar.getStepSize();18: if (mIndicatorRatingBar.getStepSize() != ratingBarStepSize) {19: mIndicatorRatingBar.setStepSize(ratingBarStepSize);20: mSmallRatingBar.setStepSize(ratingBarStepSize);21: }22: }當ratingBar為三個星時,
當ratingBar為五個星時,
66.ScrollBar1
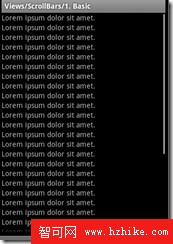
它就在布局XML文件裡的ScrollView裡加入了N個TextVIEw
1: <ScrollVIEw XMLns:android="http://schemas.android.com/apk/res/android" 2: android:layout_width="fill_parent" 3: android:layout_height="wrap_content"> 4: 5: <LinearLayout 6: android:orientation="vertical" 7: android:layout_width="fill_parent" 8: android:layout_height="wrap_content"> 9: 10: <TextView11: android:layout_width="fill_parent"12: android:layout_height="wrap_content"13: android:text="@string/scrollbar_1_text"/>14: <TextView15: android:layout_width="fill_parent"16: android:layout_height="wrap_content"17: android:text="@string/scrollbar_1_text"/>18: <TextVIEw19: android:layout_width="fill_parent"20: android:layout_height="wrap_content"21: android:text="@string/scrollbar_1_text"/>
67.ScrollBar2
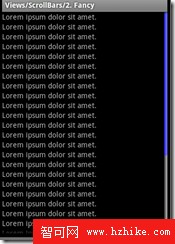
和上面的例子就差在顏色上,
注意第4.5行的android:scrollbarTrackVertical="@drawable/scrollbar_vertical_track" android:scrollbarThumbVertical="@drawable/scrollbar_vertical_thumb"
1: <ScrollView xmlns:android="http://schemas.android.com/apk/res/android" 2: android:layout_width="fill_parent" 3: android:layout_height="wrap_content" 4: android:scrollbarTrackVertical="@drawable/scrollbar_vertical_track" 5: android:scrollbarThumbVertical="@drawable/scrollbar_vertical_thumb" 6: android:scrollbarSize="12dip"> 7: 8: <LinearLayout 9: android:orientation="vertical"10: android:layout_width="fill_parent"11: android:layout_height="wrap_content">12: 13: <TextView14: android:layout_width="fill_parent"15: android:layout_height="wrap_content"16: android:text="@string/scrollbar_2_text"/>17: <TextVIEw18: android:layout_width="fill_parent"19: android:layout_height="wrap_content"20: android:text="@string/scrollbar_2_text"/>scrollbar_vertical_track.XML
1: <?xml version="1.0" encoding="utf-8"?>2: 3: 4: <shape xmlns:android="http://schemas.android.com/apk/res/android">5: <gradIEnt android:startColor="#505050" android:endColor="#C0C0C0"6: android:angle="0"/>7: <corners android:radius="0dp" />8: </shape>9: scrollbar_vertical_thumb.XML
1: <?xml version="1.0" encoding="utf-8"?>2: 3: <shape XMLns:android="http://schemas.android.com/apk/res/android">4: <gradIEnt android:startColor="#3333FF" android:endColor="#8080FF"5: android:angle="0"/>6: <corners android:radius="6dp" />7: </shape>8:
68.ScrollBar3
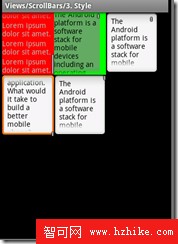
第4行設置style 
1: 2: setContentView(R.layout.scrollbar3);3: 4: findViewById(R.id.view3).setScrollBarStyle(VIEw.SCROLLBARS_INSIDE_INSET);布局:
注意:第114行的style  android:scrollbarStyle="outsideInset"
1: <?xml version="1.0" encoding="utf-8"?> 2: 3: 4: <!-- Demonstrates scrolling with a ScrollVIEw. --> 5: 6: <LinearLayout 7: XMLns:android="http://schemas.android.com/apk/res/android" 8: android:layout_width="fill_parent" 9: android:layout_height="fill_parent" 10: android:orientation="vertical"> 11: 12: <LinearLayout 13: android:layout_width="fill_parent" 14: android:layout_height="wrap_content" 15: android:orientation="horizontal"> 16: 17: <ScrollView 18: android:layout_width="100dip" 19: android:layout_height="120dip" 20: android:background="#FF0000"> 21: <LinearLayout 22: android:orientation="vertical" 23: android:layout_width="fill_parent" 24: android:layout_height="fill_parent"> 25: 26: <TextView 27: android:layout_width="fill_parent" 28: android:layout_height="wrap_content" 29: android:text="@string/scrollbar_2_text" /> 30: <TextView 31: android:layout_width="fill_parent" 32: android:layout_height="wrap_content" 33: android:text="@string/scrollbar_2_text" /> 34: <TextView 35: android:layout_width="fill_parent" 36: android:layout_height="wrap_content" 37: android:text="@string/scrollbar_2_text" /> 38: <TextView 39: android:layout_width="fill_parent" 40: android:layout_height="wrap_content" 41: android:text="@string/scrollbar_2_text" /> 42: <TextView 43: android:layout_width="fill_parent" 44: android:layout_height="wrap_content" 45: android:text="@string/scrollbar_2_text" /> 46: <TextView 47: android:layout_width="fill_parent" 48: android:layout_height="wrap_content" 49: android:text="@string/scrollbar_2_text" /> 50: <TextView 51: android:layout_width="fill_parent" 52: android:layout_height="wrap_content" 53: android:text="@string/scrollbar_2_text" /> 54: <TextView 55: android:layout_width="fill_parent" 56: android:layout_height="wrap_content" 57: android:text="@string/scrollbar_2_text" /> 58: <TextView 59: android:layout_width="fill_parent" 60: android:layout_height="wrap_content" 61: android:text="@string/scrollbar_2_text" /> 62: <TextView 63: android:layout_width="fill_parent" 64: android:layout_height="wrap_content" 65: android:text="@string/scrollbar_2_text" /> 66: </LinearLayout> 67: </ScrollView> 68: 69: <ScrollView 70: android:layout_width="100dip" 71: android:layout_height="120dip" 72: android:background="#00FF00" 73: android:paddingRight="12dip"> 74: <TextView 75: android:layout_width="fill_parent" 76: android:layout_height="wrap_content" 77: android:text="@string/scrollbar_3_text" 78: android:textColor="#000000" 79: android:background="#60AA60" /> 80: </ScrollView> 81: 82: <ScrollView 83: android:id="@+id/view3" 84: android:layout_width="100dip" 85: android:layout_height="120dip" 86: android:background="@android:drawable/edit_text"> 87: <TextView 88: android:layout_width="fill_parent" 89: android:layout_height="wrap_content" 90: android:textColor="#000000" 91: android:text="@string/scrollbar_3_text" /> 92: </ScrollView> 93: </LinearLayout> 94: 95: <LinearLayout 96: android:layout_width="fill_parent" 97: android:layout_height="wrap_content"> 98: <ScrollView 99: android:id="@+id/view4"100: android:layout_width="100dip"101: android:layout_height="120dip"102: android:scrollbarStyle="outsideOverlay"103: android:background="@android:drawable/edit_text">104: <TextView105: android:layout_width="fill_parent"106: android:layout_height="wrap_content"107: android:textColor="#000000"108: android:text="@string/scrollbar_3_text" />109: </ScrollView>110: <ScrollView111: android:id="@+id/view5"112: android:layout_width="100dip"113: android:layout_height="120dip"114: android:scrollbarStyle="outsideInset"115: android:background="@android:drawable/edit_text">116: <TextVIEw117: android:layout_width="fill_parent"118: android:layout_height="wrap_content"119: android:textColor="#000000"120: android:text="@string/scrollbar_3_text" />121: </ScrollVIEw>122: </LinearLayout>123: </LinearLayout>124:
69.SeekBar1
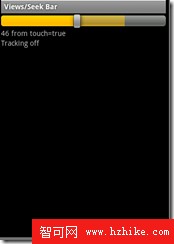
布局:
1: <?xml version="1.0" encoding="utf-8"?> 2: 3: <LinearLayout XMLns:android="http://schemas.android.com/apk/res/android" 4: android:orientation="vertical" 5: android:layout_width="fill_parent" 6: android:layout_height="fill_parent"> 7: 8: <SeekBar android:id="@+id/seek" 9: android:layout_width="fill_parent"10: android:layout_height="wrap_content"11: android:max="100"12: android:progress="50"13: android:secondaryProgress="75" />14: 15: <TextView android:id="@+id/progress"16: android:layout_width="fill_parent"17: android:layout_height="wrap_content" />18: 19: <TextVIEw android:id="@+id/tracking"20: android:layout_width="fill_parent"21: android:layout_height="wrap_content" />22: </LinearLayout>源碼:
1: SeekBar mSeekBar; 2: TextView mProgressText; 3: TextView mTrackingText; 4: 5: @Override 6: protected void onCreate(Bundle savedInstanceState) { 7: super.onCreate(savedInstanceState); 8: 9: setContentView(R.layout.seekbar_1);10: 11: mSeekBar = (SeekBar) findViewById(R.id.seek);12: mSeekBar.setOnSeekBarChangeListener(this);13: mProgressText = (TextView) findViewById(R.id.progress);14: mTrackingText = (TextView) findVIEwById(R.id.tracking);15: }16: 17: public void onProgressChanged(SeekBar seekBar, int progress,18: boolean fromTouch) {19: mProgressText.setText(progress + " "20: + getString(R.string.seekbar_from_touch) + "=" + fromTouch);21: }22: 23: public void onStartTrackingTouch(SeekBar seekBar) {24: mTrackingText.setText(getString(R.string.seekbar_tracking_on));25: }26: 27: public void onStopTrackingTouch(SeekBar seekBar) {28: mTrackingText.setText(getString(R.string.seekbar_tracking_off));29: }
 終於在XP host的VirtualBox Ubuntu系統下掛載成功Host下的文件夾
准備在虛擬機下的Ubuntu系統編譯Android源代碼,但是發現在線下載源代碼老是出現問題,幸好在Windows下已經下載成功了android源代碼,於是就想在Ubu
 Android反編譯方法的總結
ps:對於軟件開發人員來說,保護代碼安全也是比較重要的因素之一,不過目前來說Google Android平台選擇了Java Dalvik VM的方式使其程序很容易破解和
 Android ApiDemo ——Graphics和View (4)
58.List11 多選List 源碼就這些:注意第8行 final ListView listView = getListVIEw();獲得當前List&n
 獲取未安裝的APK圖標
網上關於獲取未安裝的APK圖標的文章滿天飛,但都是轉帖,運行後的效果卻是獲取到android的默認小機器人圖標.那個暴寒....現提供解決方法如下,廢話不說,上效果圖,