編輯:高級開發
手機開發最重要的是用戶接口,android中的Activity就是android應用與用戶的接口!
學習android開發之前最起碼要學過J2SE,因為我們是用Java語言開發android應用,當然要會Java語言了。學習Java的途徑很多,推薦在網上找些好的視頻邊看邊學(我曾經就是這樣學Java的)。今天的任務是實現Activity跳轉(就是J2SE中的界面跳轉),在PC機上這個功能非常簡單,但是在android手機上好像還要費一番功夫!
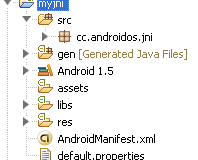
首先來看看android應用的目錄結構:src目錄:這個不用多說是放我們編寫的源代碼的。gen目錄:這個目錄需要注意,裡面有一個R.Java,是定義一些組件ID值的,一般不需要我們修改。接著是assets目錄:這個目錄可以放一些資源文件,還有個res目錄:這個目錄也是放資源文件的,但這裡的資源都要在R.Java中注冊ID值,一般是自動注冊的。res目錄下還有幾個子目錄,前三個是放圖片的(drawable-hdpi,drawable-ldpi,drawable-mdpi)分別代表不同的分辨率的圖片,layout目錄是存放布局文件的,這個非常重要,我們要經常使用。還有個values目錄,這裡存放一些其他資源的。需要特別注意的是在res目錄以及其子目錄下的文件都需要在R.Java裡注冊ID值。還有個文件非常重要,那就是Android的配置文件androidManifest.XML,我們創建的每一個Activity都要在這個文件裡配置。
下面來看開發實例:功能描述:第一個Activity裡有一行文字和一個按鈕,當點擊按鈕時,界面跳轉到第二個Activity,並將從第一個Activity裡傳來的值顯示在界面上。下面是源代碼:
HelloActivity.Java:
- package guxia.android;
- import android.app.Activity;
- import android.content.Intent;
- import android.os.Bundle;
- import android.view.VIEw;
- import android.view.VIEw.OnClickListener;
- import android.widget.Button;
- import android.widget.TextVIEw;
- public class HelloActivity extends Activity {
- /** Called when the activity is first created. */
- @Override
- public void onCreate(Bundle savedInstanceState) {
- super.onCreate(savedInstanceState);
- setContentVIEw(R.layout.main);
- TextView myTextView=(TextView)findViewById(R.id.myTextVIEw);
- Button myButton = (Button)findVIEwById(R.id.myButton);
- myTextVIEw.setText("welcome to myandroid");
- myButton.setText("my Button");
- myButton.setOnClickListener(new OnClickListener(){
- @Override
- public void onClick(VIEw arg0) {
- Intent intent=new Intent();
- intent.putExtra("myname", "這是從HelloActivity傳過來的值");
- intent.setClass(HelloActivity.this, Activity01.class);
- HelloActivity.this.startActivity(intent);
- }
- });
- }
- }
Activity01.Java:
- package guxia.android;
- import android.app.Activity;
- import android.content.Intent;
- import android.os.Bundle;
- import android.widget.TextVIEw;
- public class Activity01 extends Activity{
- private TextView myTextVIEw=null;
- @Override
- protected void onCreate(Bundle savedInstanceState) {
- // TODO Auto-generated method stub
- super.onCreate(savedInstanceState);
- setContentVIEw(R.layout.android01);
- myTextView=(TextView)findVIEwById(R.id.android01TextVIEw);
- Intent inte=getIntent();
- String myname=inte.getStringExtra("myname");
- myTextVIEw.setText(myname);
- }
- }
R.Java
- /* AUTO-GENERATED FILE. DO NOT MODIFY.
- *
- * This class was automatically generated by the
- * aapt tool from the resource data it found. It
- * should not be modifIEd by hand.
- */
- package guxia.android;
- public final class R {
- public static final class attr {
- }
- public static final class drawable {
- public static final int icon=0x7f020000;
- }
- public static final class id {
- public static final int android01TextVIEw=0x7f050000;
- public static final int myButton=0x7f050002;
- public static final int myTextVIEw=0x7f050001;
- }
- public static final class layout {
- public static final int android01=0x7f030000;
- public static final int main=0x7f030001;
- }
- public static final class string {
- public static final int android01=0x7f040002;
- public static final int app_name=0x7f040001;
- public static final int hello=0x7f040000;
- }
- }
main.XML(Layout目錄下,HelloActivity的布局文件):
- <?XML version="1.0" encoding="utf-8"?>
- <LinearLayout XMLns:android="http://schemas.android.com/apk/res/android"
- android:orIEntation="vertical"
- android:layout_width="fill_parent"
- android:layout_height="fill_parent"
- >
- <TextVIEw
- android:id="@+id/myTextVIEw"
- android:layout_width="fill_parent"
- android:layout_height="wrap_content"
- />
- <Button
- android:id="@+id/myButton"
- android:layout_width="fill_parent"
- android:layout_height="wrap_content"
- />
- </LinearLayout>
Activity01.XML(Activity01的布局文件):
- <?XML version="1.0" encoding="utf-8"?>
- <LinearLayout XMLns:android="http://schemas.android.com/apk/res/android"
- android:orIEntation="vertical"
- android:layout_width="fill_parent"
- android:layout_height="fill_parent"
- >
- <TextVIEw
- android:id="@+id/android01TextVIEw"
- android:layout_width="fill_parent"
- android:layout_height="wrap_content"
- />
- </LinearLayout>
strings.XML(values目錄下):
- <?XML version="1.0" encoding="utf-8"?>
- <resources>
- <string name="hello">Hello World, HelloActivity!</string>
- <string name="app_name">helloWord</string>
- <string name="android01">android</string>
- </resources>
配置文件androidManifest.XML:
- <?XML version="1.0" encoding="utf-8"?>
- <manifest XMLns:android="http://schemas.android.com/apk/res/android"
- package="guxia.android"
- android:versionCode="1"
- android:versionName="1.0">
- <uses-sdk android:minSdkVersion="8" />
- <application android:icon="@drawable/icon" android:label="@string/app_name">
- <activity android:name=".HelloActivity"
- android:label="@string/app_name">
- <intent-filter>
- <action android:name="android.intent.action.MAIN" />
- <category android:name="android.intent.category.LAUNCHER" />
- </intent-filter>
- </activity>
- <activity android:name=".Activity01" android:label="@string/android01">
- </activity>
- </application>
- </manifest>
 圖解Android應用程序構建原理
android 是Google開發的基於Linux平台的開源手機操作系統,每一個android應用在底層都會對應一個獨立的Dalvik虛擬機實例,其代碼在虛擬機的解釋下
 NDK入門項目實戰(5)
ock; margin-left: auto; margin-right: auto; src=/School/UploadFiles_7810/201203/2012
 探索Android DDMS工作原理
android DDMS將為IDE搭建起與測試終端的鏈接,它們應用各自獨立的端口監聽調試器的信息,android DDMS最大的特性就是可以實時監測到測試終端的連接情況
 Win7 配置Android開發環境(1)
一、安裝 JDK 下載JDK最新版本,下載地址如下: http://www.Oracle.com/technetwork/java/Javase/downloads