編輯:關於android開發

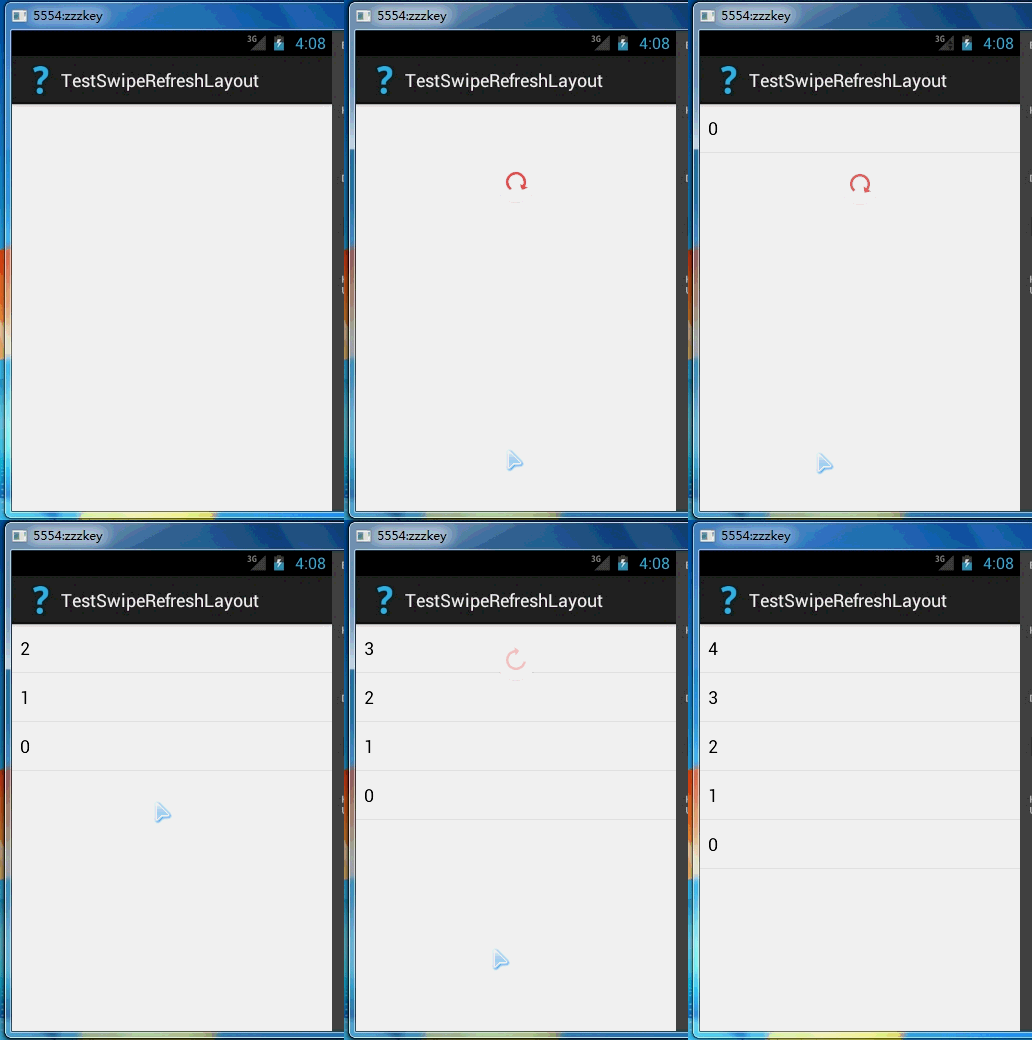
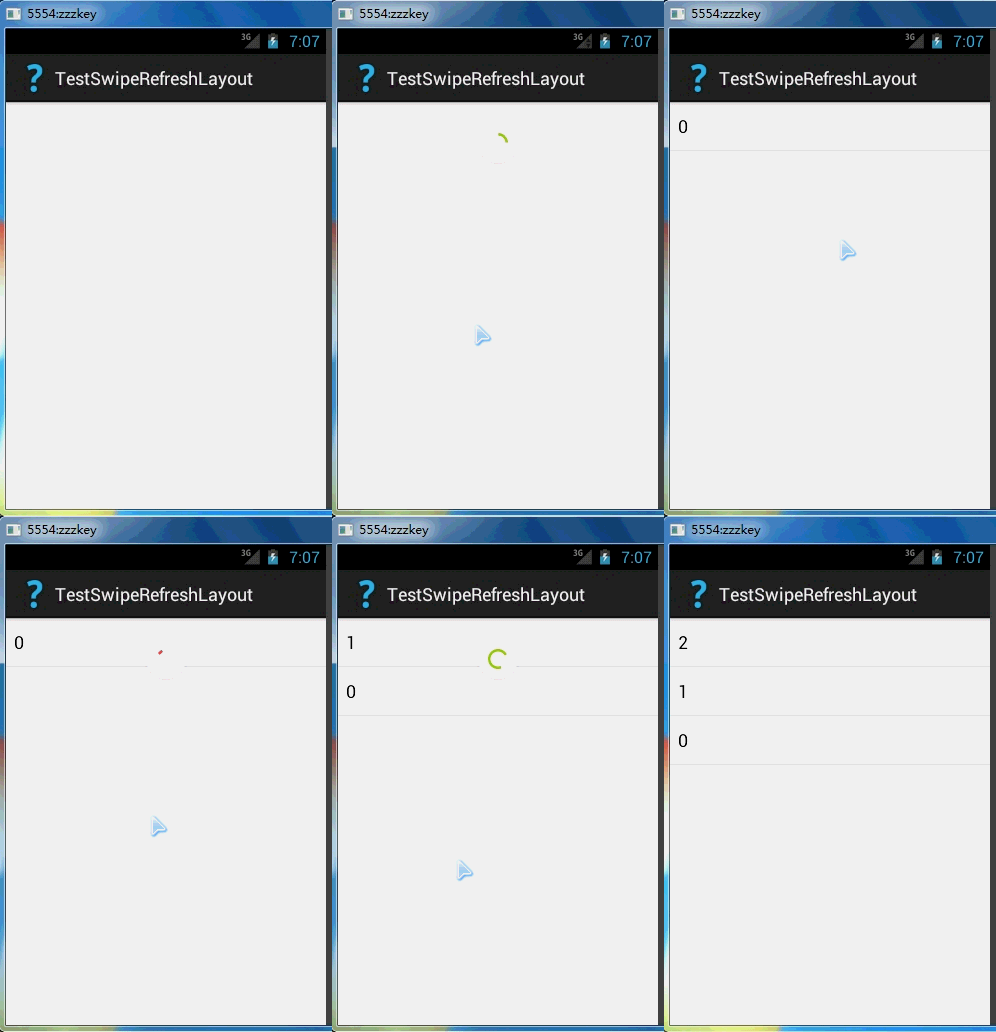
代碼工程簡要說明:以一個SwipeRefreshLayout包裹ListView,SwipeRefreshLayout接管ListView的下拉事件,若ListView被用戶觸發下拉動作後,SwipeRefreshLayout啟動下拉刷新的UI表現樣式,下拉刷新完畢,在SwipeRefreshLayout提供的接口中回調更新ListView中的數據。
activity_main.xml:
 1 <RelativeLayout xmlns:android="http://schemas.android.com/apk/res/android"
 2     xmlns:tools="http://schemas.android.com/tools"
 3     android:layout_width="match_parent"
 4     android:layout_height="match_parent"
 5     tools:context="com.zzw.testswiperefreshlayout.MainActivity" >
 6
 7     <android.support.v4.widget.SwipeRefreshLayout
 8         android:id="@+id/swipeRefreshLayoyut"
 9         android:layout_width="match_parent"
10         android:layout_height="match_parent" >
11
12         <ListView
13             android:id="@+id/listView"
14             android:layout_width="match_parent"
15             android:layout_height="match_parent" />
16     </android.support.v4.widget.SwipeRefreshLayout>
17
18 </RelativeLayout>
MainActivity.java:
 1 package com.zzw.testswiperefreshlayout;
 2
 3 import java.util.ArrayList;
 4
 5 import android.app.Activity;
 6 import android.os.Bundle;
 7 import android.support.v4.widget.SwipeRefreshLayout;
 8 import android.support.v4.widget.SwipeRefreshLayout.OnRefreshListener;
 9 import android.widget.ArrayAdapter;
10 import android.widget.ListView;
11
12 public class MainActivity extends Activity {
13
14     private SwipeRefreshLayout swipeRefreshLayout;
15
16     private int count = 0;
17     private ArrayList<String> data;
18     private ArrayAdapter<String> adapter;
19
20     @Override
21     protected void onCreate(Bundle savedInstanceState) {
22         super.onCreate(savedInstanceState);
23         setContentView(R.layout.activity_main);
24
25         data = new ArrayList<String>();
26
27         swipeRefreshLayout = (SwipeRefreshLayout) findViewById(R.id.swipeRefreshLayoyut);
28         ListView listView = (ListView) findViewById(R.id.listView);
29
30         // 設置刷新動畫的顏色,可以設置1或者更多.
31         // 我們暫時使用三個Android系統自帶的顏色。
32         swipeRefreshLayout.setColorSchemeResources(android.R.color.holo_red_light, android.R.color.holo_green_light,
33                 android.R.color.holo_orange_light);
34
35         swipeRefreshLayout.setOnRefreshListener(new OnRefreshListener() {
36
37             @Override
38             public void onRefresh() {
39                 longTimeOperation();
40             }
41         });
42         // 使用Android系統自帶的一個簡單TextView布局文件android.R.layout.simple_list_item_1顯示我們的數據內容。
43         adapter = new ArrayAdapter<String>(this, android.R.layout.simple_list_item_1, data);
44
45         listView.setAdapter(adapter);
46     }
47
48     // 每一次下拉刷新將觸發更新操作動作。
49     // 這裡將是比較耗時的操作:如網絡請求的數據,加載一個大圖片。
50     // 簡單期間,我們假設就是簡單的將count數據加1,然後更新顯示。
51     //
52     // 備注:swipeRefreshLayout.setRefreshing(true) 到
53     // swipeRefreshLayout.setRefreshing(false)之間的這段代碼 ,
54     // 在實際的應用開發中一般就是線程化的、耗時的或者後台的操作代碼。
55     private void longTimeOperation() {
56         // true,刷新開始,所以啟動刷新的UI樣式.
57         swipeRefreshLayout.setRefreshing(true);
58
59         // 開始啟動刷新...
60         // 在這兒放耗時操作的 AsyncTask線程、後台Service等代碼。
61
62         // add(0,xxx)每次將更新的數據xxx添加到頭部。
63         data.add(0, "" + count++);
64         adapter.notifyDataSetChanged();
65
66         // 刷新完畢
67         // false,刷新完成,因此停止UI的刷新表現樣式。
68         swipeRefreshLayout.setRefreshing(false);
69     }
70
71 }
在上面如果遇到一個耗時操作就會造成主線程堵塞,所以將上述的小Demo進行了簡單的優化,把耗時操作放在了一個AsyncTask中操作:
actuvity_main.xml不變,變化的是MainActivity.java:
代碼為:
 1 package com.zzw.testswiperefreshlayout;
 2
 3 import java.util.ArrayList;
 4
 5 import android.app.Activity;
 6 import android.os.AsyncTask;
 7 import android.os.Bundle;
 8 import android.os.SystemClock;
 9 import android.support.v4.widget.SwipeRefreshLayout;
10 import android.support.v4.widget.SwipeRefreshLayout.OnRefreshListener;
11 import android.widget.ArrayAdapter;
12 import android.widget.ListView;
13
14 public class MainActivity extends Activity {
15
16     private SwipeRefreshLayout swipeRefreshLayout;
17
18     private int count = 0;
19     private ArrayList<String> data;
20     private ArrayAdapter<String> adapter;
21
22     @Override
23     protected void onCreate(Bundle savedInstanceState) {
24         super.onCreate(savedInstanceState);
25         setContentView(R.layout.activity_main);
26
27         data = new ArrayList<String>();
28
29         swipeRefreshLayout = (SwipeRefreshLayout) findViewById(R.id.swipeRefreshLayoyut);
30         ListView listView = (ListView) findViewById(R.id.listView);
31
32         // 設置刷新動畫的顏色,可以設置1或者更多.
33         // 我們暫時使用三個Android系統自帶的顏色。
34         swipeRefreshLayout.setColorSchemeResources(android.R.color.holo_red_light, android.R.color.holo_green_light,
35                 android.R.color.holo_orange_light);
36
37         swipeRefreshLayout.setOnRefreshListener(new OnRefreshListener() {
38
39             @Override
40             public void onRefresh() {
41                 new MyAsyncTask().execute();
42             }
43         });
44         // 使用Android系統自帶的一個簡單TextView布局文件android.R.layout.simple_list_item_1顯示我們的數據內容。
45         adapter = new ArrayAdapter<String>(this, android.R.layout.simple_list_item_1, data);
46
47         listView.setAdapter(adapter);
48     }
49
50     private class MyAsyncTask extends AsyncTask {
51
52         // 初始化
53         @Override
54         protected void onPreExecute() {
55             // true,刷新開始,所以啟動刷新的UI樣式.
56             swipeRefreshLayout.setRefreshing(true);
57         }
58
59         protected Object doInBackground(Object... params) {
60             // 假設耗時5秒
61             SystemClock.sleep(5000);
62             return count++;
63         }
64
65         @Override
66         protected void onPostExecute(Object result) {
67             // add(0,xxx)每次將更新的數據xxx添加到頭部。
68             data.add(0, result + "");
69             adapter.notifyDataSetChanged();
70
71             // 刷新完畢
72             // false,刷新完成,因此停止UI的刷新表現樣式。
73             swipeRefreshLayout.setRefreshing(false);
74         }
75
76     }
77
78 }
最後的結果如下圖:

 Android帶頭像的用戶注冊頁面,android用戶注冊
Android帶頭像的用戶注冊頁面,android用戶注冊詳細的圖文可以到我的百度經驗去查看:http://jingyan.baidu.com/article/cd4c2
 Android SharedPreference的使用,sharedpreference
Android SharedPreference的使用,sharedpreference在《Android 在內部存儲讀寫文件》一文中,談到了登錄用戶名和密碼的方法,通過
 【React Native開發】React Native控件之ProgressBarAndroid進度條講解(12)
【React Native開發】React Native控件之ProgressBarAndroid進度條講解(12) (一)前言 今天我們一起來看一下進度加載條Pro
 Android開發案例,android案例
Android開發案例,android案例所有電商APP的商品詳情頁面幾乎都是和淘寶的一模一樣(見下圖): 采用上下分頁的模式 商品基本參數 & 選購參數在上頁