編輯:關於android開發
PostgreSQL的HA方案有很多種,本文演示基於Pacemaker的PostgreSQL一主多從讀負載均衡集群搭建。 搭建過程並不是使用原始的Pacemaker pgsql RA腳本,而使用以下我修改和包裝的腳本集pha4pgsql。
所有節點設置時鐘同步
cp /usr/share/zoneinfo/Asia/Shanghai /etc/localtimentpdate time.windows.com && hwclock -w
所有節點設置獨立的主機名(node1,node2,node3)
hostnamectl set-hostname node1
設置對所有節點的域名解析
$ vi /etc/hosts...192.168.0.231 node1192.168.0.232 node2192.168.0.233 node3
在所有節點上禁用SELINUX
$ setenforce 0$ vi /etc/selinux/config...SELINUX=disabled
在所有節點上禁用防火牆
systemctl disable firewalld.servicesystemctl stop firewalld.service
如果開啟防火牆需要開放postgres,pcsd和corosync的端口。參考CentOS 7防火牆設置示例
在所有節點執行:
yum install -y pacemaker corosync pcs ipvsadm
在所有節點執行:
systemctl start pcsd.servicesystemctl enable pcsd.service
在所有節點執行:
echo hacluster | passwd hacluster --stdin
在任何一個節點上執行:
pcs cluster auth -u hacluster -p hacluster node1 node2 node3
在任何一個節點上執行:
pcs cluster setup --last_man_standing=1 --name pgcluster node1 node2 node3
在任何一個節點上執行:
pcs cluster start --all
安裝9.2以上的PostgreSQL,本文通過PostgreSQL官方yum源安裝CentOS 7.3對應的PostgreSQL 9.6
在所有節點執行:
yum install -y https://yum.postgresql.org/9.6/redhat/rhel-7.3-x86_64/pgdg-centos96-9.6-3.noarch.rpmyum install -y postgresql96 postgresql96-contrib postgresql96-libs postgresql96-server postgresql96-develln -sf /usr/pgsql-9.6 /usr/pgsqlecho 'export PATH=/usr/pgsql/bin:$PATH' >>~postgres/.bash_profile
在node1節點執行:
創建數據目錄
mkdir -p /pgsql/datachown -R postgres:postgres /pgsql/chmod 0700 /pgsql/data
初始化db
su - postgresinitdb -D /pgsql/data/
修改postgresql.conf
listen_addresses = '*'wal_level = hot_standbywal_log_hints = onsynchronous_commit = onmax_wal_senders=5wal_keep_segments = 32hot_standby = onwal_sender_timeout = 5000wal_receiver_status_interval = 2max_standby_streaming_delay = -1max_standby_archive_delay = -1restart_after_crash = offhot_standby_feedback = on
注:設置"wal_log_hints = on"可以使用pg_rewind修復舊Master。
修改pg_hba.conf
local all all trusthost all all 192.168.0.0/24 md5host replication all 192.168.0.0/24 md5
啟動postgres
pg_ctl -D /pgsql/data/ start
創建復制用戶
createuser --login --replication replication -P -s
注:加上“-s”選項可支持pg_rewind。
在node2和node3節點執行:
創建數據目錄
mkdir -p /pgsql/datachown -R postgres:postgres /pgsql/chmod 0700 /pgsql/data
創建基礎備份
su - postgrespg_basebackup -h node1 -U replication -D /pgsql/data/ -X stream -P
在node1上執行: pg_ctl -D /pgsql/data/ stop
在任意一個節點上執行:
下載pha4pgsql
cd /optgit clone git://github.com/Chenhuajun/pha4pgsql.git
拷貝config.ini
cd /opt/pha4pgsqlcp template/config_muti_with_lvs.ini.sample config.ini
注:如果不需要配置基於LVS的負載均衡,可使用模板config_muti.ini.sample
修改config.ini
pcs_template=muti_with_lvs.pcs.templateOCF_ROOT=/usr/lib/ocfRESOURCE_LIST="msPostgresql vip-master vip-slave"pha4pgsql_dir=/opt/pha4pgsqlwriter_vip=192.168.0.236reader_vip=192.168.0.237node1=node1node2=node2node3=node3othernodes=""vip_nic=ens37vip_cidr_netmask=24pgsql_pgctl=/usr/pgsql/bin/pg_ctlpgsql_psql=/usr/pgsql/bin/psqlpgsql_pgdata=/pgsql/datapgsql_pgport=5432pgsql_restore_command=""pgsql_rep_mode=syncpgsql_repuser=replicationpgsql_reppassord=replication
安裝pha4pgsql
sh install.sh./setup.sh
執行install.sh使用了scp拷貝文件,中途會多次要求輸入其它節點的root賬號。 install.sh執行會生成Pacemaker的配置腳本/opt/pha4pgsql/config.pcs,可以根據情況對其中的參數進行調優後再執行setup.sh。
設置環境變量
export PATH=/opt/pha4pgsql/bin:$PATHecho 'export PATH=/opt/pha4pgsql/bin:$PATH' >>/root/.bash_profile
啟動集群
cls_start
確認集群狀態
cls_status
cls_status的輸出如下:
[root@node1 pha4pgsql]# cls_statusStack: corosyncCurrent DC: node1 (version 1.1.15-11.el7_3.2-e174ec8) - partition with quorumLast updated: Wed Jan 11 00:53:58 2017 Last change: Wed Jan 11 00:45:54 2017 by root via crm_attribute on node13 nodes and 9 resources configuredOnline: [ node1 node2 node3 ]Full list of resources: vip-master (ocf::heartbeat:IPaddr2): Started node1 vip-slave (ocf::heartbeat:IPaddr2): Started node2 Master/Slave Set: msPostgresql [pgsql] Masters: [ node1 ] Slaves: [ node2 node3 ] lvsdr (ocf::heartbeat:lvsdr): Started node2 Clone Set: lvsdr-realsvr-clone [lvsdr-realsvr] Started: [ node2 node3 ] Stopped: [ node1 ]Node Attributes:* Node node1: + master-pgsql : 1000 + pgsql-data-status : LATEST + pgsql-master-baseline : 00000000050001B0 + pgsql-status : PRI * Node node2: + master-pgsql : 100 + pgsql-data-status : STREAMING|SYNC + pgsql-status : HS:sync * Node node3: + master-pgsql : -INFINITY + pgsql-data-status : STREAMING|ASYNC + pgsql-status : HS:async Migration Summary:* Node node2:* Node node3:* Node node1:pgsql_REPL_INFO:node1|1|00000000050001B0
檢查集群的健康狀態。完全健康的集群需要滿足以下條件:
pgsql_REPL_INFO的3段內容分別指當前master,上次提升前的時間線和xlog位置。
pgsql_REPL_INFO:node1|1|00000000050001B0
LVS配置在node2上
[root@node2 ~]# ipvsadm -LIP Virtual Server version 1.2.1 (size=4096)Prot LocalAddress:Port Scheduler Flags -> RemoteAddress:Port Forward Weight ActiveConn InActConnTCP node2:postgres rr -> node2:postgres Route 1 0 0 -> node3:postgres Route 1 0 0
停止Master上的網卡模擬故障
[root@node1 pha4pgsql]# ifconfig ens37 down
檢查集群狀態
Pacemaker已經將Master和寫VIP切換到node2上
[root@node2 ~]# cls_statusresource msPostgresql is NOT runningStack: corosyncCurrent DC: node2 (version 1.1.15-11.el7_3.2-e174ec8) - partition with quorumLast updated: Wed Jan 11 01:25:08 2017 Last change: Wed Jan 11 01:21:26 2017 by root via crm_attribute on node23 nodes and 9 resources configuredOnline: [ node2 node3 ]OFFLINE: [ node1 ]Full list of resources: vip-master (ocf::heartbeat:IPaddr2): Started node2 vip-slave (ocf::heartbeat:IPaddr2): Started node3 Master/Slave Set: msPostgresql [pgsql] Masters: [ node2 ] Slaves: [ node3 ] Stopped: [ node1 ] lvsdr (ocf::heartbeat:lvsdr): Started node3 Clone Set: lvsdr-realsvr-clone [lvsdr-realsvr] Started: [ node3 ] Stopped: [ node1 node2 ]Node Attributes:* Node node2: + master-pgsql : 1000 + pgsql-data-status : LATEST + pgsql-master-baseline : 00000000050008E0 + pgsql-status : PRI * Node node3: + master-pgsql : 100 + pgsql-data-status : STREAMING|SYNC + pgsql-status : HS:sync Migration Summary:* Node node2:* Node node3:pgsql_REPL_INFO:node2|2|00000000050008E0
LVS和讀VIP被移到了node3上
[root@node3 ~]# ipvsadm -LIP Virtual Server version 1.2.1 (size=4096)Prot LocalAddress:Port Scheduler Flags -> RemoteAddress:Port Forward Weight ActiveConn InActConnTCP node3:postgres rr -> node3:postgres Route 1 0 0
修復舊Master的網卡
在舊Master node1上,postgres進程還在(注1)。但是由於配置的是同步復制,數據無法寫入不會導致腦裂。
[root@node1 pha4pgsql]# ps -ef|grep postgresroot 20295 2269 0 01:35 pts/0 00:00:00 grep --color=auto postgrespostgres 20556 1 0 00:45 ? 00:00:01 /usr/pgsql-9.6/bin/postgres -D /pgsql/data -c config_file=/pgsql/data/postgresql.confpostgres 20566 20556 0 00:45 ? 00:00:00 postgres: logger process postgres 20574 20556 0 00:45 ? 00:00:00 postgres: checkpointer process postgres 20575 20556 0 00:45 ? 00:00:00 postgres: writer process postgres 20576 20556 0 00:45 ? 00:00:00 postgres: stats collector process postgres 22390 20556 0 00:45 ? 00:00:00 postgres: wal writer process postgres 22391 20556 0 00:45 ? 00:00:00 postgres: autovacuum launcher process
啟動網卡後,postgres進程被停止
[root@node1 pha4pgsql]# ifconfig ens37 up[root@node1 pha4pgsql]# ps -ef|grep postgresroot 21360 2269 0 01:36 pts/0 00:00:00 grep --color=auto postgres[root@node1 pha4pgsql]# cls_statusresource msPostgresql is NOT runningStack: corosyncCurrent DC: node2 (version 1.1.15-11.el7_3.2-e174ec8) - partition with quorumLast updated: Wed Jan 11 01:36:20 2017 Last change: Wed Jan 11 01:36:00 2017 by hacluster via crmd on node23 nodes and 9 resources configuredOnline: [ node1 node2 node3 ]Full list of resources: vip-master (ocf::heartbeat:IPaddr2): Started node2 vip-slave (ocf::heartbeat:IPaddr2): Started node3 Master/Slave Set: msPostgresql [pgsql] Masters: [ node2 ] Slaves: [ node3 ] Stopped: [ node1 ] lvsdr (ocf::heartbeat:lvsdr): Started node3 Clone Set: lvsdr-realsvr-clone [lvsdr-realsvr] Started: [ node3 ] Stopped: [ node1 node2 ]Node Attributes:* Node node1: + master-pgsql : -INFINITY + pgsql-data-status : DISCONNECT + pgsql-status : STOP * Node node2: + master-pgsql : 1000 + pgsql-data-status : LATEST + pgsql-master-baseline : 00000000050008E0 + pgsql-status : PRI * Node node3: + master-pgsql : 100 + pgsql-data-status : STREAMING|SYNC + pgsql-status : HS:sync Migration Summary:* Node node2:* Node node3:* Node node1: pgsql: migration-threshold=3 fail-count=1000000 last-failure='Wed Jan 11 01:36:08 2017'Failed Actions:* pgsql_start_0 on node1 'unknown error' (1): call=278, status=complete, exitreason='The master's timeline forked off current database system timeline 2 before latest checkpoint location 0000000005000B80, REPL_INF', last-rc-change='Wed Jan 11 01:36:07 2017', queued=0ms, exec=745mspgsql_REPL_INFO:node2|2|00000000050008E0
注1:這是通過ifconfig ens37 down停止網卡模擬故障的特殊現象(或者說是corosync的bug),Pacemkaer的日志中不停的輸出以下警告。在實際的物理機宕機或網卡故障時,故障節點會由於失去quorum,postgres進程會被Pacemaker主動停止。
[43260] node3 corosyncwarning [MAIN ] Totem is unable to form a cluster because of an operating system or network fault. The most common cause of this message is that the local firewall is configured improperly.
修復舊Master(node1)並作為Slave加入集群
通過pg_rewind修復舊Master
[root@node1 pha4pgsql]# cls_repair_by_pg_rewind resource msPostgresql is NOT runningresource msPostgresql is NOT runningresource msPostgresql is NOT runningconnected to serverservers diverged at WAL position 0/50008E0 on timeline 2rewinding from last common checkpoint at 0/5000838 on timeline 2reading source file listreading target file listreading WAL in targetneed to copy 99 MB (total source directory size is 117 MB)102359/102359 kB (100%) copiedcreating backup label and updating control filesyncing target data directoryDone!pg_rewind complete!resource msPostgresql is NOT runningresource msPostgresql is NOT runningWaiting for 1 replies from the CRMd. OKwait for recovery complete.....slave recovery of node1 successed
檢查集群狀態
[root@node1 pha4pgsql]# cls_statusStack: corosyncCurrent DC: node2 (version 1.1.15-11.el7_3.2-e174ec8) - partition with quorumLast updated: Wed Jan 11 01:39:30 2017 Last change: Wed Jan 11 01:37:35 2017 by root via crm_attribute on node23 nodes and 9 resources configuredOnline: [ node1 node2 node3 ]Full list of resources: vip-master (ocf::heartbeat:IPaddr2): Started node2 vip-slave (ocf::heartbeat:IPaddr2): Started node3 Master/Slave Set: msPostgresql [pgsql] Masters: [ node2 ] Slaves: [ node1 node3 ] lvsdr (ocf::heartbeat:lvsdr): Started node3 Clone Set: lvsdr-realsvr-clone [lvsdr-realsvr] Started: [ node1 node3 ] Stopped: [ node2 ]Node Attributes:* Node node1: + master-pgsql : -INFINITY + pgsql-data-status : STREAMING|ASYNC + pgsql-status : HS:async * Node node2: + master-pgsql : 1000 + pgsql-data-status : LATEST + pgsql-master-baseline : 00000000050008E0 + pgsql-status : PRI * Node node3: + master-pgsql : 100 + pgsql-data-status : STREAMING|SYNC + pgsql-status : HS:sync + pgsql-xlog-loc : 000000000501F118Migration Summary:* Node node2:* Node node3:* Node node1:pgsql_REPL_INFO:node2|2|00000000050008E0
LVS配置在node3上,2個real server
[root@node3 ~]# ipvsadm -LIP Virtual Server version 1.2.1 (size=4096)Prot LocalAddress:Port Scheduler Flags -> RemoteAddress:Port Forward Weight ActiveConn InActConnTCP node3:postgres rr -> node1:postgres Route 1 0 0 -> node3:postgres Route 1 0 0
在其中一個Slave(node1)上停止網卡
[root@node1 pha4pgsql]# ifconfig ens37 down
Pacemaker已自動修改LVS的real server配置
[root@node3 ~]# ipvsadm -LIP Virtual Server version 1.2.1 (size=4096)Prot LocalAddress:Port Scheduler Flags -> RemoteAddress:Port Forward Weight ActiveConn InActConnTCP node3:postgres rr -> node3:postgres Route 1 0 0
目前配置的是1主2從集群,2個Slave通過讀VIP+LVS做讀負載均衡,如果讀負載很高可以添加額外的Slave擴展讀性能。 把更多的Slave直接添加到Pacemaker集群中可以達到這個目的,但過多的節點數會增加Pacemaker+Corosync集群的復雜性和通信負擔(Corosync的通信是一個環路,節點數越多,時延越大)。所以不把額外的Slave加入Pacemaker集群,僅僅加到LVS的real server中,並讓lvsdr監視Slave的健康狀況,動態更新LVS的real server列表。方法如下:
准備第4台機器node4(192.168.0.234),並在該機器上執行以下命令創建新的Slave
禁用SELINUX
$ setenforce 0$ vi /etc/selinux/config...SELINUX=disabled
禁用防火牆
systemctl disable firewalld.servicesystemctl stop firewalld.service
安裝PostgreSQL
yum install -y https://yum.postgresql.org/9.6/redhat/rhel-7.3-x86_64/pgdg-centos96-9.6-3.noarch.rpmyum install -y postgresql96 postgresql96-contrib postgresql96-libs postgresql96-server postgresql96-develln -sf /usr/pgsql-9.6 /usr/pgsqlecho 'export PATH=/usr/pgsql/bin:$PATH' >>~postgres/.bash_profile
創建數據目錄
mkdir -p /pgsql/datachown -R postgres:postgres /pgsql/chmod 0700 /pgsql/data
創建Salve備份
從當前的Master節點(即寫VIP 192.168.0.236)拉取備份創建Slave
su - postgrespg_basebackup -h 192.168.0.236 -U replication -D /pgsql/data/ -X stream -P
編輯postgresql.conf
將postgresql.conf中的下面一行刪掉
¥vi /pgsql/data/postgresql.conf...#include '/var/lib/pgsql/tmp/rep_mode.conf' # added by pgsql RA
編輯recovery.conf
$vi /pgsql/data/recovery.confstandby_mode = 'on'primary_conninfo = 'host=192.168.0.236 port=5432 application_name=192.168.0.234 user=replication password=replication keepalives_idle=60 keepalives_interval=5 keepalives_count=5'restore_command = ''recovery_target_timeline = 'latest'
上面的application_name設置為本節點的IP地址192.168.0.234
啟動Slave
pg_ctl -D /pgsql/data/ start
在Master上檢查postgres wal sender進程,新建的Slave(192.168.0.234)已經和Master建立了流復制。
[root@node1 pha4pgsql]# ps -ef|grep '[w]al sender'postgres 32387 111175 0 12:15 ? 00:00:00 postgres: wal sender process replication 192.168.0.234(47894) streaming 0/7000220postgres 116675 111175 0 12:01 ? 00:00:00 postgres: wal sender process replication 192.168.0.233(33652) streaming 0/7000220postgres 117079 111175 0 12:01 ? 00:00:00 postgres: wal sender process replication 192.168.0.232(40088) streaming 0/7000220
設置系統參數
echo 1 > /proc/sys/net/ipv4/conf/lo/arp_ignoreecho 2 > /proc/sys/net/ipv4/conf/lo/arp_announceecho 1 > /proc/sys/net/ipv4/conf/all/arp_ignoreecho 2 > /proc/sys/net/ipv4/conf/all/arp_announce
在lo網卡上添加讀VIP
ip a add 192.168.0.237/32 dev lo:0
現在LVS的配置中還沒有把新的Slave作為real server加入
[root@node3 ~]# ipvsadmIP Virtual Server version 1.2.1 (size=4096)Prot LocalAddress:Port Scheduler Flags -> RemoteAddress:Port Forward Weight ActiveConn InActConnTCP node3:postgres rr -> node2:postgres Route 1 0 0 -> node3:postgres Route 1 0 0
在Pacemaker集群的任意一個節點(node1,node2或node3)上,修改lvsdr RA的配置,加入新的real server。
[root@node2 ~]# pcs resource update lvsdr realserver_get_real_servers_script="/opt/pha4pgsql/tools/get_active_slaves /usr/pgsql/bin/psql \"host=192.168.0.236 port=5432 dbname=postgres user=replication password=replication connect_timeout=5\""
設置realserver_get_real_servers_script參數後,lvsdr會通過腳本獲取LVS的real server列表,這裡的get_active_slaves會通過寫VIP連接到Master節點獲取所有以連接到Master的Slave的application_name作為real server。設置後新的Slave 192.168.0.234已經被加入到real server 列表中了。
[root@node2 ~]# ipvsadmIP Virtual Server version 1.2.1 (size=4096)Prot LocalAddress:Port Scheduler Flags -> RemoteAddress:Port Forward Weight ActiveConn InActConnTCP node2:postgres rr -> node2:postgres Route 1 0 0 -> node3:postgres Route 1 0 0 -> 192.168.0.234:postgres Route 1 0 0
在當前的Master節點(node1)上通過讀VIP訪問postgres,可以看到psql會輪詢連接到3個不同的Slave上。
[root@node1 pha4pgsql]# psql "host=192.168.0.237 port=5432 dbname=postgres user=replication password=replication" -tAc "select pg_postmaster_start_time()"2017-01-14 12:01:48.068455+08[root@node1 pha4pgsql]# psql "host=192.168.0.237 port=5432 dbname=postgres user=replication password=replication" -tAc "select pg_postmaster_start_time()"2017-01-14 12:01:12.222412+08[root@node1 pha4pgsql]# psql "host=192.168.0.237 port=5432 dbname=postgres user=replication password=replication" -tAc "select pg_postmaster_start_time()"2017-01-14 12:15:19.614782+08[root@node1 pha4pgsql]# psql "host=192.168.0.237 port=5432 dbname=postgres user=replication password=replication" -tAc "select pg_postmaster_start_time()"2017-01-14 12:01:48.068455+08[root@node1 pha4pgsql]# psql "host=192.168.0.237 port=5432 dbname=postgres user=replication password=replication" -tAc "select pg_postmaster_start_time()"2017-01-14 12:01:12.222412+08[root@node1 pha4pgsql]# psql "host=192.168.0.237 port=5432 dbname=postgres user=replication password=replication" -tAc "select pg_postmaster_start_time()"2017-01-14 12:15:19.614782+08
下面測試Salve節點發生故障的場景。 先連接到其中一台Slave
[root@node1 pha4pgsql]# psql "host=192.168.0.237 port=5432 dbname=postgres user=replication password=replication"psql (9.6.1)Type "help" for help.
當前連接在node4上
[root@node4 ~]# ps -ef|grep postgrespostgres 11911 1 0 12:15 pts/0 00:00:00 /usr/pgsql-9.6/bin/postgres -D /pgsql/datapostgres 11912 11911 0 12:15 ? 00:00:00 postgres: logger process postgres 11913 11911 0 12:15 ? 00:00:00 postgres: startup process recovering 000000090000000000000007postgres 11917 11911 0 12:15 ? 00:00:00 postgres: checkpointer process postgres 11918 11911 0 12:15 ? 00:00:00 postgres: writer process postgres 11920 11911 0 12:15 ? 00:00:00 postgres: stats collector process postgres 11921 11911 0 12:15 ? 00:00:04 postgres: wal receiver process streaming 0/7000CA0postgres 12004 11911 0 13:19 ? 00:00:00 postgres: replication postgres 192.168.0.231(42116) idleroot 12006 2230 0 13:19 pts/0 00:00:00 grep --color=auto postgres
強制殺死node4上的postgres進程
[root@node4 ~]# killall postgres
lvsdr探測到node4掛了後會自動將其從real server列表中摘除
[root@node2 ~]# ipvsadmIP Virtual Server version 1.2.1 (size=4096)Prot LocalAddress:Port Scheduler Flags -> RemoteAddress:Port Forward Weight ActiveConn InActConnTCP node2:postgres rr -> node2:postgres Route 1 0 0 -> node3:postgres Route 1 0 0
psql執行下一條SQL時就會自動連接到其它Slave上。
postgres=# select pg_postmaster_start_time();FATAL: terminating connection due to administrator commandserver closed the connection unexpectedly This probably means the server terminated abnormally before or while processing the request.The connection to the server was lost. Attempting reset: Succeeded.postgres=# select pg_postmaster_start_time(); pg_postmaster_start_time ------------------------------- 2017-01-14 12:01:48.068455+08(1 row)
有時候不希望將所有連接到Master的Slave都加入到LVS的real server中,比如某個Slave可能實際上是pg_receivexlog。 這時可以在lvsdr上指定靜態的real server列表作為白名單。
通過default_weight和weight_of_realservers指定各個real server的權重,將不想參與到負載均衡的Slave的權重設置為0。 並且還是通過在Master上查詢Slave一覽的方式監視Slave健康狀態。
下面在Pacemaker集群的任意一個節點(node1,node2或node3)上,修改lvsdr RA的配置,設置有效的real server列表為node,node2和node3。
pcs resource update lvsdr default_weight="0"pcs resource update lvsdr weight_of_realservers="node1,1 node2,1 node3,1"pcs resource update lvsdr realserver_get_real_servers_script="/opt/pha4pgsql/tools/get_active_slaves /usr/pgsql/bin/psql \"host=192.168.0.236 port=5432 dbname=postgres user=replication password=replication connect_timeout=5\""
在lvsdr所在節點上檢查LVS的狀態,此時node4(192.168.0.234)的權重為0,LVS不會往node4上轉發請求。
[root@node2 ~]# ipvsadmIP Virtual Server version 1.2.1 (size=4096)Prot LocalAddress:Port Scheduler Flags -> RemoteAddress:Port Forward Weight ActiveConn InActConnTCP node2:postgres rr -> node2:postgres Route 1 0 0 -> node3:postgres Route 1 0 0 -> 192.168.0.234:postgres Route 0 0 0
通過default_weight和weight_of_realservers指定real server一覽,並通過調用check_active_slave腳本,依次連接到real server中的每個節點上檢查其是否可以連接並且是Slave。
pcs resource update lvsdr default_weight="1"pcs resource update lvsdr weight_of_realservers="node1 node2 node3 192.168.0.234"pcs resource update lvsdr realserver_dependent_resource=""pcs resource update lvsdr realserver_get_real_servers_script=""pcs resource update lvsdr realserver_check_active_real_server_script="/opt/pha4pgsql/tools/check_active_slave /usr/pgsql/bin/psql \"port=5432 dbname=postgres user=replication password=replication connect_timeout=5\" -h"
推薦采用方法1,因為每次健康檢查只需要1次連接。
 安卓性能調優工具簡介,安卓調優簡介
安卓性能調優工具簡介,安卓調優簡介Traceview Traceview是執行日志的圖形查看器。這些日志通過使用Debug類記錄。 Traceview可以幫助
 Pulltorefresh使用中碰到的問題,pulltorefresh碰到
Pulltorefresh使用中碰到的問題,pulltorefresh碰到第一 在使用XScrollView布局是,無法在該布局.xml文件,放置內容布局控件,假如放置了
 手機安全衛士——在設置中心 自定義view和自定義屬性,安全衛士view
手機安全衛士——在設置中心 自定義view和自定義屬性,安全衛士view自定義組合控件 1. 自定義一個View, 繼承ViewGroup,比如RelativeLayo
 Android設計模式之一個例子讓你徹底明白裝飾者模式(Decorator Pattern)
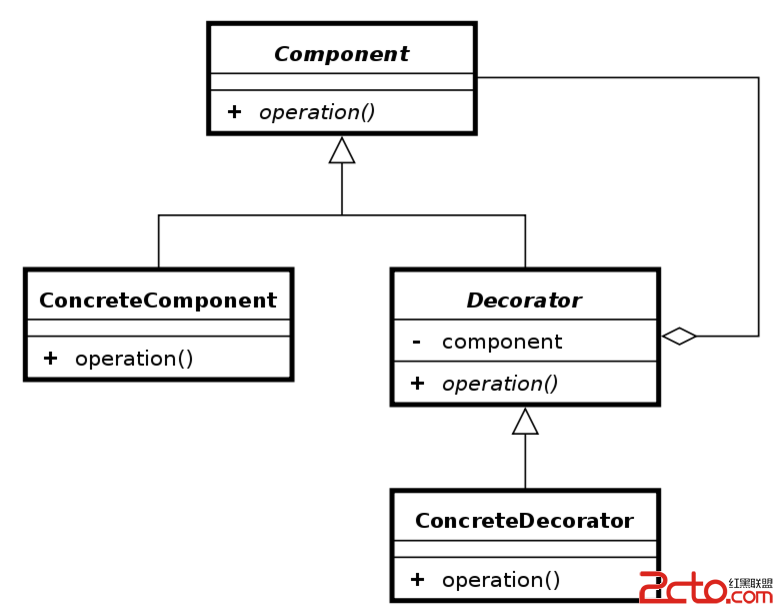
Android設計模式之一個例子讓你徹底明白裝飾者模式(Decorator Pattern) 導讀 這篇文章中我不會使用概念性文字來說明裝飾者模式,因為通常概念性的問題都