編輯:關於android開發
今天學到了這個Loader,淺談一下自己的看法:
1.定義
Loader是一個加載器,可以用來它訪問數據,可以看做訪問數據的機器(好比挖掘機)。裝再器從android3.0開始引進,它使得在activity或fragment中異步加載數據變得簡單。
具有如下特別:
1)它們對每個Activity和Fragment都有效
2)它們提供了異步加載數據的能力
3)它擁有一個數據改變通知機制,當數據源做出改變是會及時通知。當Cursor發生變化時,會自動加載數據,因此不需要重新進行數據查詢
解釋一下為什麼會有異步加載數據的能力:
final class LoadTask extends ModernAsyncTask<Void, Void, D> implements Runnable {
    private final CountDownLatch mDone = new CountDownLatch(1);

    // Set to true to indicate that the task has been posted to a handler for
    // execution at a later time.  Used to throttle updates.
    boolean waiting;

    /* Runs on a worker thread */
    @Override
    protected D doInBackground(Void... params) {
        if (DEBUG) Log.v(TAG, this + " >>> doInBackground");
        try {
            D data = AsyncTaskLoader.this.onLoadInBackground();
            if (DEBUG) Log.v(TAG, this + "  <<< doInBackground");
            return data;
        } catch (OperationCanceledException ex) {
            if (!isCancelled()) {
                // onLoadInBackground threw a canceled exception spuriously.
                // This is problematic because it means that the LoaderManager did not
                // cancel the Loader itself and still expects to receive a result.
                // Additionally, the Loader's own state will not have been updated to
                // reflect the fact that the task was being canceled.
                // So we treat this case as an unhandled exception.
                throw ex;
            }
            if (DEBUG) Log.v(TAG, this + "  <<< doInBackground (was canceled)", ex);
            return null;
        }
    }
protected D onLoadInBackground() {
    return loadInBackground();
}
public abstract D loadInBackground();
這是AsyncTaskLoader底層代碼實現。可以看出,在AsyncTaskLoader中創建一個final修飾的內部類,實現異步任務。封裝了一個抽象方法loadInBackground(),在子類繼承時,實現各自的實現方式。
2.作用
用來加載數據,訪問數據庫(系統自帶的數據庫,自定義數據庫)。當然訪問數據庫,我們可以使用ContentResolver通過query()訪問數據庫,得到一個Cursor對象,遍歷這個對象就可以拿到我們想要的數據。但Loader的作用比ContentResolver更簡便更快捷。
3.用法(使用裝載器時設計到的類和方法)
LoaderManager:本身是一個抽象類。關聯到每一個Activity或Fragment,管理一個或多個裝載器的實例。這幫助一個應用管理那些與Activity或Fragment的聲明周期相關的長時間運行的操作。最常見的方式是與一個CursorLoader一起使用,然而應用是可以隨便寫它們自己的加載器從而加載其他類型的數據。
LoaderManager.LoaderCallBack<D>:本身是一個接口。一個用於客戶端與LoaderManager交互的回調接口。如:你可以使用onCreateLoader()創建一個Loader加載器
Loader:本身是一個抽象類。一個執行異步數據加載的抽象類。它是加載器的基類,你可以使用典型的CursorLoader,但是你也可以使用自定義的Loader(創建一個類extends AsyncTaskLoader),它們將監試它們的數據源並且在數據改變是發送新的結果。
AsyncTaskLoader:本身是一個抽象類,提供一個AsyncTask來執行異步加載工作(工作在子線程,進行耗時操作)。
CursorLoader:AsyncTaskLoader的實現類。
4.我自己寫的一個demo訪問手機聯系人
package com.yz.searchcontacts;

import android.content.ContentResolver;
import android.content.Context;
import android.database.Cursor;
import android.net.Uri;
import android.os.Bundle;
import android.provider.ContactsContract;
import android.support.v4.app.LoaderManager;
import android.support.v4.content.AsyncTaskLoader;
import android.support.v4.content.Loader;
import android.support.v7.app.AppCompatActivity;
import android.support.v7.widget.SearchView;
import android.widget.ListView;
import android.widget.SimpleCursorAdapter;

public class MainActivity extends AppCompatActivity implements LoaderManager.LoaderCallbacks<Cursor> {

    private ListView lv_contacts;
    private SearchView msv_name;
    private static ContentResolver mResolver;
    private SimpleCursorAdapter mAdapter;
    private LoaderManager manager;

    @Override
    protected void onCreate(Bundle savedInstanceState) {
        super.onCreate(savedInstanceState);
        setContentView(R.layout.activity_main);
        //獲取控件
        msv_name = (SearchView) findViewById(R.id.sv_name);
        lv_contacts = (ListView) findViewById(R.id.list_item);
        //創建適配器
        mAdapter = new SimpleCursorAdapter(this, R.layout.list_item,null,new String[]{"_id","display_name"},new int[]{R.id.tv_id,R.id.tv_name},SimpleCursorAdapter.FLAG_REGISTER_CONTENT_OBSERVER);
        lv_contacts.setAdapter(mAdapter);
        //創建loader加載器,並初始化
        manager = getSupportLoaderManager();
        manager.initLoader(1,null,this);
        //獲取ContentResolver
        mResolver = getContentResolver();
    }


    @Override
    public Loader<Cursor> onCreateLoader(int id, Bundle args) {

        return new MyLoader(this,args);
    }

    @Override
    public void onLoadFinished(Loader<Cursor> loader, Cursor data) {

        mAdapter.swapCursor(data);
        //為SearchView設置監聽
        msv_name.setOnQueryTextListener(new SearchView.OnQueryTextListener() {
            @Override
            public boolean onQueryTextSubmit(String query) {
                return false;
            }

            @Override
            public boolean onQueryTextChange(String newText) {
                Bundle args = new Bundle();
                args.putString("name",newText);
                manager.restartLoader(1,args,MainActivity.this);
                return true;
            }
        });
    }

    @Override
    public void onLoaderReset(Loader<Cursor> loader) {
        mAdapter.swapCursor(null);
    }
    //自定義Loader
    static class MyLoader extends AsyncTaskLoader<Cursor>
    {
        private Bundle args;
        public MyLoader(Context context,Bundle args) {
            super(context);
            this.args = args;
        }

        @Override
        protected void onStartLoading() {
            super.onStartLoading();
            //強制加載
            forceLoad();
        }

        @Override
        public Cursor loadInBackground() {
            //進行耗時操作
            Uri uri = ContactsContract.RawContacts.CONTENT_URI;
            if (args != null) {

                Cursor cursor = mResolver.query(uri, new String[]{"_id", "display_name"}, "display_name like ?", new String[]{"%" + args.getString("name") + "%"}, null);
                return cursor;
            }else
            {
                Cursor cursor = mResolver.query(uri, new String[]{"_id", "display_name"}, null, null, null);
                return cursor;
            }
        }
    }
}在這個簡單的小程序裡有幾個我犯的小問題,提醒一下:
1)包的一致性
2)
 protected void onStartLoading() {
            super.onStartLoading();
            //強制加載
            forceLoad();
        }
 [FastDev4Android框架開發]神器ViewGragHelper完全解析之詳解實現QQ5.X側滑酷炫效果(三十四)
[FastDev4Android框架開發]神器ViewGragHelper完全解析之詳解實現QQ5.X側滑酷炫效果(三十四) (一).前言: 這幾天正
 熱修復-Nuwa學習篇,熱修復-nuwa
熱修復-Nuwa學習篇,熱修復-nuwanuwa熱修復是基於qq空間團隊的思路,最近的熱度話題了,很多種方案,自己先研究幾種方案,基本上都各有優勢,學習肯定得先挑個軟柿子
 android:TextView實現文字走馬燈效果(欺騙系統獲取持久的焦點)
android:TextView實現文字走馬燈效果(欺騙系統獲取持久的焦點) 通常情況下我們想實現文字的走馬燈效果需要在xml文件中這樣設置 <textv
 我的android學習經歷16,android學習經歷16
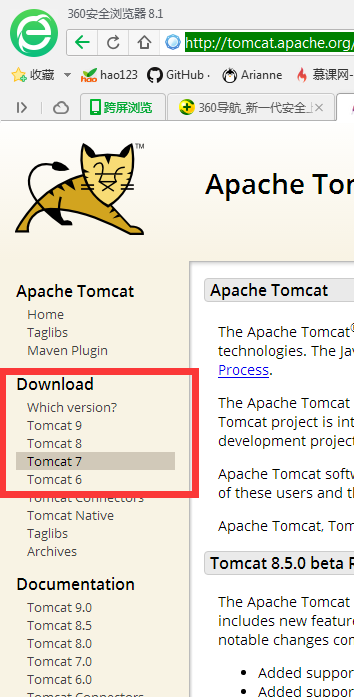
我的android學習經歷16,android學習經歷16tomcat的下載安裝 1.下載tomcat 在百度中輸入tomcat可以直接出現他的英文官網 htt
 模擬QQ側滑控件 實現三種界面切換效果(知識點:回調機制,解析網絡json數據,fragment用法等)。,jsonfragment
模擬QQ側滑控件 實現三種界面切換效果(知識點:回調機制,解析網絡jso