編輯:關於android開發
前言:
最近一個多月在認真的學習Android和做項目,文章內容表達的不好或者理解錯了,希望大家評論指出。 :-)
本文是總結幾個比較常用且使用的技巧,和一個大家都會遇到的問題。
文章中大部分語句摘抄自一下兩篇大神寫的文章:(如果對ExpandableListView一無所知,建議按照順序去閱讀,遇到問題再看本文)
1、Android中ExpandableListView的使用
網址:http://blog.csdn.net/gyflyx/article/details/6461242
2、[Android UI設計]ExpandableListView詳解
網址:http://www.tuicool.com/articles/JjaMnqf
ExpandableListView是Android中可以實現下拉ListView的一個控件,是ListView的子類。
直接上圖,就是這麼一功能~
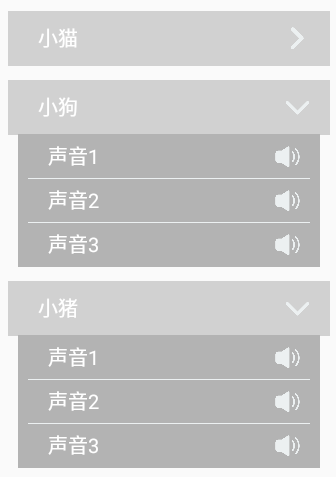 (點擊就會展開,再點擊就縮回去)
Android自帶的布局不是這樣的,這個是自定義了Group和Child的布局。
ExpandableListView的使用步驟:
1、在xml中定義一個ExpandableListView
2、在類中定義兩個List集合,用於存放Group/Child中的內容,並初始化內容
3、定義ExpandableListView的Adapter,繼承BaseExpanableListAdapter
例如:public class MyExpandableAdapter extends BaseExpandableListAdapter
4、最後給定義好的ExpandableView添加上Adapter
這裡就貼出兩個子布局的代碼和MyExpandableAdapter的代碼~
expandlist_group.xml
<?xml version="1.0" encoding="utf-8"?>
<LinearLayout xmlns:android="http://schemas.android.com/apk/res/android"
    android:orientation="vertical"
    android:layout_width="match_parent"
    android:layout_height="70dp">

    <RelativeLayout
        android:layout_width="match_parent"
        android:layout_height="55dp"
        android:background="#d1d1d1"
        android:layout_marginTop="15dp">

        <TextView
            android:id="@+id/tv_group_name"
            android:layout_width="wrap_content"
            android:layout_height="match_parent"
            android:layout_marginLeft="30dp"
            android:text="小貓"
            android:textColor="#ffffff"
            android:textSize="20sp"
            android:gravity="center_vertical"/>


        <ImageView
            android:id="@+id/iv_arrow"
            android:layout_width="25dp"
            android:layout_height="25dp"
            android:layout_alignParentRight="true"
            android:layout_centerVertical="true"
            android:layout_marginRight="20dp"
            android:background="@drawable/right_arrow"/>

    </RelativeLayout>


</LinearLayout>
expandlist_item.xml
<?xml version="1.0" encoding="utf-8"?>
<LinearLayout xmlns:android="http://schemas.android.com/apk/res/android"
    android:orientation="vertical"
    android:layout_width="match_parent"
    android:layout_height="45dp">

    <RelativeLayout
        android:layout_width="match_parent"
        android:layout_height="45dp"
        android:layout_marginLeft="10dp"
        android:layout_marginRight="10dp"
        android:background="#b3b3b3">

        <TextView
            android:id="@+id/tv_child_name"
            android:layout_width="wrap_content"
            android:layout_height="match_parent"
            android:layout_marginLeft="30dp"
            android:text="聲音1"
            android:textColor="#ffffff"
            android:textSize="20sp"
            android:gravity="center_vertical"/>


        <ImageView
            android:id="@+id/iv_sound"
            android:layout_width="25dp"
            android:layout_height="25dp"
            android:layout_alignParentRight="true"
            android:layout_centerVertical="true"
            android:layout_marginRight="20dp"
            android:background="@drawable/sound"/>

        <ImageView
            android:id="@+id/iv_divider"
            android:layout_width="match_parent"
            android:layout_height="1dp"
            android:background="#ecf0f1"
            android:layout_marginLeft="10dp"
            android:layout_marginRight="10dp"
            android:layout_alignParentTop="true"/>

    </RelativeLayout>


</LinearLayout>
MyExpandableAdapter.java
public class MyExpandableAdapter extends BaseExpandableListAdapter {

    private List<String> groupArray;
    private List<List<String>> childArray;
    private Context mContext;

    public MyExpandableAdapter(Context context, List<String> groupArray, List<List<String>> childArray){
        mContext = context;
        this.groupArray = groupArray;
        this.childArray = childArray;
    }

    @Override
    public int getGroupCount() {
        return groupArray.size();
    }

    @Override
    public int getChildrenCount(int groupPosition) {
        return childArray.get(groupPosition).size();
    }

    @Override
    public Object getGroup(int groupPosition) {
        return groupArray.get(groupPosition);
    }

    @Override
    public Object getChild(int groupPosition, int childPosition) {
        return childArray.get(groupPosition).get(childPosition);
    }

    @Override
    public long getGroupId(int groupPosition) {
        return groupPosition;
    }

    @Override
    public long getChildId(int groupPosition, int childPosition) {
        return childPosition;
    }

    @Override
    public boolean hasStableIds() {
        return true;
    }

    @Override
    public View getGroupView(int groupPosition, boolean isExpanded, View convertView, ViewGroup parent) {
        View view = convertView;
        GroupHolder holder = null;
        if(view == null){
            holder = new GroupHolder();
            view = LayoutInflater.from(mContext).inflate(R.layout.expandlist_group, null);
            holder.groupName = (TextView)view.findViewById(R.id.tv_group_name);
            holder.arrow = (ImageView)view.findViewById(R.id.iv_arrow);
            view.setTag(holder);
        }else{
            holder = (GroupHolder)view.getTag();
        }

        //判斷是否已經打開列表
        if(isExpanded){
            holder.arrow.setBackgroundResource(R.drawable.dowm_arrow);
        }else{
            holder.arrow.setBackgroundResource(R.drawable.right_arrow);
        }

        holder.groupName.setText(groupArray.get(groupPosition));

        return view;
    }

    @Override
    public View getChildView(int groupPosition, int childPosition, boolean isLastChild, View convertView, ViewGroup parent) {
        View view = convertView;
        ChildHolder holder = null;
        if(view == null){
            holder = new ChildHolder();
            view = LayoutInflater.from(mContext).inflate(R.layout.expandlist_item, null);
            holder.childName = (TextView)view.findViewById(R.id.tv_child_name);
            holder.sound = (ImageView)view.findViewById(R.id.iv_sound);
            holder.divider = (ImageView)view.findViewById(R.id.iv_divider);
            view.setTag(holder);
        }else{
            holder = (ChildHolder)view.getTag();
        }

        if(childPosition == 0){
            holder.divider.setVisibility(View.GONE);
        }

        holder.sound.setBackgroundResource(R.drawable.sound);
        holder.childName.setText(childArray.get(groupPosition).get(childPosition));

        return view;
    }

    @Override
    public boolean isChildSelectable(int groupPosition, int childPosition) {
        return true;
    }

    class GroupHolder{
        public TextView groupName;
        public ImageView arrow;
    }

    class ChildHolder{
        public TextView childName;
        public ImageView sound;
        public ImageView divider;
    }
}
有一下幾點需要注意的:
1.設置指示器
有人也許會發現效果圖中沒有默認箭頭(指示器),因為我隱藏了啊~
ExpandableListView expandableListView;
...省略獲取id得到實例的代碼
expandableListView.setGroupIndicator(null),這樣就是設置沒有指示器,就是默認的箭頭。
如果剛剛的代碼,沒有設置隱藏指示器就是下圖的效果:
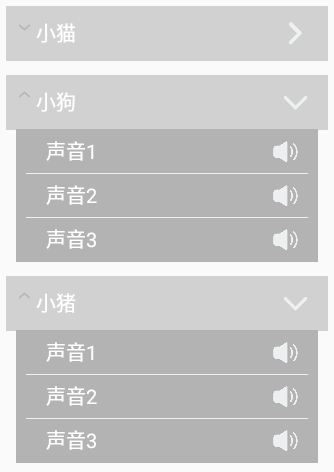 (這樣就不好看了!!)
2.自定義指示器
隱藏了就要自定義一個指示器了喔。

在ExpandableAdapter中的getGroupView中參數有一個參數是isExpanded,代表當前Group是否已經打開。
關鍵代碼:
//判斷是否已經打開列表
        if(isExpanded){
            holder.arrow.setBackgroundResource(R.drawable.dowm_arrow);
        }else{
            holder.arrow.setBackgroundResource(R.drawable.right_arrow);
        }
打開了就返回true,沒有打開就返回false。
3.默認打開某一個Group
ExpandableListView expandableListView;
...省略獲取id得到實例的代碼
expandableListView.expandGroup(int)
4.設置每一個item的高度
這個問題困擾了我很久,上面的兩個鏈接也沒有明確的說明,於是就百度了半天,終於找出答案了。
但是不知道為什麼,要嵌套布局才可以,就是外面一個布局設定高度,裡面再設定一個布局也設定高度。然後實際上寬度和高度都是在第二個裡設置才有效。
下面是expandlist_group.xml的部分代碼:
<LinearLayout xmlns:android="http://schemas.android.com/apk/res/android"
    android:orientation="vertical"
    android:layout_width="match_parent"
    android:layout_height="55dp">

    <RelativeLayout
        android:layout_width="match_parent"
        android:layout_height="55dp"
        android:background="#d1d1d1"
        android:layout_marginTop="15dp">
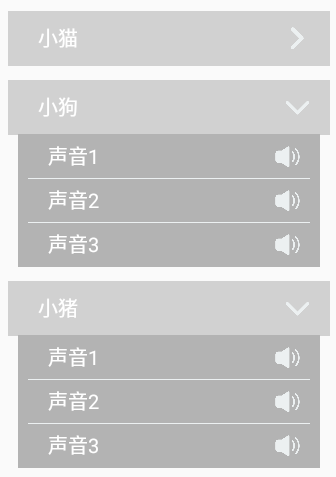
①第一個布局高度設置55dp,第二個布局高度也設置55dp
效果是這樣的:
②第一個布局高度設置75dp,第二個布局高度也設置55dp
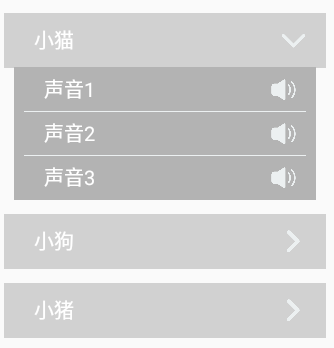
然而發現並沒有什麼用,所以推斷第二個布局才是item的高度
這裡就演示這麼多了,動手實踐才是真理,大家可以試一試刪除其中一個布局,高度是否還能正常設置。(我試過是不能喔)
第一次寫博客,希望對大家有幫助。睡覺~zzzzz
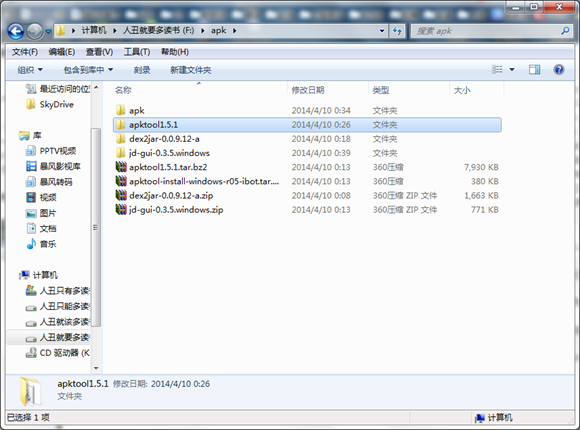 Android程序apk反編譯破解方法,androidapk
Android程序apk反編譯破解方法,androidapk簡短不割了,我們直接奔主題吧。 把apktool-install-windows-r05-ibot文件裡的兩個
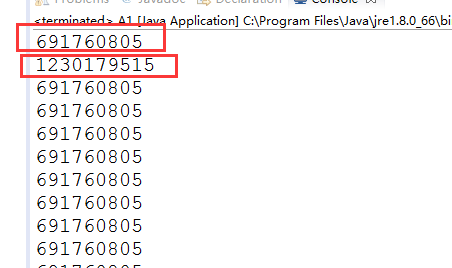 Java 單例模式,Java模式
Java 單例模式,Java模式前言:昨天公司計劃把項目中的部分功能做出SDK的形式,供其他公司的產品使用,所以不得不重新研究一下單例模式。 為什麼單例 1
 Android----Thread+Handler 線程 消息循環(轉載),handlerthread
Android----Thread+Handler 線程 消息循環(轉載),handlerthread近來找了一些關於android線程間通信的資料,整理學習了一下,並制
 Android特效專輯(十二)——如何仿支付寶咻一咻功能實現波紋擴散特效
Android特效專輯(十二)——如何仿支付寶咻一咻功能實現波紋擴散特效 Android特效專輯(十二)——仿支付寶咻一咻功能實現波紋擴散特效