Xamarin.Android 入門之:xamarin使用webserver和html交互,xamarin
一、引言
如今,Android+html5開發已經成為最流行的開發模式。
Android 中可以通過webview來實現和js的交互,在程序中調用js代碼,只需要將webview控件的支持js的屬性設置為true
Android(Java)與JavaScript(HTML)交互有四種情況:
1) Android(Java)調用HTML中js代碼
2) Android(Java)調用HTML中js代碼(帶參數)
3) HTML中js調用Android(Java)代碼
4) HTML中js調用Android(Java)代碼(帶參數)
二、准備工作
1.添加一個Android項目,在Assets中添加一個名為Test的html文件
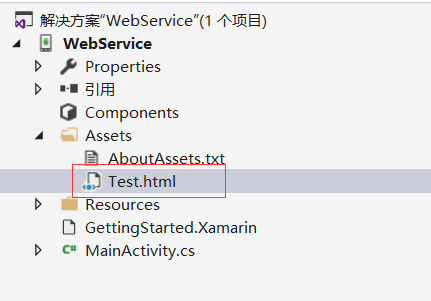
2.添加以下html代碼到Test.html

![]()
<html>
<head>
<meta http-equiv="Content-Type" content="text/html;charset=gb2312">
<script type="text/javascript">
function javacalljs(){
document.getElementById("content").innerHTML +=
"<br\>java調用了js函數";
}
function javacalljswithargs(arg){
document.getElementById("content").innerHTML +=
("<br\>"+arg);
}
</script>
</head>
<body>
this is my html <br />
<a onClick="window.Test.startFunction()">點擊調用java代碼</a><br />
<a onClick="window.Test.startFunction('hello world')">點擊調用java代碼並傳遞參數</a>
<br />
<div id="content">內容顯示</div>
</body>
</html>
View Code
3.刪除layout文件夾下的main.axml文件的原油控件,添加以下控件

![]()
<?xml version="1.0" encoding="utf-8"?>
<LinearLayout xmlns:android="http://schemas.android.com/apk/res/android"
android:layout_width="fill_parent"
android:layout_height="fill_parent"
android:orientation="vertical">
<WebView
android:id="@+id/webview"
android:layout_width="fill_parent"
android:layout_height="fill_parent"
android:layout_weight="9" />
<ScrollView
android:id="@+id/scrollView1"
android:layout_width="fill_parent"
android:layout_height="wrap_content">
<TextView
android:id="@+id/msg"
android:layout_width="fill_parent"
android:layout_height="fill_parent"
android:text="text" />
</ScrollView>
<Button
android:id="@+id/button"
android:layout_width="fill_parent"
android:layout_height="wrap_content"
android:layout_weight="1"
android:text="java調用js函數" />
</LinearLayout>
View Code
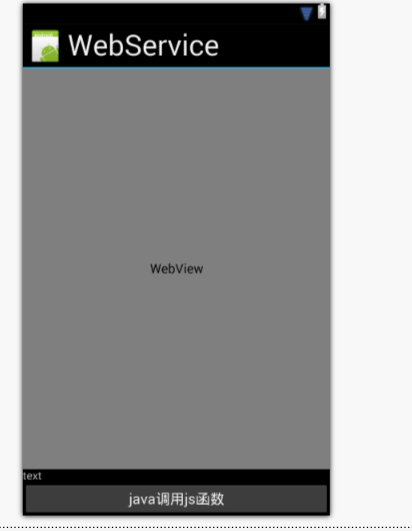
三、代碼
1.在MainActivity.cs中刪除原來的代碼,替換以下代碼

![]()
[Activity(Label = "WebService", MainLauncher = true, Icon = "@drawable/icon")]
public class MainActivity : Activity, Button.IOnClickListener//繼承按鈕的點擊接口
{
/// <summary>
/// 定義控件
/// </summary>
public WebView webview;
public TextView msgtext;
protected override void OnCreate(Bundle bundle)
{
base.OnCreate(bundle);
SetContentView(Resource.Layout.Main);
//找到控件
webview = FindViewById<WebView>(Resource.Id.webview);
msgtext = FindViewById<TextView>(Resource.Id.msg);
//找到按鈕並堅挺點擊事件
Button button = FindViewById<Button>(Resource.Id.button);
button.SetOnClickListener(this);
webview.Settings.JavaScriptEnabled = true;//設置webserver支持js
webview.AddJavascriptInterface(this, "Test");//添加js接口
webview.LoadUrl("file:///android_asset/Test.html");//加載html的地址
//webview.LoadUrl(this.GetString(Resource.String.Url));//如果我們的html文件實在服務器端則這邊可以填服務器端的地址例如127.0.0.1:91/Test.html
}
public void OnClick(View v)
{
// 無參數調用
webview.LoadUrl("javascript:javacalljs()");
// 傳遞參數調用
webview.LoadUrl("javascript:javacalljswithargs(" + "'hello world'" + ")");
}
[Export("startFunction")]
public void startFunction()
{
RunOnUiThread(new Runnable(() =>
{
msgtext.Text = msgtext.Text + "\njs調用了java函數";
}));
}
/// <summary>
/// 當用戶調用了這個方法會傳遞過來一個參數,我們可以獲取出來然後用Android的toast顯示
/// </summary>
/// <param name="str"></param>
[Export("startFunction")]
public void startFunction(string str)
{
Toast.MakeText(this, str, ToastLength.Short).Show();
RunOnUiThread(new Runnable(() =>
{
msgtext.Text = msgtext.Text + "\njs調用了js函數"+str;
}));
}
}
View Code
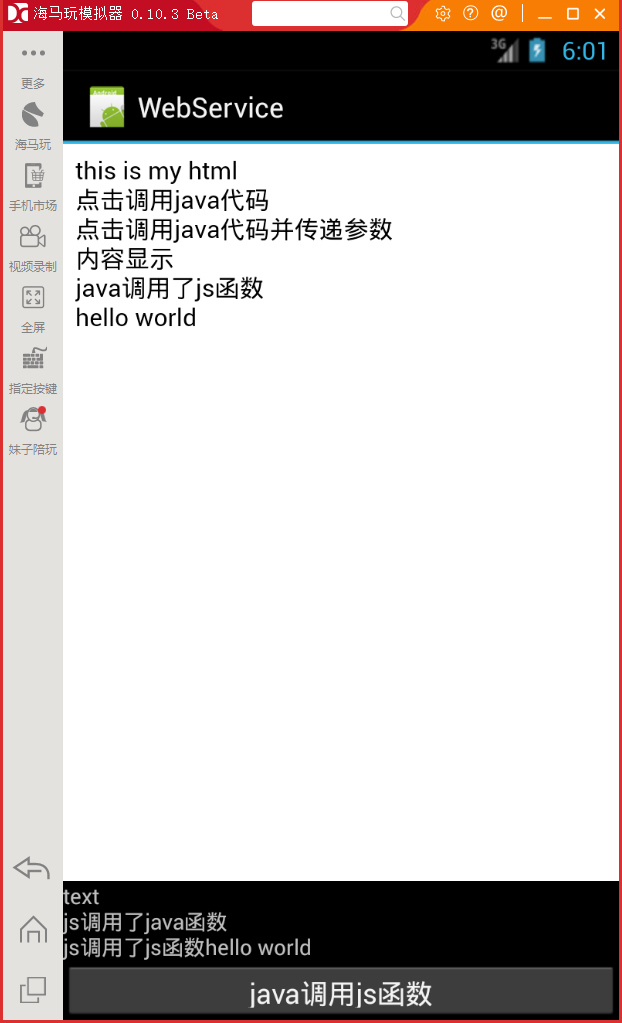
2.最後在虛擬機上運行,當我們點擊“點擊調用java代碼”的時候在我們程序中多了一行文字,當我們點擊“點擊調用java代碼並傳遞參數”,程序除了添加了一行文字之外還跳出了提示。當我們點擊java調用js函數在我們html頁面山會把我們傳遞的參數顯示出來。好了簡單的Android和html的交互就是這樣。


 階段一:AsyncTask的三個屬性值和四個步驟,asynctask屬性值
 Android Bottom Sheet詳解
 FFmpeg使用手冊 - FFmpeg 編碼支持與定制
 Android消息機制Handler解析(源碼+Demo)