編輯:關於android開發
本文實現Android中的圖片的縮放效果
首先設計布局:
<LinearLayout xmlns:android="http://schemas.android.com/apk/res/android"
    xmlns:tools="http://schemas.android.com/tools"
    android:layout_width="match_parent"
    android:layout_height="match_parent"
    android:orientation="vertical"
    tools:context=".MainActivity" >

    <ImageView
        android:id="@+id/iv_1"
        android:layout_width="wrap_content"
        android:layout_height="wrap_content"
        />

    <ImageView
        android:id="@+id/iv_2"
        android:layout_width="wrap_content"
        android:layout_height="wrap_content"
         />

</LinearLayout>
邏輯代碼如下:
public class MainActivity extends Activity {

    private ImageView iv1;
    private ImageView iv2;

    @Override
    protected void onCreate(Bundle savedInstanceState) {
        super.onCreate(savedInstanceState);
        setContentView(R.layout.activity_main);

        iv1 = (ImageView) findViewById(R.id.iv_1);
        iv2 = (ImageView) findViewById(R.id.iv_2);

        // 設置第一個bitmap的圖標
        Bitmap bitmap1 = BitmapFactory.decodeResource(getResources(),
                R.drawable.ic_launcher);

        iv1.setImageBitmap(bitmap1);

        // 新建一個bitmap
        Bitmap alterBitmap = Bitmap.createBitmap(bitmap1.getWidth(),
                bitmap1.getHeight(), bitmap1.getConfig());

        // 以alterBitmap為模板新建畫布
        Canvas canvas = new Canvas(alterBitmap);
        // 新建畫筆並設置屬性
        Paint paint = new Paint();
        paint.setColor(Color.BLACK);

        //新建矩陣並設置縮放值
        Matrix matrix = new Matrix();
        matrix.setValues(new float[] {
                0.5f, 0, 0,
                0, 1, 0,
                0, 0, 1
        });
        //設置畫布
        canvas.drawBitmap(bitmap1, matrix, paint);
        iv2.setImageBitmap(alterBitmap);
    }

}
如果你對矩陣的設置不清楚,還可以使用下列api提供的方法替換上面標記部分的代碼:
matrix.setScale(0.5f, 1);
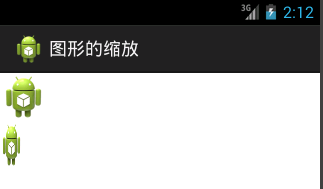
最後運行項目效果如下:

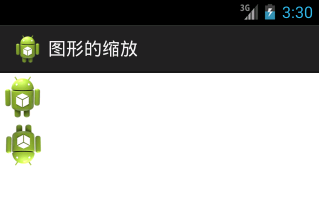
除了圖像的縮放,還可以使圖片旋轉指定的角度,例如旋轉180度
matrix.setRotate(180, bitmap1.getWidth() / 2, bitmap1.getHeight() / 2);

 【原創】StickHeaderListView的簡單實現,解決footerView問題,stickheaderlistview
【原創】StickHeaderListView的簡單實現,解決footerView問題,stickheaderlistview1、前言: 前幾天用了GitH
 android6.0源碼分析之Camera API2.0下的Capture流程分析,android6.0api2.0
android6.0源碼分析之Camera API2.0下的Capture流程分析,android6.0api2.0前面對Camera2的初始化以及預覽的相關流程進行了詳
 android開發之SnackBar的使用
android開發之SnackBar的使用 SnackBar是一個類似於Toast的東西,它也有顯示時長,但是比Toast更加靈活,同時,我們還可以給SnackBar設置
 Android開發Tips
Android開發Tips 介紹一些, 在Android開發中, 會經常使用的小知識點. 1. Download文件夾 絕對路徑 /storage/emulat
 模擬QQ側滑控件 實現三種界面切換效果(知識點:回調機制,解析網絡json數據,fragment用法等)。,jsonfragment
模擬QQ側滑控件 實現三種界面切換效果(知識點:回調機制,解析網絡jso