編輯:關於android開發
一、Activity的簡要理解
上篇博文已經知道如何編寫一個簡單的Activity了,可能有很多初學者會疑惑到底什麼是Activity?我們來給出Activity的一個通俗的解釋:Activity就是呈現在我們手機上的各種界面,也就是說,只要在手機上我們能看到的,都是Activity。任何一個Activity都需要繼承android.app.Activity才能有顯示界面的“本領”,當一個類繼承自android.app.Activity,那麼系統就會為其分配一個透明的布滿手機屏幕的PhoneWindow(窗口),然後在onCreate裡利用setContentView把布局填充至這個PhoneWindow,大多數布局都是鋪滿整個窗口的,但也有一些例外,如,Dialog(對話框)雖然本質上也是Activity,但是它的布局並沒有把整個窗口鋪滿;接下來我們在布局中“粘上”一系列的控件,如,Button(按鈕)、CheckBox(開關)等,這樣一來就構成了我們在手機上平常看到的各種界面。好了,現在我們已經知道,要實現一個Activity,需要以下幾個步驟:
① 繼承自android.app.Activity
② Android系統為其分配PhoneWindow
③ setContentView把布局載入PhoneWindow
④ 在AndroidManifest.xml中申明此Activity
AndroidManifest.xml是安卓程序的一個清單,相當於我們大家的檔案,裡面有對程序最全面而又最簡潔的描述,Android系統需要對其進行解析,根據解析出的不同結果去做相應的事;我們來看看上一篇博文中HelloWorld中的AndroidManifest,對其關鍵地方進行簡要的注釋說明。
<manifest xmlns:android="http://schemas.android.com/apk/res/android"
    package="com.example.lushengduan.helloworld"> //這是包名,在同一個手機中,包名不能重復

    <application
        android:allowBackup="true"
        android:icon="@mipmap/ic_launcher" //應用程序的圖標,就是顯示在桌面的圖標
        android:label="@string/app_name" //應用程序的名稱,顯示在圖標下面的文字,如QQ,新浪微博
        android:supportsRtl="true"
        android:theme="@style/AppTheme">

        <activity
            android:name=".HelloWorldActivity">
            <intent-filter>
                <action android:name="android.intent.action.MAIN"/>
                <category android:name="android.intent.category.LAUNCHER"/>
            </intent-filter>
        </activity>

    </application>

</manifest>
<activity ... </activity>中包裹的內容就是我們的HelloWorldActivity,必要的定義有兩樣,一個是“name”,另一個是“intent-filter”,android:name指的是“包名 + 類名”,而.HelloWorldActivity是把包名的省略了,用“.”來代替“com.example.lushengduan.helloworld”,這樣也是常用的寫法,每個Activity都寫一遍包名,確實不是什麼好的事情。intent-filter是intent的過濾器,intent我們暫時先不介紹,只需要記住,一個Activity要成為主界面(點開應用程序進入的第一個界面),在intent-filter中必須定義action為“android.intent.action.MAIN”,category為“android.intent.category.LAUNCHER”。
二、彈出一條Toast提示框
上一篇文章裡,我們是通過java代碼來實現布局的,但在Android開發裡,更多的是使用xml布局文件,我們把HelloWorldActivity改成如下代碼:
package com.example.lushengduan.helloworld;

import android.app.Activity;
import android.os.Bundle;

/**
 * Created by Lushengduan on 2016/3/4.
 */
public class HelloWorldActivity extends Activity {
    @Override
    protected void onCreate(Bundle savedInstanceState) {
        super.onCreate(savedInstanceState);
        setContentView(R.layout.main_layout);
    }
}
我們發現,上面的代碼是通過“R.layout.main_layout”來載入布局的,至於為什麼是“R.layout.xx”這個涉及到資源id,以後抽空再說,來先看看res/layout/main_layout.xml
<?xml version="1.0" encoding="utf-8"?>
<LinearLayout xmlns:android="http://schemas.android.com/apk/res/android"
    android:layout_width="match_parent"
    android:layout_height="match_parent"
    android:orientation="vertical">

    <TextView
        android:layout_width="wrap_content"
        android:layout_height="wrap_content"
        android:text="HelloWorld!"/>

</LinearLayout>
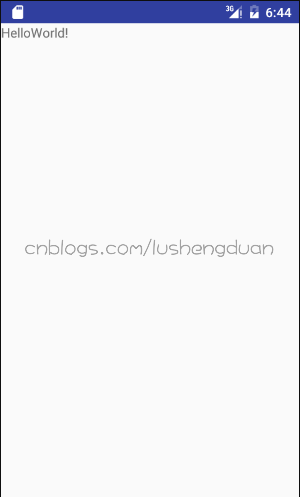
不管三七二十一,先把這個程序跑起來看看,是否能顯示出來“HelloWorld!”這行文件,運行結果如下:

運行結果和前一篇文章是一樣的,LinearLayout是線性布局,TextView是一個顯示文字控件,android:text的內容將會被顯示出來;接下來,我們來為主界面添加一個Button,讓按鈕上顯示的文字為“CLICK ME!”
<?xml version="1.0" encoding="utf-8"?>
<LinearLayout xmlns:android="http://schemas.android.com/apk/res/android"
    android:layout_width="match_parent"
    android:layout_height="match_parent"
    android:orientation="vertical">

    <TextView
        android:layout_width="wrap_content"
        android:layout_height="wrap_content"
        android:text="HelloWorld!"/>
    <Button
        android:layout_width="wrap_content"
        android:layout_height="wrap_content"
        android:text="CLICK ME!"/>

</LinearLayout>
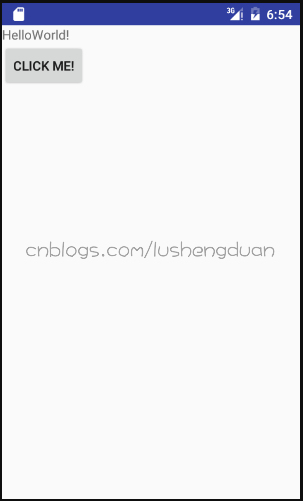
運行一下,看看結果:

一般情況下,點擊一下Button都會系統都會有響應,如在DeskClok裡的秒表界面,點擊“開始”這個Button,秒表開始計時;現在我們需要實現一個功能:點擊一下“CLICK ME!”,然後彈出一個Toast提示框,先給Button控件添加onClick屬性
    <Button
        android:layout_width="wrap_content"
        android:layout_height="wrap_content"
        android:onClick="showToast"
        android:text="CLICK ME!"/>
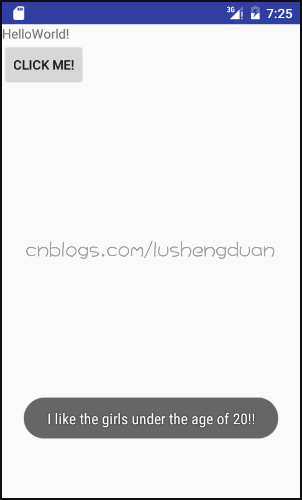
設定onClick的值為“showToast”的話,根據onClick的值,就可以在HelloWorldActivity裡定義一個名稱為“showToast”的方法;當我們點擊“CLICK ME!”按鈕後,就會去調用showToast函數,然後利用Toast彈出所需要的提示框;鑒於大多數人都喜歡“20歲以下的妹子”,彈出的內容就似乎它了
    public void showToast (View view){
        Toast.makeText(this, "I like the girls under the age of 20!!", Toast.LENGTH_LONG).show();
    }
Toast提示框需要三個參數
① Context上下文:Activity本身也是Context,所以第一個參數用“this”(this就是HelloWorldActivity自己)
② 需要顯示的文字:這個沒什麼好說的,想寫什麼寫什麼
③ 提示框顯示時長:這裡設置為長時間
寫完後,不要忘記把提示框“show”出來,很多初學者就把.show()忘了加上,然後發現根本不會彈出提示框;還有此方法沒有返回值,且參數是View類型的;好了,運行一下看看結果:

 使用Android Studio開發調用.NET Webservice 之初體驗,androidwebservice
使用Android Studio開發調用.NET Webservice 之初體驗,androidwebservice本人是。NET出身 但苦於領導要讓研究Android
 減少移動端用戶的輸入,移動端用戶
減少移動端用戶的輸入,移動端用戶最近因為一個登錄注冊的問題和公司的項目經理爭論開來,項目經理覺得需要在注冊的時候需要進行密碼的二次確認,我的觀點則是在移動端不需要二次確認
 Android動態部署五:如何從插件apk中啟動Service
Android動態部署五:如何從插件apk中啟動Service 經過前面幾篇文章的分析,我們了解到了Google原生是如何拆分apk的,並且我們自己可以通過解析manif
 細說MySQL 之MEM_ROOT
細說MySQL 之MEM_ROOT這篇文章會詳細解說MySQL中使用非常廣泛的MEM_ROOT的結構體,同時省去debug部分的信息,僅分析正常情況下,mysql中使用M