安卓應用的界面編程(5),安卓界面編程
第四組UI組件:AdapterView及其子類
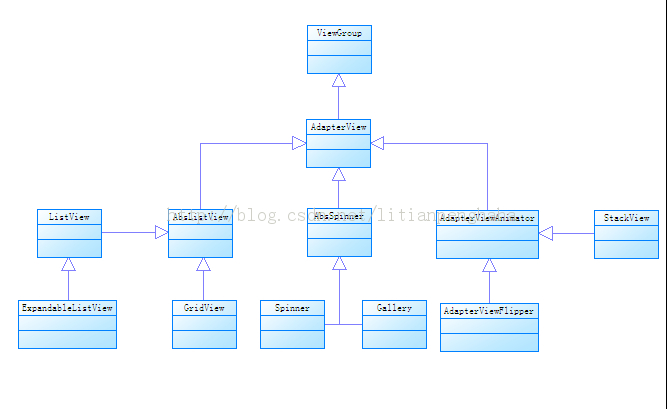
AdapterView組件是一組重要的組件,AdapterView本身是一個抽象基類,它派生的子類在用法上十分相似,只是顯示界面有些不同。
繼承了ViewGroup,本質是容器,可以包括多個“列表項”。
顯示的多個“列表項”由Adapter提供,調用AdapterView的setAdapter(Adapter)方法設置Adapter即可
下面是AdapterView及其子類的繼承關系類圖:(圖從網上找的,有點模糊)
1.列表視圖(ListView)和ListActivity
ListView以垂直列表的形式顯示所有列表項
兩種生成方式
(1)直接使用ListView進行創建
(2)讓Activity繼承ListActivity(相當於該Activity顯示的組件為ListView),之後為ListView設置它要顯示的列表項
注:ListView/GridView/Spinner/Gallery等AdapterView都只是容器,而Adapter負責提供每個“列表項”組件,AdapterView則負責采用合適的方式顯示這些列表項
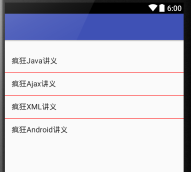
下面是ListView最簡單的使用例子,先在布局文件定義一個ListView

![]()
1 <?xml version="1.0" encoding="utf-8"?>
2 <LinearLayout xmlns:android="http://schemas.android.com/apk/res/android"
3 android:orientation="vertical"
4 android:layout_width="match_parent"
5 android:layout_height="match_parent">
6 <TextView
7 android:layout_width="wrap_content"
8 android:layout_height="wrap_content"
9 android:layout_marginTop="120px"/>
10 <!-- 直接使用數組資源給出列表項 -->
11 <!-- 設置使用紅色的分隔條 -->
12 <!-- android:headerDividersEnabled="false"不在header View之後繪制分隔條 -->
13 <ListView
14 android:layout_width="match_parent"
15 android:layout_height="wrap_content"
16 android:entries="@array/books"
17 android:divider="#f00"
18 android:dividerHeight="2px"
19 android:headerDividersEnabled="false">
20 </ListView>
21 </LinearLayout>
View Code
裡面引用的數組資源另外定義文件
![]()
1 <?xml version="1.0" encoding="utf-8"?>
2 <resources>
3 <string-array name="books">
4 <item>瘋狂Java講義</item>
5 <item>瘋狂Ajax講義</item>
6 <item>瘋狂XML講義</item>
7 <item>瘋狂Android講義</item>
8 </string-array>
9 </resources>
View Code
效果圖
下面把ListView作為AdapterView使用,通過Adapter控制每個列表項的外觀和行為。
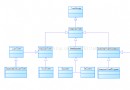
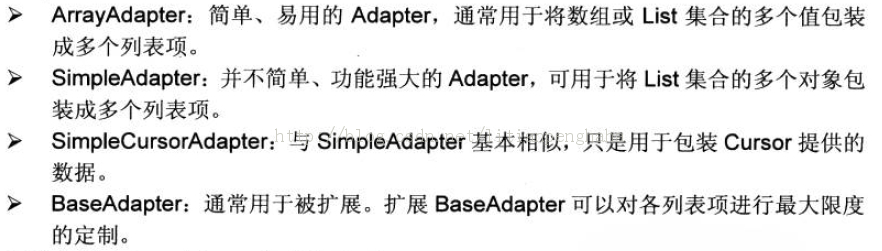
2.Adapter接口及實現類
Adapter接口派生出了ListAdapter和SpinnerAdapter兩個子接口
其中ListAdapter為AbsListView提供列表項,SpinnerAdapter為AbsSpinner提供列表項
Adapter常用的實現類如下,圖片取自(http://www.it165.net/pro/html/201404/11876.html)
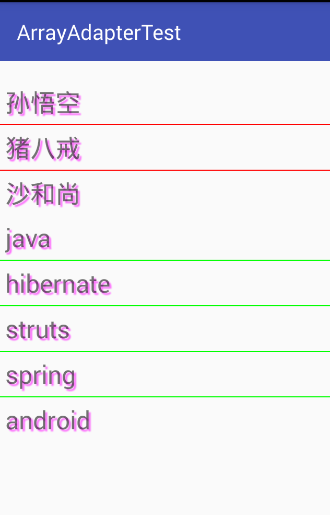
下面通過ArrayAdapter來實現ListView
先是簡單的布局文件
![]()
1 <LinearLayout
2 xmlns:android="http://schemas.android.com/apk/res/android"
3 android:orientation="vertical"
4 android:layout_width="match_parent"
5 android:layout_height="match_parent">
6 <!-- 設置使用紅色的分隔條 -->
7 <ListView
8 android:id="@+id/list1"
9 android:layout_width="match_parent"
10 android:layout_height="wrap_content"
11 android:divider="#f00"
12 android:dividerHeight="2px"
13 android:headerDividersEnabled="false">
14 </ListView>
15 <!-- 設置使用綠色的分隔條 -->
16 <ListView
17 android:id="@+id/list2"
18 android:layout_width="match_parent"
19 android:layout_height="wrap_content"
20 android:divider="#0f0"
21 android:dividerHeight="2px"
22 android:headerDividersEnabled="false">
23 </ListView>
24 </LinearLayout>
View Code
上面的兩個ListView沒有指定android:entries屬性,所以要通過Adapter來提供列表項,下面在Activity中為兩個ListView提供Adapter
![]()
1 public class ArrayAdapterTest extends AppCompatActivity {
2
3 @Override
4 protected void onCreate(Bundle savedInstanceState) {
5 super.onCreate(savedInstanceState);
6 setContentView(R.layout.activity_array_adapter_test);
7 ListView list1=(ListView)findViewById(R.id.list1);
8 //定義一個數組
9 String[] arr1={"孫悟空","豬八戒","沙和尚"};
10 //將數組包裝為ArrayAdapter
11 ArrayAdapter<String> adapter1=new ArrayAdapter<String>(this,R.layout.array_item,arr1);
12 //為ListView設置Adapter
13 list1.setAdapter(adapter1);
14 ListView list2=(ListView)findViewById(R.id.list2);
15 String[] arr2={"java","hibernate","struts","spring","android"};
16 ArrayAdapter<String> adapter2=new ArrayAdapter<String>(this,R.layout.array_item,arr2);
17 list2.setAdapter(adapter2);
18 }
19 }
View Code
創建ArrayAdapter的三個參數分別為
1.Context:代表訪問整個Android應用的接口
2.textViewReourceId:資源ID(作為ArrayAdapter的列表項組件)
3.數組或List(提供數據)
下面是R.layout.array_item布局文件,即第二個參數指定的文件
![]()
1 <?xml version="1.0" encoding="utf-8"?>
2 <TextView
3 xmlns:android="http://schemas.android.com/apk/res/android"
4 android:id="@+id/TextView"
5 android:layout_width="match_parent"
6 android:layout_height="wrap_content"
7 android:textSize="24dp"
8 android:padding="10px"
9 android:shadowColor="#f0f"
10 android:shadowDx="4"
11 android:shadowDy="4"
12 android:shadowRadius="2">
13 </TextView>
View Code
效果圖
基於ListActivity實現列表比較簡單,不作說明了
接下來使用SimpleAdapter(功能比ArrayAdapter強大,較為復雜)創建ListView
先簡單定義一個ListView
![]()
1 <LinearLayout
2 xmlns:android="http://schemas.android.com/apk/res/android"
3 android:orientation="vertical"
4 android:layout_width="match_parent"
5 android:layout_height="wrap_content">
6 <TextView
7 android:layout_width="wrap_content"
8 android:layout_height="wrap_content"
9 android:layout_marginTop="95px"/>
10 <!-- 定義個ListView -->
11 <ListView
12 android:id="@+id/mylist"
13 android:layout_width="match_parent"
14 android:layout_height="wrap_content">
15 </ListView>
16 </LinearLayout>
View Code
然後是一個界面布局文件simple_item.xml
![]()
1 <?xml version="1.0" encoding="utf-8"?>
2 <LinearLayout xmlns:android="http://schemas.android.com/apk/res/android"
3 android:orientation="horizontal"
4 android:layout_width="match_parent"
5 android:layout_height="wrap_content">
6 <!-- 定義一個ImageView,用於作為列表項的一部分 -->
7 <ImageView
8 android:id="@+id/header"
9 android:layout_width="wrap_content"
10 android:layout_height="wrap_content"
11 android:paddingLeft="10dp"/>
12 <LinearLayout
13 android:orientation="vertical"
14 android:layout_width="match_parent"
15 android:layout_height="wrap_content">
16 <!-- 定義一個TextView,用於作為列表項的一部分 -->
17 <TextView
18 android:id="@+id/name"
19 android:layout_width="wrap_content"
20 android:layout_height="wrap_content"
21 android:textSize="20dp"
22 android:textColor="#f0f"
23 android:paddingLeft="10dp"/>
24 <!-- 定義一個TextView,用於作為列表項的一部分 -->
25 <TextView
26 android:id="@+id/desc"
27 android:layout_width="wrap_content"
28 android:layout_height="wrap_content"
29 android:textSize="14dp"
30 android:paddingLeft="10dp"/>
31 </LinearLayout>
32 </LinearLayout>
View Code
最後是Activity代碼
![]()
1 public class SimpleAdapterTest extends AppCompatActivity {
2
3 private String[] names=new String[]{"虎頭","弄玉","李清照","李白"};
4 private String[] descs=new String[]{"可愛的小孩","一個擅長音樂的女孩","一個擅長文學的女性","浪漫主義詩人"};
5 private int[] imageIds=new int[]{R.drawable.tiger,R.drawable.nongyu,R.drawable.qingzhao,R.drawable.libai};
6
7 @Override
8 protected void onCreate(Bundle savedInstanceState) {
9 super.onCreate(savedInstanceState);
10 setContentView(R.layout.activity_simple_adapter_test);
11 //創建一個List集合,List集合的元素是Map
12 List<Map<String,Object>> listItems=new ArrayList<Map<String,Object>>();
13 for(int i=0;i<names.length;i++)
14 {
15 Map<String,Object> listItem=new HashMap<String,Object>();
16 listItem.put("header",imageIds[i]);
17 listItem.put("personName",names[i]);
18 listItem.put("desc",descs[i]);
19 listItems.add(listItem);
20 }
21 //創建一個SimpleAdapter
22 SimpleAdapter simpleAdapter=new SimpleAdapter(this,listItems,R.layout.simple_item,
23 new String[]{"personName","header","desc"},new int[]{R.id.name,R.id.header,R.id.desc});
24 ListView list=(ListView)findViewById(R.id.mylist);
25 //為ListView設置Adapter
26 list.setAdapter(simpleAdapter);
27
28 //為ListView的列表項的單擊事件綁定事件監聽器
29 list.setOnItemClickListener(new AdapterView.OnItemClickListener() {
30 //第position項被單擊時激發該方法
31 @Override
32 public void onItemClick(AdapterView<?> parent, View view, int position, long id) {
33 System.out.println(names[position]+"被單擊了");
34 }
35 });
36
37 //為ListView的列表項的選中事件綁定事件監聽器
38 list.setOnItemSelectedListener(new AdapterView.OnItemSelectedListener() {
39 //第position項背選中時激發該方法
40 @Override
41 public void onItemSelected(AdapterView<?> parent, View view, int position, long id) {
42 System.out.println(names[position]+"被選中了");
43 }
44
45 @Override
46 public void onNothingSelected(AdapterView<?> parent) {
47
48 }
49 });
50 }
51 }
View Code
效果圖
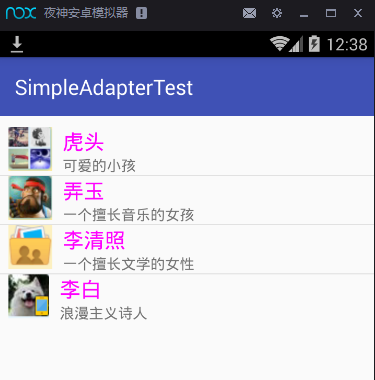
這個比較復雜,理解一下感覺渾然一體,以後數據項應該是從數據庫裡面抽取。
還可以使用擴展BaseAdapter來實現不存儲列表項的ListView,從而取得對Adapter最大的控制權,這裡不舉例說明了。
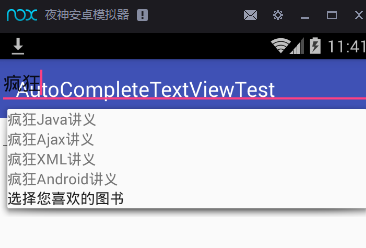
3.自動完成文本框(AutoCompleteTextView)的功能和用法
從EditView派生而出,比普通編輯框多了一個功能:當用戶輸入一定字符之後,自動完成文本框會顯示一個下拉菜單,供用戶從中選擇。
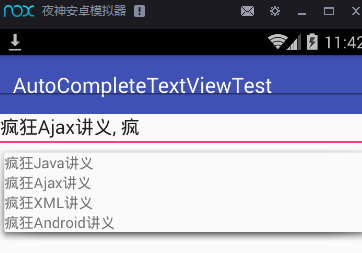
AutoCompleteTextView又派生出了MultiAutoCompleteTextView(允許輸入多個提示項)。下面是簡單的使用說明
首先在布局文件中定義一個AutoCompleteTextView和一個MultiAutoCompleteTextView
![]()
1 <LinearLayout
2 xmlns:android="http://schemas.android.com/apk/res/android"
3 android:orientation="vertical"
4 android:layout_width="match_parent"
5 android:layout_height="match_parent">
6 <!-- 定義一個自動完成文本框,指定輸入一個字符後進行提示 -->
7 <AutoCompleteTextView
8 android:id="@+id/auto"
9 android:layout_width="match_parent"
10 android:layout_height="wrap_content"
11 android:completionHint="選擇您喜歡的圖書"
12 android:completionThreshold="1"/>
13 <!-- 定義一個MultiAutoCompleteTextView組件 -->
14 <MultiAutoCompleteTextView
15 android:id="@+id/mauto"
16 android:layout_width="match_parent"
17 android:layout_height="wrap_content"
18 android:completionThreshold="1"/>
19 </LinearLayout>
View Code
然後是Activity代碼
![]()
1 public class AutoCompleteTextViewTest extends AppCompatActivity {
2 AutoCompleteTextView actv;
3 MultiAutoCompleteTextView mactv;
4 //定義字符串數組作為提示文本
5 String[] books=new String[]{
6 "瘋狂Java講義",
7 "瘋狂Ajax講義",
8 "瘋狂XML講義",
9 "瘋狂Android講義"
10 };
11 @Override
12 protected void onCreate(Bundle savedInstanceState) {
13 super.onCreate(savedInstanceState);
14 setContentView(R.layout.activity_auto_complete_text_view_test);
15 ArrayAdapter<String> aa=new ArrayAdapter<String>(this,R.layout.simple_dropdown_item_line,books);
16 actv=(AutoCompleteTextView)findViewById(R.id.auto);
17 mactv=(MultiAutoCompleteTextView)findViewById(R.id.mauto);
18 actv.setAdapter(aa);
19 mactv.setAdapter(aa);
20 //為MultiAutoCompleTextView設置分隔符
21 mactv.setTokenizer(new MultiAutoCompleteTextView.CommaTokenizer());
22 }
23 }
View Code
運行效果
4.網格視圖(GridView)的功能和用法
用於在界面上按行列分布顯示多個組件(多列的ListView),一般指定numColumns大於1,否則變成ListView。
下面的實例是一個帶預覽的圖片浏覽器
先簡單定義一個GridView和ImageView
![]()
1 <LinearLayout
2 xmlns:android="http://schemas.android.com/apk/res/android"
3 android:orientation="vertical"
4 android:layout_width="match_parent"
5 android:layout_height="match_parent"
6 android:gravity="center_horizontal">
7 <!-- 定義GridView組件 -->
8 <GridView
9 android:id="@+id/grid01"
10 android:layout_width="match_parent"
11 android:layout_height="wrap_content"
12 android:horizontalSpacing="1pt"
13 android:verticalSpacing="1pt"
14 android:numColumns="4"
15 android:gravity="center">
16 </GridView>
17 <!-- 定義一個ImageView組件 -->
18 <ImageView
19 android:id="@+id/imageView"
20 android:layout_width="240dp"
21 android:layout_height="240dp"
22 android:layout_gravity="center_horizontal"/>
23 </LinearLayout>
View Code
然後是Activity代碼
![]()
1 public class GridViewTest extends AppCompatActivity {
2
3 GridView gridView;
4 ImageView imageView;
5 int[] imageIds=new int[]
6 {
7 R.drawable.libai,R.drawable.nongyu,R.drawable.qingzhao,R.drawable.suit,R.drawable.tiger
8 };
9 @Override
10 protected void onCreate(Bundle savedInstanceState) {
11 super.onCreate(savedInstanceState);
12 setContentView(R.layout.activity_grid_view_test);
13 //創建一個List對象,List對象的元素是Map
14 List<Map<String,Object>> listItems=new ArrayList<Map<String,Object>>();
15 for(int i=0;i<imageIds.length;i++)
16 {
17 Map<String,Object> listItem=new HashMap<String,Object>();
18 listItem.put("image",imageIds[i]);
19 listItems.add(listItem);
20 }
21 //獲取顯示圖片的ImageView
22 imageView=(ImageView)findViewById(R.id.imageView);
23 //創建一個SimpleAdapter
24 SimpleAdapter simpleAdapter=new SimpleAdapter(this,listItems,R.layout.cell,new String[]{"image"},new int[]{R.id.image});
25 gridView=(GridView)findViewById(R.id.grid01);
26 //為GridView設置Adapter
27 gridView.setAdapter(simpleAdapter);
28
29 //添加列表項被選中的監聽器
30 gridView.setOnItemSelectedListener(new AdapterView.OnItemSelectedListener() {
31 @Override
32 public void onItemSelected(AdapterView<?> parent, View view, int position, long id) {
33 //顯示當前被選中的圖片
34 imageView.setImageResource(imageIds[position]);
35 }
36
37 @Override
38 public void onNothingSelected(AdapterView<?> parent) {
39
40 }
41 });
42
43 //添加列表項被單擊的監聽器
44 gridView.setOnItemClickListener(new AdapterView.OnItemClickListener()
45 {
46 @Override
47 public void onItemClick(AdapterView<?> parent, View view, int position, long id) {
48 imageView.setImageResource(imageIds[position]);
49 }
50 });
51 }
52 }
View Code
效果圖,忘了在上面加個占位的。

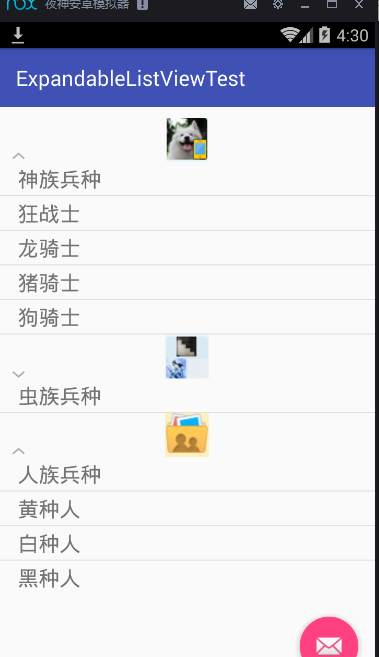
5.可展開的列表組件(ExpandableListView)
ExpandableListView是ListView的子類,它在普通ListView的基礎上進行擴展,把應用中的列表項分為幾組,每組又可以包含多個列表項,
ExpandableListView與普通的ListView用法十分相似,只是ExpandableListView所顯示的列表應該由ExpandableListAdapter提供
布局文件簡單定義,下面是Activity的代碼
![]()
1 public class ExpandableListViewTest extends AppCompatActivity {
2
3 @Override
4 protected void onCreate(Bundle savedInstanceState) {
5 super.onCreate(savedInstanceState);
6 setContentView(R.layout.activity_expandable_list_view_test);
7 //創建一個BaseExpandableListAdapter對象
8 ExpandableListAdapter adapter=new ExpandableListAdapter() {
9
10 int[] logos=new int[]
11 {
12 R.drawable.libai, R.drawable.suit,R.drawable.qingzhao
13 };
14 private String[] armTypes=new String[]{"神族兵種","蟲族兵種","人族兵種"};
15 private String[][] arms=new String[][]
16 {
17 {"狂戰士","龍騎士","豬騎士","狗騎士"},
18 {"小狗","小貓","小蛇","小豬"},
19 {"黃種人","白種人","黑種人"}
20 };
21
22 @Override
23 public void registerDataSetObserver(DataSetObserver observer) {
24
25 }
26
27 @Override
28 public void unregisterDataSetObserver(DataSetObserver observer) {
29
30 }
31
32 @Override
33 public int getGroupCount() {
34 return armTypes.length;
35 }
36
37 @Override
38 public int getChildrenCount(int groupPosition) {
39 return arms[groupPosition].length;
40 }
41
42 //獲取指定組位置處的組數據
43 @Override
44 public Object getGroup(int groupPosition) {
45 return armTypes[groupPosition];
46 }
47
48 //獲取指定組位置/指定子列表項處的子列表項數據
49 @Override
50 public Object getChild(int groupPosition, int childPosition) {
51 return arms[groupPosition][childPosition];
52 }
53
54 private TextView getTextView()
55 {
56 AbsListView.LayoutParams lp=new AbsListView.LayoutParams(ViewGroup.LayoutParams.MATCH_PARENT,64);
57 TextView textView=new TextView(ExpandableListViewTest.this);
58 textView.setLayoutParams(lp);
59 textView.setGravity(Gravity.CENTER_VERTICAL | Gravity.LEFT);
60 textView.setPadding(36, 0, 0, 0);
61 textView.setTextSize(20);
62 return textView;
63 }
64
65 @Override
66 public long getGroupId(int groupPosition) {
67 return groupPosition;
68 }
69
70 @Override
71 public long getChildId(int groupPosition, int childPosition) {
72 return childPosition;
73 }
74
75 @Override
76 public boolean hasStableIds() {
77 return true;
78 }
79
80 //該方法決定每個組選項的外觀
81 @Override
82 public View getGroupView(int groupPosition, boolean isExpanded, View convertView, ViewGroup parent) {
83 LinearLayout ll=new LinearLayout(ExpandableListViewTest.this);
84 ll.setOrientation(LinearLayout.VERTICAL);
85 ImageView logo=new ImageView(ExpandableListViewTest.this);
86 logo.setImageResource(logos[groupPosition]);
87 ll.addView(logo);
88 TextView textView=getTextView();
89 textView.setText(getGroup(groupPosition).toString());
90 ll.addView(textView);
91 return ll;
92 }
93
94 //該方法決定每個子選項的外觀
95 @Override
96 public View getChildView(int groupPosition, int childPosition, boolean isLastChild, View convertView, ViewGroup parent) {
97 TextView textView=getTextView();
98 textView.setText(getChild(groupPosition,childPosition).toString());
99 return textView;
100 }
101
102 @Override
103 public boolean isChildSelectable(int groupPosition, int childPosition) {
104 return true;
105 }
106
107 @Override
108 public boolean areAllItemsEnabled() {
109 return false;
110 }
111
112 @Override
113 public boolean isEmpty() {
114 return false;
115 }
116
117 @Override
118 public void onGroupExpanded(int groupPosition) {
119
120 }
121
122 @Override
123 public void onGroupCollapsed(int groupPosition) {
124
125 }
126
127 @Override
128 public long getCombinedChildId(long groupId, long childId) {
129 return 0;
130 }
131
132 @Override
133 public long getCombinedGroupId(long groupId) {
134 return 0;
135 }
136 };
137 ExpandableListView expandableListView=(ExpandableListView)findViewById(R.id.Exlist);
138 expandableListView.setAdapter(adapter);
139 }
140 }
View Code
運行效果
6.Spinner的功能和用法
Spinner組件就是一個列表選擇框,這裡相當於彈出一個菜單供用戶選擇,比較簡單,不做說明。Gallery已經漸漸淡出視野,不做介紹
7.AdapterViewFlipper的功能與用法
可以在多個View切換過程中使用漸隱漸現的動畫效果,還可以控制自動播放下一個View組件
下面的實例是一個自動播放的圖片庫
首先是布局文件,因為和書上的有點出入自己查資料改了改
![]()
1 <LinearLayout
2 xmlns:android="http://schemas.android.com/apk/res/android"
3 android:orientation="vertical"
4 android:gravity="center_vertical"
5 android:layout_width="match_parent"
6 android:layout_height="match_parent">
7 <TextView
8 android:layout_width="wrap_content"
9 android:layout_height="wrap_content"
10 android:layout_marginTop="95px"/>
11 <AdapterViewFlipper
12 android:id="@+id/flipper"
13 android:layout_width="400px"
14 android:layout_height="400px"
15 android:flipInterval="5000"
16 android:layout_alignParentTop="true">
17 </AdapterViewFlipper>
18 <Button
19 android:layout_width="wrap_content"
20 android:layout_height="wrap_content"
21 android:onClick="prev"
22 android:text="上一個"/>
23 <Button
24 android:layout_width="wrap_content"
25 android:layout_height="wrap_content"
26 android:onClick="next"
27 android:text="下一個"/>
28 <Button
29 android:layout_width="wrap_content"
30 android:layout_height="wrap_content"
31 android:onClick="auto"
32 android:text="自動播放"/>
33 </LinearLayout>
View Code
然後是Activity代碼
![]()
1 package mocking.com.adapterviewandhissons;
2
3 import android.os.Bundle;
4 import android.support.design.widget.FloatingActionButton;
5 import android.support.design.widget.Snackbar;
6 import android.support.v7.app.AppCompatActivity;
7 import android.support.v7.widget.Toolbar;
8 import android.view.View;
9 import android.view.ViewGroup;
10 import android.widget.AdapterViewFlipper;
11 import android.widget.BaseAdapter;
12 import android.widget.ImageView;
13 import android.widget.RelativeLayout;
14
15 public class AdapterViewFlipperTest extends AppCompatActivity {
16
17 int[] imageIds=new int[]
18 {
19 R.drawable.one,R.drawable.two,R.drawable.three,R.drawable.four,R.drawable.five
20 };
21 private AdapterViewFlipper flipper;
22 @Override
23 protected void onCreate(Bundle savedInstanceState) {
24 super.onCreate(savedInstanceState);
25 setContentView(R.layout.activity_adapter_view_flipper_test);
26 flipper=(AdapterViewFlipper)findViewById(R.id.flipper);
27 //創建一個BaseAdapter對象,該對象負責提供Gallery所顯示的列表項
28 BaseAdapter adapter=new BaseAdapter() {
29 @Override
30 public int getCount() {
31 return imageIds.length;
32 }
33
34 @Override
35 public Object getItem(int position) {
36 return position;
37 }
38
39 @Override
40 public long getItemId(int position) {
41 return position;
42 }
43
44 //該方法返回的View代表了每個列表項
45 @Override
46 public View getView(int position, View convertView, ViewGroup parent) {
47 //創建一個ImageView
48 ImageView imageView=new ImageView(AdapterViewFlipperTest.this);
49 imageView.setImageResource(imageIds[position]);
50 //設置ImageView的縮放類型
51 imageView.setScaleType(ImageView.ScaleType.FIT_XY);
52 //為ImageView設置布局參數
53 imageView.setLayoutParams(new ViewGroup.LayoutParams(RelativeLayout.LayoutParams.MATCH_PARENT, RelativeLayout.LayoutParams.MATCH_PARENT));
54 return imageView;
55 }
56 };
57 flipper.setAdapter(adapter);
58
59 Toolbar toolbar = (Toolbar) findViewById(R.id.toolbar);
60 setSupportActionBar(toolbar);
61
62 FloatingActionButton fab = (FloatingActionButton) findViewById(R.id.fab);
63 fab.setOnClickListener(new View.OnClickListener() {
64 @Override
65 public void onClick(View view) {
66 Snackbar.make(view, "Replace with your own action", Snackbar.LENGTH_LONG)
67 .setAction("Action", null).show();
68 }
69 });
70 }
71
72 public void prev(View source)
73 {
74 //顯示上一個組件
75 flipper.showPrevious();
76 //停止播放
77 flipper.stopFlipping();
78 }
79
80 public void next(View source)
81 {
82 //顯示下一個組件
83 flipper.showNext();
84 //停止播放
85 flipper.stopFlipping();
86 }
87
88 public void auto(View source)
89 {
90 //開始自動播放
91 flipper.startFlipping();
92 }
93 }
View Code
效果圖

8.StackView的功能和用法
會以堆疊的方式顯示多個列表項
下面的實例是疊在一起的圖片
布局文件
![]()
1 <LinearLayout
2 xmlns:android="http://schemas.android.com/apk/res/android"
3 android:orientation="horizontal"
4 android:layout_width="match_parent"
5 android:layout_height="match_parent">
6 <StackView
7 android:id="@+id/mStackView"
8 android:layout_width="match_parent"
9 android:layout_height="wrap_content"
10 android:loopViews="true"></StackView>
11 <LinearLayout
12 android:orientation="horizontal"
13 android:layout_width="wrap_content"
14 android:layout_height="wrap_content">
15 <Button
16 android:layout_width="wrap_content"
17 android:layout_height="wrap_content"
18 android:text="上一個"
19 android:onClick="prev"/>
20 <Button
21 android:layout_width="wrap_content"
22 android:layout_height="wrap_content"
23 android:text="下一個"
24 android:onClick="next"/>
25 </LinearLayout>
26 </LinearLayout>
View Code
Activity代碼
![]()
1 package mocking.com.adapterviewandhissons;
2
3 import android.os.Bundle;
4 import android.support.design.widget.FloatingActionButton;
5 import android.support.design.widget.Snackbar;
6 import android.support.v7.app.AppCompatActivity;
7 import android.support.v7.widget.Toolbar;
8 import android.view.View;
9 import android.widget.SimpleAdapter;
10 import android.widget.StackView;
11
12 import java.util.ArrayList;
13 import java.util.HashMap;
14 import java.util.List;
15 import java.util.Map;
16
17 public class StackViewTest extends AppCompatActivity {
18
19 StackView stackView;
20 int[] imageIds=new int[]
21 {
22 R.drawable.one,R.drawable.two,R.drawable.three,R.drawable.four,R.drawable.five
23 };
24 @Override
25 protected void onCreate(Bundle savedInstanceState) {
26 super.onCreate(savedInstanceState);
27 setContentView(R.layout.activity_stack_view_test);
28 stackView=(StackView)findViewById(R.id.mStackView);
29 List<Map<String,Object>> listItems=new ArrayList<Map<String,Object>>();
30 for(int i=0;i<imageIds.length;i++)
31 {
32 Map<String,Object> listItem=new HashMap<String,Object>();
33 listItem.put("image",imageIds[i]);
34 listItems.add(listItem);
35 }
36 SimpleAdapter simpleAdapter=new SimpleAdapter(this,listItems,R.layout.cell,new String[]{"image"},new int[]{R.id.image1});
37 stackView.setAdapter(simpleAdapter);
38 Toolbar toolbar = (Toolbar) findViewById(R.id.toolbar);
39 setSupportActionBar(toolbar);
40
41 FloatingActionButton fab = (FloatingActionButton) findViewById(R.id.fab);
42 fab.setOnClickListener(new View.OnClickListener() {
43 @Override
44 public void onClick(View view) {
45 Snackbar.make(view, "Replace with your own action", Snackbar.LENGTH_LONG)
46 .setAction("Action", null).show();
47 }
48 });
49 }
50
51 public void prev(View view)
52 {
53 stackView.showPrevious();
54 }
55
56 public void next(View view)
57 {
58 stackView.showNext();
59 }
60
61 }
View Code
效果圖,最上方的圖片可以拖走。。效果不錯= =亂七八糟估計是圖片大小不一樣引起的

這篇結束。。最近顧著玩,連續拖更。。下一篇ProgressBar及其子類
 ImageLoader簡單使用,imageloader
 谷歌電子市場1--BaseFragment,1--basefragment
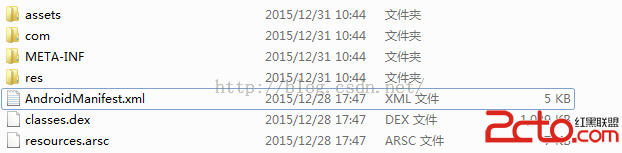 Android逆向之旅---解析編譯之後的AndroidManifest文件格式
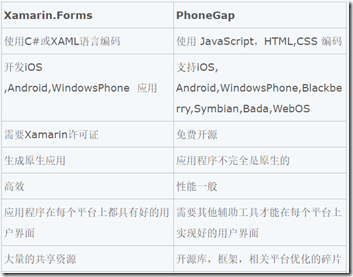 跨平台開發的兩種方法及其對比,兩種方法