編輯:Android編程入門
讓我們開始真正的基於Android框架編程。在開始使用Android SDK寫第一個示例之前,請確保你已經按照Android - 環境搭建 教程中介紹的完成了你的Android開發環境搭建。同時,我假設你具備一些Eclipse IDE的知識。
現在讓我們開始寫一個簡單的Android應用程序,可以打印出"Hello World"。
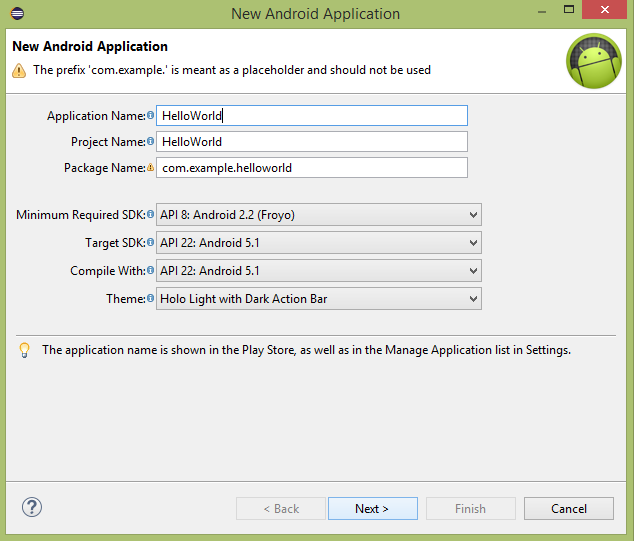
第一步是通過Eclipse IDE來創建一個簡單地Android應用程序。按照選項File -> New -> Project,最後從向導列表選擇 Android New Application 。現在,使用如下的窗口向導將應用程序命名為HelloWorld:
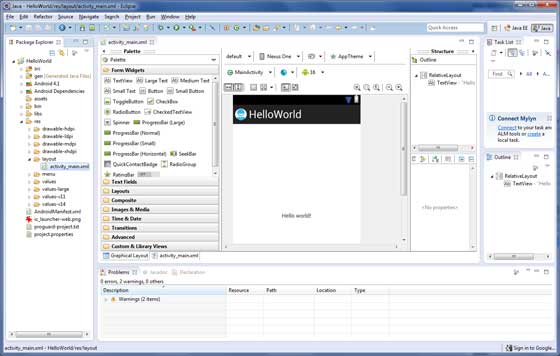
接下來,按照所提供的說明,保持所有的默認輸入,直到最後一步。一旦項目創建成功,將會看到如下的項目界面 -
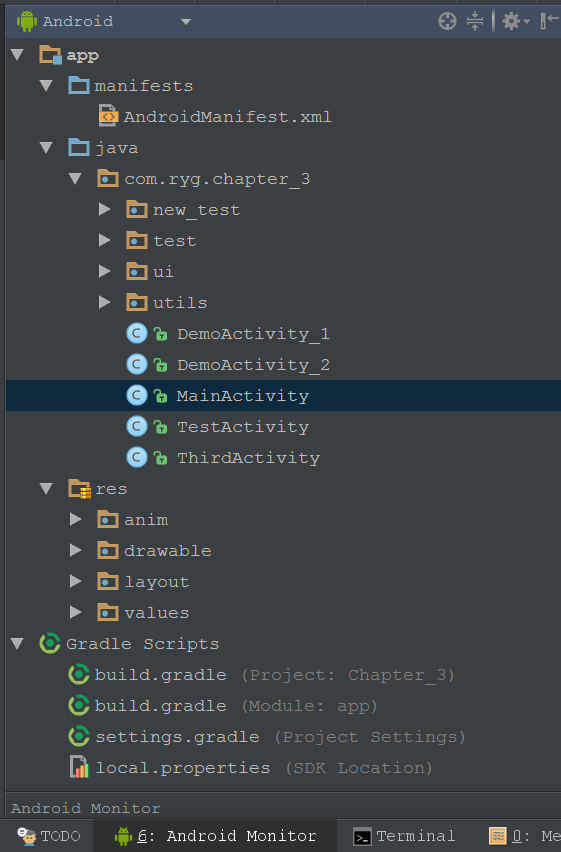
在運行應用之前,你需要知道Android項目中的一些文件目錄和文件 -
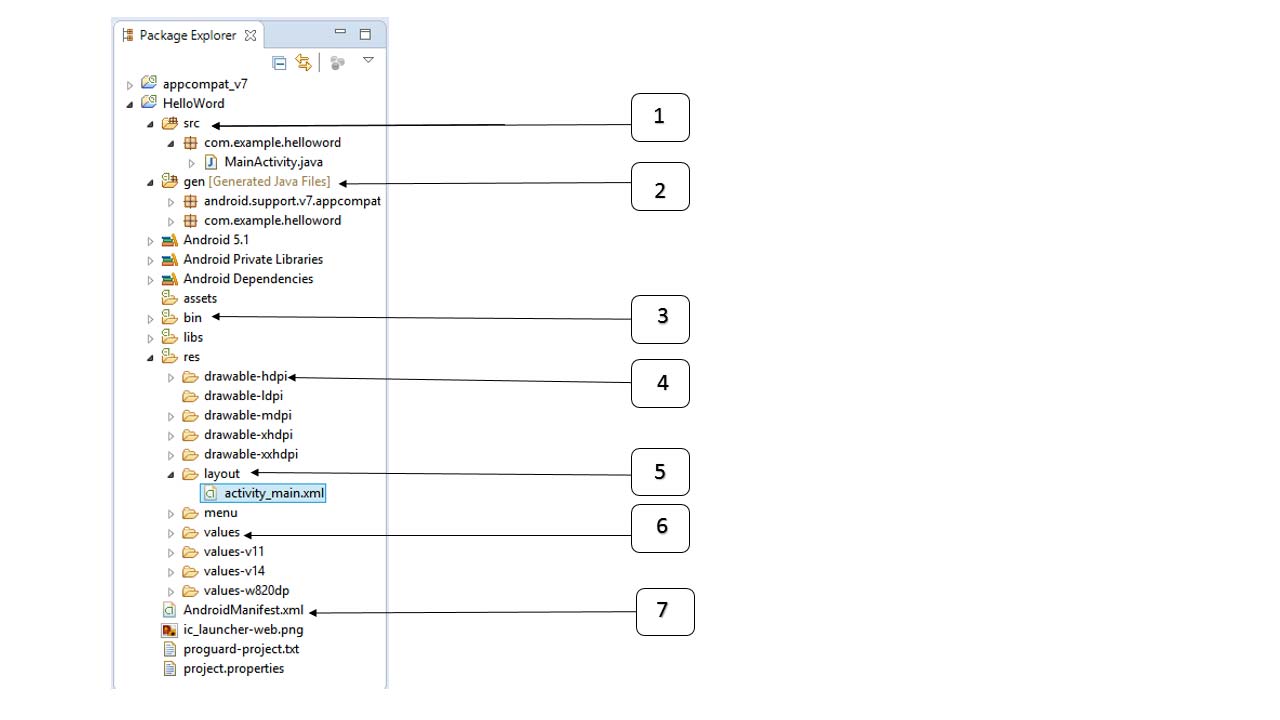
下面的章節將給出一些重要的應用程序文件的概覽。
主要活動代碼在MainActivity.java的Java文件中。這是實際的應用程序文件,將被轉化為Dalvik可執行文件並運行。下面是由應用向導為Hello World應用生成的默認代碼 -
package com.example.helloworld;

import android.os.Bundle;
import android.app.Activity;
import android.view.Menu;
import android.view.MenuItem;
import android.support.v4.app.NavUtils;

public class MainActivity extends Activity {

   @Override
   public void onCreate(Bundle savedInstanceState) {
      super.onCreate(savedInstanceState);
      setContentView(R.layout.activity_main);
   }

   @Override
   public boolean onCreateOptionsMenu(Menu menu) {
      getMenuInflater().inflate(R.menu.activity_main, menu);
      return true;
   }
}
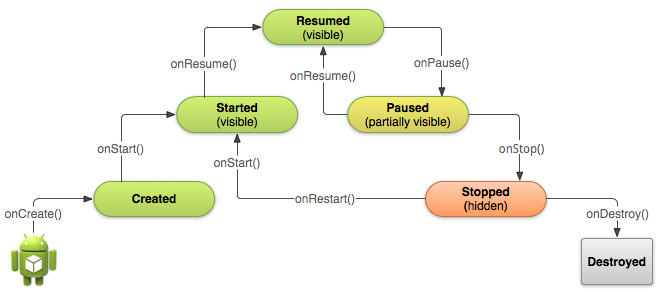
這裡,R.layout.activity_main引用自res/layout目錄下的activity_main.xml文件。onCreate()是活動被加載之後眾多被調用的方法之一。
無論你開發什麼組件用作應用程序中的一部分,都需要在應用程序項目根目錄下的manifest.xml文件中聲明所有的組件。這個文件是Android操作系統與你的應用程序之間的接口,因此,如果沒有在這個文件中聲明你的組件,將無法被操作系統所識別。舉個例子,一個默認的清單文件看起來如下:
<manifest xmlns:android="http://schemas.android.com/apk/res/android"
   package="com.example.helloworld"
   android:versionCode="1"
   android:versionName="1.0" >

   <uses-sdk
      android:minSdkVersion="8"
      android:targetSdkVersion="22" />

   <application
       android:icon="@drawable/ic_launcher"
       android:label="@string/app_name"
       android:theme="@style/AppTheme" >

       <activity
          android:name=".MainActivity"
          android:label="@string/title_activity_main" >

          <intent-filter>
             <action android:name="android.intent.action.MAIN" />
             <category android:name="android.intent.category.LAUNCHER"/>
          </intent-filter>

       </activity>

   </application>
</manifest>
這裡,...標簽之間是應用程序相關的組件。andnroid:icon屬性指出位於res/drawable-hdpi下面的應用程序圖標。這個應用使用drawable文件夾下名為ic_launcher.png的圖片。
標簽用於指定一個活動,android:name屬性指定一個Activity類子類的全名。android:label屬性指定用於活動名稱的字符串。可以使用標簽來指定多個活動。
意圖過濾器的action被命名為android.intent.action.MAIN,表明這個活動被用做應用程序的入口。意圖過濾器的category被命名為android.intent.category.LAUNCHER,表明應用程序可以通過設備啟動器的圖標來啟動。
@tring指的是strings.xml(將在後面介紹)。因此,@string/app_name指的是定義在strings.xml中的app_name,實際為"Hello World"。類似的,應用中的其他字符串也很流行。
下面是你的清單文件中將用到的標簽,用於指定不同的Android應用程序組件:
strings.xml文件在res/value文件夾下,它包含應用程序使用到的所有文本。例如,按鈕、標簽的名稱,默認文本,以及其他相似的strings。這個文件為他們的文本內容負責。一個默認的strings文件看起來如下:
<resources>
   <string name="app_name">HelloWorld</string>
   <string name="hello_world">Hello world!</string>
   <string name="menu_settings">Settings</string>
   <string name="title_activity_main">MainActivity</string>
</resources>
gen/com.example.helloworld/R.java文件是活動的Java文件,如MainActivity.java的和資源如strings.xml之間的膠水。這是一個自動生成的文件,不要修改R.java文件的內容。下面是一個R.java文件的示例:
/* AUTO-GENERATED FILE.  DO NOT MODIFY.
 *
 * This class was automatically generated by the
 * aapt tool from the resource data it found.  It
 * should not be modified by hand.
 */

package com.example.helloworld;

public final class R {
   public static final class attr {
   }

   public static final class dimen {
      public static final int padding_large=0x7f040002;
      public static final int padding_medium=0x7f040001;
      public static final int padding_small=0x7f040000;
   }

   public static final class drawable {
      public static final int ic_action_search=0x7f020000;
      public static final int ic_launcher=0x7f020001;
   }

   public static final class id {
      public static final int menu_settings=0x7f080000;
   }

   public static final class layout {
      public static final int activity_main=0x7f030000;
   }

   public static final class menu {
      public static final int activity_main=0x7f070000;
   }

   public static final class string {
      public static final int app_name=0x7f050000;
      public static final int hello_world=0x7f050001;
      public static final int menu_settings=0x7f050002;
      public static final int title_activity_main=0x7f050003;
   }

   public static final class style {
      public static final int AppTheme=0x7f060000;
   }
}
activity_main.xml是一個在res/layout目錄下的layout文件。當應用程序構建它的界面時被引用。你將非常頻繁的修改這個文件來改變應用程序的布局。在"Hello World"應用程序中,這個文件具有默認的布局,內容如下:
<RelativeLayout xmlns:android="http://schemas.android.com/apk/res/android"
   xmlns:tools="http://schemas.android.com/tools"
   android:layout_width="match_parent"
   android:layout_height="match_parent" >

   <TextView
      android:layout_width="wrap_content"
      android:layout_height="wrap_content"
      android:layout_centerHorizontal="true"
      android:layout_centerVertical="true"
      android:padding="@dimen/padding_medium"
      android:text="@string/hello_world"
      tools:context=".MainActivity" />

</RelativeLayout>
這是一個簡單的RelativeLayout的示例,更多內容會在獨立的章節中講解。TextView是一個Android的控件用於構建用戶圖形界面。它包含有許多不同的屬性,諸如android:layout_width, android:layout_height等用來設置它的寬度和高度等。@string指的是res/values文件夾下的strings.xml文件。因此,@string/hello_world指的是定義在strings.xml中的名為hello的字符串:"Hello World!"。
讓我們嘗試運行剛剛建立的Hello World!應用程序。假設在搭建環境時你已經創建好了AVD。從Eclipse運行應用,打開你項目中的一個活動文件,並且點擊工具欄上的 圖標。Eclipse在AVD上安裝應用,並啟動它。如果一切順利,將顯示如下的模擬器窗口 -
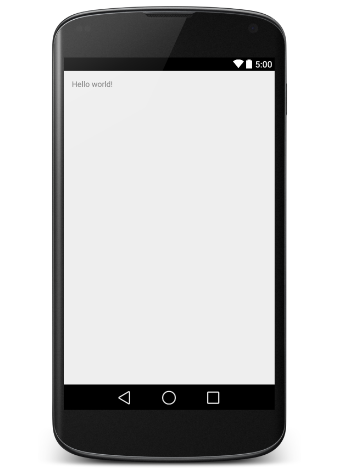
恭喜你已經開發了第一個Android應用程序,按照接下來剩余的教程一步一步來,你將成為一個牛B的Android開發人員。
 Android 開發環境搭建
Android 開發環境搭建首先,你可以在以下的操作系統開始 Android 應用程序開發:Microsoft Windows XP 或更高版本。帶有英特
 Android Activity的生命周期簡單總結
Android Activity的生命周期簡單總結這裡的內容參考官方的文檔,這篇文章的目的不是去總結Activity是如何啟動,如何創造,以及暫停和銷毀的,而是從實際開發
 Android Studio的基本使用
今天總結下這段時間對於android studio的使用情況,也對剛使用的朋友一些參考,之前一直使用Eclipse
 Android 廣播接收器(Broadcast Receivers)
Android 廣播接收器(Broadcast Receivers)廣播接收器用於響應來之其他應用程序或者系統的廣播消息。這些消息有時被稱為事件或者意圖。