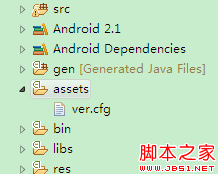
首先看這個 HelloWorld 類。
Java代碼
public class HelloWorld extends Activity {
/** Called when the activity is first created. */
@Override
public void onCreate(Bundle savedInstanceState) {
super.onCreate(savedInstanceState);
setContentView(R.layout.main);
}
}
他繼承了 Activity ,前面講了,一個 Activity 可以想象成一個手機的屏幕,用於展示一屏的內容,所以所有要展示內容的屏幕都要繼承 Activity 才能實現,接著覆蓋了 onCreate() 方法對該 Activity 進行初始化 setContentView(R.layout. main ); 設置了使用 main.xml 這個布局文件作為當前 Activity 的內容展示 .main.xml 就是放在 res 下, layout 下面的文件 xml 布局文件 , 我們可以直接使用 R.layout.main 進行直接的引用他,這也是 Android 亮點的地方,省得我們為了引用一個 xml 文件再使用 File 類去讀取,我們要做的只是把這個 xml 文件的索引給 Android ,他會自動的幫我們找到它並使用 .
2. main.xml 布局文件
Xml代碼
<?xml version="1.0" encoding="utf-8"?>
<LinearLayout xmlns:android="http://schemas.android.com/apk/res/android"
android:orientation="vertical"
android:layout_width="fill_parent"
android:layout_height="fill_parent"
>
<TextView
android:layout_width="fill_parent"
android:layout_height="wrap_content"
android:text="@string/hello"
/>
</LinearLayout>
布局文件的內容不多 , 開始就是一個 LinearLayout 組件的定義,然後在這個 LinearLayout 放了一個用於顯示文字的 TextView 。現在來看一下幾個參數 :
. LinearLayout 一個線性布局面板,只能垂直和水平布局, android:orientation="vertical" 代表裡面的子元素只能垂直排列,而使用 android:orientation="horizontal" 就標識裡面的子元素水平排列 ..
. android:layout_width 定義當前視圖占的寬度,這裡是 fill_parent 即為充滿整個屏幕。而設置成 wrap_content 會根據當前視圖的大小只能的改變寬度
. android:layout_height 是定義視圖的高度,這裡也是填充整個屏幕。而設置成 wrap_content 會根據當前視圖的大小只能的改變高度。
. android:text 是這是 TextView 要顯示的文本,可以是字符串,也可以是一個字符串的引用,這裡是一個引用,引用的是 strings.xml 定義好的名字為 hello 的字符串
3. string.xml 介紹。
Xml代碼
<?xml version="1.0" encoding="utf-8"?>
<resources>
<string name="hello">Hello World, HelloWorld!</string>
<string name="app_name">HelloWorld</string>
</resources>
這裡我們看看就明白了,只要是定義一個個的 K-V 的鍵值對,供其他地方使用。比如上面的 main 中對 hello 的引用。這對字符的統一管理和國際化有很大的意義。
4. AndroidManifest.xml 的介紹
Xml代碼
<manifest xmlns:android="http://schemas.android.com/apk/res/android"
package="com.flysnow"
android:versionCode="1"
android:versionName="1.0">
<application android:icon="@drawable/icon" android:label="@string/app_name">
<activity android:name=".HelloWorld"
android:label="@string/app_name">
<intent-filter>
<action android:name="android.intent.action.MAIN" />
<category android:name="android.intent.category.LAUNCHER" />
</intent-filter>
</activity>
</application>
<uses-sdk android:minSdkVersion="8" />
</manifest>
這是項目的重要配置文件,諸如 Activity ,權限, Intent 等都在這裡配置
Package: 定義了該應用的包。
android:versioCode 定義了應用的版本號
android:versionName 定義了應用的版本名字
application 標簽定義了一個應用,一個項目最多有一個 Application 標簽。
android:icon="@drawable/icon" 定義了應用的圖標 引用資源文件中的 icon 圖片
android:label="@string/app_name" 定義了應用的名稱
activity 標簽定義了一個 Activity ,你的每一個 Activity 必須在這裡定義,否則不能運行 .
Android:name 定義了 Activity 的類名 , 這裡的 .HelloWorld 是以上面的 Package 定義為基礎的,也就是 Package(com.flysnow) 加上這個 android:name(.HelloWorld) 要能定位到這個 Activity(com.flysnow.HelloWorld) ,否則就是找不到 .
android:label 定義了該 Activity 的標題
intent-filter 定義一個 Intent 過濾器,用於標記對應的 Activity ,以便 Android 系統能找到該 Activity ,定義的是隱性的 Intent ,主要使用兩個子標簽 action 和 category 來區分每個 Intent 。
最後的 <uses-sdk android:minSdkVersion="8" /> 就是定義應用的最低 SDK 的級別,
 Android開發技巧之我的菜單我做主(自定義菜單)
 Android筆記之:App列表之下拉刷新的使用
 Android開發學習筆記 淺談WebView
 android 版本檢測 Android程序的版本檢測與更新實現介紹