編輯:Android開發實例
當然上面的布局方式可以幫助我們完成簡單應用的開發了,但是如果你想寫一個復雜的應用,這樣就有點牽強了,大家不信可以下源碼都研究看看,高手寫的布局方式,如上面的布局高手通常是這樣寫的: view plaincopy to clipboardprint?
- <?xml version="1.0" encoding="utf-8"?>
- <LinearLayout xmlns:android="http://schemas.android.com/apk/res/android"
- android:orientation="vertical"
- android:layout_width="fill_parent"
- android:layout_height="fill_parent"
- >
- <TextView
- android:layout_width="fill_parent"
- android:layout_height="wrap_content"
- android:text="@string/hello"
- />
- </LinearLayout>
view plaincopy to clipboardprint?
- <?xml version="1.0" encoding="utf-8"?>
- <A>
- <B></B>
- </A>
- <?xml version="1.0" encoding="utf-8"?>
- <A>
- <B></B>
- </A>
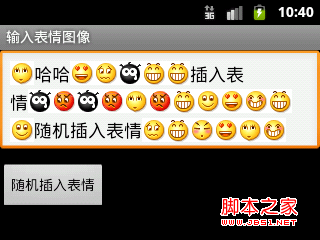
最後執行之,效果如下圖: OK,大功告成,今天就寫到這裡,開始做飯了,老婆孩子等我做飯了,lol~
- view plaincopy to clipboardprint?
- package com.android.tutor;
- import android.content.Context;
- import android.graphics.Canvas;
- import android.graphics.Color;
- import android.graphics.Paint;
- import android.graphics.Rect;
- import android.graphics.Paint.Style;
- import android.util.AttributeSet;
- import android.view.View;
- public class MyView extends View {
- private Paint mPaint;
- private Context mContext;
- private static final String mString = "Welcome to Mr Wei's blog";
- public MyView(Context context) {
- super(context);
- }
- public MyView(Context context,AttributeSet attr)
- {
- super(context,attr);
- }
- @Override
- protected void onDraw(Canvas canvas) {
- // TODO Auto-generated method stub
- super.onDraw(canvas);
- mPaint = new Paint();
- //設置畫筆顏色
- mPaint.setColor(Color.RED);
- //設置填充
- mPaint.setStyle(Style.FILL);
- //畫一個矩形,前倆個是矩形左上角坐標,後面倆個是右下角坐標
- canvas.drawRect(new Rect(10, 10, 100, 100), mPaint);
- mPaint.setColor(Color.BLUE);
- //繪制文字
- canvas.drawText(mString, 10, 110, mPaint);
- }
- }
- 然後將我們自定義的View 加入到main.xml 布局文件中,代碼如下:
- view plaincopy to clipboardprint?
- <?xml version="1.0" encoding="utf-8"?>
- <LinearLayout xmlns:android="http://schemas.android.com/apk/res/android"
- android:orientation="vertical"
- android:layout_width="fill_parent"
- android:layout_height="fill_parent"
- >
- <TextView
- android:layout_width="fill_parent"
- android:layout_height="wrap_content"
- android:text="@string/hello"
- />
- <com.android.tutor.MyView
- android:layout_width="fill_parent"
- android:layout_height="fill_parent"
- />
- </LinearLayout>
本文出自 “Android_Tutor” 博客,請務必保留此出處http://weizhulin.blog.51cto.com/1556324/311457
 Android啟動模擬器報錯解決方法
Android模擬器報Failed To Allocate memory 8錯誤的解決辦法Android在啟動模擬器AVD時,出現下面的異常:“Failed to
 Android 利用方向傳感器實現指南針具體步驟
step1:新建一個項目Compass,並將一張指南針圖片導入到res/drawable-hdpi目錄中 step2:設計應用的UI界面,main.x
 Android本地化
Android應用程序可以在許多不同地區的許多設備上運行。為了使應用程序更具交互性,應用程序應該處理以適合應用程序將要使用的語言環境方面的文字,數字,文件等。在本章中,我
 Android開發技巧之像QQ一樣輸入文字和表情圖像
EditText和TextView一樣,也可以進行圖文混排。所不同的是,TextView只用於顯示圖文混排效果,而EditText不僅可顯示,也可混合輸入文字和圖