編輯:Android資訊
Button,就是按鈕,是android中應用最多的組件之一,Button有兩種用法,一種是XML中配置,另一種是在程序中直接使用
在XML布局文件裡,會遇到如下一些單位
px:是屏幕的像素點
in:英寸
mm:毫米
pt:磅,1/72 英寸
dp:一個基於density的抽象單位,如果一個160dpi的屏幕,1dp=1px
dip:等同於dp
sp:同dp相似,但還會根據用戶的字體大小偏好來縮放。
建議使用sp作為文本的單位,其它用dip
例1:在XML中布局,這樣來設置控件以後修改起來會更方便,也符合了MVC模式
main.xml布局文件
<?xml version="1.0" encoding="utf-8"?>
<LinearLayout xmlns:android="http://schemas.android.com/apk/res/android"
    android:orientation="vertical"
    android:layout_width="fill_parent"
    android:layout_height="fill_parent"
    >
<TextView
    android:layout_width="fill_parent"
    android:layout_height="wrap_content"
    android:text="這是個Button示例"
    />
<Button
        android:layout_width="fill_parent"------充滿父控件
        android:layout_height="wrap_content"------充滿內容
        android:id="@+id/button1"----設置button的ID
        android:text="按鈕一"    ------設置按鈕的文本顯示信息,也可以用string
/>
<Button
        android:layout_width="150dip"---按鈕二的寬度
        android:layout_height="30dip"---按鈕二的高度
        android:background="#aa00aa"---設置按鈕背景顏色
        android:textColor="#00aa00"---設置按鈕二裡的文本顏色
        android:layout_gravity="center"---設置控件居中顯示,注意:android:gravity="center"表是文本在控件中居中顯示
        android:id="@+id/button2"
        android:text="按鈕二"
/>
</LinearLayout>
TestButton.java源代碼
package org.loulijun.button;

import android.app.Activity;
import android.os.Bundle;
import android.view.Gravity;
import android.view.View;
import android.widget.Button;
import android.widget.Toast;

public class TestButton extends Activity {
    /** Called when the activity is first created. */
        private Button btn1,btn2;
    @Override
    public void onCreate(Bundle savedInstanceState) {
        super.onCreate(savedInstanceState);
        setContentView(R.layout.main);
        btn1=(Button)findViewById(R.id.button1);---獲得父控件id
        btn2=(Button)findViewById(R.id.button2);
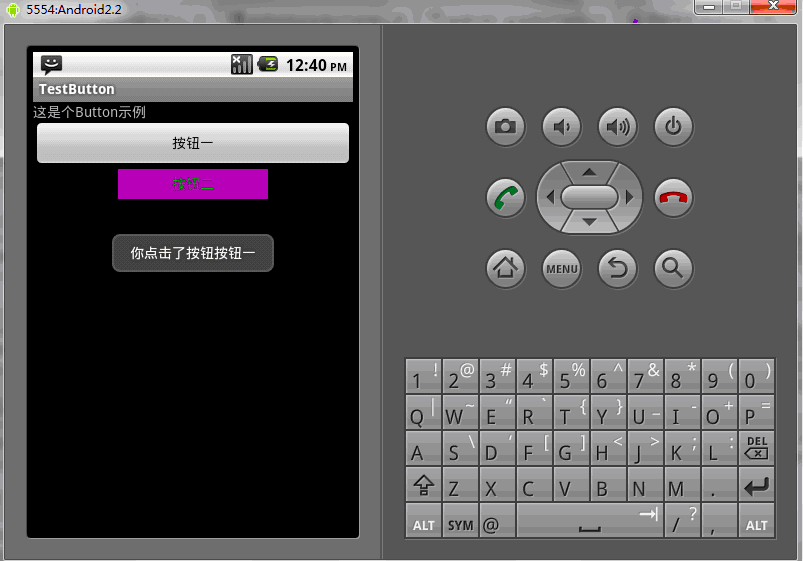
        //為控件設置監聽,當點擊了按鈕一,就彈出一個提示,當點擊按鈕二,退出程序
        btn1.setOnClickListener(new Button.OnClickListener()
        {

                        @Override
                        public void onClick(View arg0) {
                                // TODO Auto-generated method stub
                                Toast toast=Toast.makeText(TestButton.this, "你點擊了按鈕"+btn1.getText().toString(), Toast.LENGTH_SHORT);
                                toast.setGravity(Gravity.TOP,0,150);
                                toast.show();
                        }

        });
        btn2.setOnClickListener(new Button.OnClickListener()
        {

                        @Override
                        public void onClick(View v) {
                                // TODO Auto-generated method stub
                                TestButton.this.finish();
                        }

        });
    }
}
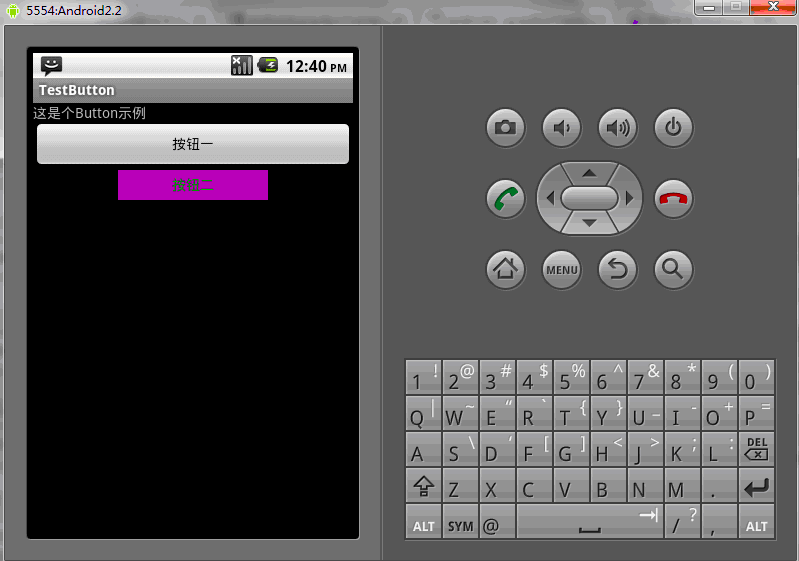
運行結果:


當然,也可以直接在程序中使用相應的方法來這是Button的相應屬性
public class TestButton extends Activity{
private Button btn1,btn2;
public void onCreate(Bundle savedInstanceState)
{
        super.onCreate(savedInstanceState);
        setContentView(R.layout.main);
        btn1=(Button)findViewById(R.id.button1);
        btn2=(Button)findViewById(R.id.button2);
        btn1.setWidth(150);--設置按鈕寬度,當然也可以用setHeight()來設置高度
        btn2.setWidth(100);
        btn1.setText("按鈕一");---設置按鈕文本顯示信息
        btn2.setText("安妮二");
        btn1.setTextColor(Color.GREEN);---設置按鈕內文本顏色
        btn2.setTextColor(Color.RED);
        btn1.setTextSize(30);---設置按鈕內文本大小
        btn2.setTextSize(20);
        btn2.setBackgroundColor(Color.RED);---設置按鈕背景顏色
}
}
 Android 性能監控實現原理
涉及知識點:APM, Java Agent, plugin, bytecode, asm, InvocationHandler, smail 一. 背景介紹 AP
 7款Android開發者常用的Android UI組件
本文由碼農網 – 小峰原創,轉載請看清文末的轉載要求,歡迎參與我們的付費投稿計劃! Android開發是目前最熱門的移動開發技術之一,隨著開發者的不斷努力
 Android 端 10 個最常見問題
這裡逐條記錄下最容易遇到的 React native android 相關case 1.app啟動後,紅色界面,unable load jsbundle 解決辦法
 對Android初學者的10個建議
本文由碼農網 – 小峰原創翻譯,轉載請看清文末的轉載要求,歡迎參與我們的付費投稿計劃! 這些Android開發的技巧都是我個人的經驗。總共10條,所以我又