編輯:關於Android編程
前言
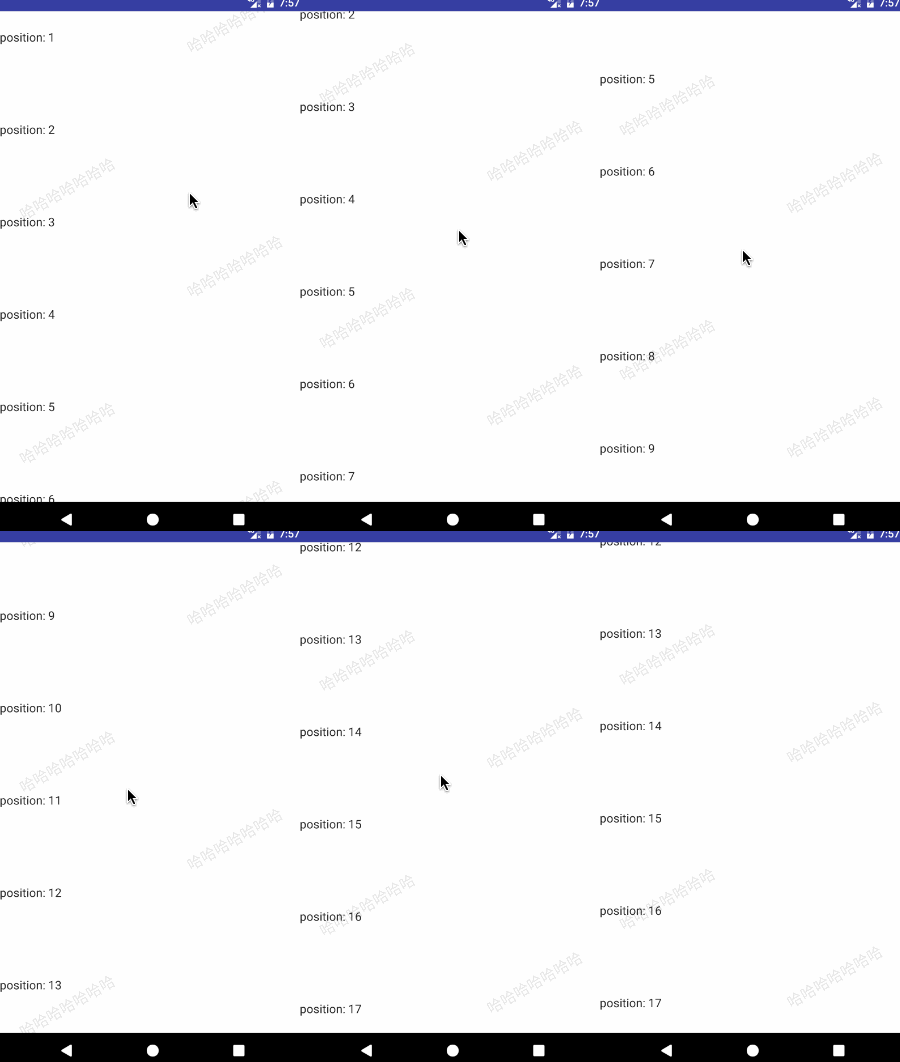
項目中有使用到水印效果,如下圖所示。在實現過程中,最終選用ItemDecoration來實現,其中有兩大步驟:自定義Drawable來完成水印圖片、使用ItemDecoration來布局水印。
Demo在 WatermarkFragment 中,效果圖如下:

1. 自定義Drawable完成水印圖片
public class MyDrawable extends Drawable {
 Paint mPaint;

 public MyDrawable() {
  mPaint = new Paint();
  mPaint.setColor(Color.parseColor("#1A000000"));
  mPaint.setAntiAlias(true);
  mPaint.setTextAlign(Paint.Align.LEFT);//從字的最左邊開始畫
  mPaint.setTextSize(54);
 }

 @Override public void draw(@NonNull Canvas canvas) {
  Rect r = getBounds();

  //畫斜著的字
  canvas.save();
  canvas.rotate(-30, r.left, r.bottom);
  canvas.drawText("哈哈哈哈哈哈哈", r.left, r.bottom, mPaint);

  canvas.restore();
 }

 /*
  復寫這兩個方法是為了當在控件wrap_content時能自己測量出高,同時也方便布局。
 */

 //傾斜30度,可以算出高來
 @Override public int getIntrinsicHeight() {
  return (int) (Math.sqrt(3) / 3 * getIntrinsicWidth() + 0.5F);

 }

 @Override public int getIntrinsicWidth() {
  return (int) (mPaint.measureText("DecorationDraw") + 0.5F);
 }

 //...模板方法省略

}
這裡說一下,自定義該Drawable是比較簡單的,但是想到這一步的話就簡答多了,剛開始是想直接在ItemDecoration裡邊繪制邊布局,但後來嘗試了一下太復雜,所以就使用Drawable獨立出來,然後就順利了好多。
2. 使用ItemDecoration布局水印
public class MyDecoration extends RecyclerView.ItemDecoration {
 private Drawable mDivider;
 private int mScrollY;

 public MyDecoration() {
  mDivider = new MyDrawable();
 }

 @Override public void onDraw(Canvas canvas, RecyclerView parent, RecyclerView.State state) {
  //清除之前畫的
  // canvas.drawColor(Color.WHITE);

  /*
   * 跟著滑動是因為bounds在不停的變化,就是top
   */
  int top = UIUtil.dp(20) - mScrollY;

  // 對於畫多少個水印,根據業務需求來,這裡直接畫count個
  int itemCount = parent.getAdapter().getItemCount();

  // 進行布局
  for (int i = 0; i < itemCount; ++i) {
   int left = i % 2 == 0 ? UIUtil.dp(20) : parent.getMeasuredWidth() -mDivider.getIntrinsicWidth() - UIUtil.dp(20);

   //通過setBounds來控制水印的左右
   mDivider.setBounds(left, top, parent.getMeasuredWidth(), top + mDivider.getIntrinsicHeight());
   mDivider.draw(canvas);

   if (i % 2 == 0) {
    top += UIUtil.dp(20) + mDivider.getIntrinsicHeight();
   } else {
    top += UIUtil.dp(140) + mDivider.getIntrinsicHeight();
   }
  }

 }

 /*
  mScrollY用於監測recyclerView的滑動距離,此處使用的是onScrollListener中dy的累加值,當item不發生刪除添加操作時是准確的
 */
 public void setScrollY(int scrollY) {
  this.mScrollY = scrollY;
 }
}
在RecyclerView中:
private int totallyY = 0;

recyclerView.addOnScrollListener(new RecyclerView.OnScrollListener() {
 @Override public void onScrolled(RecyclerView recyclerView, int dx, int dy) {
  totallyY += dy;
  myDecoration.setScrollY(totallyY);
  }
});
結語
這麼寫下來感覺還是很簡單的,剛開始實現時感覺確實有點難度,RecyclerView寫的真的好,藝術般的控件。
以上就是本文的全部內容,希望對大家的學習有所幫助,也希望大家多多支持本站。
 收藏的Android非常好用的組件或者框架。
收藏的Android非常好用的組件或者框架。 android框架 先說兩個網站: http://www.androidviews.net/ 很好的國外開源代碼站,就是訪
 Android ORM系列之GreenDao最佳實踐
GreenDAO是一個可以幫助Android開發者快速將Java對象映射到SQLite數據庫的表單中的ORM解決方案,通過使用一個簡單的面向對象API,開發者可以對Ja
 Android高仿京東垂直循環滾動新聞欄
實現思路其實很簡單,就是一個自定義的LinearLayout,並且textView能夠循環垂直滾動,而且條目可以點擊,顯示區域最多顯示2個條目,並且還有交替的屬性垂直移動
 Android數據加密之Aes加密
前言:項目中除了登陸,支付等接口采用rsa非對稱加密,之外的采用aes對稱加密,今天我們來認識一下aes加密。 其他幾種加密方式: •An