編輯:關於Android編程
效果圖展示,圖片有點卡,耐心看會,原程序是很流暢的
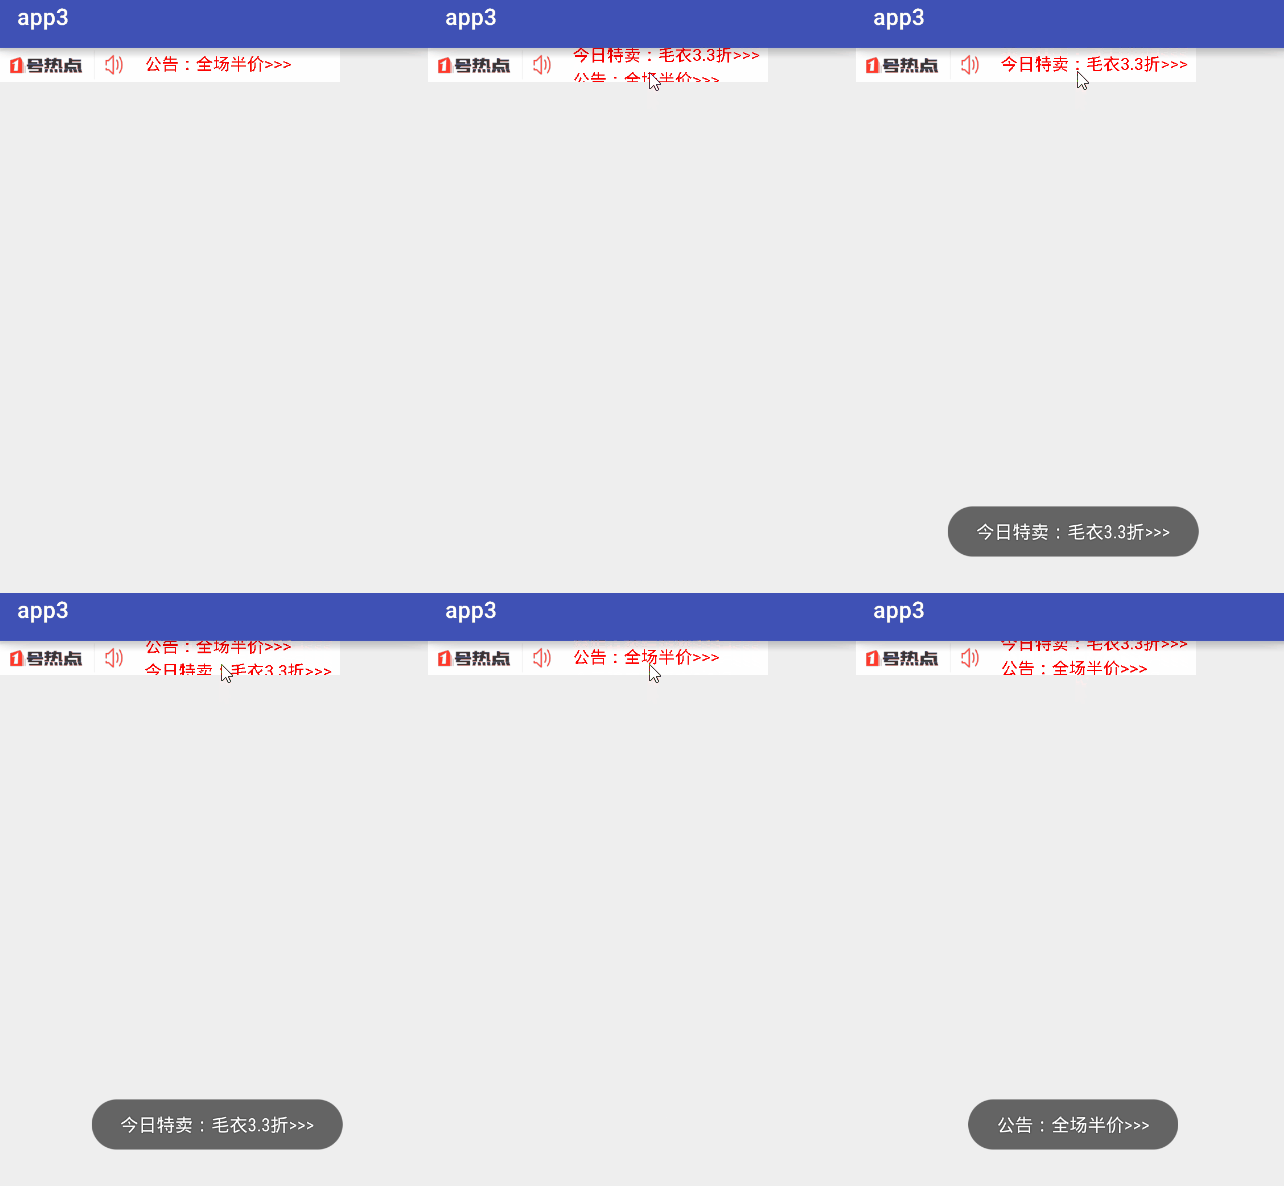
實現步驟:
實現原理(坐標變換原理):整個過程都是基於坐標Y的增加和交換進行處理的,Y值都會一直增加到endY,然後進行交換邏輯
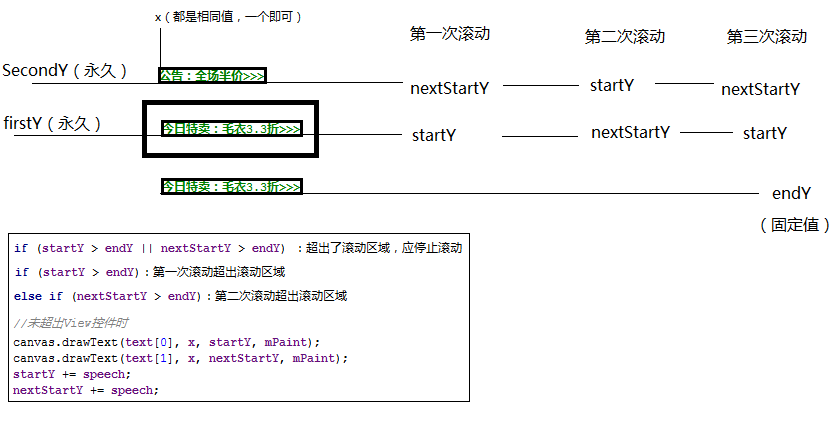
步驟一:聲明變量
由於1號店是兩句話的滾動,所以我們也是使用兩句話來實現的
private Paint mPaint;
private float x, startY, endY, firstY, nextStartY, secondY;
//整個View的寬高是以第一個為標准的,所以第二句話長度必須小於第一句話
private String[] text = {"今日特賣:毛衣3.3折>>>", "公告:全場半價>>>"};
private float textWidth, textHeight;
//滾動速度
private float speech = 0;
private static final int CHANGE_SPEECH = 0x01;
//是否已經在滾動
private boolean isScroll = false;
步驟二:初始化畫筆、文本大小和坐標
以第一句話為標准來做控件的寬高標准
//初始化畫筆
mPaint = new Paint();
mPaint.setColor(Color.RED);
mPaint.setTextSize(30);
//測量文字的寬高,以第一句話為標准
Rect rect = new Rect();
mPaint.getTextBounds(text[0], 0, text[0].length(), rect);
textWidth = rect.width();
textHeight = rect.height();
//文字開始的x,y坐標
//由於文字是以基准線為基線的,文字底部會突出一點,所以向上收5px
x = getX() + getPaddingLeft();
startY = getTop() + textHeight + getPaddingTop() - 5;
//文字結束的x,y坐標
endY = startY + textHeight + getPaddingBottom();
//下一個文字滾動開始的y坐標
//由於文字是以基准線為基線的,文字底部會突出一點,所以向上收5px
nextStartY = getTop() - 5;
//記錄開始的坐標
firstY = startY;
secondY = nextStartY;
步驟三:onMeasure()適配wrap_content的寬高
如果學習過自定義View的話,下面的代碼應該很熟悉,就是適配warp_content的模板代碼:
@Override
protected void onMeasure(int widthMeasureSpec, int heightMeasureSpec) {
 super.onMeasure(widthMeasureSpec, heightMeasureSpec);
 int width = measureWidth(widthMeasureSpec);
 int height = measureHeight(heightMeasureSpec);
 setMeasuredDimension(width, height);
}
private int measureHeight(int heightMeasureSpec) {
 int result = 0;
 int size = MeasureSpec.getSize(heightMeasureSpec);
 int mode = MeasureSpec.getMode(heightMeasureSpec);
 if (mode == MeasureSpec.EXACTLY) {
  result = size;
 } else {
  result = (int) (getPaddingTop() + getPaddingBottom() + textHeight);
  if (mode == MeasureSpec.AT_MOST) {
   result = Math.min(result, size);
  }
 }
 return result;
}
private int measureWidth(int widthMeasureSpec) {
 int result = 0;
 int size = MeasureSpec.getSize(widthMeasureSpec);
 int mode = MeasureSpec.getMode(widthMeasureSpec);
 if (mode == MeasureSpec.EXACTLY) {
  result = size;
 } else {
  result = (int) (getPaddingLeft() + getPaddingRight() + textWidth);
  if (mode == MeasureSpec.AT_MOST) {
   result = Math.min(result, size);
  }
 }
 return result;
}
步驟四:onDraw()畫出根據坐標畫出兩段Text(已修復:Text停下來時閃一下的bug)
通過Handler來改變速度
通過isScroll鎖,來控制Handler只改變一次
通過invalidate一直重繪兩句話的文字
@Override
protected void onDraw(Canvas canvas) {
 super.onDraw(canvas);
 //啟動滾動
 if (!isScroll) {
  mHandler.sendEmptyMessageDelayed(CHANGE_SPEECH, 2000);
  isScroll = true;
 }
 canvas.drawText(text[0], x, startY, mPaint);
 canvas.drawText(text[1], x, nextStartY, mPaint);
 startY += speech;
 nextStartY += speech;
 //超出View的控件時
 if (startY > endY || nextStartY > endY) {
  if (startY > endY) {
   //第一次滾動過後交換值
   startY = secondY;
   nextStartY = firstY;
  } else if (nextStartY > endY) {
   //第二次滾動過後交換值
   startY = firstY;
   nextStartY = secondY;
  }
  speech = 0;
  isScroll = false;
 }
 invalidate();
}

private Handler mHandler = new Handler() {
 @Override
 public void handleMessage(Message msg) {
  super.handleMessage(msg);
  switch (msg.what) {
   case CHANGE_SPEECH:
    speech = 1f;
    break;
  }
 }
};
步驟五:監聽點擊事件(已修復:點擊事件錯亂的問題)
在自定義View重寫dispatchTouchEvent處理點擊事件,這個也是模板代碼:
public onTouchListener listener;
public interface onTouchListener {
 void touchListener(String s);
}
public void setListener(onTouchListener listener) {
 this.listener = listener;
}
@Override
public boolean dispatchTouchEvent(MotionEvent event) {
 switch (event.getAction()) {
  case MotionEvent.ACTION_DOWN:
  case MotionEvent.ACTION_MOVE:
   //點擊事件
   if (listener != null) {
    if (startY >= firstY && nextStartY < firstY) {
     listener.touchListener(text[0]);
    } else if (nextStartY >= firstY && startY < firstY) {
     listener.touchListener(text[1]);
    }
   }
   break;
 }
 return true;
}
步驟六:在Activity中實現點擊事件
public class VerTextViewActivity extends AppCompatActivity {
 @Override
 protected void onCreate(Bundle savedInstanceState) {
  super.onCreate(savedInstanceState);
  setContentView(R.layout.activity_ver_text_view);
  VerTextView tv_ver = (VerTextView) findViewById(R.id.tv_ver);
  tv_ver.setListener(new VerTextView.onTouchListener() {
   @Override
   public void touchListener(String s) {
    Toast.makeText(VerTextViewActivity.this, s, Toast.LENGTH_LONG).show();
   }
  });
 }
}
布局文件
<?xml version="1.0" encoding="utf-8"?>
<LinearLayout xmlns:android="http://schemas.android.com/apk/res/android"
 android:layout_width="match_parent"
 android:layout_height="match_parent"
 android:orientation="horizontal">
 <ImageView
  android:layout_width="120dp"
  android:layout_height="30dp"
  android:background="@drawable/vertextview" />
 <com.handsome.app3.Custom.VerTextView.VerTextView
  android:id="@+id/tv_ver"
  android:layout_width="wrap_content"
  android:layout_height="wrap_content"
  android:background="#ffffff"
  android:padding="8dp" />
</LinearLayout>
整個類的源碼:
/**
 * =====作者=====
 * 許英俊
 * =====時間=====
 * 2016/10/11.
 */
public class VerTextView extends View {
 private Paint mPaint;
 private float x, startY, endY, firstY, nextStartY, secondY;
 //整個View的寬高是以第一個為標准的,所以第二句話長度必須小於第一句話
 private String[] text = {"今日特賣:毛衣3.3折>>>", "公告:全場半價>>>"};
 private float textWidth, textHeight;
 //滾動速度
 private float speech = 0;
 private static final int CHANGE_SPEECH = 0x01;
 //是否已經在滾動
 private boolean isScroll = false;
 private Handler mHandler = new Handler() {
  @Override
  public void handleMessage(Message msg) {
   super.handleMessage(msg);
   switch (msg.what) {
    case CHANGE_SPEECH:
     speech = 1f;
     break;
   }
  }
 };
 public VerTextView(Context context, AttributeSet attrs) {
  super(context, attrs);
  //初始化畫筆
  mPaint = new Paint();
  mPaint.setColor(Color.RED);
  mPaint.setTextSize(30);
  //測量文字的寬高,以第一句話為標准
  Rect rect = new Rect();
  mPaint.getTextBounds(text[0], 0, text[0].length(), rect);
  textWidth = rect.width();
  textHeight = rect.height();
  //文字開始的x,y坐標
  //由於文字是以基准線為基線的,文字底部會突出一點,所以向上收5px
  x = getX() + getPaddingLeft();
  startY = getTop() + textHeight + getPaddingTop() - 5;
  //文字結束的x,y坐標
  endY = startY + textHeight + getPaddingBottom();
  //下一個文字滾動開始的y坐標
  //由於文字是以基准線為基線的,文字底部會突出一點,所以向上收5px
  nextStartY = getTop() - 5;
  //記錄開始的坐標
  firstY = startY;
  secondY = nextStartY;
 }
 @Override
 protected void onMeasure(int widthMeasureSpec, int heightMeasureSpec) {
  super.onMeasure(widthMeasureSpec, heightMeasureSpec);
  int width = measureWidth(widthMeasureSpec);
  int height = measureHeight(heightMeasureSpec);
  setMeasuredDimension(width, height);
 }
 private int measureHeight(int heightMeasureSpec) {
  int result = 0;
  int size = MeasureSpec.getSize(heightMeasureSpec);
  int mode = MeasureSpec.getMode(heightMeasureSpec);
  if (mode == MeasureSpec.EXACTLY) {
   result = size;
  } else {
   result = (int) (getPaddingTop() + getPaddingBottom() + textHeight);
   if (mode == MeasureSpec.AT_MOST) {
    result = Math.min(result, size);
   }
  }
  return result;
 }
 private int measureWidth(int widthMeasureSpec) {
  int result = 0;
  int size = MeasureSpec.getSize(widthMeasureSpec);
  int mode = MeasureSpec.getMode(widthMeasureSpec);
  if (mode == MeasureSpec.EXACTLY) {
   result = size;
  } else {
   result = (int) (getPaddingLeft() + getPaddingRight() + textWidth);
   if (mode == MeasureSpec.AT_MOST) {
    result = Math.min(result, size);
   }
  }
  return result;
 }
 @Override
 protected void onDraw(Canvas canvas) {
  super.onDraw(canvas);
  //啟動滾動
  if (!isScroll) {
   mHandler.sendEmptyMessageDelayed(CHANGE_SPEECH, 2000);
   isScroll = true;
  }
  canvas.drawText(text[0], x, startY, mPaint);
  canvas.drawText(text[1], x, nextStartY, mPaint);
  startY += speech;
  nextStartY += speech;
  //超出View的控件時
  if (startY > endY || nextStartY > endY) {
   if (startY > endY) {
    //第一次滾動過後交換值
    startY = secondY;
    nextStartY = firstY;
   } else if (nextStartY > endY) {
    //第二次滾動過後交換值
    startY = firstY;
    nextStartY = secondY;
   }
   speech = 0;
   isScroll = false;
  }
  invalidate();
 }
 public onTouchListener listener;
 public interface onTouchListener {
  void touchListener(String s);
 }
 public void setListener(onTouchListener listener) {
  this.listener = listener;
 }
 @Override
 public boolean dispatchTouchEvent(MotionEvent event) {
  switch (event.getAction()) {
   case MotionEvent.ACTION_DOWN:
   case MotionEvent.ACTION_MOVE:
    //點擊事件
    if (listener != null) {
     if (startY >= firstY && nextStartY < firstY) {
      listener.touchListener(text[0]);
     } else if (nextStartY >= firstY && startY < firstY) {
      listener.touchListener(text[1]);
     }
    }
    break;
  }
  return true;
 }
}
以上所述是小編給大家介紹的Android自定義View實現仿1號店垂直滾動廣告條代碼,希望對大家有所幫助,如果大家有任何疑問請給我留言,小編會及時回復大家的。在此也非常感謝大家對本站網站的支持!
 WeatherForecast之實現天氣預報
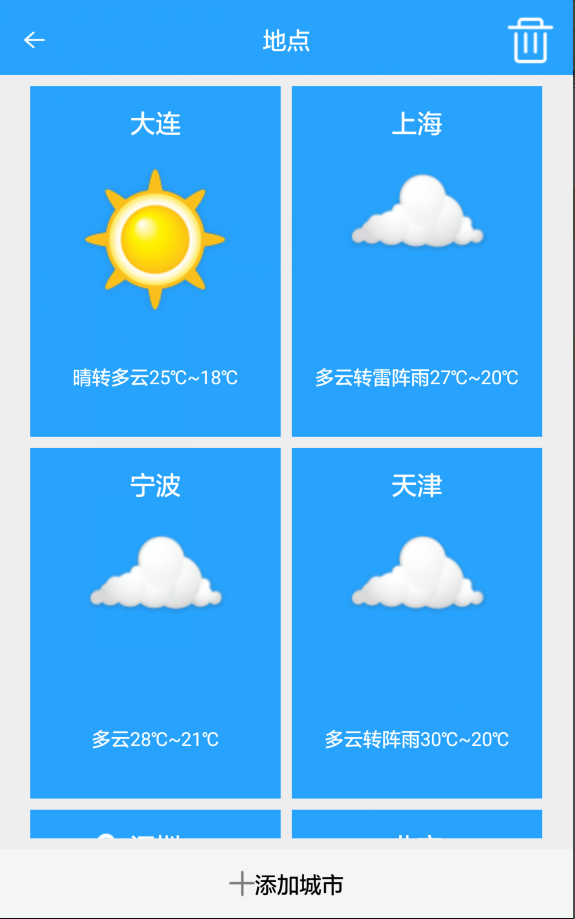
最近心情比較浮躁,項目初步已經完成一直沒有心情來更新博客,基本功能已經實現了包括添加城市,刪除城市,獲取城市部分天氣預報信息,已經詳細的天氣預報信息,還集成了ShareS
 Android 最火的快速開發框架XUtils之注解機制詳解
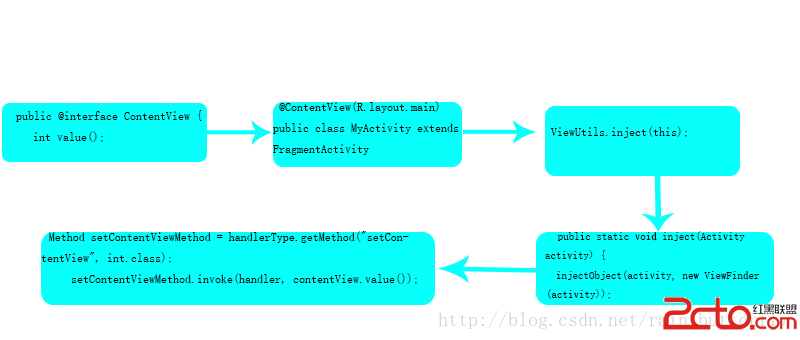
在上一篇文章Android 最火的快速開發框架XUtils中簡單介紹了xUtils的基本使用方法,這篇文章說一下xUtils裡面的注解原理。 先來看一下xU
 Android5.0 新特性學習總結
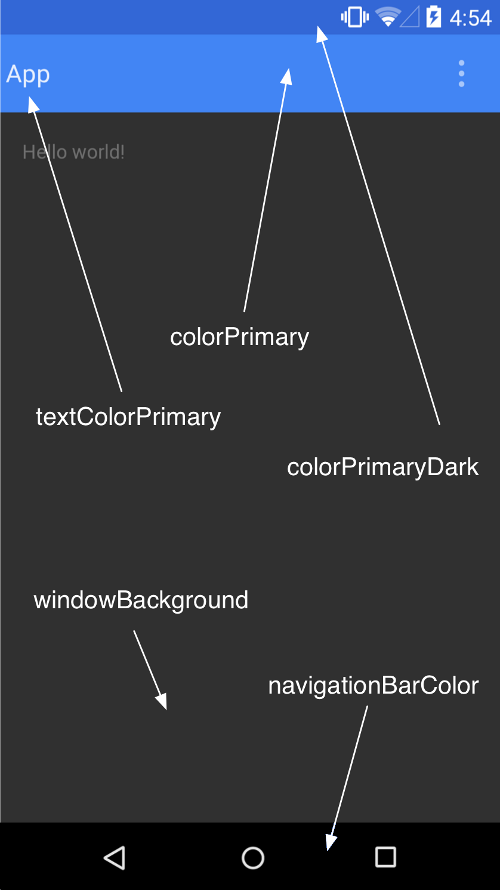
低版本android上實現Material design應用Android5.0版本,推出了Material Design的概念,這是在設計上Android的又一大突破。
 移動應用技術開發大作業——Android平台個人簡歷
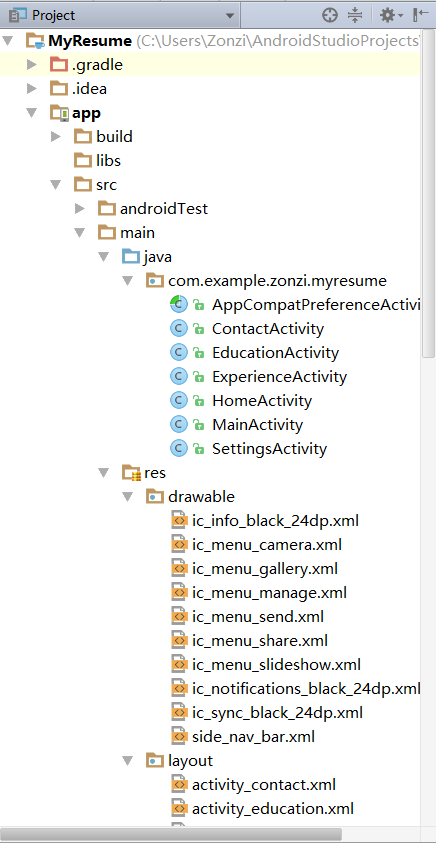
項目結構MainActivity使用的之前寫的登錄界面xml代碼:(兩個輸入文本 一個登陸按鈕 范佩西背景圖)<merge xmlns:android="