編輯:關於Android編程
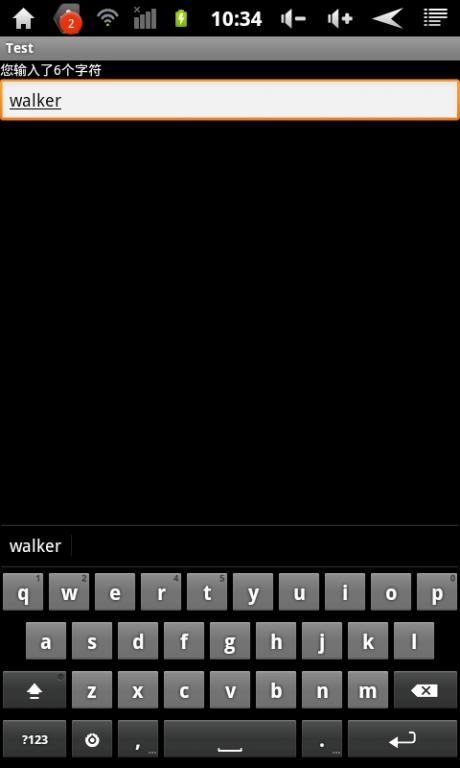
最近在寫一個小項目,其中有一點用到了顯示EditText中輸入了多少個字符,像微博中顯示剩余多少字符的功能。在EditText提供了一個方法addTextChangedListener實現對輸入文本的監控。下邊是我自己寫的一個Demo。
代碼實現:
布局文件main.xml
[html] view plain copy
<?xml version="1.0" encoding="utf-8"?>
<LinearLayout xmlns:android="http://schemas.android.com/apk/res/android"
  android:orientation="vertical"
  android:layout_width="fill_parent"
  android:layout_height="fill_parent"
  >
<TextView android:id="@+id/tv"
  android:layout_width="fill_parent"
  android:layout_height="wrap_content"
  android:textColor="@android:color/white"
  android:text="Please input the text:"
  />
<EditText android:id="@+id/ET"
  android:layout_width="match_parent"
  android:layout_height="wrap_content"
  />
</LinearLayout>
Activity
[java] view plain copy
package com.damai.test;
import android.app.Activity;
import android.os.Bundle;
import android.text.Editable;
import android.text.TextWatcher;
import android.widget.EditText;
import android.widget.TextView;
import android.widget.Toast;
public class TestActivity extends Activity {
  private TextView mTextView;
  private EditText mEditText;
  @Override
  public void onCreate(Bundle savedInstanceState) {
    super.onCreate(savedInstanceState);
    setContentView(R.layout.main);
    mTextView = (TextView)findViewById(R.id.tv);
    mEditText = (EditText)findViewById(R.id.ET);
    mEditText.addTextChangedListener(mTextWatcher);
  }
  TextWatcher mTextWatcher = new TextWatcher() {
    private CharSequence temp;
    private int editStart ;
    private int editEnd ;
    @Override
    public void onTextChanged(CharSequence s, int start, int before, int count) {
      // TODO Auto-generated method stub
       temp = s;
    }
    @Override
    public void beforeTextChanged(CharSequence s, int start, int count,
        int after) {
      // TODO Auto-generated method stub
//     mTextView.setText(s);//將輸入的內容實時顯示
    }
    @Override
    public void afterTextChanged(Editable s) {
      // TODO Auto-generated method stub
      editStart = mEditText.getSelectionStart();
      editEnd = mEditText.getSelectionEnd();
      mTextView.setText("您輸入了" + temp.length() + "個字符");
      if (temp.length() > 10) {
        Toast.makeText(TestActivity.this,
            "你輸入的字數已經超過了限制!", Toast.LENGTH_SHORT)
            .show();
        s.delete(editStart-1, editEnd);
        int tempSelection = editStart;
        mEditText.setText(s);
        mEditText.setSelection(tempSelection);
      }
    }
  };
}

以上就是本文的全部內容,希望本文的內容對大家的學習或者工作能帶來一定的幫助,同時也希望多多支持本站!
 Android中屏幕密度和圖片大小的關系分析
前言 Android中支持許多資源,包括圖片(Bitmap),對應於bitmap的文件夾是drawable,除了drawable,還有drawable-ld
 Android自定義TextView實現文字傾斜效果
前言由於Android自帶的TextView控件沒有提供傾斜的(我暫時沒有找到),我們可以自定義控件來實現,下面首先來看我們實現的效果圖。TextView文字傾斜其實實現
 Android自定義控件之百分比圓環進度條
首先我們先來看一下效果分析我們來看這個進度條應該分為3個小部分1.中間的圓2.外邊的圓環3.中間的文字分開畫這3部分就是需要我們自己畫出來的,因此我們需要3根畫筆//設置
 Android分分鐘教你寫一個個性化的加載框
閒來無事寫的一個加載框,實現效果如下:實現思路:其實看樣子就感覺很簡單的...在自定義Relativelayout裡用onDraw繪制就行了。復習了一下以前學的知識。&n