編輯:關於Android編程
本文實例講述了Android基於反射技術實現的加減乘除運算。分享給大家供大家參考,具體如下:
JAVA反射機制定義:
JAVA反射機制是在運行狀態中,對於任意一個類,都能夠知道這個類的所有屬性和方法;對於任意一個對象,都能夠調用它的任意一個方法;這種動態獲取的信息以及動態調用對象的方法的功能稱為java語言的反射機制。
Java反射機制主要提供了以下功能: 在運行時判斷任意一個對象所屬的類;在運行時構造任意一個類的對象;在運行時判斷任意一個類所具有的成員變量和方法;在運行時調用任意一個對象的方法;生成動態代理。
有時候我們說某個語言具有很強的動態性,有時候我們會區分動態和靜態的不同技術與作法。我們朗朗上口動態綁定(dynamic binding)、動態鏈接(dynamic linking)、動態加載(dynamic loading)等。然而“動態”一詞其實沒有絕對而普遍適用的嚴格定義,有時候甚至像對象導向當初被導入編程領域一樣,一人一把號,各吹各的調。
一般而言,開發者社群說到動態語言,大致認同的一個定義是:“程序運行時,允許改變程序結構或變量類型,這種語言稱為動態語言”。從這個觀點看,Perl,Python,Ruby是動態語言,C++,Java,C#不是動態語言。
盡管在這樣的定義與分類下Java不是動態語言,它卻有著一個非常突出的動態相關機制:Reflection。這個字的意思是 “反射、映象、倒影”,用在Java身上指的是我們可以於運行時加載、探知、使用編譯期間完全未知的classes。換句話說,Java程序可以加載一個 運行時才得知名稱的class,獲悉其完整構造(但不包括methods定義),並生成其對象實體、或對其fields設值、或喚起其methods1。 這種“看透class”的能力(the ability of the program to examine itself)被稱為introspection(內省、內觀、反省)。Reflection和introspection是常被並提的兩個術語。
以上摘錄自百度百科,在Android 中有很多類是被封閉的,比如 ServiceManager 藍牙模塊更是有N多個類被Android 隱藏不開放,要調用這些類必須使用java 的反射技術將類轉為對象進行操作.Android 應用也是基於JAVA 語言為基礎,當然也具備反射這一技術,下面我寫了一個DEMO 是如何通過反射技術調用類名方法並完成一個加減乘除的記算器。
首先我們定義一個類,此為只是簡單的定義幾個方法,即加減乘除四個方法,代碼如下:
class operationClass {
  public float add(int parm1, int parm2) {
    return parm1 + parm2;
  }
  public float cut(int parm1, int parm2) {
    return parm1 - parm2;
  }
  public float ride(int parm1, int parm2) {
    return parm1 * parm2;
  }
  public float Except(int parm1, int parm2) {
    return parm1 / parm2;
  }
}
界面布局文件代碼
<?xml version="1.0" encoding="utf-8"?>
<LinearLayout xmlns:android="http://schemas.android.com/apk/res/android"
  android:layout_width="fill_parent" android:orientation="vertical"
  android:layout_height="fill_parent">
  <EditText android:id="@+id/EditText01" android:layout_width="fill_parent"
    android:layout_height="wrap_content"></EditText>
  <EditText android:id="@+id/EditText02" android:layout_width="fill_parent"
    android:layout_height="wrap_content"></EditText>
  <TextView android:id="@+id/TextView01" android:layout_gravity="center"
    android:layout_width="wrap_content" android:layout_height="wrap_content"></TextView>
  <LinearLayout android:id="@+id/LinearLayout01"
    android:orientation="horizontal" android:layout_width="wrap_content"
    android:layout_height="wrap_content">
    <Button android:text="+" android:id="@+id/Button01"
      android:layout_width="wrap_content" android:layout_height="wrap_content"></Button>
    <Button android:text="-" android:id="@+id/Button02"
      android:layout_width="wrap_content" android:layout_height="wrap_content"></Button>
    <Button android:text="*" android:id="@+id/Button03"
      android:layout_width="wrap_content" android:layout_height="wrap_content"></Button>
    <Button android:text="/" android:id="@+id/Button04"
      android:layout_width="wrap_content" android:layout_height="wrap_content"></Button>
    <Button android:text="=" android:id="@+id/Button05"
      android:layout_width="wrap_content" android:layout_height="wrap_content"></Button>
  </LinearLayout>
</LinearLayout>
下面就是一些對反射技術的操作代碼了,由於本篇是反射機制的入門篇,在此只是通過一個小DEMO 講解反射的常用的幾個方法,這裡的流程如下:
獲取相應的類對象名稱
Class<?> classType = Class.forName("com.terry.operationClass");
如果知道類名並且類名存在於我們工程中,即jar 文件中包含可以使用如下寫法
Class<?> classType = operationClass.class;
返回本類對象
Object invokeOperation = classType.newInstance();
根據類對象名稱去查找對應的方法
Method addMethod = classType.getMethod("add", new Class[] {
          int.class, int.class });
參數一:代碼需要查找類名的方法,參數二:指定查找方法的參數類型
調用查找 到的方法執行此方法的處理
Object result = addMethod.invoke(invokeOperation, new Object[] {
  new Integer(first), new Integer(second)
});
通過調用查找到的方法即可實現方法體的功能。
Tip:反射比較耗費系統資源,建議不在不得以的情況下不要用,尤其是在移動設備上這種對資源要求十分苛刻的設備。
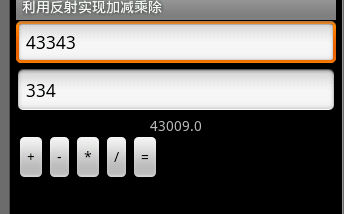
運行效果如下:

下面給出全部頁面代碼:
package com.terry;
import java.lang.reflect.InvocationTargetException;
import java.lang.reflect.Method;
import android.app.Activity;
import android.os.Bundle;
import android.view.View;
import android.view.View.OnClickListener;
import android.widget.Button;
import android.widget.EditText;
import android.widget.TextView;
public class OperationActivity extends Activity {
  private EditText one, two;
  private TextView result;
  private Button add, cut, ride, Except, sum;
  int first, second;
  String operaionFun = "";
  /** Called when the activity is first created. */
  @Override
  public void onCreate(Bundle savedInstanceState) {
    super.onCreate(savedInstanceState);
    setContentView(R.layout.main);
    findview();
    add.setOnClickListener(click);
    cut.setOnClickListener(click);
    ride.setOnClickListener(click);
    Except.setOnClickListener(click);
    sum.setOnClickListener(click);
  }
  void findview() {
    one = (EditText) findViewById(R.id.EditText01);
    two = (EditText) findViewById(R.id.EditText02);
    result = (TextView) findViewById(R.id.TextView01);
    add = (Button) findViewById(R.id.Button01);
    cut = (Button) findViewById(R.id.Button02);
    ride = (Button) findViewById(R.id.Button03);
    Except = (Button) findViewById(R.id.Button04);
    sum = (Button) findViewById(R.id.Button05);
  }
  OnClickListener click = new OnClickListener() {
    @Override
    public void onClick(View v) {
      // TODO Auto-generated method stub
      first = Integer.parseInt(one.getText().toString());
      second = Integer.parseInt(two.getText().toString());
      switch (v.getId()) {
      case R.id.Button01:
        operaionFun = "+";
        break;
      case R.id.Button02:
        operaionFun = "-";
        break;
      case R.id.Button03:
        operaionFun = "*";
        break;
      case R.id.Button04:
        operaionFun = "/";
        break;
      case R.id.Button05:
        try {
          result.setText(operation(operaionFun, first, second));
        } catch (SecurityException e) {
          // TODO Auto-generated catch block
          e.printStackTrace();
        } catch (IllegalArgumentException e) {
          // TODO Auto-generated catch block
          e.printStackTrace();
        } catch (ClassNotFoundException e) {
          // TODO Auto-generated catch block
          e.printStackTrace();
        } catch (IllegalAccessException e) {
          // TODO Auto-generated catch block
          e.printStackTrace();
        } catch (InstantiationException e) {
          // TODO Auto-generated catch block
          e.printStackTrace();
        } catch (NoSuchMethodException e) {
          // TODO Auto-generated catch block
          e.printStackTrace();
        } catch (InvocationTargetException e) {
          // TODO Auto-generated catch block
          e.printStackTrace();
        }
        break;
      }
    }
  };
  /**
   * 操作方法
   *
   * @param oper
   * @param first
   * @param second
   * @return
   * @throws ClassNotFoundException
   * @throws IllegalAccessException
   * @throws InstantiationException
   * @throws SecurityException
   * @throws NoSuchMethodException
   * @throws IllegalArgumentException
   * @throws InvocationTargetException
   */
  String operation(String oper, int first, int second)
      throws ClassNotFoundException, IllegalAccessException,
      InstantiationException, SecurityException, NoSuchMethodException,
      IllegalArgumentException, InvocationTargetException {
    // 獲取相應的類對象名稱
    Class<?> classType = Class.forName("com.terry.operationClass");
    // 如果知道類名並且類名存在於我們工程中,即jar 文件中包含可以使用如下寫法
    //Class<?> classType = operationClass.class;
    // 返回本類對象
    Object invokeOperation = classType.newInstance();
    if (oper.equals("+")) {
      // 根據類對象名稱去查找對應的方法
      Method addMethod = classType.getMethod("add", new Class[] {
          int.class, int.class });
      // 調用查找 到的方法執行此方法的處理
      Object result = addMethod.invoke(invokeOperation, new Object[] {
          new Integer(first), new Integer(second) });
      return result.toString();
    } else if (oper.equals("-")) {
      Method cutMethod = classType.getMethod("cut", new Class[] {
          int.class, int.class });
      Object result = cutMethod.invoke(invokeOperation, new Object[] {
          new Integer(first), new Integer(second) });
      return result.toString();
    } else if (oper.equals("*")) {
      Method rideMethod = classType.getMethod("ride", new Class[] {
          int.class, int.class });
      Object result = rideMethod.invoke(invokeOperation, new Object[] {
          new Integer(first), new Integer(second) });
      return result.toString();
    } else if (oper.equals("/")) {
      Method execMthod = classType.getMethod("Except", new Class[] {
          int.class, int.class });
      Object result = execMthod.invoke(invokeOperation, new Object[] {
          new Integer(first), new Integer(second) });
      return result.toString();
    }
    return "";
  }
}
Tip:在JAVA中可以通過main 函數打印,在Android 好像調用會出錯
更多關於Android相關內容感興趣的讀者可查看本站專題:《Android調試技巧與常見問題解決方法匯總》、《Android開發入門與進階教程》、《Android多媒體操作技巧匯總(音頻,視頻,錄音等)》、《Android基本組件用法總結》、《Android視圖View技巧總結》、《Android布局layout技巧總結》及《Android控件用法總結》
希望本文所述對大家Android程序設計有所幫助。
 Android實現右邊抽屜Drawerlayout效果
側邊欄是Android應用中很常見的一個界面效果(抽屜效果)。而利用DrawerLayout實現右側欄是相對簡單的。而且這個控件自帶滑動效果,十分方便。 DrawerLa
 Android中TouchEvent觸摸事件機制
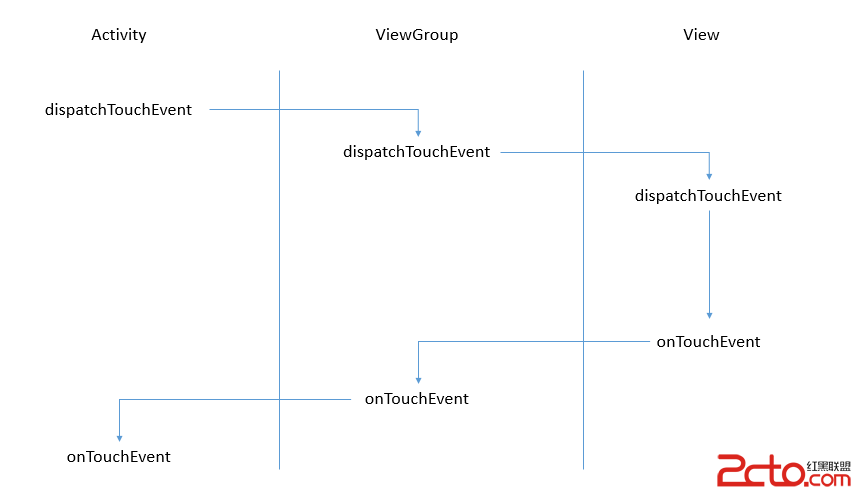
當我們的手指在Android屏幕上點擊或滑動時,就會觸發觸摸事件TouchEvent。在App中ViewGroup和View存在多級嵌套,在最外層的是Activity,最
 BaseAdapter的使用(筆記)
適配器模式的應用: 1.降低程序耦合性2.容易擴展 BaseAdapterListView的顯示與緩存機制:需要才顯示,顯示完
 ListView的Adapter使用(綁定數據) 之 自定義每一項的布局去綁定數據
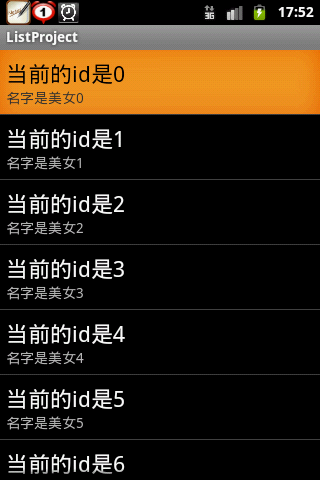
大家先看第一個例子顯示: 這個界面相信大家都看到過的,這次比上一個例子多的是ListView 的每一項綁定的是不再是單純的一個字符串了,ListView 的每一個條目我們