編輯:關於Android編程
前言
RxJava 在 GitHub 主頁上的自我介紹是 "a library for composing asynchronous and event-based programs using observable sequences for the Java VM"(一個在 Java VM 上使用可觀測的序列來組成異步的、基於事件的程序的庫)。這就是 RxJava ,概括得非常精准。
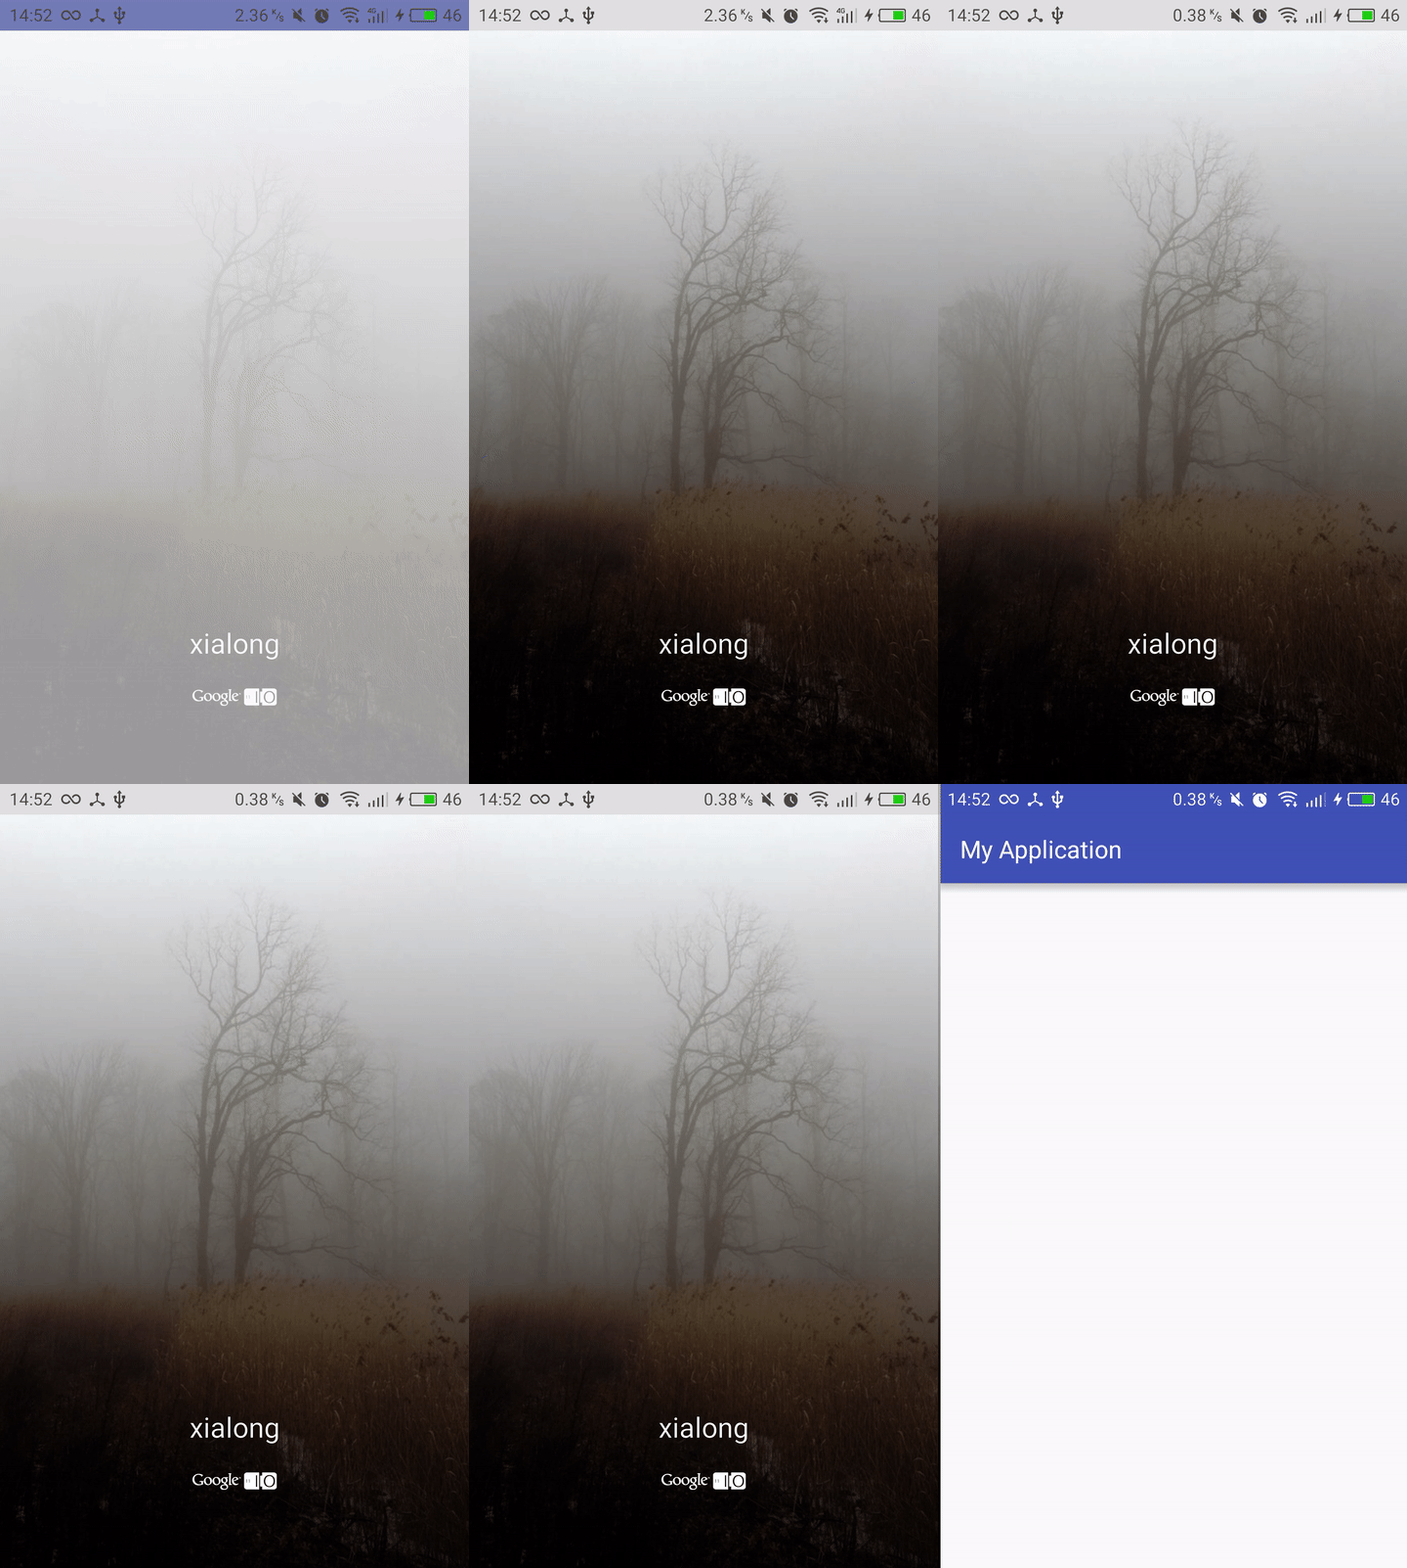
之前注意到coding APP啟動頁很是酷炫,今天我們使用RxJava和屬性動畫模仿實現其效果。
先來看看效果

一、新建啟動頁WelcomeActivity
注意,我們這裡讓WelcomeActivity繼承Activity不要繼承AppCompatActivity,因為AppCompatActivity會默認去加載主題,造成卡頓
  public class WelcomeActivity extends Activity {

  @Override
  protected void onCreate(Bundle savedInstanceState) {
    super.onCreate(savedInstanceState);
    setContentView(R.layout.activity_welcome);
  }
}
二、定義引導頁布局activity_welcome.xml
不多說直接上代碼:
<?xml version="1.0" encoding="utf-8"?>
<RelativeLayout xmlns:android="http://schemas.android.com/apk/res/android"
  android:layout_width="match_parent"
  android:layout_height="match_parent">

  <ImageView
    android:id="@+id/iv_entry"
    android:layout_width="match_parent"
    android:layout_height="match_parent"
    android:scaleType="fitXY"
    android:src="@drawable/welcomimg1"/>

  <View
    android:layout_width="match_parent"
    android:layout_height="match_parent"
    android:background="@drawable/welcomimg_bg"/>


  <TextView
    android:layout_width="match_parent"
    android:layout_height="wrap_content"
    android:layout_alignParentBottom="true"
    android:layout_marginBottom="100dp"
    android:gravity="center"
    android:text="xialong"
    android:textColor="@android:color/white"
    android:textSize="23sp"/>

  <ImageView
    android:layout_width="wrap_content"
    android:layout_height="wrap_content"
    android:src="@mipmap/google_logo"
    android:layout_alignParentBottom="true"
    android:layout_marginBottom="60dp"
    android:layout_centerInParent="true"
    android:tint="@android:color/white" />
</RelativeLayout>
這裡我們用了相對布局,在ImageView上覆蓋一個View,該View用漸變色背景welcomimg_bg.xml以暗化圖片,
welcomimg_bg.xml代碼如下:
<?xml version="1.0" encoding="utf-8"?>
<shape xmlns:android="http://schemas.android.com/apk/res/android">

  <gradient
    android:angle="90"
    android:startColor="@color/black"
    android:endColor="@android:color/transparent"
    />

</shape>
其中startColor表示起始顏色,endColor表示結束顏色,angle=90 表示顏色從下往上漸變。
三、隨機選取圖片並使用RxJava啟動動畫
最後我們的WelcomeActivity.java長這樣:
public class WelcomeActivity extends Activity {

  @Bind(R.id.iv_entry)
  ImageView mIVEntry;

  private static final int ANIM_TIME = 2000;

  private static final float SCALE_END = 1.15F;

  private static final int[] Imgs={
      R.drawable.welcomimg1,R.drawable.welcomimg2,
      R.drawable.welcomimg3,R.drawable.welcomimg4,
      R.drawable.welcomimg5, R.drawable.welcomimg6,
      R.drawable.welcomimg7,R.drawable.welcomimg8,
      R.drawable.welcomimg9,R.drawable.welcomimg10,
      R.drawable.welcomimg11,R.drawable.welcomimg12,};

  @Override
  protected void onCreate(Bundle savedInstanceState) {
    super.onCreate(savedInstanceState);
    setContentView(R.layout.activity_welcome);
    ButterKnife.bind(this);

    Random random = new Random(SystemClock.elapsedRealtime());//SystemClock.elapsedRealtime() 從開機到現在的毫秒數(手機睡眠(sleep)的時間也包括在內)
    mIVEntry.setImageResource(Imgs[random.nextInt(Imgs.length)]);

    Observable.timer(1000, TimeUnit.MILLISECONDS)
        .observeOn(AndroidSchedulers.mainThread())
        .subscribe(new Action1<Long>()
        {

          @Override
          public void call(Long aLong)
          {
            startAnim();
          }
        });
  }


  private void startAnim() {

    ObjectAnimator animatorX = ObjectAnimator.ofFloat(mIVEntry, "scaleX", 1f, SCALE_END);
    ObjectAnimator animatorY = ObjectAnimator.ofFloat(mIVEntry, "scaleY", 1f, SCALE_END);

    AnimatorSet set = new AnimatorSet();
    set.setDuration(ANIM_TIME).play(animatorX).with(animatorY);
    set.start();

    set.addListener(new AnimatorListenerAdapter()
    {

      @Override
      public void onAnimationEnd(Animator animation)
      {

        startActivity(new Intent(WelcomeActivity.this, MainActivity.class));
        WelcomeActivity.this.finish();
      }
    });
  }
}
這裡的RxJava使用了timer操作符,它的意思是延遲執行某個操作,第一個參數表示延遲時間,第二個參數是時間單位。
好了,就醬。以上就是用RxJava打造酷炫啟動頁的全部內容,希望本文對大家學習Android開發有所幫助。
 Android程序加入代碼混淆器
加入代碼混淆器,主要是加入proguard-project.txt文件的規則進行混淆,之前新建Android程序是proguard.cfg文件 可以看一下我采用的通用規則
 如何手動調低Android手機屏幕分辨率
1080P全高清屏幕雖然可為手機帶來更細膩的視界,但同時也會增加系統負載,拖慢游戲速度(和同配置720P手機相比)。那麼,如何才能提高1080P手機的游戲速
 Android:Layout_weight的深刻理解
最近寫Demo,突然發現了Layout_weight這個屬性,發現網上有很多關於這個屬性的有意思的討論,可是找了好多資料都沒有找到一個能夠說的清楚的,於是自己結合網上資
 Android常用命令集錦(圖文並茂適應於初學者)
大家好,今天我們要講的是android開發中,比較常用的名令集錦, 在我們開發中難免用到Android命令,有些確實命令確實很有用處。特別對於一些初學者來說,命令根本沒有