編輯:關於Android編程
少量數據保存之SharedPreferences接口實例
SharedPreferences數據保存主要是通過鍵值的方式存儲在xml文件中
xml文件在data/此程序的包名/XX.xml。
格式:
<?xml version='1.0' encoding='utf-8' standalone='yes' ?>
<map>
<int name="count" value="3" />
<string name="time">寫入日期:2013年10月07日,時間:11:28:09</string>
</map>
SharedPreferences讀寫的基本步驟:
讀:
1.通過Context的getSharedPreferences獲取SharedPreferences接口的對象share:SharedPreferences share = this.getSharedPreferences("share",Context.MODE_PRIVATE);
"shre"保存的xml文件名 ,Context.MODE_PRIVATE 保存的類型為只被本程序訪問 (還有MODE_WORLD_READABLE表示其余的程序能夠讀不能寫,MODE
_WORLD_WRITEBLE能讀寫 這兩個都在api17的時候被廢了)
2.通過share的getXXX的方法獲取指定key的值 : share.getInt("count", 0);
寫:
1.通過SharedPreferences對象的edit()方法獲取Edit對象:Edit editor = share.edit();
2.通過editor對象的putXXX方法來寫入值 :editor.putInt("count", 1);
3.調用Editor的commit()方法提交修改值 :editor.commit();
訪問其他程序的SharedPreferences
訪問其他程序的SharedPreferences 的讀寫唯一不同的是先的獲取該程序的Context接口對象:this.createPackageContext(packageName, flags)
packageName為要該目標程序的包名,flags訪問類型
其余的就和上面的步驟差不多 就不再概敘
實例
<LinearLayout xmlns:android="http://schemas.android.com/apk/res/android"
 xmlns:tools="http://schemas.android.com/tools"
 android:layout_width="match_parent"
 android:layout_height="match_parent"

 android:orientation="vertical"
 tools:context=".MainActivity" >

 <Button
  android:id="@+id/write"
  android:layout_width="wrap_content"
  android:layout_height="wrap_content"
   android:layout_gravity="center_horizontal"
  android:text="寫入數據" />

 <Button
  android:id="@+id/read"
  android:layout_width="wrap_content"
  android:layout_height="wrap_content"
   android:layout_gravity="center_horizontal"
  android:text="讀入數據" />
 <TextView
  android:id="@+id/txtCount"
  android:layout_width="match_parent"
  android:layout_height="wrap_content"/>

 <TextView
  android:id="@+id/txt1"
  android:layout_width="match_parent"
  android:layout_height="wrap_content" />

</LinearLayout>
package com.android.xiong.sharepreferencestest;

import java.text.SimpleDateFormat;
import java.util.Date;

import android.app.Activity;
import android.content.Context;
import android.content.SharedPreferences;
import android.content.SharedPreferences.Editor;
import android.os.Bundle;
import android.view.Menu;
import android.view.View;
import android.view.View.OnClickListener;
import android.widget.Button;
import android.widget.TextView;

public class MainActivity extends Activity {

 private Button write;
 private Button read;

 private TextView txt1;
 private TextView countTxt;

 SharedPreferences share ;

 Editor editor;

 int countO=0;
 @Override
 protected void onCreate(Bundle savedInstanceState) {
  super.onCreate(savedInstanceState);
  setContentView(R.layout.activity_main);
  //獲取SharedPreferences對象
  share = this.getSharedPreferences("share",
    Context.MODE_PRIVATE);
  //獲取Editor對象
  editor = share.edit();
  write = (Button) findViewById(R.id.write);
  read = (Button) findViewById(R.id.read);
  txt1 = (TextView) findViewById(R.id.txt1);
  countTxt=(TextView)findViewById(R.id.txtCount);
  //獲取share中key為count的值
  countO=share.getInt("count", 0);
  countO++;
  //修改share中key為count的值
  editor.putInt("count", countO);
  //提交修改
  editor.commit();
  System.out.println("該應用程序使用了:"+countO+"次");
  countTxt.setText("該應用程序使用了:"+countO+"次");

  OnClickListener writeListener = new OnClickListener() {

   @Override
   public void onClick(View v) {
    // TODO Auto-generated method stub

    SimpleDateFormat data = new SimpleDateFormat(
      "寫入日期:yyyy年MM月dd日,時間:hh:mm:ss");
    editor.putString("time",
      data.format(new Date()));
    editor.commit();

   }
  };
  OnClickListener readListener=new OnClickListener() {

   @Override
   public void onClick(View v) {
    // TODO Auto-generated method stub
    if(!share.contains("share")){
     txt1.setText(share.getString("time", null));
    }

   }
  };
  write.setOnClickListener(writeListener);
  read.setOnClickListener(readListener);

 }

 @Override
 public boolean onCreateOptionsMenu(Menu menu) {
  // Inflate the menu; this adds items to the action bar if it is present.
  getMenuInflater().inflate(R.menu.main, menu);
  return true;
 }

}
機身內存數據讀寫(Internal Storage)
1.機身內存讀取主要用個兩個類文件輸入流(FileInputStream)和文件輸出流(FileOutputStream): FileInputStream fileInput = this.openFileInput("test.txt") 第一個參數為 data/此程序包名/data/test.txt 文件下 的文件名 ;
FileOutputStream fileOut = this.openFileOutput("test.txt",this.MODE_APPEND)第一個參數表示文件名 第二個參數表示打開的方式
2.獲取了文件輸入輸出流之後 其後的文件的讀寫和基本的IO操作一樣
機身內存數據讀寫實例
<LinearLayout xmlns:android="http://schemas.android.com/apk/res/android"
 xmlns:tools="http://schemas.android.com/tools"
 android:layout_width="match_parent"
 android:layout_height="match_parent"
 android:layout_gravity="center_horizontal"
 android:orientation="vertical"
 tools:context=".MainActivity" >
 <EditText
  android:layout_width="match_parent"
  android:layout_height="wrap_content"
  android:id="@+id/ed1"
  android:inputType="textMultiLine"/>
 <Button
  android:id="@+id/write"
  android:text="寫入"
  android:layout_width="match_parent"
  android:layout_height="wrap_content"/>
 <Button
  android:id="@+id/read"
  android:layout_width="match_parent"
  android:layout_height="wrap_content"
  android:text="讀入"/>
 <EditText
  android:id="@+id/ed2"
  android:layout_width="match_parent"
  android:layout_height="wrap_content"
  android:inputType="textMultiLine"/>
 <Button
  android:id="@+id/delete"
  android:layout_width="match_parent"
  android:layout_height="wrap_content"
  android:text="刪除指定的文件"
  />
 <EditText
  android:id="@+id/ed3"
  android:layout_width="match_parent"
  android:layout_height="wrap_content"
  />

</LinearLayout>
package com.android.xiong.fileiotest;

import java.io.BufferedReader;
import java.io.File;
import java.io.FileInputStream;
import java.io.FileOutputStream;
import java.io.InputStreamReader;
import java.lang.reflect.Array;
import java.util.ArrayList;
import java.util.Arrays;
import java.util.List;

import android.app.Activity;
import android.os.Bundle;
import android.view.Menu;
import android.view.View;
import android.view.View.OnClickListener;
import android.widget.Button;
import android.widget.EditText;

public class MainActivity extends Activity {

 private Button read;
 private Button write;
 private EditText ed1;
 private EditText ed2;
 private EditText ed3;
 private Button delete;

 @Override
 protected void onCreate(Bundle savedInstanceState) {
  super.onCreate(savedInstanceState);
  setContentView(R.layout.activity_main);
  read = (Button) findViewById(R.id.read);
  write = (Button) findViewById(R.id.write);
  delete = (Button) findViewById(R.id.delete);
  ed3 = (EditText) findViewById(R.id.ed3);
  ed2 = (EditText) findViewById(R.id.ed2);
  ed1 = (EditText) findViewById(R.id.ed1);
  write.setOnClickListener(new OnClickListener() {
   @Override
   public void onClick(View v) {
    String str = ed1.getText().toString();
    if (!str.equals("")) {
     write(str);
    }

   }
  });
  read.setOnClickListener(new OnClickListener() {

   @Override
   public void onClick(View v) {
    read();

   }
  });
  delete.setOnClickListener(new OnClickListener() {
   @Override
   public void onClick(View v) {
    String str = ed3.getText().toString();
    if (!str.equals("")) {
     deleteFiles(str);
    } else {
     ed3.setText(str + ":該文件輸入錯誤或不存在!");
    }

   }
  });

 }

 private void write(String content) {
  try {
   // 以追加的方式打開文件輸出流
   FileOutputStream fileOut = this.openFileOutput("test.txt",
     this.MODE_APPEND);
   // 寫入數據
   fileOut.write(content.getBytes());
   // 關閉文件輸出流
   fileOut.close();

  } catch (Exception e) {
   e.printStackTrace();
  }
 }

 private void read() {
  try {
   ed2.setText("");
   // 打開文件輸入流
   FileInputStream fileInput = this.openFileInput("test.txt");
   BufferedReader br = new BufferedReader(new InputStreamReader(
     fileInput));
   String str = null;
   StringBuilder stb = new StringBuilder();
   while ((str = br.readLine()) !=null ) {
    stb.append(str);
   }
   ed2.setText(stb);
  } catch (Exception e) {
   e.printStackTrace();
  }

 }

 //刪除指定的文件
 private void deleteFiles(String fileName) {
  try {
   // 獲取data文件中的所有文件列表
   List<String> name = Arrays.asList(this.fileList());
   if (name.contains(fileName)) {
    this.deleteFile(fileName);
    ed3.setText(fileName + ":該文件成功刪除!");
   } else
    ed3.setText(fileName + ":該文件輸入錯誤或不存在!");

  } catch (Exception e) {
   e.printStackTrace();
  }
 }

 @Override
 public boolean onCreateOptionsMenu(Menu menu) {
  getMenuInflater().inflate(R.menu.main, menu);
  return true;
 }

}
SDcard(External Storage)讀寫數據實例
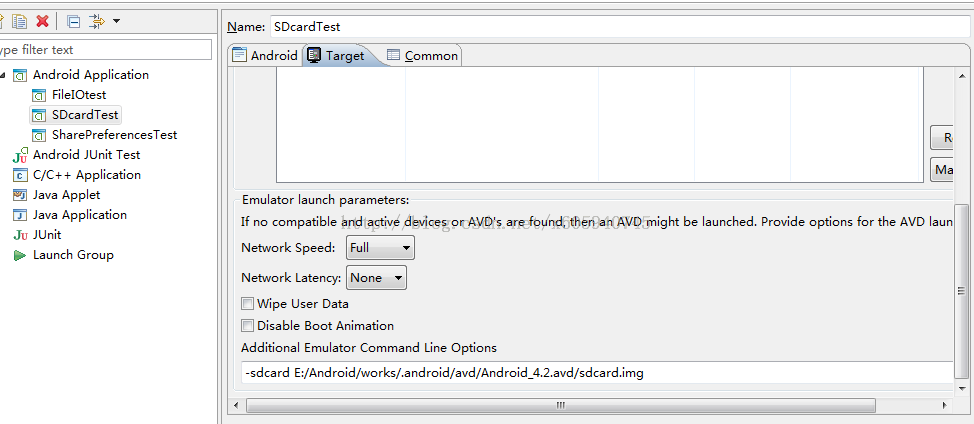
1.SDcard數據讀寫需要注定的先要在Androidmainfest.xml文件中注冊新建刪除和讀寫的權限 :
<!-- 在SD卡上創建與刪除權限 -->
<uses-permission Android:name="android.permission.MOUNT_FORMAT_FILESYSTEMS" />
<!-- 向SD卡上寫入權限 -->
<uses-permission android:name="android.permission.WRITE_EXTERNAL_STORAGE" />
2.讀寫的基本流程就是:
2.1 通過Environment類的getExternalStorageState()方法來判斷手機是否有SDcard:
Environment.getExternalStorageState().equals(Environment.MEDIA_MOUNTED)
2.2 最通過getExternalStorageDirectory()方法來獲取文件目錄:
復制代碼 代碼如下:
File file = new File(Environment.getExternalStorageDirectory().getCanonicalPath() + "/test.txt");
 SDcard數據讀寫實例
<LinearLayout xmlns:android="http://schemas.android.com/apk/res/android"
 xmlns:tools="http://schemas.android.com/tools"
 android:layout_width="match_parent"
 android:layout_height="match_parent"
 android:gravity="center_horizontal"
 android:orientation="vertical"
 tools:context=".MainActivity" >
 <EditText
  android:id="@+id/ed1"
  android:layout_width="match_parent"
  android:layout_height="wrap_content"
  android:inputType="textMultiLine"/>
 <Button
  android:id="@+id/write"
  android:layout_width="match_parent"
  android:layout_height="wrap_content"
  android:text="寫入SD卡中"/>
 <Button
  android:id="@+id/read"
  android:layout_width="match_parent"
  android:layout_height="wrap_content"
  android:text="讀取SD文件"/>
 <TextView
  android:id="@+id/txt1"
  android:layout_width="match_parent"
  android:layout_height="wrap_content"/>
</LinearLayout>
<?xml version="1.0" encoding="utf-8"?>
<manifest xmlns:android="http://schemas.android.com/apk/res/android"
 package="com.android.xiong.sdcardtest"
 android:versionCode="1"
 android:versionName="1.0" >

 <uses-sdk
  android:minSdkVersion="14"
  android:targetSdkVersion="17" />
 <!-- 在SD卡上創建與刪除權限 -->
 <uses-permission android:name="android.permission.MOUNT_FORMAT_FILESYSTEMS" />
 <!-- 向SD卡上寫入權限 -->
 <uses-permission android:name="android.permission.WRITE_EXTERNAL_STORAGE" />

 <application
  android:allowBackup="true"
  android:icon="@drawable/ic_launcher"
  android:label="@string/app_name"
  android:theme="@style/AppTheme" >
  <activity
   android:name="com.android.xiong.sdcardtest.MainActivity"
   android:label="@string/app_name" >
   <intent-filter>
    <action android:name="android.intent.action.MAIN" />

    <category android:name="android.intent.category.LAUNCHER" />
   </intent-filter>
  </activity>
 </application>

</manifest>
package com.android.xiong.sdcardtest;

import java.io.BufferedReader;
import java.io.File;
import java.io.FileInputStream;
import java.io.FileOutputStream;
import java.io.InputStreamReader;

import android.app.Activity;
import android.os.Bundle;
import android.os.Environment;
import android.view.Menu;
import android.view.View;
import android.view.View.OnClickListener;
import android.widget.Button;
import android.widget.EditText;
import android.widget.TextView;

public class MainActivity extends Activity {

 private Button write;
 private Button read;

 private EditText ed1;
 private TextView txt1;

 @Override
 protected void onCreate(Bundle savedInstanceState) {
  super.onCreate(savedInstanceState);
  setContentView(R.layout.activity_main);
  write = (Button) findViewById(R.id.write);
  read = (Button) findViewById(R.id.read);
  ed1 = (EditText) findViewById(R.id.ed1);
  txt1 = (TextView) findViewById(R.id.txt1);
  write.setOnClickListener(new OnClickListener() {

   @Override
   public void onClick(View v) {
    // TODO Auto-generated method stub
    writeSDcard(ed1.getText().toString());

   }
  });
  read.setOnClickListener(new OnClickListener() {

   @Override
   public void onClick(View v) {
    // TODO Auto-generated method stub

    txt1.setText(readSDcard());
   }
  });
 }

 // 把數據寫入SD卡

 private void writeSDcard(String str) {

  try {
   // 判斷是否存在SD卡
   if (Environment.getExternalStorageState().equals(
     Environment.MEDIA_MOUNTED)) {
    // 獲取SD卡的目錄
    File file = Environment.getExternalStorageDirectory();
    FileOutputStream fileW = new FileOutputStream(file.getCanonicalPath() + "/test.txt");
    fileW.write(str.getBytes());
    fileW.close();
   }
  } catch (Exception e) {
   e.printStackTrace();
  }

 }

 // 從SD卡中讀取數據
 private String readSDcard() {
  StringBuffer str = new StringBuffer();
  try {
   // 判斷是否存在SD
   if (Environment.getExternalStorageState().equals(
     Environment.MEDIA_MOUNTED)) {
    File file = new File(Environment.getExternalStorageDirectory()
      .getCanonicalPath() + "/test.txt");
    // 判斷是否存在該文件
    if (file.exists()) {
     // 打開文件輸入流
     FileInputStream fileR = new FileInputStream(file);
     BufferedReader reads = new BufferedReader(
       new InputStreamReader(fileR));
     String st = null;
     while ((st =reads.readLine())!=null ) {
      str.append(st);
     }
     fileR.close();
    } else {
     txt1.setText("該目錄下文件不存在");
    }
   }

  } catch (Exception e) {
   e.printStackTrace();
  }
  return str.toString();
 }

 @Override
 public boolean onCreateOptionsMenu(Menu menu) {
  // Inflate the menu; this adds items to the action bar if it is present.
  getMenuInflater().inflate(R.menu.main, menu);
  return true;
 }

}
SQLite簡介和簡單的登錄與注冊源代碼
1.獲取SQLiteDatabase對象db創建數據庫或連接數據庫:SQLiteDatabasedb = SQLiteDatabase.openOrCreateDatabase(MainActivity.this.getFilesDir().toString()+ "/test.dbs", null);如果目錄下有test.dbs數據庫則是連接沒有就是創建
2.用對象db的方法來執行sql語句:db.execSQL(String sql) 此方法木有返回值 所以查詢不好弄。查詢一般用db.rawQuery返回一個Cursor對象(相當與jdbc中的ResultSet),Cursor有如下幾個方法來查詢數據:
2.1 move ToFirst 將記錄指針跳到第一行
2.2 moveToLast將記錄指針跳到最後一行
2.3 moveNext將記錄指針移到下一行
2.4moveToPosition( int ss)將記錄指針跳到指定的ss行
2.5moveToPrevious將記錄指針跳到上一行
將記錄指針跳到指定的行之後就可以通過對象的getXXX方法來獲取數據 :如 Cursor cursor = db.rawQuery("select na,pw from user where na=? and pw=?", new String []{name,pwd});
3.回收資源close
當然以SQLiteDatabase對象還可以調用許多方法來操作數據庫,不過俺是覺得這幾個方法基本夠了
簡單的登錄與注冊源代碼:
(僅此來練習SQLite的操作 一般注冊的信息都樣上傳到服務器而不會是存儲在手機數據庫)

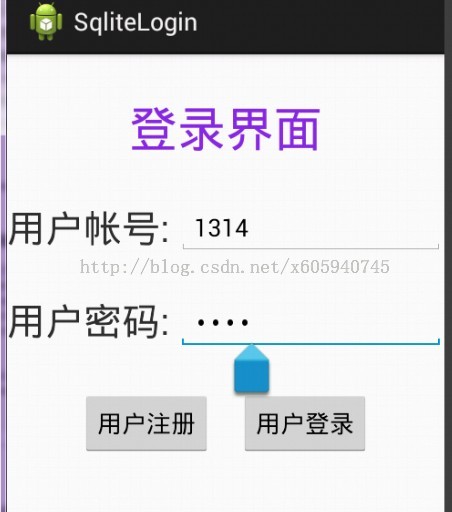
<?xml version="1.0" encoding="utf-8"?>
<manifest xmlns:android="http://schemas.android.com/apk/res/android"
  package="com.android.xiong.sqlitelogin"
  android:versionCode="1"
  android:versionName="1.0" >

  <uses-sdk
    android:minSdkVersion="8"
    android:targetSdkVersion="14" />

  <application
    android:allowBackup="true"
    android:icon="@drawable/ic_launcher"
    android:label="@string/app_name"
    android:theme="@style/AppTheme" >
    <activity
      android:name="com.android.xiong.sqlitelogin.MainActivity"
      android:label="@string/app_name" >
      <intent-filter>
        <action android:name="android.intent.action.MAIN" />

        <category android:name="android.intent.category.LAUNCHER" />
      </intent-filter>
    </activity>
    <activity
      android:name="com.android.xiong.sqlitelogin.RegistersActivity"
      android:label="@string/app_name" >
    </activity>
  </application>

</manifest>
<RelativeLayout xmlns:android="http://schemas.android.com/apk/res/android"
  xmlns:tools="http://schemas.android.com/tools"
  android:layout_width="match_parent"
  android:layout_height="match_parent"
  tools:context=".MainActivity" >

  <TextView
    android:id="@+id/login"
    android:layout_width="match_parent"
    android:layout_height="wrap_content"
    android:layout_margin="30dp"
    android:gravity="center_horizontal"
    android:textColor="#8a2be2"
    android:textSize="35dp"
    android:text="登錄界面" />
  <TextView
    android:id="@+id/txtname"
    android:layout_width="wrap_content"
    android:layout_height="wrap_content"
    android:layout_below="@id/login"
    android:layout_marginRight="5dp"
    android:layout_marginBottom="30dp"
    android:textSize="28dp"
    android:text="用戶帳號:"/>
  <EditText
    android:id="@+id/edname"
    android:layout_width="wrap_content"
    android:layout_height="wrap_content"
    android:layout_marginBottom="30dp"
    android:layout_below="@id/login"
    android:layout_toRightOf="@id/txtname"
    android:layout_alignParentRight="true"
     android:hint="請輸入用戶帳號"/>
    <TextView
    android:id="@+id/txtpassword"
    android:layout_width="wrap_content"
    android:layout_height="wrap_content"
    android:layout_below="@id/txtname"
    android:layout_marginRight="5dp"
    android:textSize="28dp"
    android:text="用戶密碼:"/>
  <EditText
    android:id="@+id/edpassword"
    android:layout_width="wrap_content"
    android:layout_height="wrap_content"
    android:layout_below="@id/edname"
    android:layout_toRightOf="@id/txtpassword"
    android:layout_alignParentRight="true"
    android:inputType="textPassword"
    android:hint="請輸入用戶密碼"/>
  <LinearLayout
    android:layout_below="@id/edpassword"
    android:orientation="horizontal"
    android:layout_width="match_parent"
    android:layout_height="wrap_content"
    android:layout_marginTop="30dp"
    android:gravity="center_horizontal" >
  <Button
    android:id="@+id/btregister"
    android:layout_height="wrap_content"
    android:layout_width="wrap_content"
    android:layout_marginRight="20dp"
    android:text="用戶注冊"/>
   <Button
    android:id="@+id/btlogin"
    android:layout_height="wrap_content"
    android:layout_width="wrap_content"
    android:text="用戶登錄"/>
   </LinearLayout>

</RelativeLayout>
<?xml version="1.0" encoding="utf-8"?>
<RelativeLayout xmlns:android="http://schemas.android.com/apk/res/android"
  android:layout_width="match_parent"
  android:layout_height="match_parent" >


  <TextView
    android:id="@+id/txt1"
    android:layout_width="match_parent"
    android:layout_height="wrap_content"
    android:layout_margin="30dp"
    android:gravity="center_horizontal"
    android:text="注冊界面"
    android:textColor="#8a2be2"
    android:textSize="35dp" />

  <TextView
    android:id="@+id/txtname1"
    android:layout_width="wrap_content"
    android:layout_height="wrap_content"
    android:layout_below="@id/txt1"
    android:layout_marginBottom="30dp"
    android:layout_marginRight="5dp"
    android:text="帳號:"
    android:textSize="28dp" />

  <EditText
    android:id="@+id/edname1"
    android:layout_width="wrap_content"
    android:layout_height="wrap_content"
    android:layout_alignParentRight="true"
    android:layout_below="@id/txt1"
     android:layout_toRightOf="@id/txtname1"
    android:layout_marginBottom="30dp" />

  <TextView
    android:id="@+id/txtpassword1"
    android:layout_width="wrap_content"
    android:layout_height="wrap_content"
    android:layout_below="@id/txtname1"
    android:layout_marginRight="5dp"
    android:text="密碼:"
    android:textSize="28dp" />

  <EditText
    android:id="@+id/edpassword1"
    android:layout_width="wrap_content"
    android:layout_height="wrap_content"
    android:layout_alignParentRight="true"
    android:layout_below="@id/edname1"
    android:layout_toRightOf="@id/txtpassword1" />

  <LinearLayout
    android:layout_width="match_parent"
    android:layout_height="wrap_content"
    android:layout_below="@id/edpassword1"
    android:layout_marginTop="30dp"
    android:gravity="center_horizontal"
    android:orientation="horizontal" >

    <Button
      android:id="@+id/btregister1"
      android:layout_width="wrap_content"
      android:layout_height="wrap_content"
      android:layout_marginRight="20dp"
      android:text="提交數據" />
  </LinearLayout>
</RelativeLayout>
package com.android.xiong.sqlitelogin;

import android.app.Activity;
import android.app.AlertDialog;
import android.content.Intent;
import android.database.Cursor;
import android.database.sqlite.SQLiteDatabase;
import android.database.sqlite.SQLiteException;
import android.os.Bundle;
import android.view.Menu;
import android.view.View;
import android.view.View.OnClickListener;
import android.widget.Button;
import android.widget.EditText;

public class MainActivity extends Activity {

  // 帳號和密碼
  private EditText edname;
  private EditText edpassword;

  private Button btregister;
  private Button btlogin;
  // 創建SQLite數據庫
  public static SQLiteDatabase db;

  @Override
  protected void onCreate(Bundle savedInstanceState) {
    super.onCreate(savedInstanceState);
    setContentView(R.layout.activity_main);
    edname = (EditText) findViewById(R.id.edname);
    edpassword = (EditText) findViewById(R.id.edpassword);
    btregister = (Button) findViewById(R.id.btregister);
    btlogin = (Button) findViewById(R.id.btlogin);
    db = SQLiteDatabase.openOrCreateDatabase(MainActivity.this.getFilesDir().toString()
        + "/test.dbs", null);
    // 跳轉到注冊界面
    btregister.setOnClickListener(new OnClickListener() {

      @Override
      public void onClick(View v) {
        // TODO Auto-generated method stub
        Intent intent = new Intent();
        intent.setClass(MainActivity.this, RegistersActivity.class);
        startActivity(intent);
      }
    });
    btlogin.setOnClickListener(new LoginListener());
  }

  @Override
  protected void onDestroy() {
    // TODO Auto-generated method stub
    super.onDestroy();
    db.close();
  }


  class LoginListener implements OnClickListener {

    @Override
    public void onClick(View v) {
      // TODO Auto-generated method stub
      String name = edname.getText().toString();
      String password = edpassword.getText().toString();
      if (name.equals("") || password.equals("")) {
        // 彈出消息框
        new AlertDialog.Builder(MainActivity.this).setTitle("錯誤")
            .setMessage("帳號或密碼不能空").setPositiveButton("確定", null)
            .show();
      } else {
        isUserinfo(name, password);
      }
    }

    // 判斷輸入的用戶是否正確
    public Boolean isUserinfo(String name, String pwd) {
      try{
        String str="select * from tb_user where name=? and password=?";
        Cursor cursor = db.rawQuery(str, new String []{name,pwd});
        if(cursor.getCount()<=0){
          new AlertDialog.Builder(MainActivity.this).setTitle("錯誤")
          .setMessage("帳號或密碼錯誤!").setPositiveButton("確定", null)
          .show();
          return false;
        }else{
          new AlertDialog.Builder(MainActivity.this).setTitle("正確")
          .setMessage("成功登錄").setPositiveButton("確定", null)
          .show();
          return true;
        }

      }catch(SQLiteException e){
        createDb();
      }
      return false;
    }

  }
  // 創建數據庫和用戶表
  public void createDb() {
    db.execSQL("create table tb_user( name varchar(30) primary key,password varchar(30))");
  }
  @Override
  public boolean onCreateOptionsMenu(Menu menu) {
    // Inflate the menu; this adds items to the action bar if it is present.
    getMenuInflater().inflate(R.menu.main, menu);
    return true;
  }

}
package com.android.xiong.sqlitelogin;

import android.app.Activity;
import android.app.AlertDialog;
import android.content.DialogInterface;
import android.content.Intent;
import android.database.sqlite.SQLiteDatabase;
import android.os.Bundle;
import android.view.View;
import android.view.View.OnClickListener;
import android.widget.Button;
import android.widget.EditText;

public class RegistersActivity extends Activity {

  private EditText edname1;
  private EditText edpassword1;
  private Button btregister1;
  SQLiteDatabase db;

  @Override
  protected void onDestroy() {
    // TODO Auto-generated method stub
    super.onDestroy();
    db.close();
  }

  @Override
  protected void onCreate(Bundle savedInstanceState) {
    // TODO Auto-generated method stub
    super.onCreate(savedInstanceState);
    setContentView(R.layout.register);
    edname1 = (EditText) findViewById(R.id.edname1);
    edpassword1 = (EditText) findViewById(R.id.edpassword1);
    btregister1 = (Button) findViewById(R.id.btregister1);
    btregister1.setOnClickListener(new OnClickListener() {

      @Override
      public void onClick(View v) {
        // TODO Auto-generated method stub
        String name = edname1.getText().toString();
        String password = edpassword1.getText().toString();
        if (!(name.equals("") && password.equals(""))) {
          if (addUser(name, password)) {
            DialogInterface.OnClickListener ss = new DialogInterface.OnClickListener() {
              @Override
              public void onClick(DialogInterface dialog,
                  int which) {
                // TODO Auto-generated method stub
                // 跳轉到登錄界面
                Intent in = new Intent();
                in.setClass(RegistersActivity.this,
                    MainActivity.class);
                startActivity(in);
                // 銷毀當前activity
                RegistersActivity.this.onDestroy();
              }
            };
            new AlertDialog.Builder(RegistersActivity.this)
                .setTitle("注冊成功").setMessage("注冊成功")
                .setPositiveButton("確定", ss).show();

          } else {
            new AlertDialog.Builder(RegistersActivity.this)
                .setTitle("注冊失敗").setMessage("注冊失敗")
                .setPositiveButton("確定", null);
          }
        } else {
          new AlertDialog.Builder(RegistersActivity.this)
              .setTitle("帳號密碼不能為空").setMessage("帳號密碼不能為空")
              .setPositiveButton("確定", null);
        }

      }
    });

  }

  // 添加用戶
  public Boolean addUser(String name, String password) {
    String str = "insert into tb_user values(?,?) ";
    MainActivity main = new MainActivity();
    db = SQLiteDatabase.openOrCreateDatabase(this.getFilesDir().toString()
        + "/test.dbs", null);
    main.db = db;
    try {
      db.execSQL(str, new String[] { name, password });
      return true;
    } catch (Exception e) {
      main.createDb();
    }
    return false;
  }

}
 Android中的Touch事件
Activity或View類的onTouchEvent()回調函數會接收到touch事件。一個完整的手勢是從ACTION_DOWN開始,到ACTION_UP結束。簡單的情
 谷歌約束控件(ConstraintLayout)扁平化布局入門
序在Google IO大會中不僅僅帶來了Android Studio 2.2預覽版,同時帶給我們一個依賴約束的庫。簡單來說,她是相對布局的升級版本,但是區別與相對布局更加
 Android系統上的鍵盤監控
鍵盤監控 鍵盤監控,顧名思義是在應用軟件在運行時,用戶在設備上的一舉一動都將被詳細記錄下來,更多的實在使用者毫無覺察的情況下將屏幕內容以圖片的形式、按鍵內容以文本文檔的形
 實現360手機助手TabHost的波紋效果
現在新版360手機助手的界面都做得挺漂亮的,在切換底部導航時的波紋效果也很好看,剛好最近看了個開源項目才了解到原來Drawable做動畫效果也怎麼好用,所以就仿照360實
 AndRoid源碼分析----------Handler消息機制(1)Handler獲取Message對象及Message的復用
在研究源碼之前,我們對Handler的了解一般是這樣的概念:在主線程中,