編輯:關於Android編程
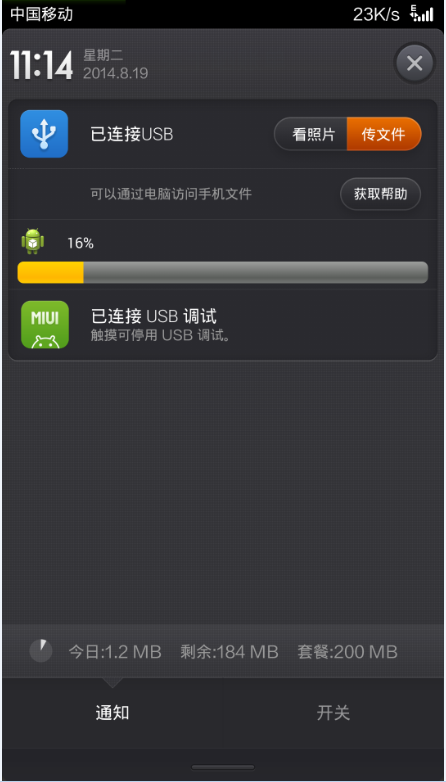
Android應用檢查版本更新後,在通知欄下載,更新下載進度,下載完成自動安裝,效果圖如下:

•檢查當前版本號
AndroidManifest文件中的versionCode用來標識版本,在服務器放一個新版本的apk,versioncode大於當前版本,下面代碼用來獲取versioncode的值
PackageInfo packageInfo = context.getPackageManager().getPackageInfo(context.getPackageName(), 0);
int localVersion = packageInfo.versionCode;
用當前versioncode和服務端比較,如果小於,就進行版本更新
•下載apk文件
/**
* 下載apk
*
* @param apkUri
*/private void downLoadNewApk(String apkUri, String version) {
manager = (NotificationManager) context
.getSystemService((context.NOTIFICATION_SERVICE));
notify = new Notification();
notify.icon = R.drawable.ic_launcher;
// 通知欄顯示所用到的布局文件
notify.contentView = new RemoteViews(context.getPackageName(),
R.layout.view_notify_item);
manager.notify(100, notify);
//建立下載的apk文件
File fileInstall = FileOperate.mkdirSdcardFile("downLoad", APK_NAME
+ version + ".apk");
downLoadSchedule(apkUri, completeHandler, context,
fileInstall);
}
FileOperate是自己寫的文件工具類
通知欄顯示的布局,view_notify_item.xml
<?xml version="1.0" encoding="utf-8"?>
<RelativeLayout xmlns:android="http://schemas.android.com/apk/res/android"
android:layout_width="match_parent"
android:layout_height="match_parent"
android:layout_marginLeft="10dp"
android:background="#00000000"
android:padding="5dp" >
<ImageView
android:id="@+id/notify_icon_iv"
android:layout_width="25dp"
android:layout_height="25dp"
android:src="@drawable/ic_launcher" />
<TextView
android:id="@+id/notify_updata_values_tv"
android:layout_width="wrap_content"
android:layout_height="wrap_content"
android:layout_centerHorizontal="true"
android:layout_marginBottom="6dp"
android:layout_marginLeft="15dp"
android:layout_marginTop="5dp"
android:layout_toRightOf="@id/notify_icon_iv"
android:gravity="center_vertical"
android:text="0%"
android:textColor="@color/white"
android:textSize="12sp" />
<ProgressBar
android:id="@+id/notify_updata_progress"

android:layout_width="fill_parent"
android:layout_height="wrap_content"
android:layout_below="@id/notify_icon_iv"
android:layout_marginTop="4dp"
android:max="100" />
</RelativeLayout>
/**
* 連接網絡,下載一個文件,並傳回進度
*
* @param uri
* @param handler
* @param context
* @param file
*/public static void downLoadSchedule(final String uri,
final Handler handler, Context context, final File file) {
if (!file.exists()) {
handler.sendEmptyMessage(-1);
return;
}
// 每次讀取文件的長度
final int perLength = 4096;
new Thread() {
@Override
public void run() {
super.run();
try {
URL url = new URL(uri);
HttpURLConnection conn = (HttpURLConnection) url
.openConnection();
conn.setDoInput(true);
conn.connect();
InputStream in = conn.getInputStream();
// 2865412
long length = conn.getContentLength();
// 每次讀取1k
byte[] buffer = new byte[perLength];
int len = -1;
FileOutputStream out = new FileOutputStream(file);
int temp = 0;
while ((len = in.read(buffer)) != -1) {
// 寫入文件
out.write(buffer, 0, len);
// 當前進度
int schedule = (int) ((file.length() * 100) / length);
// 通知更新進度(10,7,4整除才通知,沒必要每次都更新進度)
if (temp != schedule
&& (schedule % 10 == 0 || schedule % 4 == 0 || schedule % 7 == 0)) {
// 保證同一個數據只發了一次
temp = schedule;
handler.sendEmptyMessage(schedule);
}
}
out.flush();
out.close();
in.close();
} catch (IOException e) {
e.printStackTrace();
}
}
}.start();
}
handler根據下載進度進行更新
•更新通知欄進度條
/**
* 更新通知欄
*/ private Handler completeHandler = new Handler() {
public void handleMessage(android.os.Message msg) {
// 更新通知欄
if (msg.what < 100) {
notify.contentView.setTextViewText(
R.id.notify_updata_values_tv, msg.what + "%");
notify.contentView.setProgressBar(R.id.notify_updata_progress,
100, msg.what, false);
manager.notify(100, notify);
} else {
notify.contentView.setTextViewText(
R.id.notify_updata_values_tv, "下載完成");
notify.contentView.setProgressBar(R.id.notify_updata_progress,
100, msg.what, false);// 清除通知欄
manager.cancel(100);
installApk(fileInstall);
}
};
};
下載完成後調用系統安裝。
•安裝apk
/**
* 安裝apk
*
* @param file
*/private void installApk(File file) {
Intent intent = new Intent();
intent.addFlags(Intent.FLAG_ACTIVITY_NEW_TASK);
intent.setAction(android.content.Intent.ACTION_VIEW);
intent.setDataAndType(Uri.fromFile(file),
"application/vnd.android.package-archive");
context.startActivity(intent);
}
安裝完成搞定
 Android設計模式之一個例子讓你徹底明白工廠模式(Factory Pattern)
提出疑問這幾天研究工廠模式的時候,看到網上的一些文章中舉的例子我就很疑惑,我相信這也是許多人的疑惑:工廠模式的功能就是創建實例,我們創建實例直接new不就完了嗎,干嘛還得
 單例模式在android中使用
單例模式(Singleton)單例模式是對象的創建模式,單例模式能夠確保某個類只有一個單一的實例對象存在,同時能夠自行實例化並將單一的實例提供給外界調用的特點,其在實際項
 Android v4包下的PagerTitleStrip,ViewPager的頁面標題
android.support.v4.view.PagerTitleStrip將Page的Title分離出來的一個自定義View,這樣可以靈活的設置title的樣式、文本
 Ubuntu14.04 32bit編譯Android2.3.4源碼全過程記錄
在Ubuntu 14.04 32bit麒麟版上編譯Android2.3.4源碼全過程 真正地體會到:編譯真是個苦力活,耗費一天的時間,終於將android2