編輯:關於Android編程
介紹
最近要使用播放器做一個簡單的視頻播放功能,開始學習VideoView,在橫豎屏切換的時候碰到了點麻煩,不過在查閱資料後總算是解決了。在寫VideoView播放視頻時候定義控制的代碼全寫在Actvity裡了,寫完一看我靠代碼好亂,於是就寫了個自定義的播放器控件,支持指定大小,可以橫豎屏切換,手動左右滑動快進快退。好了,下面開始。
效果圖有點卡,我也不知道為啥。。。。。
VideoView介紹
這個是我們實現視頻播放最主要的控件,詳細的介紹大家百度就去看,這裡介紹幾個常用的方法。
用於播放視頻文件。 VideoView 類可以從不同的來源(例如資源文件或內容提供器) 讀取圖像,計算和維護視頻的畫面尺寸以使其適用於任何布局管理器, 並提供一些諸如縮放、著色之類的顯示選項。
VideoView 常用的幾個方法
public int getDuration ()
獲得所播放視頻的總時間
public int getCurrentPosition ()
獲得當前的位置,我們可以用來設置播放時間的顯示
public int getCurrentPosition ()
獲得當前的位置,我們可以用來設置播放時間的顯示
public int pause ()
暫停播放
public int seekTo ()
設置播放位置,我們用來總快進的時候就能用到
public int setOnCompletionListener(MediaPlayer.OnCompletionListener l)
注冊在媒體文件播放完畢時調用的回調函數。
public int setOnErrorListener (MediaPlayer.OnErrorListener l)
注冊在設置或播放過程中發生錯誤時調用的回調函數。如果未指定回調函數, 或回調函數返回false,會彈一個dialog提示用戶不能播放
public void setOnPreparedListener (MediaPlayer.OnPreparedListener l)
注冊在媒體文件加載完畢,可以播放時調用的回調函數。
public void setVideoURI (Uri uri)
設置播放的視頻源,也可以用setVideoPath指定本地文件
public void start ()
開始播放
getHolder().setFixedSize(width,height);
設置VideoView的分辨率,如果我們的VideoView在開始播放的時候是豎屏的,當橫屏的時候我們改變了VideoView的布局大小,就需要這個方法重新設置它的分辨率,否則你會發現改變了之後VideoView內部的視頻部分還是原來的大小,這點要注意。
自定義播放器思路
說是自定義,其實無非就是把這些VideoView和用來顯示的其它控件結合在一起,然後在內部處理它的事件交互,我們要做的就是以下幾步:1、寫好整個空間的布局。2、在自定義控件的內部獲取到整個控件內部的各個小控件,並且為它們設置一些初始化事件。3、根據你自己的邏輯和想實現的效果在裡面寫自己的事件處理,需要在和外部進行交互就提供方法和接口咯。最後就是使用測試效果了。好了,我們就跟著這裡說的4步去實現吧!
具體實現
1、第一步,寫自己的布局文件
想要的效果就是在底部放一個狀態欄顯示時間等信息,播放進度,進入全屏,中間放一個快進快退的狀態,布局代碼如下:
<?xml version="1.0" encoding="utf-8"?>
<FrameLayout
xmlns:android="http://schemas.android.com/apk/res/android"
android:id="@+id/viewBox"
android:layout_width="match_parent"
android:layout_height="wrap_content"
android:descendantFocusability="beforeDescendants">
<com.qiangyu.test.commonvideoview.MyVideoView
android:id="@+id/videoView"
android:layout_width="match_parent"
android:layout_height="match_parent"/>
//底部狀態欄
<LinearLayout android:layout_width="match_parent"
android:layout_height="wrap_content"
android:orientation="horizontal"
android:background="#CC282828"
android:padding="3dip"
android:id="@+id/videoControllerLayout"
android:gravity="center"
android:layout_gravity="bottom">
<LinearLayout android:layout_width="wrap_content"
android:layout_height="match_parent"
android:gravity="center"
android:id="@+id/videoPauseBtn"
android:paddingRight="10dip"
android:paddingLeft="10dp">
<ImageView android:layout_width="22dp"
android:layout_height="22dp"
android:id="@+id/videoPauseImg" />
</LinearLayout>
<LinearLayout android:layout_width="fill_parent"
android:layout_height="wrap_content"
android:layout_weight="1"
android:orientation="horizontal"
android:paddingRight="0dip">
<SeekBar android:layout_width="fill_parent"
android:id="@+id/videoSeekBar"
android:layout_weight="1"

android:layout_height="wrap_content"/>
<TextView android:layout_width="wrap_content"
android:layout_height="fill_parent"
android:gravity="center"
android:text="00:00"
android:textSize="12dp"
android:id="@+id/videoCurTime"
android:textColor="#FFF"
/>
<TextView
android:layout_width="wrap_content"
android:layout_height="match_parent"
android:gravity="center"
android:textSize="12dp"
android:textColor="#FFF"
android:text="/"/>
<TextView android:layout_width="wrap_content"
android:layout_height="fill_parent"
android:gravity="center"
android:text="00:00"
android:textSize="12dp"
android:id="@+id/videoTotalTime"
android:textColor="#FFF"
android:layout_marginRight="10dp"
/>
</LinearLayout>
<LinearLayout
android:id="@+id/screen_status_btn"
android:layout_width="wrap_content"
android:layout_height="match_parent"
android:gravity="center">
<ImageView
android:id="@+id/screen_status_img"
android:layout_width="wrap_content"
android:layout_height="wrap_content"
android:src="@mipmap/iconfont_enter_32"/>
</LinearLayout>
</LinearLayout>
//VideoVIEW中間的開始按鈕和進度條以及快進快退的提示
<ProgressBar android:layout_width="wrap_content"
android:layout_height="wrap_content"
android:layout_gravity="center"
android:id="@+id/progressBar"
/>
<ImageView android:layout_width="30dip"
android:layout_height="30dip"
android:id="@+id/videoPlayImg"
android:layout_gravity="center"
android:src="@mipmap/video_box_play"/>
<LinearLayout
android:id="@+id/touch_view"
android:layout_width="wrap_content"
android:layout_height="wrap_content"
android:orientation="vertical"
android:layout_gravity="center"
android:visibility="invisible"
android:paddingLeft="15dp"
android:paddingRight="15dp"
android:paddingTop="5dp"
android:paddingBottom="5dp"
android:background="#000">
<ImageView android:layout_width="fill_parent"
android:layout_height="fill_parent"
android:layout_weight="1"
android:id="@+id/touchStatusImg"/>
<TextView
android:id="@+id/touch_time"
android:layout_width="wrap_content"
android:text="25:00/59:00"
android:textSize="12sp"
android:textColor="#fff"
android:layout_height="wrap_content"/>
</LinearLayout>
</FrameLayout>
上面的布局很簡單,VideoView用了自定義是因為當布局改變的時候,要讓VideoView重新獲取布局位置,在裡面設置它的分辨率為全屏.VideoView的代碼如下
public class MyVideoView extends VideoView {
public MyVideoView(Context context, AttributeSet attrs, int defStyle) {
super(context, attrs, defStyle);
}
public MyVideoView(Context context, AttributeSet attrs) {
super(context, attrs);
}
public MyVideoView(Context context) {
super(context);
}
@Override
protected void onMeasure(int widthMeasureSpec, int heightMeasureSpec) {
int width = getDefaultSize(0, widthMeasureSpec);
int height = getDefaultSize(0, heightMeasureSpec);
this.getHolder().setFixedSize(width,height);//設置分辨率
setMeasuredDimension(width, height);
}
}
好,布局寫好了我來第二步,獲取內部控件初始化事件
2、第二步,onFinishInflate()中得到內部的控件,做初始化工作
onFinishInflate方法在xml解析完畢的時候會回調該方法,一般在做組合控件的時候最常用
@Override
protected void onFinishInflate() {
super.onFinishInflate();
initView();
}
private void initView() {
View view = LayoutInflater.from(context).inflate(R.layout.common_video_view,null);
viewBox = (FrameLayout) view.findViewById(R.id.viewBox);
videoView = (MyVideoView) view.findViewById(R.id.videoView);
videoPauseBtn = (LinearLayout) view.findViewById(R.id.videoPauseBtn);
screenSwitchBtn = (LinearLayout) view.findViewById(R.id.screen_status_btn);
videoControllerLayout = (LinearLayout) view.findViewById(R.id.videoControllerLayout);
touchStatusView = (LinearLayout) view.findViewById(R.id.touch_view);
touchStatusImg = (ImageView) view.findViewById(R.id.touchStatusImg);
touchStatusTime = (TextView) view.findViewById(R.id.touch_time);
videoCurTimeText = (TextView) view.findViewById(R.id.videoCurTime);
videoTotalTimeText = (TextView) view.findViewById(R.id.videoTotalTime);
videoSeekBar = (SeekBar) view.findViewById(R.id.videoSeekBar);
videoPlayImg = (ImageView) view.findViewById(R.id.videoPlayImg);
videoPlayImg.setVisibility(GONE);
videoPauseImg = (ImageView) view.findViewById(R.id.videoPauseImg);
progressBar = (ProgressBar) view.findViewById(R.id.progressBar);
videoPauseBtn.setOnClickListener(this);
videoSeekBar.setOnSeekBarChangeListener(this);
videoPauseBtn.setOnClickListener(this);
videoView.setOnPreparedListener(this);
videoView.setOnCompletionListener(this);
screenSwitchBtn.setOnClickListener(this);
videoPlayImg.setOnClickListener(this);
//注冊在設置或播放過程中發生錯誤時調用的回調函數。如果未指定回調函數,或回調函數返回false,VideoView 會通知用戶發生了錯誤。
videoView.setOnErrorListener(this);
viewBox.setOnTouchListener(this);
viewBox.setOnClickListener(this);
addView(view);
}
很簡單的做了代碼初始化和videoView的播放事件的注冊,這裡的事件待會要處理的有viewBox.setOnTouchListener(this)注冊的onTouch事件,我們要在裡面寫左右滑動快進快退的效果,videoSeekBar.setOnSeekBarChangeListener(this);處理拖動seekbar快進快退。
3、第三步,事件、效果處理
viewBox.setOnTouchListener(this);
1、onTouch裡的實現快進快退
@Override
public boolean onTouch(View v, MotionEvent event) {
switch (event.getAction()){
case MotionEvent.ACTION_DOWN:
//沒播放的時候不處理
if (!videoView.isPlaying()){
return false;
}
float downX = event.getRawX();
touchLastX = downX;
Log.d("FilmDetailActivity", "downX" + downX);
//保存當前播放的位置用與做事件顯示
this.position = videoView.getCurrentPosition();
break;
case MotionEvent.ACTION_MOVE:
//沒播放的時候不處理
if (!videoView.isPlaying()){
return false;
}
float currentX = event.getRawX();
float deltaX = currentX - touchLastX;
float deltaXAbs = Math.abs(deltaX);
if (deltaXAbs>1){//正向移動,快進
if (touchStatusView.getVisibility()!=View.VISIBLE){
touchStatusView.setVisibility(View.VISIBLE);
//顯示快進的時間view
}
touchLastX = currentX;
Log.d("FilmDetailActivity","deltaX"+deltaX);
if (deltaX > 1) {
position += touchStep;
if (position > duration) {
position = duration;
}
touchPosition = position;
touchStatusImg.setImageResource(R.mipmap.ic_fast_forward_white_24dp);
int[] time = getMinuteAndSecond(position);
touchStatusTime.setText(String.format("%02d:%02d/%s", time[0], time[1],formatTotalTime));
} else if (deltaX < -1) {//快退
position -= touchStep;
if (position < 0) {
position = 0;
}
touchPosition = position;
touchStatusImg.setImageResource(R.mipmap.ic_fast_rewind_white_24dp);
int[] time = getMinuteAndSecond(position);
touchStatusTime.setText(String.format("%02d:%02d/%s", time[0], time[1],formatTotalTime));
//mVideoView.seekTo(position);
}
}
break;
case MotionEvent.ACTION_UP:
if (touchPosition!=-1){
videoView.seekTo(touchPosition);
//放開手指的時候快進或快退到滑動決定的時間位置 touchStatusView.setVisibility(View.GONE);
touchPosition = -1;
if (videoControllerShow){
return true;
}
}
break;
}
return false;
}
2、處理 seekBar的拖動事件
@Override
public void onProgressChanged(SeekBar seekBar, int progress, boolean fromUser) {
int[] time = getMinuteAndSecond(progress);
videoCurTimeText.setText(String.format("%02d:%02d", time[0], time[1]));
//設置底部時間顯示
}
@Override
public void onStartTrackingTouch(SeekBar seekBar) {
videoView.pause();
}
@Override
public void onStopTrackingTouch(SeekBar seekBar) {
videoView.seekTo(videoSeekBar.getProgress());
videoView.start();
videoPlayImg.setVisibility(View.INVISIBLE);
videoPauseImg.setImageResource(R.mipmap.icon_video_pause);
//拖動之後到指定的時間位置
}
3、videoView的回調事件
@Override
public void onPrepared(MediaPlayer mp) {
duration = videoView.getDuration();
int[] time = getMinuteAndSecond(duration);
videoTotalTimeText.setText(String.format("%02d:%02d", time[0], time[1]));
formatTotalTime = String.format("%02d:%02d", time[0], time[1]);
videoSeekBar.setMax(duration);
progressBar.setVisibility(View.GONE);
mp.start();
videoPauseBtn.setEnabled(true);
videoSeekBar.setEnabled(true);
videoPauseImg.setImageResource(R.mipmap.icon_video_pause);
timer.schedule(timerTask, 0, 1000);
//初始化總時間等一些界面顯示,同時用timer定時去修改時間進度textView
}
@Override
public void onCompletion(MediaPlayer mp) {
videoView.seekTo(0);
videoSeekBar.setProgress(0);
videoPauseImg.setImageResource(R.mipmap.icon_video_play);
videoPlayImg.setVisibility(View.VISIBLE);
}
還有一些其它的點擊時間就不放了,都是暫停,播放,點擊顯示隱藏底部狀態欄,全屏切換等的事件。到了這裡我們的事件處理完畢啦,接下來就要我們視頻怎麼播放呢?為了播放我們為外部提供一個方法
//開始播放
public void start(String url){
videoPauseBtn.setEnabled(false);
videoSeekBar.setEnabled(false);
videoView.setVideoURI(Uri.parse(url));
videoView.start();
}
//進入全屏時候調用
public void setFullScreen(){
touchStatusImg.setImageResource(R.mipmap.iconfont_exit);
this.setLayoutParams(new LinearLayout.LayoutParams(ViewGroup.LayoutParams.MATCH_PARENT, ViewGroup.LayoutParams.MATCH_PARENT));
videoView.requestLayout();
}
//退出全屏時候調用
public void setNormalScreen(){
touchStatusImg.setImageResource(R.mipmap.iconfont_enter_32);
this.setLayoutParams(new LinearLayout.LayoutParams(ViewGroup.LayoutParams.MATCH_PARENT,400));
videoView.requestLayout();
}
上面提供的setFullScreen()和setNormalScreen()需要在Activity的 onConfigurationChanged(Configuration newConfig)橫豎屏發生改變的 回調方法裡面調用,還需要注意的是我這裡寫的是LinearLayout的LayoutParams,所以我們自定義的view的父空間要是LinearLayout,當然你也可以修改。
4、控件的使用
我們只需要在獲得空間調用start方法,然後在onConfigurationChanged方法裡調用setFullScreen和setNormalScreen就可以了,
布局
<?xml version="1.0" encoding="utf-8"?>
<LinearLayout xmlns:android="http://schemas.android.com/apk/res/android"
xmlns:app="http://schemas.android.com/apk/res-auto"
xmlns:tools="http://schemas.android.com/tools"
android:layout_width="match_parent"
android:layout_height="match_parent"
android:orientation="vertical"
app:layout_behavior="@string/appbar_scrolling_view_behavior"
tools:context="com.qiangyu.test.commonvideoview.MainActivity">
<android.support.v7.widget.Toolbar
android:id="@+id/toolbar"
android:layout_width="match_parent"
android:layout_height="?attr/actionBarSize"
android:background="?attr/colorPrimary"
app:popupTheme="@style/AppTheme.PopupOverlay"/>
<com.qiangyu.test.commonvideoview.CommonVideoView
android:id="@+id/common_videoView"
android:layout_width="match_parent"
android:layout_height="300dp" />
</LinearLayout>
activity代碼
public class MainActivity extends AppCompatActivity {
CommonVideoView videoView;
@Override
protected void onCreate(Bundle savedInstanceState) {
super.onCreate(savedInstanceState);
setContentView(R.layout.content_main);
Toolbar toolbar = (Toolbar) findViewById(R.id.toolbar);
setSupportActionBar(toolbar);
videoView = (CommonVideoView) findViewById(R.id.common_videoView);
videoView.start("你的服務器視頻地址");
}
@Override public void onConfigurationChanged(Configuration newConfig) {
super.onConfigurationChanged(newConfig);
if (newConfig.orientation == Configuration.ORIENTATION_LANDSCAPE) {
videoView.setFullScreen();
}else {
videoView.setNormalScreen();
}
}
}
最後為了防止你的Activity在橫豎屏切換的時候重新創建別忘記在AndroidManifest.xml文件裡面配置
android:configChanges=”orientation|screenSize|screenLayout”, 如果你這裡有疑惑可以參考我的文章–>深入了解Activity-生命周期
<activity
android:name=".MainActivity"
android:label="@string/app_name"
android:theme="@style/AppTheme.NoActionBar"
android:configChanges="orientation|screenSize|screenLayout">
<intent-filter>
<action android:name="android.intent.action.MAIN" />
<category android:name="android.intent.category.LAUNCHER" />
</intent-filter>
</activity>
以上所述是小編給大家分享的Android自定義播放器控件VideoView的相關知識,希望對大家有所幫助。
 Android下拉刷新框架實現代碼實例
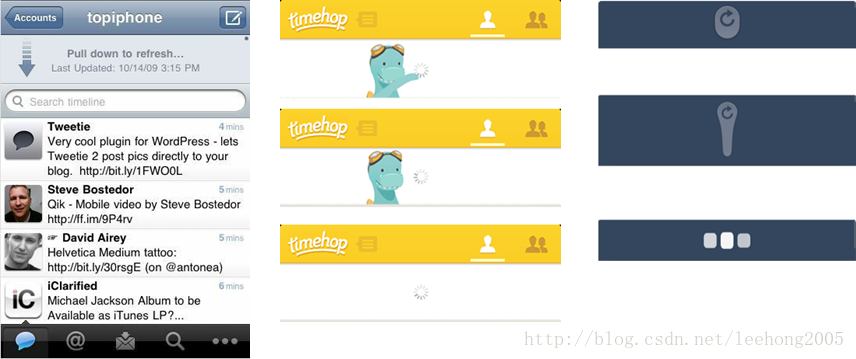
前段時間項目中用到了下拉刷新功能,之前在網上也找到過類似的demo,但這些demo的質量參差不齊,用戶體驗也不好,接口設計也不行。最張沒辦法,終於忍不了了,自己就寫了一個
 友盟集成系列之用友盟SDK解決產品經理,營銷經理的各種需求
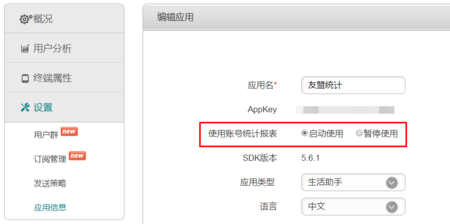
在上一篇文章中我們已經完成對友盟SDK的基本集成,但是要滿足產品經理對一個APP的期望,基本集成的功能遠遠是不夠的,此時我們需要更進一步的集成友盟SDK的功能1.賬號統計
 【Android】0行代碼實現任意形狀圖片展示--android-anyshape
前言在Android開發中, 我們經常會遇到一些場景, 需要以一些特殊的形狀顯示圖片, 比如圓角矩形、圓形等等。關於如何繪制這類形狀, 網上已經有很多的方案,比如自定義控
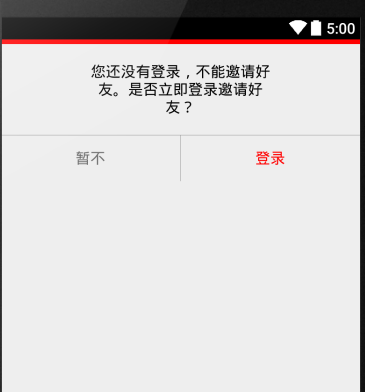
 android中自定義dialog的使用方法!!!
androidstudio中dialog是直接創建的 非自定義真對以前的方法!先看自定義對話框,就是讓對話框模樣按照自己想要的樣式來顯示。開撸!根據自己的要求布局xml;