編輯:關於Android編程
最近看到了好多高端、大氣、上檔次的動畫效果,如果給你的項目中加上這些動畫,相信你的app一定很優秀,今天給大家分析一下來自Yalantis的一個超好看的下拉刷新動畫。
首先我們看一下效果如何:

怎麼樣?是不是很高大上?接下來我們看一下代碼:
一、首先我們需要自定義刷新的動態RefreshView(也就是下拉時候的頭)
1.初始化頭所占用的Dimens
private void initiateDimens() {
    mScreenWidth = mContext.getResources().getDisplayMetrics().widthPixels;
    mJetTopOffset = mParent.getTotalDragDistance() * 0.5f;
    mTop = -mParent.getTotalDragDistance();
  }
2.為頭填充圖片,設置圖片的大小
分別為左邊的雲彩,右邊的雲彩,中間的雲彩還有中間的飛機,飛機是帶有動畫的,下面會介紹飛機的動畫
private void createBitmaps() {
    mLeftClouds = BitmapFactory.decodeResource(mContext.getResources(), R.drawable.clouds_left);
    mRightClouds = BitmapFactory.decodeResource(mContext.getResources(), R.drawable.clouds_right);
    mFrontClouds = BitmapFactory.decodeResource(mContext.getResources(), R.drawable.clouds_center);
    mJet = BitmapFactory.decodeResource(mContext.getResources(), R.drawable.airplane);

    mJetWidthCenter = mJet.getWidth() / 2;
    mJetHeightCenter = mJet.getHeight() / 2;
    mFrontCloudWidthCenter = mFrontClouds.getWidth() / 2;
    mFrontCloudHeightCenter = mFrontClouds.getHeight() / 2;

    mRightCloudsWidthCenter = mRightClouds.getWidth() / 2;
    mRightCloudsHeightCenter = mRightClouds.getHeight() / 2;
    mLeftCloudsWidthCenter = mLeftClouds.getWidth() / 2;
    mLeftCloudsHeightCenter = mLeftClouds.getHeight() / 2;
  }
3.然後我們來畫這個頭
public void draw(@NonNull Canvas canvas) {
    final int saveCount = canvas.save();

    // DRAW BACKGROUND.
    canvas.drawColor(mContext.getResources().getColor(R.color.sky_background));

    if (isRefreshing) {
      // Set up new set of wind
      while (mWinds.size() < WIND_SET_AMOUNT) {
        float y = (float) (mParent.getTotalDragDistance() / (Math.random() * RANDOM_Y_COEFFICIENT));
        float x = random(MIN_WIND_X_OFFSET, MAX_WIND_X_OFFSET);

        // Magic with checking interval between winds
        if (mWinds.size() > 1) {
          y = 0;
          while (y == 0) {
            float tmp = (float) (mParent.getTotalDragDistance() / (Math.random() * RANDOM_Y_COEFFICIENT));

            for (Map.Entry<Float, Float> wind : mWinds.entrySet()) {
              // We want that interval will be greater than fifth part of draggable distance
              if (Math.abs(wind.getKey() - tmp) > mParent.getTotalDragDistance() / RANDOM_Y_COEFFICIENT) {
                y = tmp;
              } else {
                y = 0;
                break;
              }
            }
          }
        }

        mWinds.put(y, x);
        drawWind(canvas, y, x);
      }

      // Draw current set of wind
      if (mWinds.size() >= WIND_SET_AMOUNT) {
        for (Map.Entry<Float, Float> wind : mWinds.entrySet()) {
          drawWind(canvas, wind.getKey(), wind.getValue());
        }
      }

      // We should to create new set of winds
      if (mInverseDirection && mNewWindSet) {
        mWinds.clear();
        mNewWindSet = false;
        mWindLineWidth = random(MIN_WIND_LINE_WIDTH, MAX_WIND_LINE_WIDTH);
      }

      // needed for checking direction
      mLastAnimationTime = mLoadingAnimationTime;
    }

    drawJet(canvas);
    drawSideClouds(canvas);
    drawCenterClouds(canvas);

    canvas.restoreToCount(saveCount);
  }
/**
   * Draw wind on loading animation
   *
   * @param canvas - area where we will draw
   * @param y    - y position fot one of lines
   * @param xOffset - x offset for on of lines
   */
  private void drawWind(Canvas canvas, float y, float xOffset) {
    /* We should multiply current animation time with this coefficient for taking all screen width in time
    Removing slowing of animation with dividing on {@LINK #SLOW_DOWN_ANIMATION_COEFFICIENT}
    And we should don't forget about distance that should "fly" line that depend on screen of device and x offset
    */
    float cof = (mScreenWidth + xOffset) / (LOADING_ANIMATION_COEFFICIENT / SLOW_DOWN_ANIMATION_COEFFICIENT);
    float time = mLoadingAnimationTime;

    // HORRIBLE HACK FOR REVERS ANIMATION THAT SHOULD WORK LIKE RESTART ANIMATION
    if (mLastAnimationTime - mLoadingAnimationTime > 0) {
      mInverseDirection = true;
      // take time from 0 to end of animation time
      time = (LOADING_ANIMATION_COEFFICIENT / SLOW_DOWN_ANIMATION_COEFFICIENT) - mLoadingAnimationTime;
    } else {
      mNewWindSet = true;
      mInverseDirection = false;
    }

    // Taking current x position of drawing wind
    // For fully disappearing of line we should subtract wind line width
    float x = (mScreenWidth - (time * cof)) + xOffset - mWindLineWidth;
    float xEnd = x + mWindLineWidth;

    canvas.drawLine(x, y, xEnd, y, mWindPaint);
  }

  private void drawSideClouds(Canvas canvas) {
    Matrix matrixLeftClouds = mMatrix;
    Matrix matrixRightClouds = mAdditionalMatrix;
    matrixLeftClouds.reset();
    matrixRightClouds.reset();

    // Drag percent will newer get more then 1 here
    float dragPercent = Math.min(1f, Math.abs(mPercent));

    boolean overdrag = false;

    // But we check here for overdrag
    if (mPercent > 1.0f) {
      overdrag = true;
    }

    float scale;
    float scalePercentDelta = dragPercent - SCALE_START_PERCENT;
    if (scalePercentDelta > 0) {
      float scalePercent = scalePercentDelta / (1.0f - SCALE_START_PERCENT);
      scale = SIDE_CLOUDS_INITIAL_SCALE + (SIDE_CLOUDS_FINAL_SCALE - SIDE_CLOUDS_INITIAL_SCALE) * scalePercent;
    } else {
      scale = SIDE_CLOUDS_INITIAL_SCALE;
    }

    // Current y position of clouds
    float dragYOffset = mParent.getTotalDragDistance() * (1.0f - dragPercent);

    // Position where clouds fully visible on screen and we should drag them with content of listView
    int cloudsVisiblePosition = mParent.getTotalDragDistance() / 2 - mLeftCloudsHeightCenter;

    boolean needMoveCloudsWithContent = false;
    if (dragYOffset < cloudsVisiblePosition) {
      needMoveCloudsWithContent = true;
    }

    float offsetRightX = mScreenWidth - mRightClouds.getWidth();
    float offsetRightY = (needMoveCloudsWithContent
        ? mParent.getTotalDragDistance() * dragPercent - mLeftClouds.getHeight()
        : dragYOffset)
        + (overdrag ? mTop : 0);

    float offsetLeftX = 0;
    float offsetLeftY = (needMoveCloudsWithContent
        ? mParent.getTotalDragDistance() * dragPercent - mLeftClouds.getHeight()
        : dragYOffset)
        + (overdrag ? mTop : 0);

    // Magic with animation on loading process
    if (isRefreshing) {
      if (checkCurrentAnimationPart(AnimationPart.FIRST)) {
        offsetLeftY += getAnimationPartValue(AnimationPart.FIRST) / Y_SIDE_CLOUDS_SLOW_DOWN_COF;
        offsetRightX -= getAnimationPartValue(AnimationPart.FIRST) / X_SIDE_CLOUDS_SLOW_DOWN_COF;
      } else if (checkCurrentAnimationPart(AnimationPart.SECOND)) {
        offsetLeftY += getAnimationPartValue(AnimationPart.SECOND) / Y_SIDE_CLOUDS_SLOW_DOWN_COF;
        offsetRightX -= getAnimationPartValue(AnimationPart.SECOND) / X_SIDE_CLOUDS_SLOW_DOWN_COF;
      } else if (checkCurrentAnimationPart(AnimationPart.THIRD)) {
        offsetLeftY -= getAnimationPartValue(AnimationPart.THIRD) / Y_SIDE_CLOUDS_SLOW_DOWN_COF;
        offsetRightX += getAnimationPartValue(AnimationPart.THIRD) / X_SIDE_CLOUDS_SLOW_DOWN_COF;
      } else if (checkCurrentAnimationPart(AnimationPart.FOURTH)) {
        offsetLeftY -= getAnimationPartValue(AnimationPart.FOURTH) / X_SIDE_CLOUDS_SLOW_DOWN_COF;
        offsetRightX += getAnimationPartValue(AnimationPart.FOURTH) / Y_SIDE_CLOUDS_SLOW_DOWN_COF;
      }
    }

    matrixRightClouds.postScale(scale, scale, mRightCloudsWidthCenter, mRightCloudsHeightCenter);
    matrixRightClouds.postTranslate(offsetRightX, offsetRightY);

    matrixLeftClouds.postScale(scale, scale, mLeftCloudsWidthCenter, mLeftCloudsHeightCenter);
    matrixLeftClouds.postTranslate(offsetLeftX, offsetLeftY);

    canvas.drawBitmap(mLeftClouds, matrixLeftClouds, null);
    canvas.drawBitmap(mRightClouds, matrixRightClouds, null);
  }

  private void drawCenterClouds(Canvas canvas) {
    Matrix matrix = mMatrix;
    matrix.reset();
    float dragPercent = Math.min(1f, Math.abs(mPercent));

    float scale;
    float overdragPercent = 0;
    boolean overdrag = false;

    if (mPercent > 1.0f) {
      overdrag = true;
      // Here we want know about how mach percent of over drag we done
      overdragPercent = Math.abs(1.0f - mPercent);
    }

    float scalePercentDelta = dragPercent - SCALE_START_PERCENT;
    if (scalePercentDelta > 0) {
      float scalePercent = scalePercentDelta / (1.0f - SCALE_START_PERCENT);
      scale = CENTER_CLOUDS_INITIAL_SCALE + (CENTER_CLOUDS_FINAL_SCALE - CENTER_CLOUDS_INITIAL_SCALE) * scalePercent;
    } else {
      scale = CENTER_CLOUDS_INITIAL_SCALE;
    }

    float parallaxPercent = 0;
    boolean parallax = false;
    // Current y position of clouds
    float dragYOffset = mParent.getTotalDragDistance() * dragPercent;
    // Position when should start parallax scrolling
    int startParallaxHeight = mParent.getTotalDragDistance() - mFrontCloudHeightCenter;

    if (dragYOffset > startParallaxHeight) {
      parallax = true;
      parallaxPercent = dragYOffset - startParallaxHeight;
    }

    float offsetX = (mScreenWidth / 2) - mFrontCloudWidthCenter;
    float offsetY = dragYOffset
        - (parallax ? mFrontCloudHeightCenter + parallaxPercent : mFrontCloudHeightCenter)
        + (overdrag ? mTop : 0);

    float sx = overdrag ? scale + overdragPercent / 4 : scale;
    float sy = overdrag ? scale + overdragPercent / 2 : scale;

    if (isRefreshing && !overdrag) {
      if (checkCurrentAnimationPart(AnimationPart.FIRST)) {
        sx = scale - (getAnimationPartValue(AnimationPart.FIRST) / LOADING_ANIMATION_COEFFICIENT) / 8;
      } else if (checkCurrentAnimationPart(AnimationPart.SECOND)) {
        sx = scale - (getAnimationPartValue(AnimationPart.SECOND) / LOADING_ANIMATION_COEFFICIENT) / 8;
      } else if (checkCurrentAnimationPart(AnimationPart.THIRD)) {
        sx = scale + (getAnimationPartValue(AnimationPart.THIRD) / LOADING_ANIMATION_COEFFICIENT) / 6;
      } else if (checkCurrentAnimationPart(AnimationPart.FOURTH)) {
        sx = scale + (getAnimationPartValue(AnimationPart.FOURTH) / LOADING_ANIMATION_COEFFICIENT) / 6;
      }
      sy = sx;
    }

    matrix.postScale(sx, sy, mFrontCloudWidthCenter, mFrontCloudHeightCenter);
    matrix.postTranslate(offsetX, offsetY);

    canvas.drawBitmap(mFrontClouds, matrix, null);
  }

  private void drawJet(Canvas canvas) {
    Matrix matrix = mMatrix;
    matrix.reset();

    float dragPercent = mPercent;
    float rotateAngle = 0;

    // Check overdrag
    if (dragPercent > 1.0f && !mEndOfRefreshing) {
      rotateAngle = (dragPercent % 1) * 10;
      dragPercent = 1.0f;
    }

    float offsetX = ((mScreenWidth * dragPercent) / 2) - mJetWidthCenter;

    float offsetY = mJetTopOffset
        + (mParent.getTotalDragDistance() / 2)
        * (1.0f - dragPercent)
        - mJetHeightCenter;

    if (isRefreshing) {
      if (checkCurrentAnimationPart(AnimationPart.FIRST)) {
        offsetY -= getAnimationPartValue(AnimationPart.FIRST);
      } else if (checkCurrentAnimationPart(AnimationPart.SECOND)) {
        offsetY -= getAnimationPartValue(AnimationPart.SECOND);
      } else if (checkCurrentAnimationPart(AnimationPart.THIRD)) {
        offsetY += getAnimationPartValue(AnimationPart.THIRD);
      } else if (checkCurrentAnimationPart(AnimationPart.FOURTH)) {
        offsetY += getAnimationPartValue(AnimationPart.FOURTH);
      }
    }

    matrix.setTranslate(offsetX, offsetY);

    if (dragPercent == 1.0f) {
      matrix.preRotate(rotateAngle, mJetWidthCenter, mJetHeightCenter);
    }

    canvas.drawBitmap(mJet, matrix, null);
  }
動畫效果已經畫好了,下面我們來看看怎麼結合下拉刷新來調用吧?
二、我們還需要自定義一個PullToRefreshView(下拉刷新)
1.我們的PullToRefreshView這裡需要繼承ViewGroup
我們先把剛才定義的刷新時的動畫加進來
private RefreshView mRefreshView;
<pre name="code" class="java">private ImageView mRefreshImageView;
<pre name="code" class="java">mRefreshImageView = new ImageView(context);
    mRefreshView = new RefreshView(getContext(), this);
    mRefreshImageView.setImageDrawable(mRefreshView);

    addView(mRefreshImageView);
2.然後我們設置OntouchEvent()事件
@Override
  public boolean onTouchEvent(@NonNull MotionEvent ev) {

    if (!mIsBeingDragged) {
      return super.onTouchEvent(ev);
    }

    final int action = MotionEventCompat.getActionMasked(ev);

    switch (action) {
      case MotionEvent.ACTION_MOVE: {
        final int pointerIndex = MotionEventCompat.findPointerIndex(ev, mActivePointerId);
        if (pointerIndex < 0) {
          return false;
        }

        final float y = MotionEventCompat.getY(ev, pointerIndex);
        final float yDiff = y - mInitialMotionY;
        final float scrollTop = yDiff * DRAG_RATE;
        mCurrentDragPercent = scrollTop / mTotalDragDistance;
        if (mCurrentDragPercent < 0) {
          return false;
        }
        float boundedDragPercent = Math.min(1f, Math.abs(mCurrentDragPercent));
        float extraOS = Math.abs(scrollTop) - mTotalDragDistance;
        float slingshotDist = mTotalDragDistance;
        float tensionSlingshotPercent = Math.max(0,
            Math.min(extraOS, slingshotDist * 2) / slingshotDist);
        float tensionPercent = (float) ((tensionSlingshotPercent / 4) - Math.pow(
            (tensionSlingshotPercent / 4), 2)) * 2f;
        float extraMove = (slingshotDist) * tensionPercent / 2;
        int targetY = (int) ((slingshotDist * boundedDragPercent) + extraMove);

        mRefreshView.setPercent(mCurrentDragPercent);
        setTargetOffsetTop(targetY - mCurrentOffsetTop, true);
        break;
      }
      case MotionEventCompat.ACTION_POINTER_DOWN:
        final int index = MotionEventCompat.getActionIndex(ev);
        mActivePointerId = MotionEventCompat.getPointerId(ev, index);
        break;
      case MotionEventCompat.ACTION_POINTER_UP:
        onSecondaryPointerUp(ev);
        break;
      case MotionEvent.ACTION_UP:
      case MotionEvent.ACTION_CANCEL: {
        if (mActivePointerId == INVALID_POINTER) {
          return false;
        }
        final int pointerIndex = MotionEventCompat.findPointerIndex(ev, mActivePointerId);
        final float y = MotionEventCompat.getY(ev, pointerIndex);
        final float overScrollTop = (y - mInitialMotionY) * DRAG_RATE;
        mIsBeingDragged = false;
        if (overScrollTop > mTotalDragDistance) {
          setRefreshing(true, true);
        } else {
          mRefreshing = false;
          animateOffsetToPosition(mAnimateToStartPosition);
        }
        mActivePointerId = INVALID_POINTER;
        return false;
      }
    }

    return true;
  }
三、最後我們看怎樣在Activity中使用這個下拉刷新控件
1.先看一下布局文件
這裡是我們的下拉刷新空間嵌套著我們的ListView,然後我們再給ListView填充數據即可
<RelativeLayout xmlns:android="http://schemas.android.com/apk/res/android"
  xmlns:tools="http://schemas.android.com/tools"
  android:layout_width="match_parent"
  android:layout_height="match_parent"
  tools:context=".PullToRefreshActivity">

  <com.hankkin.AnimationPullToRefreshDemo.PullToRefreshView
    android:id="@+id/pull_to_refresh"
    android:layout_width="match_parent"
    android:layout_height="match_parent">

    <ListView
      android:id="@+id/list_view"
      android:divider="@null"
      android:dividerHeight="0dp"
      android:fadingEdge="none"
      android:layout_width="match_parent"
      android:layout_height="match_parent" />

  </com.hankkin.AnimationPullToRefreshDemo.PullToRefreshView>

</RelativeLayout>
2.為ListView填充數據
為了我們的效果比較好看,這裡我們給ListView的每一個item填充不同的顏色,看起來會比較高大上。
Map<String, Integer> map;
    List<Map<String, Integer>> sampleList = new ArrayList<Map<String, Integer>>();


    int[] colors = {
        R.color.saffron,
        R.color.eggplant,
        R.color.sienna};

    int[] tripNames = {
        R.string.trip_to_india,
        R.string.trip_to_italy,
        R.string.trip_to_indonesia};

    for (int i = 0; i < tripNames.length; i++) {
      map = new HashMap<String, Integer>();
      map.put(SampleAdapter.KEY_NAME, tripNames[i]);
      map.put(SampleAdapter.KEY_COLOR, colors[i]);
      sampleList.add(map);
    }

    ListView listView = (ListView) findViewById(R.id.list_view);
    listView.setAdapter(new SampleAdapter(this, R.layout.list_item, sampleList));
3.最後,我們再設置一下下拉刷新的監聽事件就OK了
mPullToRefreshView = (PullToRefreshView) findViewById(R.id.pull_to_refresh);
    mPullToRefreshView.setOnRefreshListener(new PullToRefreshView.OnRefreshListener() {
      @Override
      public void onRefresh() {
        mPullToRefreshView.postDelayed(new Runnable() {
          @Override
          public void run() {
            mPullToRefreshView.setRefreshing(false);
          }
        }, REFRESH_DELAY);
      }
    });
怎麼樣?有沒有很高大上啊?
大家可以動手實踐一下,希望對大家的學習有所幫助。
 Android React Native組件的生命周期
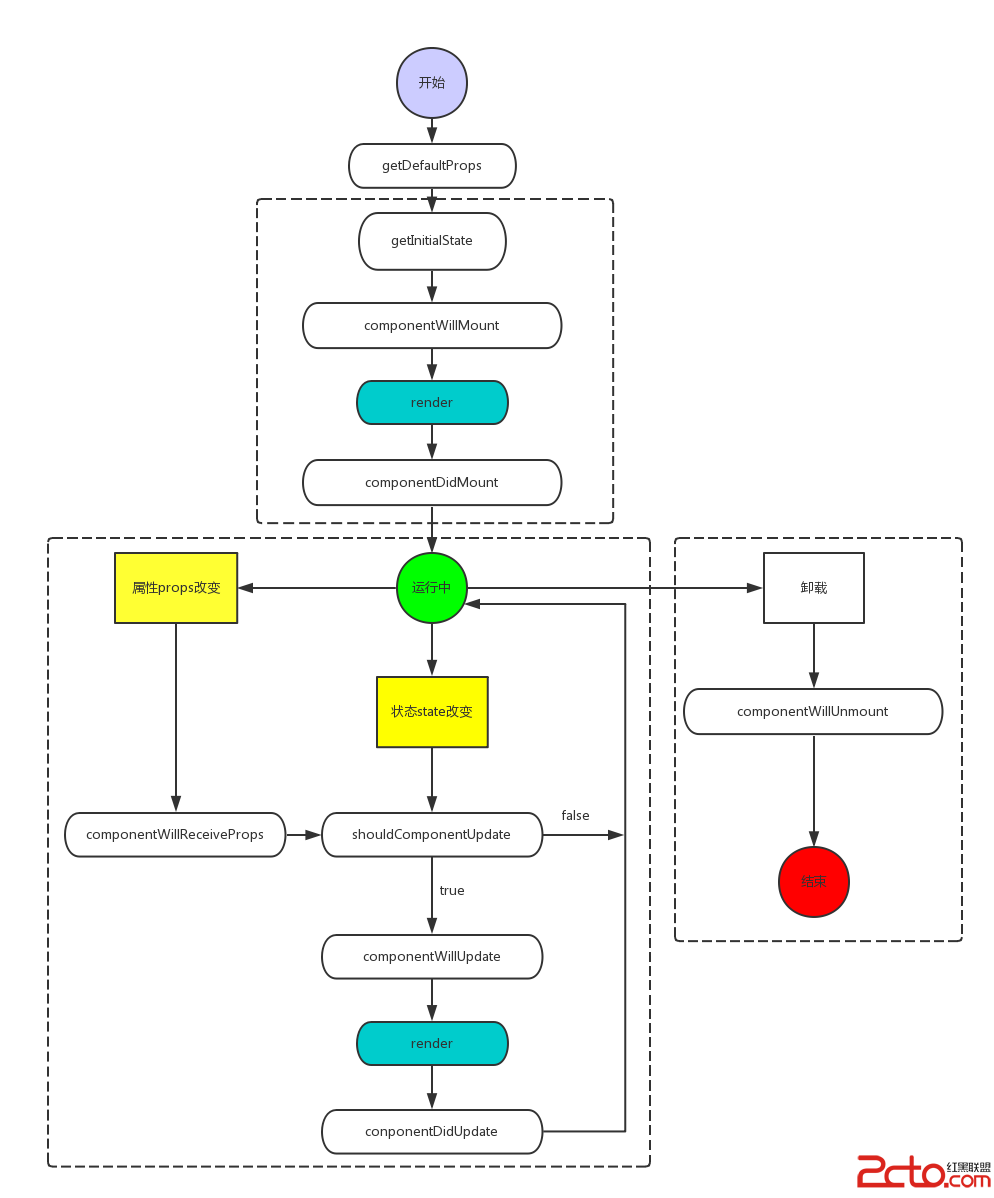
和Android一樣,React的組件也有對應的生命周期。Android React Native組件的生命周期可以總的概括為下面這一張圖。可以把組件生命周期大致分為三個
 RingProgressBar
項目地址:RingProgressBar簡介:一個簡單實現的自定義圓環進度條,可使用於文件的上傳下載圖片加載等地方.A material design circle th
 Android中自定義View和自定義動畫
Android FrameWork 層給我們提供了很多界面組件,但是在實際的商業開發中這些組件往往並不能完全滿足我們的需求,這時候我們就需要自定義我們自己的視圖和動畫。
 Android Studio 將module打成jar包
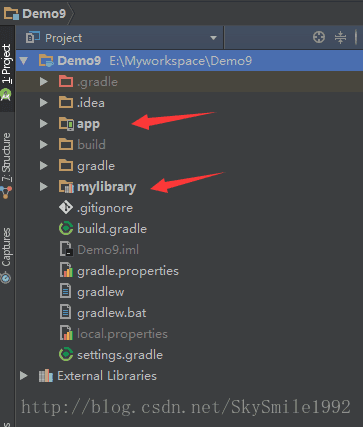
1.新建測試工程,工程裡面有兩個module,app是Android工程,mylibrary是Android Library庫。2.打開mylibrary目錄下的buil