編輯:關於Android編程
本文實例介紹了Android實現粒子雨效果的實現過程,分享給大家供大家參考,具體內容如下
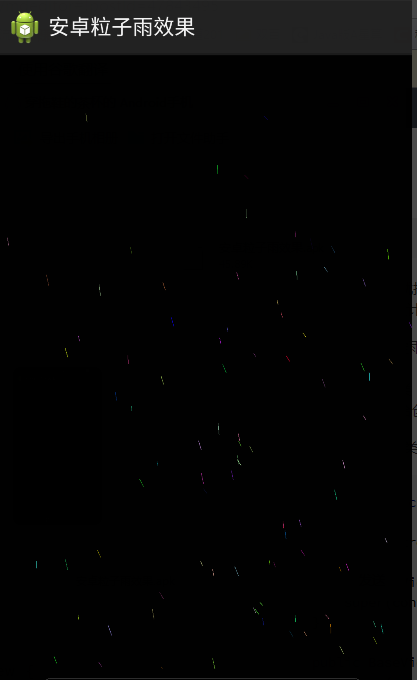
先看看效果圖:

具體實現方法:
1.baseview主要是設定雨滴要實現的動作,只是先設定,也就是抽象方法,在子類中實現其方法
2.Rainitems封裝雨滴類
3.Rainitems對雨滴集合創建到面板中,顯示出來,具體實現就是在這個類中
一、baseview封裝類,子類繼承後實現方法即可
public abstract class BaseView extends View {

  private control thread;

  public BaseView(Context context, AttributeSet attrs) {
    super(context, attrs);
  }

  public BaseView(Context context) {
    super(context);
  }
  //封裝,構造畫面,子類繼承後需要重寫
  protected abstract void drawsub(Canvas canvas);
  //封裝移動方法,子類繼承後需要重寫
  protected abstract void move();
  //封裝的初始化方法
  protected abstract void init();
  @Override
  protected final void onDraw(Canvas canvas) {

    //啟動線程
    if (thread ==null) {
      thread = new control();
      thread.start();
    }else {
      drawsub(canvas);
    }
  }

  public class control extends Thread{
    @Override
    public void run() {
      init();
      while(true){
        move();
        //相當於刷新畫布
        postInvalidate();
        try {
          sleep(30);
        } catch (InterruptedException e) {
          e.printStackTrace();
        }
      }
    }
  }

}
二、Rainitem雨點類
public class RainItem {

  private int height;
  private int width;
  private float startX;
  private float startY;
  private float stopX;
  private float stopY;
  private float sizeX;
  private float sizeY;
  private float of = 0.5f;
  private Paint paint;
  private Random random = new Random();

  public RainItem(int height,int width) {
    this.height = height;
    this.width = width;
    init();
  }

  public void init() {

    //startx和y對應的分別是起止位置
    sizeX = 1 + random.nextInt(10);
    sizeY = 10 + random.nextInt(20);
    startX = random.nextInt(width);
    startY = random.nextInt(height);
    stopX = startX + sizeX;
    stopY = startY + sizeY;
    of = (float) (0.2 + random.nextFloat());
    paint = new Paint();
  }
  /**
   * 繪畫雨滴
   * @param canvas
   */
  public void draw(Canvas canvas) {
    paint.setARGB(255, random.nextInt(255), random.nextInt(255), random.nextInt(255));
    canvas.drawLine(startX, startY, stopX, stopY, paint);
  }
  /**
   * 雨滴的移動行為
   */
  public void movestep() {
    //size*of這個是用來控制速度,所謂的速度就是線條增加的速度
    startX += sizeX*of;
    stopX += sizeX*of;

    startY += sizeY*of;
    stopY += sizeY*of;
    //如果超出邊界則重新運行
    if (startY>height) {
      init();
    }
  }
}
三、Rainplay具體實現的類
public class Rainplay extends BaseView {

  List<RainItem> list = new ArrayList<RainItem>();
  //控制雨滴的數量
  private int num = 80;

  public Rainplay(Context context) {
    super(context);
  }

  public Rainplay(Context context, AttributeSet attrs) {
    super(context, attrs);
    //與xml鏈接起來
    TypedArray ta = context.obtainStyledAttributes(attrs, R.styleable.RainView);
    num = ta.getInteger(R.styleable.RainView_rainnum,80);
    ta.recycle();
  }
  @Override
  protected void drawsub(Canvas canvas) {
    for (RainItem item : list) {
      item.draw(canvas);
    }
  }

  @Override
  protected void move() {
    for (RainItem item : list) {
      item.movestep();
    }
  }
  /**
   * 因為獲取長寬是放在layout之後才可以獲取,所以需要
   * 放在線程裡面初始化
   */
  @Override
  protected void init() {
    for (int i = 0; i < num; i++) {
      RainItem item = new RainItem(getHeight(), getWidth());
      list.add(item);
    }
  }

}
四、value與xml文件
<?xml version="1.0" encoding="utf-8"?>
<resources>
  <declare-styleable name = "RainView">
    <attr name="rainnum" format="integer"/>
   </declare-styleable>
</resources>
<FrameLayout xmlns:android="http://schemas.android.com/apk/res/android"
  xmlns:tools="http://schemas.android.com/tools"
  xmlns:an="http://schemas.android.com/apk/res/com.niuli.Rain"
  android:layout_width="match_parent"
  android:layout_height="match_parent"
   >
  <com.niuli.Rain.Rainplay
    android:layout_width="match_parent"
    android:layout_height="match_parent"
    android:background="#ff000000"
    an:rainnum = "100"/>
</FrameLayout>
希望本文所述對大家學習Android軟件編程有所幫助。
 Android為啥推薦用DialogFragment創建Dialog?
前言:這段時候有點忙,因為在趕項目,說忙也都是在敷衍,時間擠擠還是有的,從開始寫博客的那一刻起就應該一直堅持下來,不要三天打魚兩天曬網,上次寫過一個Android進階之(
 Android聯系人中添加歸屬地分組
之前重要負責收集聯系人添加歸屬地,公司這兩個智能分組;網上的實現方法很多,有說通過webserver來查詢,但是網絡這種形式不是長遠之道;畢竟服務器不是你自己的,還有
 Android畫板的實現及demo
今天給大家帶來Android畫板功能的簡單實現,以下是效果圖: 以下是關鍵源碼: import android.content.Conte
 Android中使用AsyncTask實現文件下載以及進度更新提示
Android提供了一個工具類:AsyncTask,它使創建需要與用戶界面交互的長時間運行的任務變得更簡單。相對Handler來說AsyncTask更輕量級一些,適用於簡