編輯:關於Android編程
我們在用手機的時候,如果來了短信,而我們沒有點擊查看的話,是不是在手機的最上邊的狀態欄裡有一個短信的小圖標提示啊?你是不是也想實現這種功能呢?今天的Notification就是解決這個問題的。
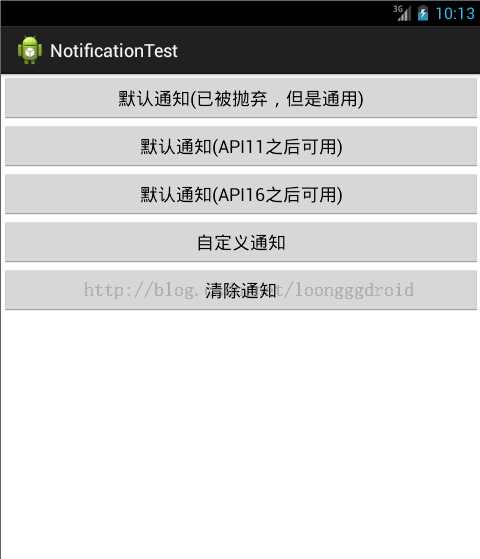
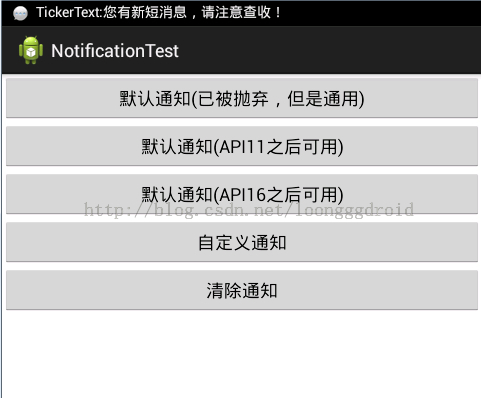
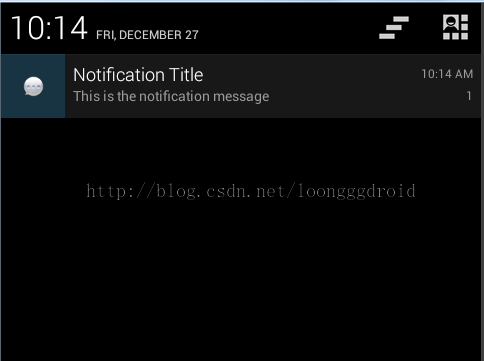
我們也知道Android系統也是在不斷升級的,有關Notification的用法也就有很多種,有的方法已經被android拋棄了,現在我實現了三種不同的方法,並適應不同的android版本。現在我就把代碼公布出來,我喜歡把解釋寫在代碼中,在這裡我就不多說了,先看效果圖:


再看代碼,主要的代碼如下:
package net.loonggg.notification;
import android.app.Activity;
import android.app.Notification;
import android.app.NotificationManager;
import android.app.PendingIntent;
import android.content.Context;
import android.content.Intent;
import android.os.Bundle;
import android.view.View;
import android.widget.RemoteViews;
public class MainActivity extends Activity {
private static final int NOTIFICATION_FLAG = 1;
@Override
protected void onCreate(Bundle savedInstanceState) {
super.onCreate(savedInstanceState);
setContentView(R.layout.activity_main);
}
public void notificationMethod(View view) {
// 在Android進行通知處理,首先需要重系統哪裡獲得通知管理器NotificationManager,它是一個系統Service。
NotificationManager manager = (NotificationManager) getSystemService(Context.NOTIFICATION_SERVICE);
switch (view.getId()) {
// 默認通知
case R.id.btn1:
// 創建一個PendingIntent,和Intent類似,不同的是由於不是馬上調用,需要在下拉狀態條出發的activity,所以采用的是PendingIntent,即點擊Notification跳轉啟動到哪個Activity
PendingIntent pendingIntent = PendingIntent.getActivity(this, 0,
new Intent(this, MainActivity.class), 0);
// 下面需兼容Android 2.x版本是的處理方式
// Notification notify1 = new Notification(R.drawable.message,
// "TickerText:" + "您有新短消息,請注意查收!", System.currentTimeMillis());
Notification notify1 = new Notification();
notify1.icon = R.drawable.message;
notify1.tickerText = "TickerText:您有新短消息,請注意查收!";
notify1.when = System.currentTimeMillis();
notify1.setLatestEventInfo(this, "Notification Title",
"This is the notification message", pendingIntent);
notify1.number = 1;
notify1.flags |= Notification.FLAG_AUTO_CANCEL; // FLAG_AUTO_CANCEL表明當通知被用戶點擊時,通知將被清除。
// 通過通知管理器來發起通知。如果id不同,則每click,在statu那裡增加一個提示
manager.notify(NOTIFICATION_FLAG, notify1);
break;
// 默認通知 API11及之後可用
case R.id.btn2:
PendingIntent pendingIntent2 = PendingIntent.getActivity(this, 0,
new Intent(this, MainActivity.class), 0);
// 通過Notification.Builder來創建通知,注意API Level
// API11之後才支持
Notification notify2 = new Notification.Builder(this)
.setSmallIcon(R.drawable.message) // 設置狀態欄中的小圖片,尺寸一般建議在24×24,這個圖片同樣也是在下拉狀態欄中所顯示,如果在那裡需要更換更大的圖片,可以使用setLargeIcon(Bitmap
// icon)
.setTicker("TickerText:" + "您有新短消息,請注意查收!")// 設置在status
// bar上顯示的提示文字
.setContentTitle("Notification Title")// 設置在下拉status
// bar後Activity,本例子中的NotififyMessage的TextView中顯示的標題
.setContentText("This is the notification message")// TextView中顯示的詳細內容
.setContentIntent(pendingIntent2) // 關聯PendingIntent
.setNumber(1) // 在TextView的右方顯示的數字,可放大圖片看,在最右側。這個number同時也起到一個序列號的左右,如果多個觸發多個通知(同一ID),可以指定顯示哪一個。
.getNotification(); // 需要注意build()是在API level
// 16及之後增加的,在API11中可以使用getNotificatin()來代替
notify2.flags |= Notification.FLAG_AUTO_CANCEL;
manager.notify(NOTIFICATION_FLAG, notify2);
break;
// 默認通知 API16及之後可用
case R.id.btn3:
PendingIntent pendingIntent3 = PendingIntent.getActivity(this, 0,
new Intent(this, MainActivity.class), 0);
// 通過Notification.Builder來創建通知,注意API Level
// API16之後才支持
Notification notify3 = new Notification.Builder(this)
.setSmallIcon(R.drawable.message)
.setTicker("TickerText:" + "您有新短消息,請注意查收!")
.setContentTitle("Notification Title")
.setContentText("This is the notification message")
.setContentIntent(pendingIntent3).setNumber(1).build(); // 需要注意build()是在API
// level16及之後增加的,API11可以使用getNotificatin()來替代
notify3.flags |= Notification.FLAG_AUTO_CANCEL; // FLAG_AUTO_CANCEL表明當通知被用戶點擊時,通知將被清除。
manager.notify(NOTIFICATION_FLAG, notify3);// 步驟4:通過通知管理器來發起通知。如果id不同,則每click,在status哪裡增加一個提示
break;
// 自定義通知
case R.id.btn4:
// Notification myNotify = new Notification(R.drawable.message,
// "自定義通知:您有新短信息了,請注意查收!", System.currentTimeMillis());
Notification myNotify = new Notification();
myNotify.icon = R.drawable.message;
myNotify.tickerText = "TickerText:您有新短消息,請注意查收!";
myNotify.when = System.currentTimeMillis();
myNotify.flags = Notification.FLAG_NO_CLEAR;// 不能夠自動清除
RemoteViews rv = new RemoteViews(getPackageName(),
R.layout.my_notification);
rv.setTextViewText(R.id.text_content, "hello wrold!");
myNotify.contentView = rv;
Intent intent = new Intent(Intent.ACTION_MAIN);
PendingIntent contentIntent = PendingIntent.getActivity(this, 1,
intent, 1);
myNotify.contentIntent = contentIntent;
manager.notify(NOTIFICATION_FLAG, myNotify);
break;
case R.id.btn5:
// 清除id為NOTIFICATION_FLAG的通知
manager.cancel(NOTIFICATION_FLAG);
// 清除所有的通知
// manager.cancelAll();
break;
default:
break;
}
}
}
再看主布局文件:
<LinearLayout xmlns:android="http://schemas.android.com/apk/res/android"
xmlns:tools="http://schemas.android.com/tools"
android:layout_width="match_parent"
android:layout_height="match_parent"
android:orientation="vertical"
tools:context=".MainActivity" >
<Button
android:id="@+id/btn1"
android:layout_width="fill_parent"
android:layout_height="wrap_content"
android:onClick="notificationMethod"
android:text="默認通知(已被拋棄,但是通用)" />
<Button
android:id="@+id/btn2"
android:layout_width="fill_parent"
android:layout_height="wrap_content"
android:onClick="notificationMethod"
android:text="默認通知(API11之後可用)" />
<Button
android:id="@+id/btn3"
android:layout_width="fill_parent"
android:layout_height="wrap_content"
android:onClick="notificationMethod"
android:text="默認通知(API16之後可用)" />
<Button
android:id="@+id/btn4"
android:layout_width="fill_parent"
android:layout_height="wrap_content"
android:onClick="notificationMethod"
android:text="自定義通知" />
<Button
android:id="@+id/btn5"
android:layout_width="fill_parent"
android:layout_height="wrap_content"
android:onClick="notificationMethod"
android:text="清除通知" />
</LinearLayout>
還有一個是:自定義通知的布局文件my_notification.xml,代碼如下:
<?xml version="1.0" encoding="utf-8"?>
<LinearLayout xmlns:android="http://schemas.android.com/apk/res/android"
android:layout_width="match_parent"
android:layout_height="wrap_content"
android:background="#ffffff"
android:orientation="vertical" >
<TextView
android:id="@+id/text_content"
android:layout_width="wrap_content"
android:layout_height="wrap_content"
android:textSize="20sp" />
</LinearLayout>
如何使自己的Notification像Android QQ一樣能出現在 “正在運行的”欄目下面
其實很簡單,只需設置Notification.flags = Notification.FLAG_ONGOING_EVENT;便可以了。
如何改變 Notification 在“正在運行的”欄目下面的布局
創建 RemoteViews 並賦給 Notification.contentView ,再把 PendingIntent 賦給 Notification.contentIntent 便可以了,如:
PendingIntent contentIntent = PendingIntent.getActivity(
arg0.getContext(),
R.string.app_name,
i,
PendingIntent.FLAG_UPDATE_CURRENT);
RemoteViews rv = new RemoteViews(Main.this.getPackageName(), R.layout.notification_view);
rv.setImageViewResource(R.id.image, R.drawable.chat);
rv.setTextViewText(R.id.text, "Hello,there,I'm john.");
n.contentView = rv;
n.contentIntent = contentIntent;
nm.notify(R.string.app_name, n);
注意,如果使用了contentView,那麼便不要使用Notification.setLatestEventInfo。如果setLatestEventInfo在賦給 Notification.contentView 的代碼之後,那麼contentView的效果將被覆蓋,顯示的便是 setLatestEventInfo 的效果;如果 setLatestEventInfo 在 Notification.contentView 的代碼之前,那麼顯示的便是 Notification.contentView 的效果,也就是說不管你想要setLatestEventInfo 或 contentView 的自定義效果,請保證始終只有一句設置代碼,因為在最後一句綁定的時候,之前的設置contentView或setLatestEventInfo的代碼都是完全沒有必要的。
 安卓可滑動的自定義日歷控件的實現
最近用到的一個日歷控件,記錄下來造福人類, 效果如圖 布局文件
 Android事件分發機制(上) ViewGroup的事件分發
綜述 Android中的事件分發機制也就是View與ViewGroup的對事件的分發與處理。在ViewGroup的內部包含了許多View,而ViewGroup繼承自Vi
 無需root,教你智能電視和智能機頂盒系統大瘦身清緩存方法
現在市面上大部分智能電視和智能機頂盒都是安卓系統。時間久了就會產生大量緩存,對於這些系統緩存如果你視而不見日積月累將會導致你的系統內存越來越少,這樣系統可用
 Android特效專輯(八)——實現心型起泡飛舞的特效,讓你的APP瞬間暖心
Android特效專輯(八)——實現心型起泡飛舞的特效,讓你的APP瞬間暖心 馬上也要放年假了,家裡估計會沒網,更完這篇的話,可能要到年後了,不過