編輯:關於Android編程
1:查看是否有存儲卡插入
復制代碼 代碼如下:
String status=Environment.getExternalStorageState();
if(status.equals(Enviroment.MEDIA_MOUNTED))
{
說明有SD卡插入
}
2:讓某個Activity透明
OnCreate中不設Layout this.setTheme(R.style.Theme_Transparent);
以下是Theme_Transparent的定義(注意transparent_bg是一副透明的圖片)
3:在屏幕元素中設置句柄
使用Activity.findViewById來取得屏幕上的元素的句柄. 使用該句柄您可以設置或獲取任何該對象外露的值.
復制代碼 代碼如下:
TextView msgTextView = (TextView)findViewById(R.id.msg);
msgTextView.setText(R.string.push_me);
4:發送短信
復制代碼 代碼如下:
String body="this is mms demo";
Intent mmsintent = new Intent(Intent.ACTION_SENDTO, Uri.fromParts("smsto", number, null));
mmsintent.putExtra(Messaging.KEY_ACTION_SENDTO_MESSAGE_BODY, body);
mmsintent.putExtra(Messaging.KEY_ACTION_SENDTO_COMPOSE_MODE, true);
mmsintent.putExtra(Messaging.KEY_ACTION_SENDTO_EXIT_ON_SENT, true);
startActivity(mmsintent);
5:發送彩信
復制代碼 代碼如下:
StringBuilder sb = new StringBuilder();
sb.append("file://");
sb.append(fd.getAbsoluteFile());
Intent intent = new Intent(Intent.ACTION_SENDTO, Uri.fromParts("mmsto", number, null));
// Below extra datas are all optional.
intent.putExtra(Messaging.KEY_ACTION_SENDTO_MESSAGE_SUBJECT, subject);
intent.putExtra(Messaging.KEY_ACTION_SENDTO_MESSAGE_BODY, body);
intent.putExtra(Messaging.KEY_ACTION_SENDTO_CONTENT_URI, sb.toString());
intent.putExtra(Messaging.KEY_ACTION_SENDTO_COMPOSE_MODE, composeMode);
intent.putExtra(Messaging.KEY_ACTION_SENDTO_EXIT_ON_SENT, exitOnSent);
startActivity(intent)
6:發送Mail
復制代碼 代碼如下:
mime = "img/jpg";
shareIntent.setDataAndType(Uri.fromFile(fd), mime);
shareIntent.putExtra(Intent.EXTRA_STREAM, Uri.fromFile(fd));
shareIntent.putExtra(Intent.EXTRA_SUBJECT, subject);
shareIntent.putExtra(Intent.EXTRA_TEXT, body);
7:注冊一個BroadcastReceiver
復制代碼 代碼如下:
registerReceiver(mMasterResetReciever, new IntentFilter("oms.action.MASTERRESET"));
private BroadcastReceiver mMasterResetReciever = new BroadcastReceiver() {
public void onReceive(Context context, Intent intent){
String action = intent.getAction();
if("oms.action.MASTERRESET".equals(action)){
RecoverDefaultConfig();
}
}
}
8:定義ContentObserver,監聽某個數據表
復制代碼 代碼如下:
private ContentObserver mDownloadsObserver = new DownloadsChangeObserver(Downloads.CONTENT_URI);
private class DownloadsChangeObserver extends ContentObserver {
public DownloadsChangeObserver(Uri uri) {
super(new Handler());
}
@Override
public void onChange(boolean selfChange) {}
}
9:獲得 手機UA
復制代碼 代碼如下:
public String getUserAgent()
{
String user_agent = ProductProperties.get(ProductProperties.USER_AGENT_KEY, null);
return user_agent;
}
10:清空手機上Cookie
復制代碼 代碼如下:
CookieSyncManager.createInstance(getApplicationContext());
CookieManager.getInstance().removeAllCookie();11:建立GPRS連接
//Dial the GPRS link.
private boolean openDataConnection() {
// Set up data connection.
DataConnection conn = DataConnection.getInstance();
if (connectMode == 0) {
ret = conn.openConnection(mContext, "cmwap", "cmwap", "cmwap");
} else {
ret = conn.openConnection(mContext, "cmnet", "", "");
}
}
12:PreferenceActivity 用法
復制代碼 代碼如下:
public class Setting extends PreferenceActivity
{
public void onCreate(Bundle savedInstanceState) {
super.onCreate(savedInstanceState);
addPreferencesFromResource(R.xml.settings);
}
}
Setting.xml:
android:key="seting2″
android:title="@string/seting2″
android:summary="@string/seting2″/>
android:key="seting1″
android:title="@string/seting1″
android:summaryOff="@string/seting1summaryOff"
android:summaryOn="@stringseting1summaryOff"/>
13:通過HttpClient從指定server獲取數據
復制代碼 代碼如下:
DefaultHttpClient httpClient = new DefaultHttpClient();
HttpGet method = new HttpGet("http://www.baidu.com/1.html");
HttpResponse resp;
Reader reader = null;
try {
// AllClientPNames.TIMEOUT
HttpParams params = new BasicHttpParams();
params.setIntParameter(AllClientPNames.CONNECTION_TIMEOUT, 10000);
httpClient.setParams(params);
resp = httpClient.execute(method);
int status = resp.getStatusLine().getStatusCode();
if (status != HttpStatus.SC_OK) return false;
// HttpStatus.SC_OK;
return true;
} catch (ClientProtocolException e) {
// TODO Auto-generated catch block
e.printStackTrace();
} catch (IOException e) {
// TODO Auto-generated catch block
e.printStackTrace();
} finally {
if (reader != null) try {
reader.close();
} catch (IOException e) {
// TODO Auto-generated catch block
e.printStackTrace();
}
}
 Android內存洩露
本篇博客主要是記錄一下Android內存洩露相關的問題。網上有很多介紹內存洩露的文章,自己摘取了一些比較有價值的內容,同時增加了一些自己的理解。在分析內存洩露前,我們必須
 android Universal-Image-Loader框架學習
一.Universal-Image-Loader概述:Android-Universal-Image-Loader是一個開源的圖片加載框架,這個項目的目的是提供一個可重復
 Android UI開源組件庫BottomView ,第三方自定義UI控件
這裡分享一個Android的非常經典實用而且簡單方便的第三方UI控件庫:BottomView(小米的米UI也用到了這個) 實現功能: 可以在底部彈出的Vie
 Android - 本地驗證碼的生成
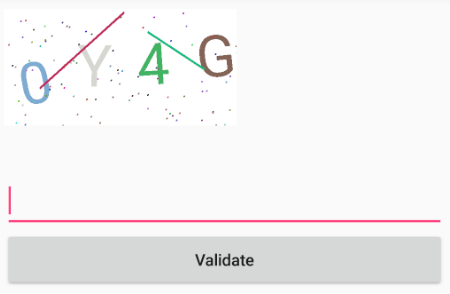
android客戶端生成本地驗證碼主要用來限制用戶隨意按請求按鈕,其實該示例也是來對自定義view的練練手而已,先給出效果圖吧其中可定制:*干擾線數目*干擾點數目*背景顏