編輯:關於Android編程
主Activity
復制代碼 代碼如下:
package com.mj.myweather;
import android.app.Activity;
import android.graphics.Bitmap;
import android.graphics.drawable.Drawable;
import android.os.Bundle;
import android.widget.ImageView;
import com.mj.myweather.utils.ImageUtil;
public class ImageActivity extends Activity {
// 聲明控件
private ImageView mImageView01, mImageView02;
@Override
public void onCreate(Bundle savedInstanceState) {
super.onCreate(savedInstanceState);
setContentView(R.layout.image);
setupViews();
}
private void setupViews() {
mImageView01 = (ImageView) findViewById(R.id.image01);
mImageView02 = (ImageView) findViewById(R.id.image02);
// 獲取壁紙返回值是Drawable
Drawable drawable = getWallpaper();
// 將Drawable轉化為Bitmap
Bitmap bitmap = ImageUtil.drawableToBitmap(drawable);
// 縮放圖片
Bitmap zoomBitmap = ImageUtil.zoomBitmap(bitmap, 300, 300);
// 獲取圓角圖片
Bitmap roundBitmap = ImageUtil
.getRoundedCornerBitmap(zoomBitmap, 10.0f);
// 獲取倒影圖片
Bitmap reflectBitmap = ImageUtil
.createReflectionImageWithOrigin(roundBitmap);
// 這裡可以讓Bitmap再轉化為Drawable
// Drawable roundDrawable = new BitmapDrawable(roundBitmap);
// Drawable reflectDrawable = new BitmapDrawable(reflectBitmap);
// mImageView01.setBackgroundDrawable(roundDrawable);
// mImageView02.setBackgroundDrawable(reflectDrawable);
mImageView01.setImageBitmap(roundBitmap);
mImageView02.setImageBitmap(reflectBitmap);
}
}
布局文件
復制代碼 代碼如下:
<?xml version="1.0" encoding="utf-8"?>
<LinearLayout xmlns:android="http://schemas.android.com/apk/res/android"
android:layout_width="fill_parent"
android:layout_height="fill_parent"
android:orientation="vertical" >
<ImageView
android:id="@+id/image01"
android:layout_width="wrap_content"
android:layout_height="wrap_content"
android:padding="10dp" />
<ImageView
android:id="@+id/image02"
android:layout_width="wrap_content"
android:layout_height="wrap_content"
android:padding="10dp" />
</LinearLayout>
圖片處理
復制代碼 代碼如下:
package com.mj.myweather.utils;
import android.graphics.Bitmap;
import android.graphics.Canvas;
import android.graphics.LinearGradient;
import android.graphics.Matrix;
import android.graphics.Paint;
import android.graphics.PixelFormat;
import android.graphics.PorterDuffXfermode;
import android.graphics.Rect;
import android.graphics.RectF;
import android.graphics.Bitmap.Config;
import android.graphics.PorterDuff.Mode;
import android.graphics.Shader.TileMode;
import android.graphics.drawable.Drawable;
public class ImageUtil {
/**
* 放大縮小圖片
* @param bitmap
* @param w
* @param h
* @return
*/
public static Bitmap zoomBitmap(Bitmap bitmap, int w, int h) {
int width = bitmap.getWidth();
int height = bitmap.getHeight();
Matrix matrix = new Matrix();
float scaleWidht = ((float) w / width);
float scaleHeight = ((float) h / height);
matrix.postScale(scaleWidht, scaleHeight);
Bitmap newbmp = Bitmap.createBitmap(bitmap, 0, 0, width, height,
matrix, true);
return newbmp;
}
/**
* 將Drawable轉化為Bitmap
* @param drawable
* @return
*/
public static Bitmap drawableToBitmap(Drawable drawable) {
int width = drawable.getIntrinsicWidth();
int height = drawable.getIntrinsicHeight();
Bitmap bitmap = Bitmap.createBitmap(width, height, drawable
.getOpacity() != PixelFormat.OPAQUE ? Bitmap.Config.ARGB_8888
: Bitmap.Config.RGB_565);
Canvas canvas = new Canvas(bitmap);
drawable.setBounds(0, 0, width, height);
drawable.draw(canvas);
return bitmap;
}
/*
* 獲得圓角圖片的方法
*/
public static Bitmap getRoundedCornerBitmap(Bitmap bitmap, float roundPx) {
Bitmap output = Bitmap.createBitmap(bitmap.getWidth(),
bitmap.getHeight(), Config.ARGB_8888);
Canvas canvas = new Canvas(output);
final int color = 0xff424242;
final Paint paint = new Paint();
final Rect rect = new Rect(0, 0, bitmap.getWidth(), bitmap.getHeight());
final RectF rectF = new RectF(rect);
paint.setAntiAlias(true);
canvas.drawARGB(0, 0, 0, 0);
paint.setColor(color);
canvas.drawRoundRect(rectF, roundPx, roundPx, paint);
paint.setXfermode(new PorterDuffXfermode(Mode.SRC_IN));
canvas.drawBitmap(bitmap, rect, rect, paint);
return output;
}
/**
* 獲得帶倒影的圖片方法
* @param originalImage
* @return
*/
public static Bitmap createReflectionImageWithOrigin(Bitmap originalImage) {
final int reflectionGap = 4;
int width = originalImage.getWidth();
int height = originalImage.getHeight();
Matrix matrix = new Matrix();
// 圖片矩陣變換(從低部向頂部的倒影)// 實現圖片翻轉90度
matrix.preScale(1, -1);
// 創建反轉後的圖片Bitmap對象,圖片高是原圖的一半
Bitmap reflectionImage = Bitmap.createBitmap(originalImage, 0, height / 2,
width, height / 2, matrix, false);
// 創建標准的Bitmap對象,寬和原圖一致,高是原圖的1.5倍
Bitmap bitmapWithReflection = Bitmap.createBitmap(width,
(height + height / 2), Config.ARGB_8888);
// 創建畫布對象,將原圖畫於畫布,起點是原點位置
Canvas canvas = new Canvas(bitmapWithReflection);
canvas.drawBitmap(originalImage, 0, 0, null);
// 將反轉後的圖片畫到畫布中
Paint deafalutPaint = new Paint();
canvas.drawRect(0, height, width, height + reflectionGap, deafalutPaint);
canvas.drawBitmap(reflectionImage, 0, height + reflectionGap, null);
Paint paint = new Paint();
// 創建線性漸變LinearGradient對象
LinearGradient shader = new LinearGradient(0, originalImage.getHeight(), 0,
bitmapWithReflection.getHeight() + reflectionGap, 0x70ffffff,
0x00ffffff, TileMode.CLAMP);
paint.setShader(shader);
// Set the Transfer mode to be porter duff and destination in
paint.setXfermode(new PorterDuffXfermode(Mode.DST_IN));
// Draw a rectangle using the paint with our linear gradient
// 畫布畫出反轉圖片大小區域,然後把漸變效果加到其中,就出現了圖片的倒影效果
canvas.drawRect(0, height, width, bitmapWithReflection.getHeight()
+ reflectionGap, paint);
return bitmapWithReflection;
}
}
 android 仿微信聊天界面
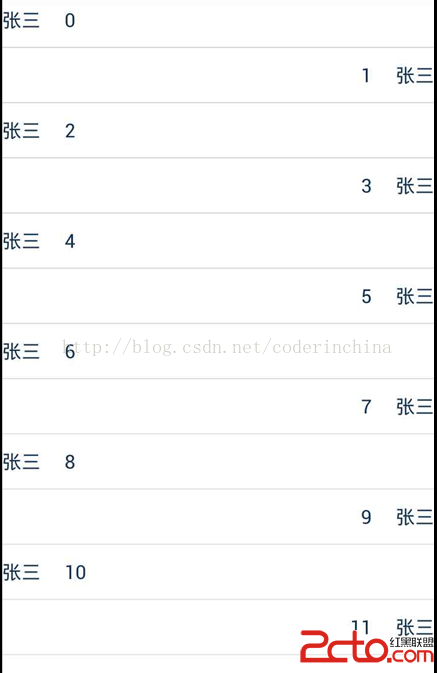
一些IM聊天軟件我們發現,他的展現形式,是左右分開的形式,而我們的listview很多時候是顯示同一個布局,其實BaseAdapter中有2個重要的方法在大多數情況下我們
 VLC for Android 基於 Opencv 對 RTSP視頻 實時人臉檢測
最近項目上需要在Android客戶端 通過獲取 RTSP 的視頻進行實時人臉檢測, 要做就就是以下幾點:1、通過VLC 獲取 獲取RTSP2、對VLC中播放的視頻進行實時
 Android下拉列表spinner的實例代碼
spinner組件有點類型於HTML中的下拉框<Select></select>的樣子,讓用戶每次從下拉框中選取一個,本文為大家分享了Androi
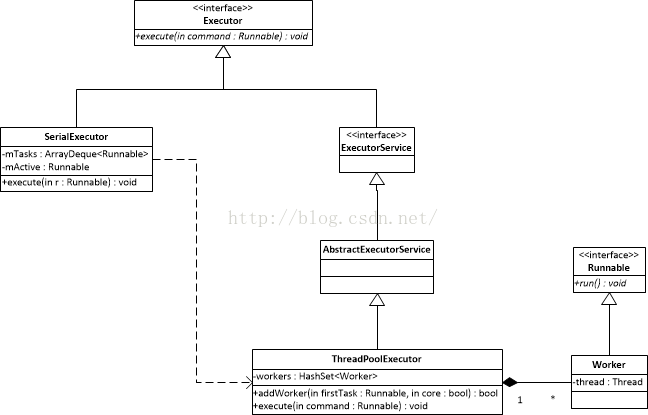
 AsyncTask - 基本原理 圖文剖析
最近用到了AsyncTask,這玩意每個寫android程序的都會用,可是不見得每個人都能用的好。如果想要用好,那麼首先勢必對基本原理有個大概了解。其實網上對這類問題的說