編輯:關於Android編程
一、改變Tab欄的位置。
java代碼。在TabActivity的oncreate方法中添加
setContentView(R.layout.tab_host);
其中 Layout tab_host.xml 是從系統資源文件中摳出來之後略作修改。
系統原來的 tab_host.xml內容如下
復制代碼 代碼如下:
<?xml version="1.0" encoding="utf-8"?>
<!--
/* //device/apps/common/assets/res/layout/tab_content.xml
**
** Copyright 2006, The Android Open Source Project
**
** Licensed under the Apache License, Version 2.0 (the "License");
** you may not use this file except in compliance with the License.
** You may obtain a copy of the License at
**
** http://www.apache.org/licenses/LICENSE-2.0
**
** Unless required by applicable law or agreed to in writing, software
** distributed under the License is distributed on an "AS IS" BASIS,
** WITHOUT WARRANTIES OR CONDITIONS OF ANY KIND, either express or implied.
** See the License for the specific language governing permissions and
** limitations under the License.
*/
-->
<TabHost xmlns:android="http://schemas.android.com/apk/res/android" android:id="@android:id/tabhost"
android:layout_width="match_parent" android:layout_height="match_parent">
<LinearLayout android:orientation="vertical"
android:layout_width="match_parent" android:layout_height="match_parent">
<TabWidget android:id="@android:id/tabs" android:layout_width="match_parent"
android:layout_height="wrap_content" android:layout_weight="0" />
<FrameLayout android:id="@android:id/tabcontent"
android:layout_width="match_parent" android:layout_height="0dip"
android:layout_weight="1"/>
</LinearLayout>
</TabHost>
要實現TAB欄在頁面下方,只需簡單修改。
復制代碼 代碼如下:
<?xml version="1.0" encoding="utf-8"?>
<TabHost xmlns:android="http://schemas.android.com/apk/res/android" android:id="@android:id/tabhost"
android:layout_width="fill_parent" android:layout_height="fill_parent">
<LinearLayout android:orientation="vertical"
android:layout_width="fill_parent" android:layout_height="fill_parent">
<FrameLayout android:id="@android:id/tabcontent"
android:layout_width="fill_parent" android:layout_height="0dip"
android:layout_weight="1"/>
<TabWidget android:id="@android:id/tabs" android:layout_width="fill_parent"
android:layout_height="wrap_content" android:layout_weight="0" />
</LinearLayout>
</TabHost>
這樣,就實現了TAB欄在頁面下冊。需要注意的是,view的id不要修改。
二、自定義TAB的圖片。系統自帶的tab_indicator.xml內容如下
復制代碼 代碼如下:
<?xml version="1.0" encoding="utf-8"?>
<!-- Copyright (C) 2008 The Android Open Source Project
Licensed under the Apache License, Version 2.0 (the "License");
you may not use this file except in compliance with the License.
You may obtain a copy of the License at
http://www.apache.org/licenses/LICENSE-2.0
Unless required by applicable law or agreed to in writing, software
distributed under the License is distributed on an "AS IS" BASIS,
WITHOUT WARRANTIES OR CONDITIONS OF ANY KIND, either express or implied.
See the License for the specific language governing permissions and
limitations under the License.
-->
<RelativeLayout xmlns:android="http://schemas.android.com/apk/res/android"
android:layout_width="0dip"
android:layout_height="64dip"
android:layout_weight="1"
android:layout_marginLeft="-3dip"
android:layout_marginRight="-3dip"
android:orientation="vertical"
android:background="@android:drawable/tab_indicator">
<ImageView android:id="@+id/icon"
android:layout_width="wrap_content"
android:layout_height="wrap_content"
android:layout_centerHorizontal="true"
/>
<TextView android:id="@+id/title"
android:layout_width="wrap_content"
android:layout_height="wrap_content"
android:layout_alignParentBottom="true"
android:layout_centerHorizontal="true"
/>
</RelativeLayout>
可以看出,默認情況下,圖標在文字上方,並且不能占到整個格,無法滿足設計需要。因此可以重寫該Layout。
編寫tab_in.xml
復制代碼 代碼如下:
<?xml version="1.0" encoding="utf-8"?>
<RelativeLayout xmlns:android="http://schemas.android.com/apk/res/android"
android:layout_width="wrap_content"
android:layout_height="64dip"
android:orientation="vertical"
>
</RelativeLayout>
View view1 = inflater.inflate(R.layout.tab_in, null);;
View view2 = inflater.inflate(R.layout.tab_in, null);;
View view3 = inflater.inflate(R.layout.tab_in, null);;
view1 .setBackgroundResource(R.drawable.record_upload_button_stateful);
view2 .setBackgroundResource(R.drawable.record_download_button_stateful);
view3 .setBackgroundResource(R.drawable.record_receive_button_stateful);
tabHost.addTab(tabHost
.newTabSpec("view1")
.setIndicator(view1)
);
tabHost.addTab(tabHost
.newTabSpec("view2")
.setIndicator(view2)
);
tabHost.addTab(tabHost
.newTabSpec("view3")
.setIndicator(view3)
);
 android自學之環境配置
寫在前言的話:博主的身份如昵稱所寫(java培訓中的菜雞,對編程有興趣,自學android);此博客所有文章就是博主自己從網上學習,自己實踐後的理解,如有不對的地方歡迎指
 Android Internet - WebView 的使用
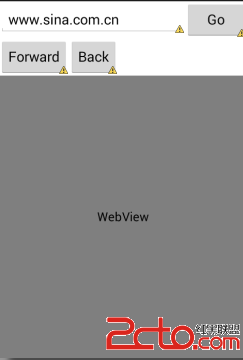
WebView是Android 提供的操作網頁的一個組件。用於浏覽網頁及其他Internet資源。這裡總結了一些WebView 的常用接口,和2個小示例程序用於自己開發時
 Android 布局優化工具Hierarchy Viewer的使用
網上已經有很多關於Hierarchy Viewer如何使用的文章,這裡就不一步步的演示具體怎樣使用了,ddna兄的《【Android工具】被忽
 Android AppBarLayout+TabLayout+RecyclerView+ViewPager+Fragment
最近有人讓我幫忙實現一個如下圖所示的效果 需求:標題欄本來是在banner的下方,當滑動下面的RecyclerView的時候標題欄會隨著向上移動,但是當標題欄移動到頂