編輯:關於Android編程
FrameLayout(幀布局),LinearLayout (線性布局),AbsoluteLayout(絕對布局),RelativeLayout(相對布局),TableLayout(表格布局)
FrameLayout:
FrameLayout是最簡單的一個布局對象。它被定制為你屏幕上的一個空白備用區域,之後你可以在其中填充一個單一對象 ,比如,一張你要發布的圖片。所有的子元素將會固定在屏幕的左上角;你不能為FrameLayout中的一個子元素指定一個位置。後一個子元素將會直接在前 一個子元素之上進行覆蓋填充,把它們部份或全部擋住(除非後一個子元素是透明的)。

LinearLayout:
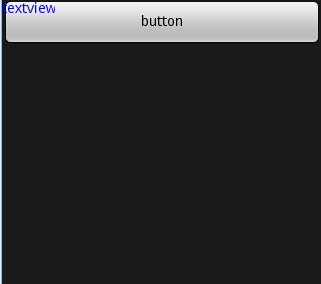
LinearLayout以你為它設置的垂直或水平的屬性值,來排列所有的子元素。所有的子元素都被堆放在其它元素之後,因此一個垂直列表的每一行只會有 一個元素,而不管他們有多寬,而一個水平列表將會只有一個行高(高度為最高子元素的高度加上邊框高度)。LinearLayout保持子元素之間的間隔以 及互相對齊(相對一個元素的右對齊、中間對齊或者左對齊)。
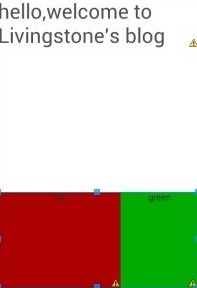
LinearLayout還支持為單獨的子元素指定weight 。好處就是允許子元素可以填充屏幕上的剩余空間。這也避免了在一個大屏幕中,一串小對象擠成一堆的情況,而是允許他們放大填充空白。子元素指定一個weight 值,剩余的空間就會按這些子元素指定的weight 比例分配給這些子元素。默認的 weight 值為0。例如,如果有三個文本框,其中兩個指定了weight 值為1,那麼,這兩個文本框將等比例地放大,並填滿剩余的空間,而第三個文本框不會放大。
復制代碼 代碼如下:
<LinearLayout xmlns:android="http://schemas.android.com/apk/res/android"
android:layout_width="match_parent"
android:layout_height="match_parent"
android:orientation="vertical" >
<LinearLayout
android:layout_width="fill_parent"
android:layout_height="fill_parent"
android:orientation="vertical"
android:layout_weight="1" >
<TextView
android:layout_width="fill_parent"
android:layout_height="wrap_content"
android:text="hello,welcome to Livingstone's blog"
android:textSize="15pt" /> </LinearLayout>
<LinearLayout
android:layout_width="fill_parent"
android:layout_height="fill_parent"
android:orientation="horizontal"
android:layout_weight="2" >
<TextView
android:layout_width="wrap_content"
android:layout_height="fill_parent"
android:layout_weight="2"
android:background="#aa0000"
android:gravity="center_horizontal"
android:text="red" />
<TextView
android:layout_width="wrap_content"
android:layout_height="fill_parent"
android:layout_weight="1"
android:background="#00aa00"
android:gravity="center_horizontal"
android:text="green" /> </LinearLayout>
</LinearLayout>
AbsoluteLayout:
AbsoluteLayout 可以讓子元素指定准確的x/y坐標值,並顯示在屏幕上。(0, 0)為左上角,當向下或向右移動時,坐標值將變大。AbsoluteLayout 沒有頁邊框,允許元素之間互相重疊(盡管不推薦)。我們通常不推薦使用 AbsoluteLayout ,除非你有正當理由要使用它,因為它使界面代碼太過剛性,以至於在不同的設備上可能不能很好地工作。
RelativeLayout:
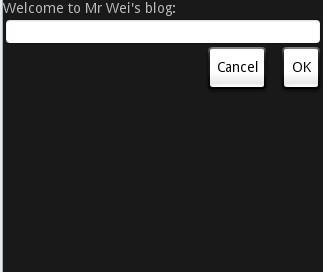
RelativeLayout 允許子元素指定他們相對於其它元素或父元素的位置(通過ID 指定)。因此,你可以以右對齊,或上下,或置於屏幕中央的形式來 排列兩個元素。元素按順序排列,因此如果第一個元素在屏幕的中央,那麼相對於這個元素的其它元素將以屏幕中央的相對位置來排列。如果使用XML 來指定這個 layout ,在你定義它之前,被關聯的元素必須定義。
 復制代碼 代碼如下:
<LinearLayout xmlns:android="http://schemas.android.com/apk/res/android"
android:layout_width="match_parent"
android:layout_height="match_parent"
android:orientation="vertical" >
<LinearLayout
android:layout_width="fill_parent"
android:layout_height="fill_parent"
android:orientation="vertical"
android:layout_weight="1" >
<TextView
android:layout_width="fill_parent"
android:layout_height="wrap_content"
android:text="hello,welcome to Livingstone's blog"
android:textSize="15pt" /> </LinearLayout>
<LinearLayout
android:layout_width="fill_parent"
android:layout_height="fill_parent"
android:orientation="horizontal"
android:layout_weight="2" >
<TextView
android:layout_width="wrap_content"
android:layout_height="fill_parent"
android:layout_weight="2"
android:background="#aa0000"
android:gravity="center_horizontal"
android:text="red" />
<TextView
android:layout_width="wrap_content"
android:layout_height="fill_parent"
android:layout_weight="1"
android:background="#00aa00"
android:gravity="center_horizontal"
android:text="green" /> </LinearLayout>
</LinearLayout>
TableLayout:
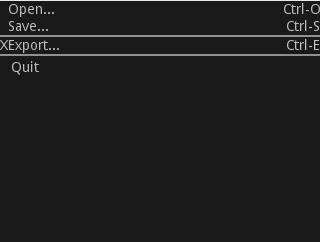
TableLayout 將子元素的位置分配到行或列中。一個TableLayout 由許多的TableRow 組成,每個TableRow都會定義一個 row (事實上,你可以定義其它的子對象,這在下面會解釋到)。TableLayout 容器不會顯示row、cloumns 或cell 的邊框線。每個 row 擁有0個或多個的cell ;每個cell 擁有一個View 對象。表格由列和行組成許多的單元格。表格允許單元格為空。單元格不能跨列,這與HTML 中的不一樣。
復制代碼 代碼如下:
<TableLayout xmlns:android="http://schemas.android.com/apk/res/android"
android:layout_width="fill_parent" android:layout_height="fill_parent"
android:stretchColumns="1">
<TableRow>
<TextView android:layout_column="1" android:text="Open..." />
<TextView android:text="Ctrl-O" android:gravity="right" />
</TableRow>
<TableRow>
<TextView android:layout_column="1" android:text="Save..." />
<TextView android:text="Ctrl-S" android:gravity="right" />
</TableRow>
<View android:layout_height="2dip" android:background="#FF909090" /> //這裡是上圖中的分隔線
<TableRow>
<TextView android:text="X" />
<TextView android:text="Export..." />
<TextView android:text="Ctrl-E" android:gravity="right " /> //讓TextView顯示在右面
</TableRow>
<View android:layout_height="2dip" android:background="#FF909090" />
<TableRow>
<TextView android:layout_column="1" android:text="Quit"
android:padding="3dip" />
</TableRow>
</TableLayout>
 Android ListView實現上拉加載下拉刷新和滑動刪除功能
最近項目需要用到可以滑動刪除並且帶有上拉加載下拉刷新的Listview,查閱了一些資料,大多都是在SwipeMenuListView的基礎上去添加頭部和底部View,來擴
 Android ViewDragHelper完全解析 自定義ViewGroup神器
一、概述在自定義ViewGroup中,很多效果都包含用戶手指去拖動其內部的某個View(eg:側滑菜單等),針對具體的需要去寫好onInterceptTouchEvent
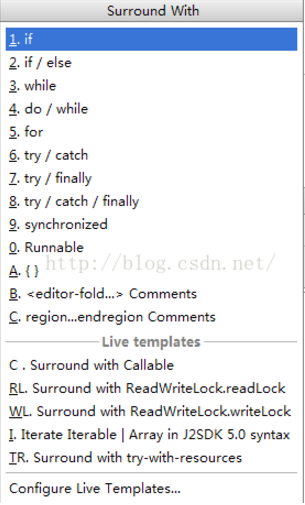 Android studio中快速try catch的快捷鍵
選擇要包裹的代碼塊,然後按下ctrl + alt + t
 Android界面編程——日期時間組件(五)
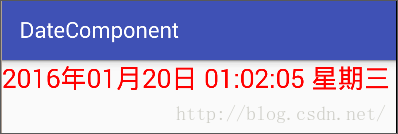
2.6日期時間組件2.6.1 TextClock以文本的方式顯示系統日期和時間,可以自定義顯示格式,是 Android4.2(對應API Level 17)提供的新特性。