編輯:關於Android編程
實例:RGB2Grey
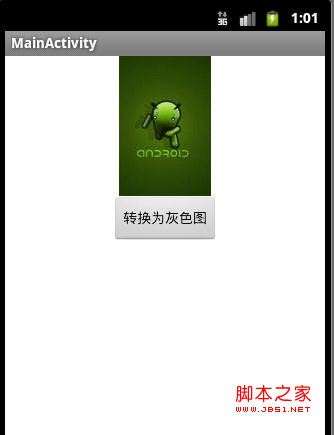
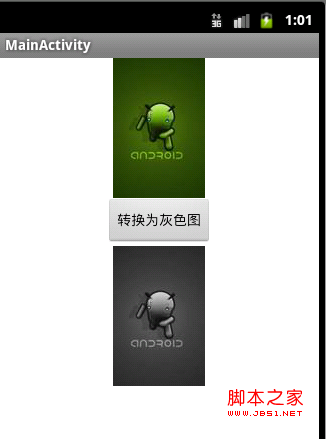
項目運行效果圖:


源代碼:
[java]
public class MainActivity extends Activity {
/* (non-Javadoc)
* @see android.app.Activity#onCreate(android.os.Bundle)
*/
@Override
public void onCreate(Bundle savedInstanceState) {
super.onCreate(savedInstanceState);
setContentView(R.layout.activity_main);
//通過Id來獲取界面中組件的引用
Button rgb2greyBtn = (Button) findViewById(R.id.rgb2greybtn);
ImageView imageView1 = (ImageView) findViewById(R.id.imageView1);
final ImageView imageView2 = (ImageView) findViewById(R.id.imageView2);
//通過位圖工廠,創建一個位圖
final Bitmap bitmap = BitmapFactory.decodeResource(getResources(), R.drawable.ic_android);
imageView1.setImageBitmap(bitmap);
//為“轉換為灰度圖”按鈕添加監聽事件
rgb2greyBtn.setOnClickListener(new OnClickListener() {
@Override
public void onClick(View v) {
// TODO Auto-generated method stub
//將轉換過後的灰度圖顯示出來
imageView2.setImageBitmap(convertGreyImg(bitmap));
}
});
}
/**
* 將彩色圖轉換為灰度圖
* @param img 位圖
* @return 返回轉換好的位圖
*/
public Bitmap convertGreyImg(Bitmap img) {
int width = img.getWidth(); //獲取位圖的寬
int height = img.getHeight(); //獲取位圖的高
int []pixels = new int[width * height]; //通過位圖的大小創建像素點數組
img.getPixels(pixels, 0, width, 0, 0, width, height);
int alpha = 0xFF << 24;
for(int i = 0; i < height; i++) {
for(int j = 0; j < width; j++) {
int grey = pixels[width * i + j];
int red = ((grey & 0x00FF0000 ) >> 16);
int green = ((grey & 0x0000FF00) >> 8);
int blue = (grey & 0x000000FF);
grey = (int)((float) red * 0.3 + (float)green * 0.59 + (float)blue * 0.11);
grey = alpha | (grey << 16) | (grey << 8) | grey;
pixels[width * i + j] = grey;
}
}
Bitmap result = Bitmap.createBitmap(width, height, Config.RGB_565);
result.setPixels(pixels, 0, width, 0, 0, width, height);
return result;
}
}
布局文件:
[html]
<LinearLayout xmlns:android="http://schemas.android.com/apk/res/android"
xmlns:tools="http://schemas.android.com/tools"
android:id="@+id/LinearLayout1"
android:layout_width="match_parent"
android:layout_height="match_parent"
android:orientation="vertical" >
<ImageView
android:id="@+id/imageView1"
android:layout_width="wrap_content"
android:layout_height="wrap_content"
android:layout_gravity="center_horizontal"
/>
<Button
android:id="@+id/rgb2greybtn"
android:layout_width="wrap_content"
android:layout_height="wrap_content"
android:text="@string/rgb2greybtn"
android:layout_gravity="center_horizontal"/>
<ImageView
android:id="@+id/imageView2"
android:layout_width="wrap_content"
android:layout_height="wrap_content"
android:layout_gravity="center_horizontal"
/>"
</LinearLayout>
 Android Activity啟動模式之standard實例詳解
本文實例講述了Android Activity啟動模式之standard。分享給大家供大家參考,具體如下:Android的活動是通過任務Task來進行管理的,一個任務就是
 Adapter類型控件之Adapter(數據適配器)
(一)概述Adapter是作為連接數據跟View之間橋梁的,你可以創建一個View來使用Adapter來對數據直接進行填充;(二)Adapter(適配器)的使用先來看看他
 BLE藍牙在Android開發中的應用
最近一段時間在寫支持BLE藍牙的Android應用。是時候總結一下了。1、什麼是BLE。(總得先知道BLE是什麼吧~~~)Bluetooth Low Energy(低功耗
 進程的啟動過程分析
1.前言分析完Zygote和SystemServer的啟動過程後,接著我們來分析Android進程的啟動過程。前面一篇文章有提到Zygote是通過復制自身的方式來穿件一個