編輯:關於Android編程
從網上找了一圈 大致有兩種方法
方法一:
Java代碼
<TabHost xmlns:android=”http://schemas.android.com/apk/res/android”
android:id=”@android:id/tabhost” android:layout_width=”fill_parent”
android:layout_height=”fill_parent”>
<LinearLayout android:orientation=”vertical”
android:layout_width=”fill_parent” android:layout_height=”fill_parent”>
<FrameLayout android:id=”@android:id/tabcontent”
android:layout_width=”fill_parent”
android:layout_height=”match_parent”
android:layout_weight=”1″ >
</FrameLayout>
<TabWidget android:id=”@android:id/tabs”
android:layout_width=”fill_parent”
android:layout_height=”wrap_content” />
</LinearLayout>
</TabHost>
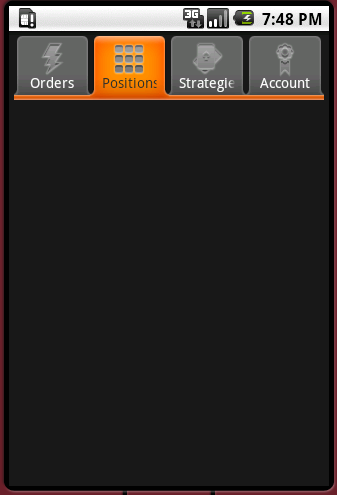
1、tabcontent和tabs交換位置
2、tabcontent的android:layout_weight=”1″
方法二:
Java代碼
<?xml version=”1.0″ encoding=”utf-8″?>
<LinearLayout
xmlns:android=”http://schemas.android.com/apk/res/android”
android:orientation=”vertical”
android:layout_width=”fill_parent”
android:layout_height=”fill_parent”>
<TabHost
android:id=”@+id/tabhost”
android:layout_width=”fill_parent”
android:layout_height=”fill_parent”>
<FrameLayout
android:id=”@android:id/tabcontent”
android:layout_width=”fill_parent”
android:layout_height=”fill_parent”
android:paddingBottom=”62px”>
</FrameLayout>
<RelativeLayout
android:layout_width=”fill_parent”
android:layout_height=”fill_parent”>
<TabWidget
android:id=”@android:id/tabs”
android:layout_alignParentBottom=”true”
android:layout_width=”fill_parent”
android:layout_height=”60px” />
</RelativeLayout>
</TabHost>
</LinearLayout>
1、tabcontent和tabs交換位置
2、將tabcontent放到一個relativeLayout中,然後加上這句android:layout_alignParentBottom=”true”
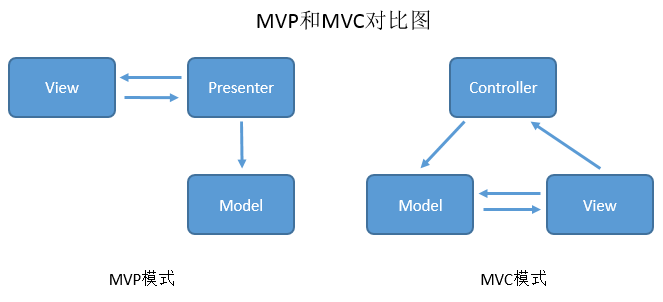
 安卓實踐開發之MVP一步步實現到高級封裝
在上家干了快2年辭職後在家休息了快一個月了,說實在的不上班的感覺爽(睡覺睡到自然醒,游戲玩到手抽筋)。哈哈,又是快到一年過中秋的時候了,好久沒有更新博客了,今天順便撸一篇
 Android仿Win8界面開發
本文將要模仿Win8界面的一個設計,一個一個的方塊。方法很簡單。這裡自己把圖片改改就可以成為自己想要的界面了。1、首先來看看自定義的MyImageView:package
 Android App中使用ViewPager實現滑動分頁的要點解析
以前如果要做 Tab 分頁的話,必須要用一個很難用的 TabActivity,而且做出來的效果很差,彈性也很小忘了從什麼時候開始,Google release 了 Vie
 AsyncTask 流程解析
為什麼要使用異步任務?Android 單線程模型,多線程的操作系統耗時操作放在非主線程中運行AsyncTask 為何而生?子線程中更新UI封裝簡化異步操作構建AsyncT