編輯:關於Android編程
今天沒事自己寫了個UICollectionView也就是九宮格的demo,遇到幾個小問題,雖然都很快解決了,但是這裡還是把它記錄下來,以後方便查閱。
(UICollectionView 一下用九宮格代稱)廢話不多說了,直接開始。
首先,創建一個UICollectionView ,需要設置的幾個代理UICollectionViewDelegate,UICollectionViewDataSource,UICollectionViewDelegateFlowLayout。九宮格 跟UITableView類似,這裡只是實現最簡單的代理方法。
- (UICollectionView *)collectionView
{
    if (_collectionView == nil) {

        UICollectionViewFlowLayout *flowLayout = [[UICollectionViewFlowLayout alloc]init];

        _collectionView = [[UICollectionView alloc]initWithFrame:self.view.frame collectionViewLayout:flowLayout];
        _collectionView.delegate = self;
        _collectionView.dataSource = self;
        [_collectionView registerClass:[CollectionViewCell class] forCellWithReuseIdentifier:CellIdentifier];

        _collectionView.backgroundColor = [UIColor grayColor];
    }

    return _collectionView;
}
其中_collectionView 是我創建的九宮格,CollectionViewCell 是我創建的自定義Cell,這個下面再講。
上面我就碰到了了一個小問題,其實也是我自己不細心的原因,但是也是容易出錯的地方:
UICollectionViewFlowLayout *flowLayout = [[UICollectionViewFlowLayout alloc]init];

 _collectionView = [[UICollectionView alloc]initWithFrame:self.view.frame collectionViewLayout:flowLayout];
上面的UICollectionViewFlowLayout ,這個類是九宮格用來實現自動布局的,注意千萬不要寫錯,我就因為寫錯,寫成了
UICollectionViewLayout (這個類我是直接點擊去九宮格的初始化方法裡面看到的)導致了九宮格顯示不出來,其他地方也沒有錯,
調了好幾遍,最後終於發現是這個類寫錯了,UICollectionViewFlowLayout 是UICollectionViewLayout 的子類。
好了,一個問題過去了。
在實現九宮格的代理方法之前,先展示一下 需要的數據
@property (nonatomic, copy) NSMutableArray *dataSourceArray;
//宏是完全替換
#define CellWidthSpace   20
#define CellWidth       (kScreenWidth - (5 * CellWidthSpace))/4
#define CellLineSpace   10

self.dataSourceArray = [NSMutableArray arrayWithArray:@[@"image1.png",@"image2.png",@"image3.png",@"image4.png",@"image5.png",@"image4.png",@"image3.png",@"image2.png",@"image1.png"]];
dataSourceArray 是九宮格的數據,CellWidthSpace 是每行Cell之間的間距,CellLineSpace 是每列Cell之間的間距,這個
都是自己定義的。 kScreenWidth 是整個屏幕的寬度,重點是CellWidth, 我要顯示4列的九宮格,間距需要5個,所以就是 屏寬度
減去5個空隙 後再除以4.就得到了每個Cell的 的寬度。
#pragma mark UICollectionViewDelegateFlowLayout
//設置每個Cell 的寬高
- (CGSize)collectionView:(UICollectionView *)collectionView  layout:(nonnull UICollectionViewLayout *)collectionViewLayout sizeForItemAtIndexPath:(nonnull NSIndexPath *)indexPath
{
    return CGSizeMake(CellWidth, CellWidth);
}
//設置Cell 之間的間距 (上,左,下,右)
- (UIEdgeInsets)collectionView:(UICollectionView *)collectionView layout:(UICollectionViewLayout *)collectionViewLayout insetForSectionAtIndex:(NSInteger)section
{
    return UIEdgeInsetsMake(CellLineSpace, CellWidthSpace, CellLineSpace, CellWidthSpace);
}

#pragma mark UICollectionViewDataSource
//設置九宮格Cell 的個數
- (NSInteger)collectionView:(UICollectionView *)collectionView numberOfItemsInSection:(NSInteger)section
{
    return self.dataSourceArray.count;
}
//設置Cell
- (UICollectionViewCell *)collectionView:(UICollectionView *)collectionView cellForItemAtIndexPath:(NSIndexPath *)indexPath
{
    CollectionViewCell *cell = [collectionView dequeueReusableCellWithReuseIdentifier:CellIdentifier forIndexPath:indexPath];
    cell.imageName = self.dataSourceArray[indexPath.row];
    cell.backgroundColor = [UIColor whiteColor];

    return cell;
}

#pragma mark UICollectionViewDelegate
//設置點擊 Cell的點擊事件
- (void)collectionView:(UICollectionView *)collectionView didSelectItemAtIndexPath:(NSIndexPath *)indexPath
{
    [collectionView deselectItemAtIndexPath:indexPath animated:YES];//取消選中

    [self alertView:[NSString stringWithFormat:@"點擊的是%ld",indexPath.row]];
}
//這個不是必須的方法 是Cell 將要顯示
- (void)collectionView:(UICollectionView *)collectionView willDisplayCell:(UICollectionViewCell *)cell forItemAtIndexPath:(NSIndexPath *)indexPath
{
    cell.layer.transform = CATransform3DMakeScale(0.3, 0.3, 1);//縮放比例
    [UIView animateWithDuration:0.8 animations:^{
        cell.layer.transform = CATransform3DMakeScale(1, 1, 1);//還原為1
    }];	  }
#pragma mark UIAlertView
- (void)alertView:(NSString *)message
{
    UIAlertView *alert = [[UIAlertView alloc]initWithTitle:@"提示" message:message delegate:self cancelButtonTitle:@"取消" otherButtonTitles:@"確定", nil];

    [alert show];
}
上面就是九宮格的代理方法(沒有列全,只是簡單實現了UICollectionView),上面的方法 看注釋。
重點是設置Cell的方法,我是使用了自定義Cell,這裡就會顯示出UICollectionView 與 UITableview 的不同.
首先,UICollectionView 與UITableView 都有類似的
[collectionView dequeueReusableCellWithReuseIdentifier:CellIdentifier forIndexPath:indexPath];這個是 Cell 的重用機制。UITableView 需要判斷Cell是否 為空
if (cell == nil) {
        cell = [[UITableViewCell alloc]initWithStyle:UITableViewCellStyleDefault reuseIdentifier:cellIdentifier];
    }
如果cell =nil 裡面就可以使用 自定義 UITableViewCell 這裡不再說了,但是UICollectionView 不需要判斷Cell 是否為nil,可以使用系統
的UICollectionViewCell 也可以使用自定義的UICollectionViewCell,我們一般用的就是自定義的Cell .
- (UICollectionViewCell *)collectionView:(UICollectionView *)collectionView cellForItemAtIndexPath:(NSIndexPath *)indexPath
{
    CollectionViewCell *cell = [collectionView dequeueReusableCellWithReuseIdentifier:CellIdentifier forIndexPath:indexPath];
    cell.imageName = self.dataSourceArray[indexPath.row];
    cell.backgroundColor = [UIColor whiteColor];

    return cell;
}
CollectionViewCell 就是我自定義的Cell ,imageName 是自定義Cell 裡面添加的圖片的名字。
我們先來看一下自定義UICollectionViewCell 的文件,我實現的Cell 很簡單就是添加了一個圖片(這個自定義Cell 可以根據需要
自行設置),
.h 文件 #import@interface CollectionViewCell : UICollectionViewCell @property (nonatomic, copy) NSString *imageName; @end .m 文件 #import "CollectionViewCell.h" @interface CollectionViewCell () @property (nonatomic, strong) UIImageView *imageView; @end @implementation CollectionViewCell - (instancetype)initWithFrame:(CGRect)frame { self = [super initWithFrame:frame]; if (self) { } return self; } - (void)setImageName:(NSString *)imageName { //注意cell裡面的控件 使用的位置 是相對於cell 的位置的 所以使用bounds _imageName = imageName; _imageView = [[UIImageView alloc]initWithFrame:self.bounds]; _imageView.image = [UIImage imageNamed:imageName]; [self addSubview:_imageView]; } @end
這裡返回cell 的方法好像只能寫
- (instancetype)initWithFrame:(CGRect)frame
我使用
- (instancetype)init
{
    self = [super init];
    if (self) {

    }
    return self;
}
但是沒有執行,好了。我們知道使用
- (instancetype)initWithFrame:(CGRect)frame
去初始化一個自定義的Cell 。
這裡我又連續碰到了2個問題,當然我上面粘貼出來出來的都是正確的。先說說第一個問題,我是在
- (instancetype)initWithFrame:(CGRect)frame
{
    self = [super initWithFrame:frame];
    if (self) {
        self.imageView = [[UIImageView alloc]initWithFrame:self.bounds];
        self.imageView.image = [UIImage imageNamed:self.imageName];
        [self addSubview:_imageView];
    }
    return self;
}
這裡面根據我傳遞過來的圖片名字設置圖片的,但是圖片並沒有顯示出來。不知道你注意到了這個沒有
- (UICollectionViewCell *)collectionView:(UICollectionView *)collectionView cellForItemAtIndexPath:(NSIndexPath *)indexPath
{
    CollectionViewCell *cell = [collectionView dequeueReusableCellWithReuseIdentifier:CellIdentifier forIndexPath:indexPath];
    cell.imageName = self.dataSourceArray[indexPath.row];
    cell.backgroundColor = [UIColor whiteColor];

    return cell;
}
這個自定義UICollectionViewCell 是直接使用重用機制,調用系統的Cell 實例方法,但是我們設置自定義Cell 的圖片信息,是在調用
過系統的重用的實例方法 ,之後設置的。因為我們沒有辦法向自定義UITableViewCell 方法一樣,實現我們自定義的實例方法。這就
導致了系統在調用我們 自定義UICollectionViewCell 的時候裡面的imageName 字符串還是nil ,所以圖片顯示不出來。這裡我使用了
重寫setter方法,當然重寫setter的時候可以傳遞過來一個模型的數據,來設置Cell 裡面的顯示的數據。
- (void)setImageName:(NSString *)imageName
{
    //注意cell裡面的控件 使用的位置 是相對於cell 的位置的 所以使用bounds
    _imageName = imageName;
    _imageView = [[UIImageView alloc]initWithFrame:self.bounds];
    _imageView.image = [UIImage imageNamed:imageName];
    [self addSubview:_imageView];
}
當我去設置 自定義Cell 裡面的屬性 iamgeName 的時候再去 添加圖片。這樣圖片就能顯示出來了。
最後一個問題,我在重寫setter方法的時候,設置cell的UIImageView frame的時候 ,出現的。顯示為UIImageView 的圖片位置
不正確,能顯示出來的只有2列,當我點擊cell 提示的彈窗,提示信息跟我點擊的cell圖片不對應,最開始我以為是cell 的間距問題,
調了兩次,發現還是調整不大。當我設置Cell 的背景顏色 為一個明顯的突出顏色的時候,就看出來問題的原因了。cell 的位置是正確
的,錯誤的是cell的UIImageView 的位置。
問題出現前:
_imageView = [[UIImageView alloc]initWithFrame:self.frame];問題解決:
_imageView = [[UIImageView alloc]initWithFrame:self.bounds];
問題的原因是,我設置UIImageView 的位置是 self.frame 這個位置是相對於整個UICollectionView 的,再添加自定義Cell 上面的時候,就不對了,那個位置是cell相對於父視圖 UICollectionView的,添加到Cell 上面的,UIImageView 的父視圖是Cell 而不是UICollectionView,所以設置圖片視圖UIImageView 的位置的時候應該用相對於Cell 位置的self.bounds .
以上,就是我在實現UICollectionView 的時候碰到的小問題,以及自定義UICollectionViewCell 。啦啦啦啦
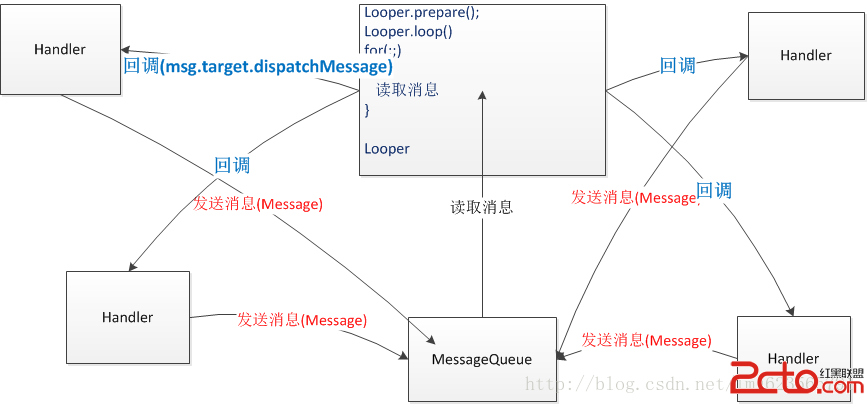
 Android 異步消息處理機制 讓你深入理解 Looper、Handler、Message三者關系
轉載請標明出處:http://blog.csdn.net/lmj623565791/article/details/38377229 ,本文出自【張鴻洋的博客】很多人面試
 Android之——系統進程與用戶進程分離
在上一篇博文《Android之——殺死用戶選中的進程優化》一文中,我向大家介紹了如何優化用戶的體驗,那麼這篇博文中,我將向大家介紹如何進行系統進程
 三大框架SSH成長路程(二)
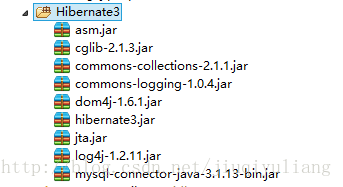
hibernate是非常典型的持久層框架,持久化的思想是非常值得我們學習和研究的。這篇博文,我們主要以實例的形式學習Hibernate,不深究Hibernate的思想和原
 Android實現ListView異步加載圖片的方法
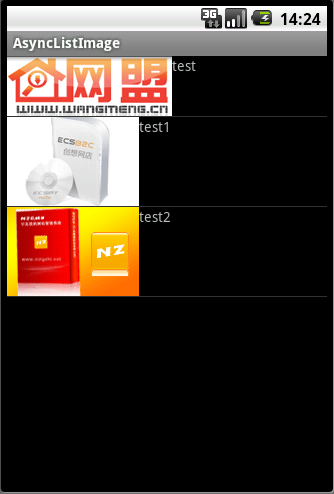
本文實例講述了Android實現ListView異步加載圖片的方法。分享給大家供大家參考。具體如下:ListView異步加載圖片是非常實用的方法,凡是是要通過網絡獲取圖片