前言

示例代碼地址:animated-vector-drawable
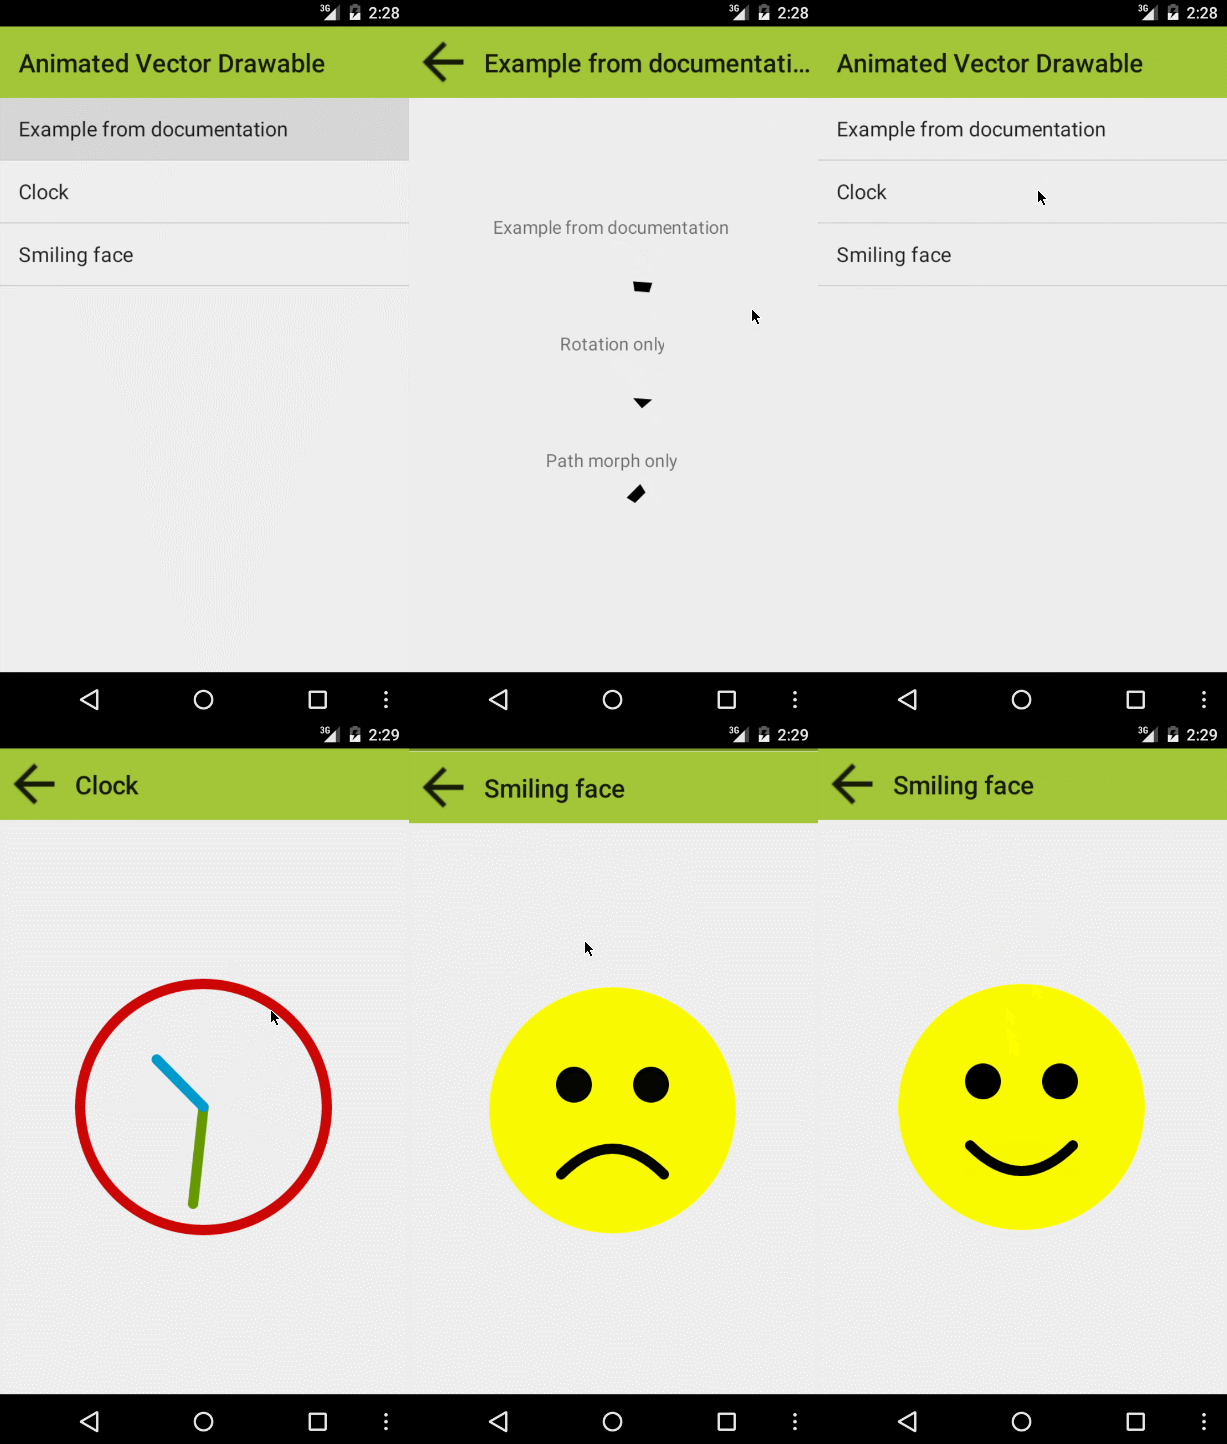
幾句代碼,幾個配置文件即可實現以上效果,流暢的體驗,無縫的動畫,贊~!
官方文檔:點擊傳送
VectorDrawable
在Android 5.0(API級別21)或以上的系統中,則可以定義矢量drawables,它可以在不失清晰度的情況下進行縮放。你僅僅需要需要一個矢量圖片的資源文件,而需要為每個屏幕密度設置一個資源文件。要創建一個矢量圖片,你需要定義形狀元素的細節在
XML文件中。
建議大家下載以上例子,我根據這個例子進行講解。
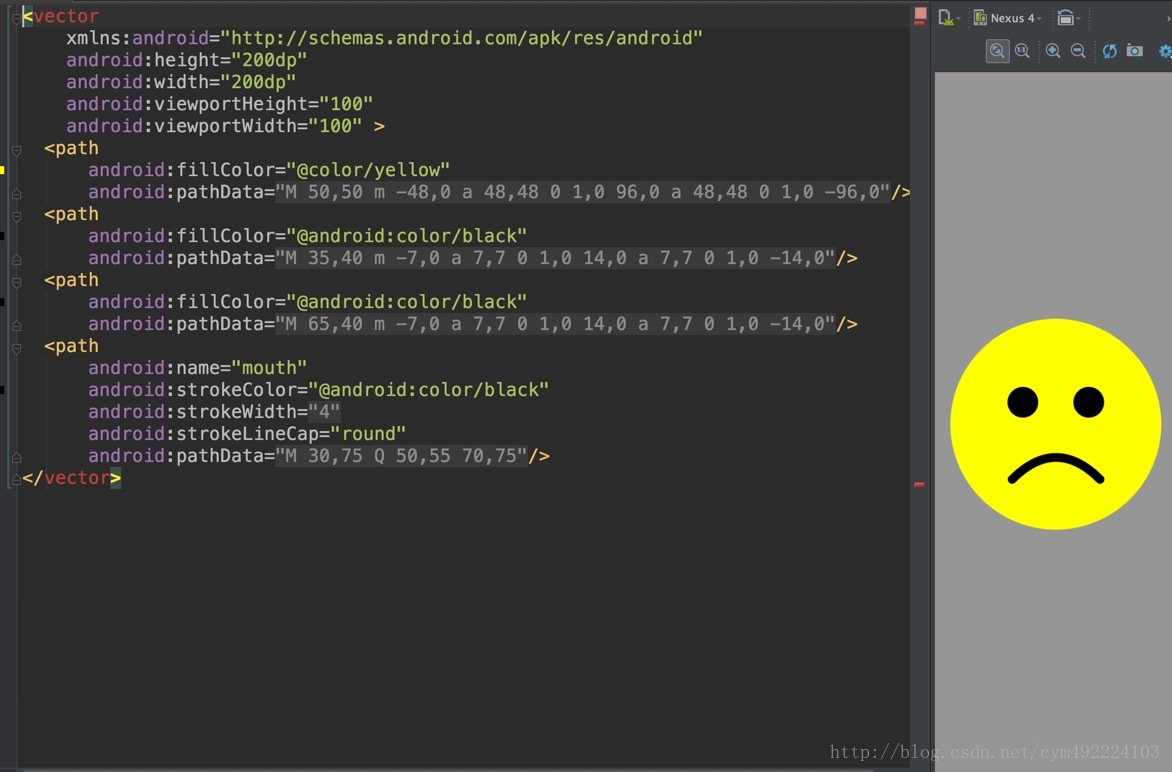
我們先看看笑臉的vector文件:

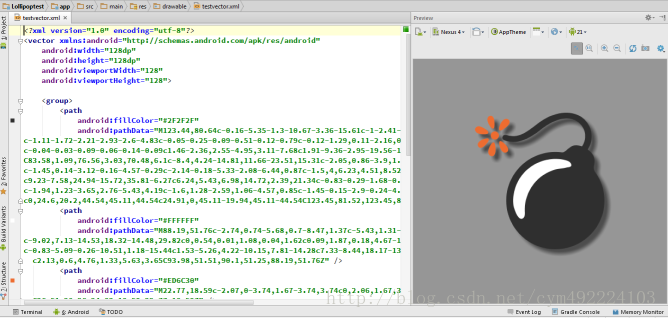
矢量圖像在Android中被表示為VectorDrawable對象。首先看到這個pathData肯定會很疑惑,更多有關pathData語法的信息,請參閱SVG Path的文檔參考。學好了PathData的語法,什麼都能繪制的出來~!我在github上面就看到一哥們畫了一個地雷有圖有真相哦。看上去雖然很復雜,但是越復雜的東西,卻往往是越靈活的東西

好了,我相信大家通過代碼和文檔已經簡單的解了vector標簽。接下來我們來看看如何給它添加動畫吧。
AnimatedVectorDrawable
AnimatedVectorDrawable類可以去創建一個矢量資源的動畫。
你通常在三個XML文件中定義矢量資源的動畫載體:
元素的矢量資源,在res/drawable/(文件夾)
元素的矢量資源動畫,在res/drawable/(文件夾)
< objectAnimator>元素的一個或多個對象動畫器,在res/anim/(文件夾)
矢量資源動畫能創建和元素屬性的動畫。元素定義了一組路徑或子組,並且元素定義了要被繪制的路徑。
當你想要創建動畫時去定義矢量資源,使用Android:name屬性分配一個唯一的名字給組和路徑,這樣你可以從你的動畫定義中查詢到它們。
接下來我就以旋轉的小三角為例:
看之前我們要思考一個問題,它是如何做到在邊旋轉的過程中變化形狀的。
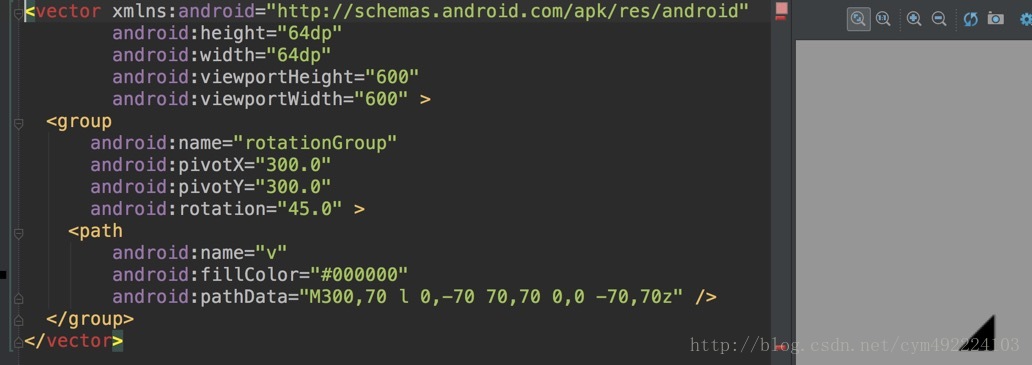
首先我們先看一下小三角的vector文件:

然後在看一下animated-vector文件:
-
- android:name="rotationGroup"
- android:animation="@anim/rotation"/>
- android:name="v"
- android:animation="@anim/path_morph"/>
從上面代碼我們可以看出配置了兩個動畫,一個是旋轉動畫一個是變化形狀的動畫。
旋轉動畫:
- android:duration="6000"
- android:propertyName="rotation"
- android:valueFrom="0"
- android:valueTo="360"/>
變化形狀動畫:
- android:duration="3000"
- android:propertyName="pathData"
- android:valueFrom="M300,70l0,-7070,700,0-70,70z"
- android:valueTo="M300,70l0,-7070,00,140-70,0z"
- android:valueType="pathType"/>
最後我們再來看下它是如何配置到layout裡面的:
- xmlns:android="http://schemas.android.com/apk/res/android"
- xmlns:tools="http://schemas.android.com/tools"
- android:id="@+id/container"
- android:layout_width="wrap_content"
- android:layout_height="wrap_content"
- android:layout_gravity="center"
- android:paddingBottom="@dimen/activity_vertical_margin"
- android:paddingLeft="@dimen/activity_horizontal_margin"
- android:paddingRight="@dimen/activity_horizontal_margin"
- android:paddingTop="@dimen/activity_vertical_margin"
- android:gravity="center_horizontal"
- android:orientation="vertical"
- tools:context=".ExampleActivity">
- android:layout_width="wrap_content"
- android:layout_height="wrap_content"
- android:layout_margin="@dimen/margin"
- android:text="@string/example_from_documentation"
- android:drawableBottom="@drawable/avd"/>
- android:layout_width="wrap_content"
- android:layout_height="wrap_content"
- android:layout_margin="@dimen/margin"
- android:text="@string/rotation_only"
- android:drawableBottom="@drawable/avd_rotation_only"/>
- android:layout_width="wrap_content"
- android:layout_height="wrap_content"
- android:layout_margin="@dimen/margin"
- android:text="@string/path_morph_only"
- android:drawableBottom="@drawable/avd_path_morph_only"/>
3個TextView,我們只需要關注第一個TextView即可,因為其他都是一樣的配置。
配置了一個avb也就是上面貼的animated-vector文件。
最後看一下Activity的啟動動畫代碼:
- TextViewtextView=(TextView)view;
- for(finalDrawabledrawable:textView.getCompoundDrawables()){
- if(drawableinstanceofAnimatable){
- ((Animatable)drawable).start();
- }
- }
找到這個view 拿到他們Drawables對象start即可,容易吧,趕緊去試試吧~!

 矢量圖像在Android中被表示為VectorDrawable對象。首先看到這個pathData肯定會很疑惑,更多有關pathData語法的信息,請參閱SVG Path的文檔參考。學好了PathData的語法,什麼都能繪制的出來~!我在github上面就看到一哥們畫了一個地雷有圖有真相哦。看上去雖然很復雜,但是越復雜的東西,卻往往是越靈活的東西
 好了,我相信大家通過代碼和文檔已經簡單的解了vector標簽。接下來我們來看看如何給它添加動畫吧。

 Android的TCP和UDP傳輸 簡單程序
 Android編程實現調用系統分享功能示例
 Android中通過訪問本地相冊或者相機設置用戶頭像實例
 Android打造炫酷的電影票在線選座app在線選座功能