編輯:關於Android編程
今天我們來看一下一個內存洩漏檢測神器 leakcanary(https://github.com/square/leakcanary)
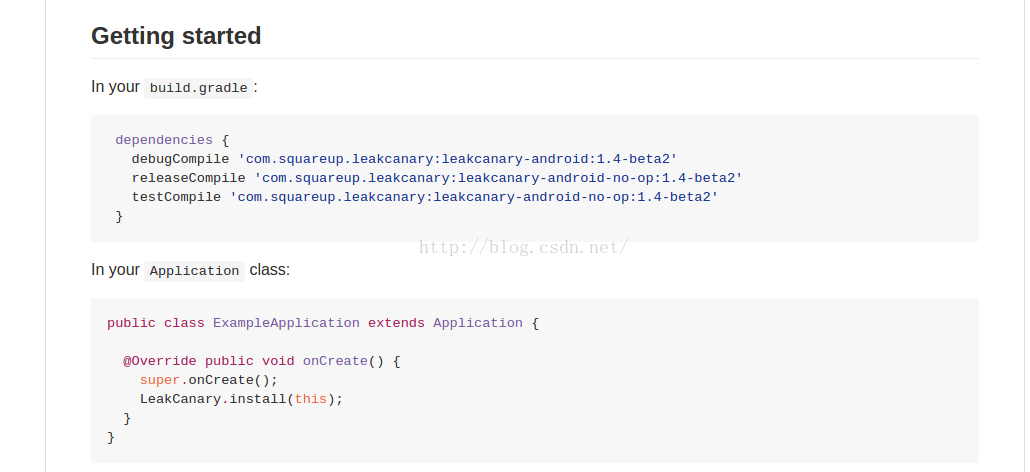
首先我們來看一下leakcanary的使用說明

就這麼多,只需要一行代碼,太簡單了,簡單得都有點懷疑它了。
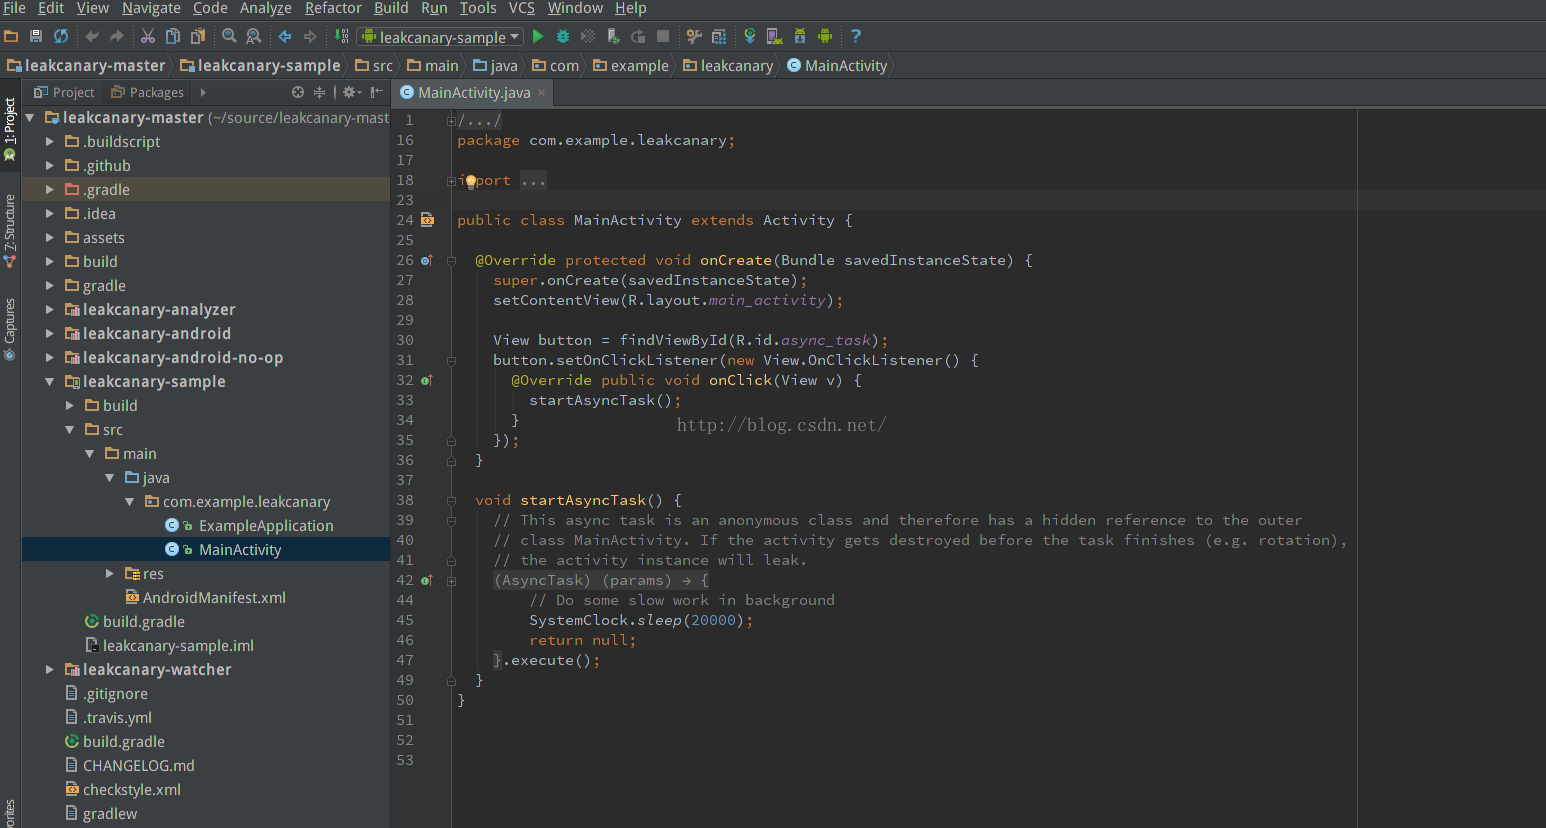
我們來看一下一個簡單的例子,也是它官方源碼中提供的一個例子,這個因為太小了我就截了個圖

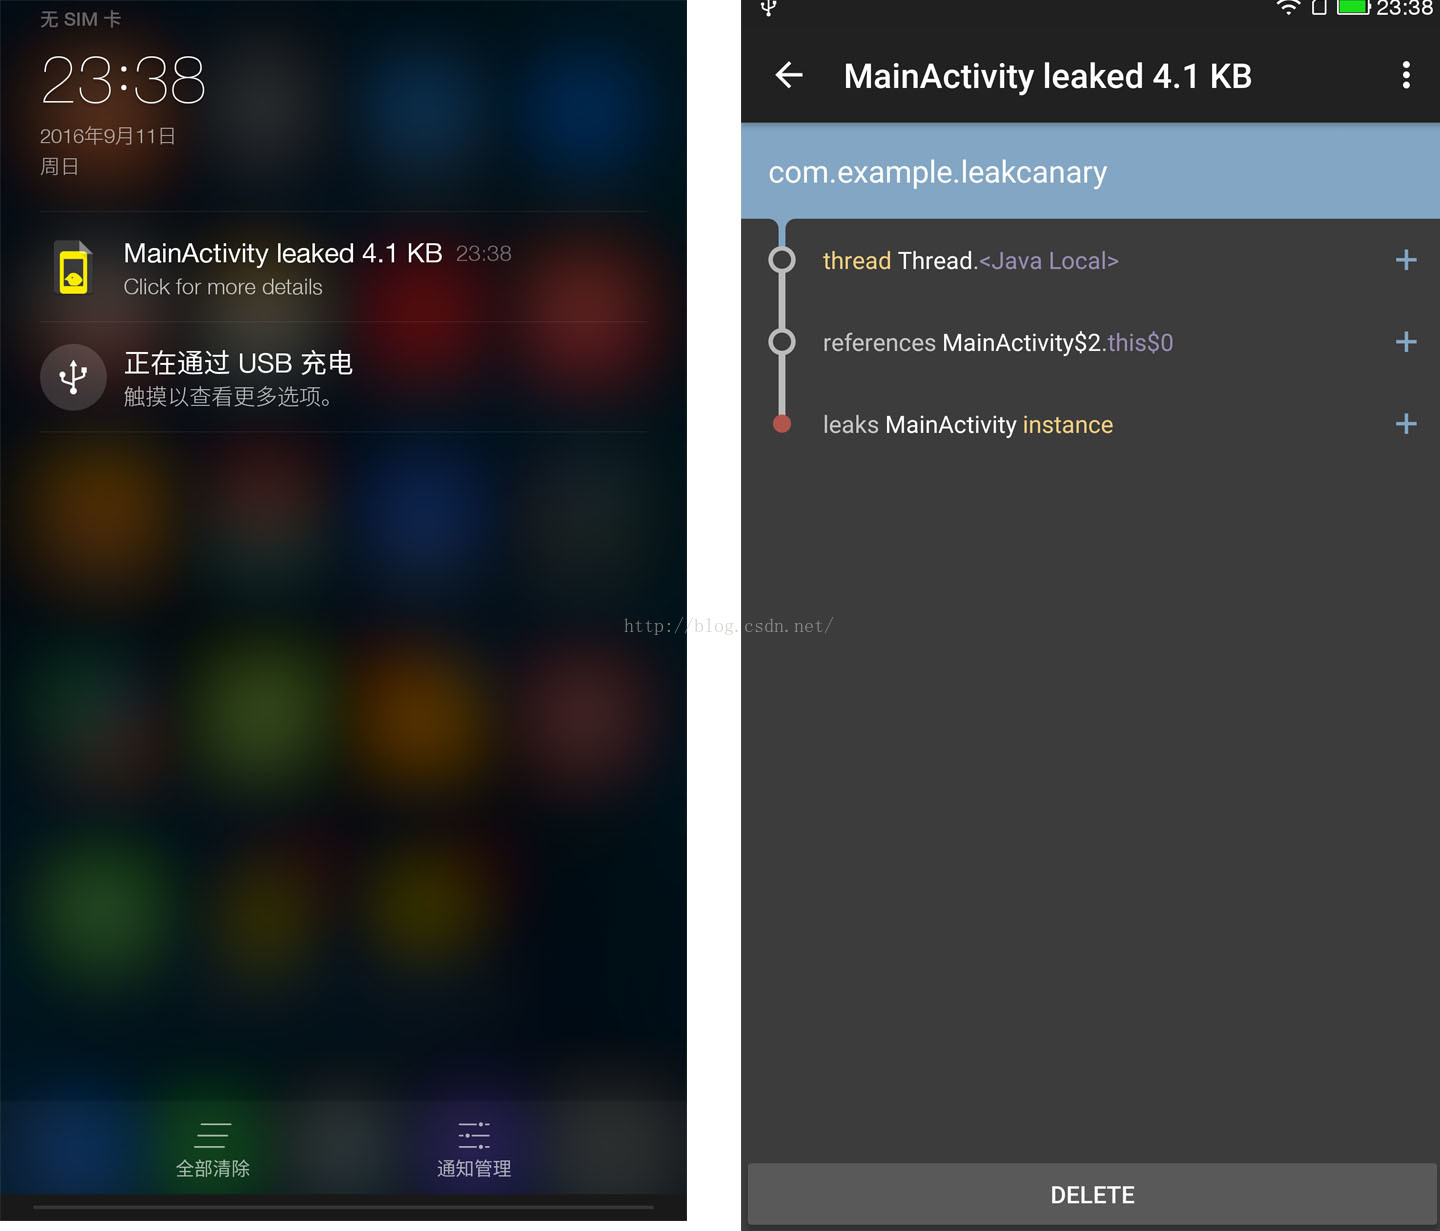
從例子中可以看到,AsyncTask執行了sleep操作,但是由於AsyncTask聲明為了一個內部匿名類,此類持有外部類的對象,導致用戶退出此Activity時,此Activity不能被gc回收,安裝此例子到手機,點擊START NEW ASYNCTASK,退出app,觀察手機,會彈出一個內存洩漏通知如下圖

很神奇吧,連洩漏的堆棧調用信息都能查到,比我們在前兩篇用到的工具方便多了
leakcanary很神奇,就像魔術一樣,我們很想知道它背後的運行機制,現在我們就來解析一下leakcanary的源碼。首先從我們應用Application入手,因為leakcanary在使用中只有一行代碼,我們就從這行代碼慢慢跟蹤一下源碼。
public class ExampleApplication extends Application {

  @Override public void onCreate() {
    super.onCreate();
    LeakCanary.install(this);
  }
}
  public static RefWatcher install(Application application) {
    return install(application, DisplayLeakService.class,
        AndroidExcludedRefs.createAppDefaults().build());
  }
  /**
   * Creates a {@link RefWatcher} that reports results to the provided service, and starts watching
   * activity references (on ICS+).
   */
  public static RefWatcher install(Application application,
                                   Class listenerServiceClass,
                                   ExcludedRefs excludedRefs) {
    if (isInAnalyzerProcess(application)) {
      return RefWatcher.DISABLED;
    }
    enableDisplayLeakActivity(application);
    //此Listener很重要,在後面會扮演重要角色
    HeapDump.Listener heapDumpListener =
            new ServiceHeapDumpListener(application, listenerServiceClass);
    //從名字我們就可以看出它是監視內存洩漏對象的
    RefWatcher refWatcher = androidWatcher(application, heapDumpListener, excludedRefs);
    //
    ActivityRefWatcher.installOnIcsPlus(application, refWatcher);
    return refWatcher;
  }
  public static void installOnIcsPlus(Application application, RefWatcher refWatcher) {
    if (SDK_INT < ICE_CREAM_SANDWICH) {
      // If you need to support Android < ICS, override onDestroy() in your base activity.
      return;
    }
    ActivityRefWatcher activityRefWatcher = new ActivityRefWatcher(application, refWatcher);
    activityRefWatcher.watchActivities();
  }
ActivityRefWtacher提供了一個方法 watchActivitys()
  public void watchActivities() {
    // Make sure you don't get installed twice.
    stopWatchingActivities();
    application.registerActivityLifecycleCallbacks(lifecycleCallbacks);
  }
  private final Application.ActivityLifecycleCallbacks lifecycleCallbacks =
      new Application.ActivityLifecycleCallbacks() {
        @Override public void onActivityCreated(Activity activity, Bundle savedInstanceState) {
        }

        @Override public void onActivityStarted(Activity activity) {
        }

        @Override public void onActivityResumed(Activity activity) {
        }

        @Override public void onActivityPaused(Activity activity) {
        }

        @Override public void onActivityStopped(Activity activity) {
        }

        @Override public void onActivitySaveInstanceState(Activity activity, Bundle outState) {
        }

        @Override public void onActivityDestroyed(Activity activity) {
          ActivityRefWatcher.this.onActivityDestroyed(activity);
        }
      };
  void onActivityDestroyed(Activity activity) {
    refWatcher.watch(activity);
  }
 public void watch(Object watchedReference, String referenceName) {
    checkNotNull(watchedReference, "watchedReference");
    checkNotNull(referenceName, "referenceName");
    if (debuggerControl.isDebuggerAttached()) {
      return;
    }
    final long watchStartNanoTime = System.nanoTime();
    //首先生成了一個id,此id是用來唯一標識這個檢測對象的
    String key = UUID.randomUUID().toString();
    //將id存起來
    retainedKeys.add(key);
    //KeyWeakReference集成自 WeakReference(弱引用),WeakReference使用來跟蹤這個對象的,
    //弱引用大家都明白,它不會影響gc回收,構造WeakReference時,可以傳入一個ReferenceQueue,
    //這個ReferenceQueue的主要作用是當對象不可達時也就是可以被gc回收時,對象所對應的WeakReference就會被放入
    //ReferenceQueue中,只要檢測ReferenceQueue是否有我們的對象的WeakReference,就可以判斷對象是否可能洩漏
    final KeyedWeakReference reference =
        new KeyedWeakReference(watchedReference, key, referenceName, queue);

    watchExecutor.execute(new Runnable() {
      @Override public void run() {
        //此方法就是為了確認對象是否可回收
        ensureGone(reference, watchStartNanoTime);
      }
    });
  }
void ensureGone(KeyedWeakReference reference, long watchStartNanoTime) {
    long gcStartNanoTime = System.nanoTime();

    long watchDurationMs = NANOSECONDS.toMillis(gcStartNanoTime - watchStartNanoTime);
    //此方法是循環ReferenceQueue,如果對象的ReferenceQueue在裡面,就從retainedKeys中移除對象的key,
    //因為此對象已經可回收,是安全的
    removeWeaklyReachableReferences();
    //判斷我們要檢測的reference是否還在retainedKeys中,如果不在說明已經被移除了,也就是可以被gc回收了
    if (gone(reference) || debuggerControl.isDebuggerAttached()) {
      return;
    }
    //執行垃圾回收,但是只是建議,並不是一定會執行
    gcTrigger.runGc();
    //再次從retainedKeys移除安全的key
    removeWeaklyReachableReferences();
    //如果此對象的WeakReference還是不能被回收,那麼此對象就有可能洩漏了,只是可能,因為gc在上一步可能沒有運行
    if (!gone(reference)) {
      long startDumpHeap = System.nanoTime();
      long gcDurationMs = NANOSECONDS.toMillis(startDumpHeap - gcStartNanoTime);
      //此方法獲得內存Heap的hprof文件,LeakCanary之所以這麼好用,主要是在這裡,它分析了hprof文件,來確認內存洩漏,
      //我們在上一篇也分析過hprof文件,原來LeakCanary也是分析這個文件,只是不需要人工分析了,LeakCanary用了一個自己
      //的開源hprof分析庫haha(https://github.com/square/haha)此庫是基於google的perflib.
      File heapDumpFile = heapDumper.dumpHeap();

      if (heapDumpFile == HeapDumper.NO_DUMP) {
        // Could not dump the heap, abort.
        return;
      }
      long heapDumpDurationMs = NANOSECONDS.toMillis(System.nanoTime() - startDumpHeap);
      //heapdumpListener主要就是啟動服務分析hprof文件
      heapdumpListener.analyze(
          new HeapDump(heapDumpFile, reference.key, reference.name, excludedRefs, watchDurationMs,
              gcDurationMs, heapDumpDurationMs));
    }
  }
  @Override public void analyze(HeapDump heapDump) {
    checkNotNull(heapDump, "heapDump");
    HeapAnalyzerService.runAnalysis(context, heapDump, listenerServiceClass);
  }
  public static void runAnalysis(Context context, HeapDump heapDump,
      Class listenerServiceClass) {
    Intent intent = new Intent(context, HeapAnalyzerService.class);
    intent.putExtra(LISTENER_CLASS_EXTRA, listenerServiceClass.getName());
    intent.putExtra(HEAPDUMP_EXTRA, heapDump);
    context.startService(intent);
  }
  @Override protected void onHandleIntent(Intent intent) {
    if (intent == null) {
      CanaryLog.d("HeapAnalyzerService received a null intent, ignoring.");
      return;
    }
    String listenerClassName = intent.getStringExtra(LISTENER_CLASS_EXTRA);
    HeapDump heapDump = (HeapDump) intent.getSerializableExtra(HEAPDUMP_EXTRA);

    //分析hprof的核心類
    HeapAnalyzer heapAnalyzer = new HeapAnalyzer(heapDump.excludedRefs);
    //檢查我們的對象是否內存洩漏
    AnalysisResult result = heapAnalyzer.checkForLeak(heapDump.heapDumpFile, heapDump.referenceKey);
    AbstractAnalysisResultService.sendResultToListener(this, listenerClassName, heapDump, result);
  }
進入checkForLeak方法
 public AnalysisResult checkForLeak(File heapDumpFile, String referenceKey) {
    long analysisStartNanoTime = System.nanoTime();

    if (!heapDumpFile.exists()) {
      Exception exception = new IllegalArgumentException("File does not exist: " + heapDumpFile);
      return failure(exception, since(analysisStartNanoTime));
    }

    try {
      HprofBuffer buffer = new MemoryMappedFileBuffer(heapDumpFile);
      //解析器解析文件
      HprofParser parser = new HprofParser(buffer);
      //解析過程,是基於google的perflib庫,根據hprof的格式進行解析,這裡就不展開看了
      Snapshot snapshot = parser.parse();
      //分析結果進行去重
      deduplicateGcRoots(snapshot);
      //此方法就是根據我們需要檢測的類的key,查詢解析結果中是否有我們的對象,獲取解析結果中我們檢測的對象
      Instance leakingRef = findLeakingReference(referenceKey, snapshot);
      //此對象不存在表示已經被gc清除了,不存在洩露因此返回無洩漏
      // False alarm, weak reference was cleared in between key check and heap dump.
      if (leakingRef == null) {
        return noLeak(since(analysisStartNanoTime));
      }
      //此對象存在也不能也不能確認它內存洩漏了,要檢測此對象的gc root
      return findLeakTrace(analysisStartNanoTime, snapshot, leakingRef);
    } catch (Throwable e) {
      return failure(e, since(analysisStartNanoTime));
    }
  }
  private Instance findLeakingReference(String key, Snapshot snapshot) {
    //因為需要檢測的類都構造了一個KeyedWeakReference,因此先找到KeyedWeakReference,就可以找到我們的對象
    ClassObj refClass = snapshot.findClass(KeyedWeakReference.class.getName());
    List keysFound = new ArrayList<>();
    //循環所有KeyedWeakReference實例
    for (Instance instance : refClass.getInstancesList()) {
      List values = classInstanceValues(instance);
      //找到KeyedWeakReference裡面的key值,此值在我們前面傳入的對象唯一標示
      String keyCandidate = asString(fieldValue(values, "key"));
      //當key值相等時就表示是我們的檢測對象
      if (keyCandidate.equals(key)) {
        return fieldValue(values, "referent");
      }
      keysFound.add(keyCandidate);
    }
    throw new IllegalStateException(
        "Could not find weak reference with key " + key + " in " + keysFound);
  }
最後一步,也是最核心的方法,確認是否內存洩漏,和我們手動分析hprof的方法幾乎相同
  private AnalysisResult findLeakTrace(long analysisStartNanoTime, Snapshot snapshot,
      Instance leakingRef) {

    //這兩行代碼是判斷內存洩露的關鍵,我們在上篇中分析hprof文件,判斷內存洩漏
    //判斷的依據是展開調用到gc root,所謂gc root,就是不能被gc回收的對象,
    //gc root有很多類型,我們只要關注兩種類型1.此對象是靜態 2.此對象被其他線程使用,並且其他線程正在運行,沒有結束
    //pathFinder.findPath方法中也就是判斷這兩種情況
    ShortestPathFinder pathFinder = new ShortestPathFinder(excludedRefs);
    ShortestPathFinder.Result result = pathFinder.findPath(snapshot, leakingRef);
    // 找不到引起內存洩漏的gc root,就表示此對象未洩漏
    // False alarm, no strong reference path to GC Roots.
    if (result.leakingNode == null) {
      return noLeak(since(analysisStartNanoTime));
    }

    //生成洩漏的調用棧,為了在通知欄中顯示
    LeakTrace leakTrace = buildLeakTrace(result.leakingNode);

    String className = leakingRef.getClassObj().getClassName();

    // Side effect: computes retained size.
    snapshot.computeDominators();

    Instance leakingInstance = result.leakingNode.instance;

    //計算洩漏的空間大小
    long retainedSize = leakingInstance.getTotalRetainedSize();

    retainedSize += computeIgnoredBitmapRetainedSize(snapshot, leakingInstance);

    return leakDetected(result.excludingKnownLeaks, className, leakTrace, retainedSize,
        since(analysisStartNanoTime));
  }
 Android框架學習筆記01Okhttp框架
Google在Android6.0之後就刪除了HttpClient相關的API,使用HttpUrlConnection代替,在Android開發中,網絡訪問是必不可少的,
 一個輕量級的Android網絡請求框架
最近有空在看《App研發錄》一書,良心之作。書中第一部分第二章節講了不少關於網絡底層封裝的知識,看後覺得學到了不少干貨。索性自己也動手完成了一個非常輕量級的網絡請求框架,
 AsyncTask 流程解析
為什麼要使用異步任務?Android 單線程模型,多線程的操作系統耗時操作放在非主線程中運行AsyncTask 為何而生?子線程中更新UI封裝簡化異步操作構建AsyncT
 Android 02 Started Service--之被啟動的服務
正文 1 Started Service介紹 Started Service,即被啟動的服務。它是2種常見服務之一,另一種是Bo