編輯:關於Android編程
現在很多app都用到了頭像的功能,我的項目中也用到了。
頭像上傳分幾步:
1.獲取頭像
2.剪裁頭像
3.文件上傳
4.服務器的接受保存
首先第一步,無非就是兩種方式
1,拍照
2,相冊選擇
之前的博客中有現到,不重復
第二步,裁剪頭像
這一步我用的時鴻洋大神的東西,是個自定的控件,不過我對其中代碼進行了一點點的修改,使之更適合自己的項目,裡面原理就是監聽onTouchEvent來對縮放,雙擊事件進行相應的處理,裁剪就是根據大小,創建一個新的bitmap,當然說起來挺簡單,如果沒有別人的代碼可以借鑒參考,估計有的搞了
裁剪圖片好像還可以調用Android自帶的裁剪功能,不過我沒用過,
第三步,上傳圖片,
上傳圖片不過也就是上傳文件,可以將文件轉化為byte數組然後進行base64轉碼後進行上傳,在服務器接收到後,將string解碼成byte數組,然後在轉化為文件。
當然上傳的方法有很多,肯定不止這一種 ,因為項目的Android和web接口都是我寫的所已我就這樣寫啦…誰讓自己的web技術有限呢,原來寫Android的時候一直說調用接口接口,原來自己寫了才知道,其實就是一個配置好servlet的java文件.⊙﹏⊙||
寫接口和寫Android差不過嘛,都是用Java寫的,本家嘛
對了文件上傳的時候如果從本地讀取,會需要讀取sd卡的權限,我在6.0的模擬器上測試的時候,一直有問題,找了半天才發現是因為,沒有申請權限,,,設立的權限不僅僅時AndroidManifest裡面的權限聲明,在6.0的系統中需要用代碼彈出對話框向用戶申請..
貼下請求代碼
    /**
     * 請求權限
     */
    public void getUserPar() {
//        Log.d("測試--授權信息", ContextCompat.checkSelfPermission(this,
//                Manifest.permission.WRITE_EXTERNAL_STORAGE) + "");
//        Log.d("測試--已授權", PackageManager.PERMISSION_GRANTED + "");
//        Log.d("測試--未授權", PackageManager.PERMISSION_DENIED + "");
        if (ContextCompat.checkSelfPermission(this,
                Manifest.permission.WRITE_EXTERNAL_STORAGE)
                == PackageManager.PERMISSION_GRANTED && ContextCompat.checkSelfPermission(this,
                Manifest.permission.READ_EXTERNAL_STORAGE)
                == PackageManager.PERMISSION_GRANTED) {
        } else {
            ActivityCompat.requestPermissions(this,
                    new String[]{Manifest.permission.WRITE_EXTERNAL_STORAGE, Manifest.permission.READ_EXTERNAL_STORAGE},
                    1);
        }
    }

    @Override
    public void onRequestPermissionsResult(int requestCode, String permissions[], int[] grantResults) {
        switch (requestCode) {
            case 1: {
                if (grantResults.length > 0 && grantResults[0] == PackageManager.PERMISSION_GRANTED) {
                    L.d("同意");
                } else {
                    L.d("拒絕");
                }
                return;
            }
        }
    }
還有文件和數組相互轉化的代碼
    /**
     * 將file文件轉化為byte數組
     *
     * @param filePath
     * @return
     */
    public static byte[] getBytes(String filePath) {
        byte[] buffer = null;
        try {
            File file = new File(filePath);
            FileInputStream fis = new FileInputStream(file);
            ByteArrayOutputStream bos = new ByteArrayOutputStream(1000);
            byte[] b = new byte[1000];
            int n;
            while ((n = fis.read(b)) != -1) {
                bos.write(b, 0, n);
            }
            fis.close();
            bos.close();
            buffer = bos.toByteArray();
        } catch (FileNotFoundException e) {
            e.printStackTrace();
        } catch (IOException e) {
            e.printStackTrace();
        }
        return buffer;
    }

    /**
     * 將byte數組轉化為file文件
     *
     * @param bfile
     * @param filePath
     * @param fileName
     */
    public static void getFile(byte[] bfile, String filePath, String fileName) {
        BufferedOutputStream bos = null;
        FileOutputStream fos = null;
        File file = null;
        try {
            File dir = new File(filePath);
            if (!dir.exists() && dir.isDirectory()) {// 判斷文件目錄是否存在
                dir.mkdirs();
            }
            file = new File(filePath + "\\" + fileName);
            fos = new FileOutputStream(file);
            bos = new BufferedOutputStream(fos);
            bos.write(bfile);
            bos.flush();
        } catch (Exception e) {
            e.printStackTrace();
        } finally {
            if (bos != null) {
                try {
                    bos.close();
                } catch (IOException e1) {
                    e1.printStackTrace();
                }
            }
            if (fos != null) {
                try {
                    fos.close();
                } catch (IOException e1) {
                    e1.printStackTrace();
                }
            }
        }
    }
還有base64轉碼的:
http://blog.csdn.net/w18756901575/article/details/51073847
嗯,好像只有這些,,沒了,,end
對了還有圓角,模糊,圖片壓縮,,,一起放上去吧

圓形圖片效果:
import android.content.Context;
import android.content.res.TypedArray;
import android.graphics.Bitmap;
import android.graphics.Bitmap.Config;
import android.graphics.BitmapFactory;
import android.graphics.Canvas;
import android.graphics.Paint;
import android.graphics.PorterDuff;
import android.graphics.PorterDuffXfermode;
import android.graphics.RectF;
import android.util.AttributeSet;
import android.util.TypedValue;
import android.widget.ImageView;

import com.yesun.league.R;
import com.yesun.league.code.utils.DimensUtils;


/**
 * 自定義View,實現圓角,圓形等效果
 *
 * @author zhy
 */
public class CustomImageView extends ImageView {

    /**
     * TYPE_CIRCLE / TYPE_ROUND
     */
    private int type;
    private static final int TYPE_CIRCLE = 0;
    private static final int TYPE_ROUND = 1;

    /**
     * 圖片
     */
    private Bitmap mSrc;

    /**
     * 圓角的大小
     */
    private int mRadius;

    /**
     * 控件的寬度
     */
    private int mWidth;
    /**
     * 控件的高度
     */
    private int mHeight;


    public CustomImageView(Context context, AttributeSet attrs) {
        this(context, attrs, 0);
    }

    public CustomImageView(Context context) {
        this(context, null);
    }

    /**
     * 初始化一些自定義的參數
     *
     * @param context
     * @param attrs
     * @param defStyle
     */
    public CustomImageView(Context context, AttributeSet attrs, int defStyle) {
        super(context, attrs, defStyle);


        TypedArray a = context.getTheme().obtainStyledAttributes(attrs,
                R.styleable.CustomImageView, defStyle, 0);

        int n = a.getIndexCount();
        for (int i = 0; i < n; i++) {
            int attr = a.getIndex(i);
            switch (attr) {
                case R.styleable.CustomImageView_src:
                    mSrc = BitmapFactory.decodeResource(getResources(),
                            a.getResourceId(attr, 0));
                    break;
                case R.styleable.CustomImageView_type:
                    type = a.getInt(attr, 0);// 默認為Circle
                    break;
                case R.styleable.CustomImageView_borderRadius:
                    mRadius = a.getDimensionPixelSize(attr, (int) TypedValue
                            .applyDimension(TypedValue.COMPLEX_UNIT_DIP, 10f,
                                    getResources().getDisplayMetrics()));// 默認為10DP
                    break;
            }
        }

        a.recycle();
    }

    @Override
    public void setImageBitmap(Bitmap bm) {
        super.setImageBitmap(bm);
        this.mSrc = bm;
        postInvalidate();
    }

    /**
     * 計算控件的高度和寬度
     */
    @Override
    protected void onMeasure(int widthMeasureSpec, int heightMeasureSpec) {
        super.onMeasure(widthMeasureSpec, heightMeasureSpec);
        /**
         * 設置寬度
         */
        int specMode = MeasureSpec.getMode(widthMeasureSpec);
        int specSize = MeasureSpec.getSize(widthMeasureSpec);

        if (specMode == MeasureSpec.EXACTLY)// match_parent , accurate
        {
            mWidth = specSize;
        } else {
            // 由圖片決定的寬
            int desireByImg = getPaddingLeft() + getPaddingRight()
                    + mSrc.getWidth();
            if (specMode == MeasureSpec.AT_MOST) {//wrap_content
                mWidth = Math.min(desireByImg, specSize);
            } else

                mWidth = desireByImg;
        }

        /***
         * 設置高度
         */

        specMode = MeasureSpec.getMode(heightMeasureSpec);
        specSize = MeasureSpec.getSize(heightMeasureSpec);
        if (specMode == MeasureSpec.EXACTLY) {// match_parent , accurate
            mHeight = specSize;
        } else {
            int desire = getPaddingTop() + getPaddingBottom()
                    + mSrc.getHeight();

            if (specMode == MeasureSpec.AT_MOST) {// wrap_content
                mHeight = Math.min(desire, specSize);
            } else
                mHeight = desire;
        }

        setMeasuredDimension(mWidth, mHeight);

    }

    /**
     * 繪制
     */
    @Override
    protected void onDraw(Canvas canvas) {
        switch (type) {
            // 如果是TYPE_CIRCLE繪制圓形
            case TYPE_CIRCLE:
                int min = Math.min(mWidth, mHeight);
                /**
                 * 長度如果不一致,按小的值進行壓縮
                 */
                mSrc = Bitmap.createScaledBitmap(mSrc, min, min, false);
                canvas.drawBitmap(createCircleImage(mSrc, min), 0, 0, null);

                //下面是繪制圓環的,不喜歡的可以不要
                Paint paint=new Paint();
                int centre = getWidth()/2; //獲取圓心的x坐標
                int radius = (int) (centre - DimensUtils.dp2px(getContext(),3)/2); //圓環的半徑
                paint.setColor(0x88ffffff); //設置圓環的顏色
                paint.setStyle(Paint.Style.STROKE); //設置空心
                paint.setStrokeWidth(DimensUtils.dp2px(getContext(),3)); //設置圓環的寬度
                paint.setAntiAlias(true);  //消除鋸齒
                canvas.drawCircle(centre, centre, radius, paint); //畫出圓環
                break;
            case TYPE_ROUND:

                mSrc = Bitmap.createScaledBitmap(mSrc, mWidth, mHeight, false);
                canvas.drawBitmap(createRoundConerImage(mSrc), 0, 0, null);
                break;
        }

    }

    /**
     * 根據原圖和變長繪制圓形圖片
     *
     * @param source
     * @param min
     * @return
     */
    private Bitmap createCircleImage(Bitmap source, int min) {
        final Paint paint = new Paint();
        paint.setAntiAlias(true);
        Bitmap target = Bitmap.createBitmap(min, min, Config.ARGB_8888);
        /**
         * 產生一個同樣大小的畫布
         */
        Canvas canvas = new Canvas(target);

        /**
         * 首先繪制圓形
         */
        canvas.drawCircle(min / 2, min / 2, min / 2, paint);
        /**
         * 使用SRC_IN,參考上面的說明
         */
        paint.setXfermode(new PorterDuffXfermode(PorterDuff.Mode.SRC_IN));//相交部分取後繪制上去的
//        paint.setXfermode(new PorterDuffXfermode(PorterDuff.Mode.DST_IN));//相交部分取
        /**
         * 繪制圖片
         */
        canvas.drawBitmap(source, 0, 0, paint);
        return target;
    }

    /**
     * 根據原圖添加圓角
     *
     * @param source
     * @return
     */
    private Bitmap createRoundConerImage(Bitmap source) {
        final Paint paint = new Paint();
        paint.setAntiAlias(true);
        Bitmap target = Bitmap.createBitmap(mWidth, mHeight, Config.ARGB_8888);
        Canvas canvas = new Canvas(target);
        RectF rect = new RectF(0, 0, source.getWidth(), source.getHeight());
        canvas.drawRoundRect(rect, mRadius, mRadius, paint);
        paint.setXfermode(new PorterDuffXfermode(PorterDuff.Mode.SRC_IN));
        canvas.drawBitmap(source, 0, 0, paint);
        return target;
    }
}
壓縮,模糊都在這個工具類中,自己看吧:
import android.annotation.TargetApi;
import android.content.Context;
import android.content.res.Resources;
import android.graphics.Bitmap;
import android.graphics.BitmapFactory;
import android.graphics.Canvas;
import android.graphics.PixelFormat;
import android.graphics.drawable.BitmapDrawable;
import android.graphics.drawable.Drawable;
import android.os.Build;
import android.renderscript.Allocation;
import android.renderscript.Element;
import android.renderscript.RenderScript;
import android.renderscript.ScriptIntrinsicBlur;

import java.io.ByteArrayInputStream;
import java.io.ByteArrayOutputStream;
import java.io.FileInputStream;
import java.io.IOException;

/**
 * Created by wkk on 2016/8/23.
 * <p>
 * 工具類
 */
public class BitmapUtils {

    //   compile 'com.yolanda.nohttp:nohttp:1.0.4'

    /**
     * 從本地讀取圖片
     *
     * @param path
     * @return
     */
    public static Bitmap getBitmapForPath(String path) {
        try {
            FileInputStream in = new FileInputStream(path);
            Bitmap bitmap = BitmapFactory.decodeStream(in);
            in.close();
            return bitmap;
        } catch (Exception e) {
        }
        return null;
    }


    /**
     * 獲取資源文件中的圖片
     *
     * @param context
     * @param resourcesId
     * @return
     */
    public static Drawable getDrawableFormResources(Context context, int resourcesId) {
        Resources resources = context.getResources();
        return new BitmapDrawable(resources, BitmapFactory.decodeResource(resources, resourcesId));
    }

    /**
     * 從資源文件中獲取bitmap對象
     *
     * @param context
     * @param resourcesId
     * @return
     */
    public static Bitmap getBitmapFromResources(Context context, int resourcesId) {
        return BitmapFactory.decodeResource(context.getResources(), resourcesId);
    }

    /**
     * bitmap轉byte數組
     *
     * @param bitmap
     * @return
     */
    public static byte[] getBitmapbyte(Bitmap bitmap) {
        ByteArrayOutputStream baos = new ByteArrayOutputStream();
        bitmap.compress(Bitmap.CompressFormat.PNG, 100, baos);
        byte[] datas = baos.toByteArray();
        try {
            baos.flush();
            baos.close();
        } catch (IOException e) {
            e.printStackTrace();
        }
        return datas;
    }

    /**
     * byte轉bitmap數組
     *
     * @param b
     * @return
     */
    public static Bitmap getBitmaoFrombyte(byte[] b) {
        return BitmapFactory.decodeByteArray(b, 0, b.length);
    }


    /**
     * 壓縮1
     *
     * @param srcPath
     * @return
     */
    public static Bitmap getimage(String srcPath) {
        BitmapFactory.Options newOpts = new BitmapFactory.Options();
        //開始讀入圖片,此時把options.inJustDecodeBounds 設回true了
        newOpts.inJustDecodeBounds = true;
        Bitmap bitmap = BitmapFactory.decodeFile(srcPath, newOpts);//此時返回bm為空

        newOpts.inJustDecodeBounds = false;
        int w = newOpts.outWidth;
        int h = newOpts.outHeight;
        //現在主流手機比較多是800*480分辨率,所以高和寬我們設置為
        float hh = 800f;//這裡設置高度為800f
        float ww = 480f;//這裡設置寬度為480f
        //縮放比。由於是固定比例縮放,只用高或者寬其中一個數據進行計算即可
        int be = 1;//be=1表示不縮放
        if (w > h && w > ww) {//如果寬度大的話根據寬度固定大小縮放
            be = (int) (newOpts.outWidth / ww);
        } else if (w < h && h > hh) {//如果高度高的話根據寬度固定大小縮放
            be = (int) (newOpts.outHeight / hh);
        }
        if (be <= 0)
            be = 1;
        newOpts.inSampleSize = be;//設置縮放比例
        //重新讀入圖片,注意此時已經把options.inJustDecodeBounds 設回false了
        bitmap = BitmapFactory.decodeFile(srcPath, newOpts);
        return compressImage(bitmap);//壓縮好比例大小後再進行質量壓縮
    }


    /**
     * 壓縮2
     *
     * @param image
     * @return
     */
    public static Bitmap comp(Bitmap image) {

        ByteArrayOutputStream baos = new ByteArrayOutputStream();
        image.compress(Bitmap.CompressFormat.JPEG, 100, baos);
        if (baos.toByteArray().length / 1024 > 1024) {//判斷如果圖片大於1M,進行壓縮避免在生成圖片(BitmapFactory.decodeStream)時溢出
            baos.reset();//重置baos即清空baos
            image.compress(Bitmap.CompressFormat.JPEG, 50, baos);//這裡壓縮50%,把壓縮後的數據存放到baos中
        }
        ByteArrayInputStream isBm = new ByteArrayInputStream(baos.toByteArray());
        BitmapFactory.Options newOpts = new BitmapFactory.Options();
        //開始讀入圖片,此時把options.inJustDecodeBounds 設回true了
        newOpts.inJustDecodeBounds = true;
        Bitmap bitmap = BitmapFactory.decodeStream(isBm, null, newOpts);
        newOpts.inJustDecodeBounds = false;
        int w = newOpts.outWidth;
        int h = newOpts.outHeight;
        //現在主流手機比較多是800*480分辨率,所以高和寬我們設置為
        float hh = 800f;//這裡設置高度為800f
        float ww = 480f;//這裡設置寬度為480f
        //縮放比。由於是固定比例縮放,只用高或者寬其中一個數據進行計算即可
        int be = 1;//be=1表示不縮放
        if (w > h && w > ww) {//如果寬度大的話根據寬度固定大小縮放
            be = (int) (newOpts.outWidth / ww);
        } else if (w < h && h > hh) {//如果高度高的話根據寬度固定大小縮放
            be = (int) (newOpts.outHeight / hh);
        }
        if (be <= 0)
            be = 1;
        newOpts.inSampleSize = be;//設置縮放比例
        newOpts.inPreferredConfig = Bitmap.Config.RGB_565;//降低圖片從ARGB888到RGB565
        //重新讀入圖片,注意此時已經把options.inJustDecodeBounds 設回false了
        isBm = new ByteArrayInputStream(baos.toByteArray());
        bitmap = BitmapFactory.decodeStream(isBm, null, newOpts);
        return compressImage(bitmap);//壓縮好比例大小後再進行質量壓縮
    }

    /**
     * 質量壓縮
     *
     * @param image
     * @return
     */
    public static Bitmap compressImage(Bitmap image) {
        ByteArrayOutputStream baos = new ByteArrayOutputStream();
        image.compress(Bitmap.CompressFormat.JPEG, 100, baos);//質量壓縮方法,這裡100表示不壓縮,把壓縮後的數據存放到baos中
        int options = 100;
        while (baos.toByteArray().length / 1024 > 100) {    //循環判斷如果壓縮後圖片是否大於100kb,大於繼續壓縮
            baos.reset();//重置baos即清空baos
            options -= 10;//每次都減少10
            image.compress(Bitmap.CompressFormat.JPEG, options, baos);//這裡壓縮options%,把壓縮後的數據存放到baos中

        }
        ByteArrayInputStream isBm = new ByteArrayInputStream(baos.toByteArray());//把壓縮後的數據baos存放到ByteArrayInputStream中
        Bitmap bitmap = BitmapFactory.decodeStream(isBm, null, null);//把ByteArrayInputStream數據生成圖片
        return bitmap;
    }

    /**
     * 獲取圖片大小
     *
     * @param bitmap
     * @return
     */
    public static long getBitmapsize(Bitmap bitmap) {
        if (Build.VERSION.SDK_INT >= Build.VERSION_CODES.HONEYCOMB_MR1) {
            return bitmap.getByteCount();
        }
        return bitmap.getRowBytes() * bitmap.getHeight();
    }


    /**
     * 對圖片進行模糊處理
     *
     * @param bitmap
     * @param context
     * @return
     */
    @TargetApi(Build.VERSION_CODES.JELLY_BEAN_MR1)
    public static Bitmap blurBitmap(Bitmap bitmap, Context context) {
        Bitmap outBitmap = Bitmap.createBitmap(bitmap.getWidth(), bitmap.getHeight(), Bitmap.Config.ARGB_8888);
        RenderScript rs = RenderScript.create(context.getApplicationContext());
        ScriptIntrinsicBlur blurScript = ScriptIntrinsicBlur.create(rs, Element.U8_4(rs));
        Allocation allIn = Allocation.createFromBitmap(rs, bitmap);
        Allocation allOut = Allocation.createFromBitmap(rs, outBitmap);
        blurScript.setRadius(25f);
        blurScript.setInput(allIn);
        blurScript.forEach(allOut);
        allOut.copyTo(outBitmap);
        bitmap.recycle();
        rs.destroy();
        return outBitmap;
    }


    public static Bitmap drawableToBitmap(Drawable drawable) {
        Bitmap bitmap = Bitmap.createBitmap(
                drawable.getIntrinsicWidth(),
                drawable.getIntrinsicHeight(),
                drawable.getOpacity() != PixelFormat.OPAQUE ? Bitmap.Config.ARGB_8888 : Bitmap.Config.RGB_565);
        Canvas canvas = new Canvas(bitmap);
        //canvas.setBitmap(bitmap);
        drawable.setBounds(0, 0, drawable.getIntrinsicWidth(), drawable.getIntrinsicHeight());
        drawable.draw(canvas);
        return bitmap;
    }

    /**
     * 水平方向模糊度
     */
    private static float hRadius = 10;
    /**
     * 豎直方向模糊度
     */
    private static float vRadius = 10;
    /**
     * 模糊迭代度
     */
    private static int iterations = 7;
    private static float a = 1.3f;

    /**
     * 模糊圖片
     * @param bmp
     * @return
     */
    public static Drawable BoxBlurFilter(Bitmap bmp) {
        hRadius = hRadius * a;
        vRadius = vRadius * a;
        iterations = (int) (iterations * a);


        int width = bmp.getWidth();
        int height = bmp.getHeight();
        int[] inPixels = new int[width * height];
        int[] outPixels = new int[width * height];
        Bitmap bitmap = Bitmap.createBitmap(width, height, Bitmap.Config.ARGB_8888);
        bmp.getPixels(inPixels, 0, width, 0, 0, width, height);
        for (int i = 0; i < iterations; i++) {
            blur(inPixels,
                    outPixels, width, height, hRadius);
            blur(outPixels,
                    inPixels, height, width, vRadius);
        }
        blurFractional(inPixels,
                outPixels, width, height, hRadius);
        blurFractional(outPixels,
                inPixels, height, width, vRadius);
        bitmap.setPixels(inPixels,
                0,
                width, 0,
                0,
                width, height);
        Drawable drawable = new BitmapDrawable(bitmap);
        return drawable;
    }

    public static void blur(int[] in, int[] out, int width, int height, float radius) {
        int widthMinus1 = width - 1;
        int r = (int) radius;
        int tableSize = 2 * r + 1;
        int divide[] = new int[256 * tableSize];
        for (int i = 0; i < 256 * tableSize; i++)
            divide[i] = i / tableSize;
        int inIndex = 0;
        for (int y = 0; y < height; y++) {
            int outIndex = y;
            int ta = 0, tr = 0, tg = 0, tb = 0;
            for (int i = -r; i <= r; i++) {
                int rgb = in[inIndex + clamp(i, 0, width - 1)];
                ta += (rgb >> 24) & 0xff;
                tr += (rgb >> 16) & 0xff;
                tg += (rgb >> 8) & 0xff;
                tb += rgb & 0xff;
            }
            for (int x = 0; x < width; x++) {
                out[outIndex] = (divide[ta] << 24) | (divide[tr] << 16) | (divide[tg] << 8)
                        | divide[tb];
                int i1 = x + r + 1;
                if (i1 > widthMinus1)
                    i1 = widthMinus1;
                int i2 = x - r;
                if (i2 < 0)
                    i2 = 0;
                int rgb1 = in[inIndex + i1];
                int rgb2 = in[inIndex + i2];
                ta += ((rgb1 >> 24) & 0xff) - ((rgb2 >> 24) & 0xff);
                tr += ((rgb1 & 0xff0000) - (rgb2 & 0xff0000)) >> 16;
                tg += ((rgb1 & 0xff00) - (rgb2 & 0xff00)) >> 8;
                tb += (rgb1 & 0xff) - (rgb2 & 0xff);
                outIndex += height;
            }
            inIndex += width;
        }
    }

    public static void blurFractional(int[] in, int[] out, int width, int height, float radius) {
        radius -= (int) radius;
        float f = 1.0f / (1 + 2 * radius);
        int inIndex = 0;
        for (int y = 0; y < height; y++) {
            int outIndex = y;
            out[outIndex] = in[0];
            outIndex += height;
            for (int x = 1; x < width - 1; x++) {
                int i = inIndex + x;
                int rgb1 = in[i - 1];
                int rgb2 = in[i];
                int rgb3 = in[i + 1];
                int a1 = (rgb1 >> 24)
                        & 0xff;
                int r1
                        = (rgb1 >> 16)
                        & 0xff;
                int g1
                        = (rgb1 >> 8)
                        & 0xff;
                int b1
                        = rgb1 & 0xff;
                int a2
                        = (rgb2 >> 24)
                        & 0xff;
                int r2
                        = (rgb2 >> 16)
                        & 0xff;
                int g2
                        = (rgb2 >> 8)
                        & 0xff;
                int b2
                        = rgb2 & 0xff;
                int a3
                        = (rgb3 >> 24)
                        & 0xff;
                int r3
                        = (rgb3 >> 16)
                        & 0xff;
                int g3
                        = (rgb3 >> 8)
                        & 0xff;
                int b3
                        = rgb3 & 0xff;
                a1
                        = a2 + (int)
                        ((a1 + a3) * radius);
                r1
                        = r2 + (int)
                        ((r1 + r3) * radius);
                g1
                        = g2 + (int)
                        ((g1 + g3) * radius);
                b1
                        = b2 + (int)
                        ((b1 + b3) * radius);
                a1
                        *= f;
                r1
                        *= f;
                g1
                        *= f;
                b1
                        *= f;
                out[outIndex]
                        = (a1 << 24)
                        | (r1 << 16)
                        | (g1 << 8)
                        | b1;
                outIndex
                        += height;
            }
            out[outIndex]
                    = in[width - 1];
            inIndex
                    += width;
        }
    }

    public static int clamp(int x,
                            int a,
                            int b) {
        return (x
                < a) ? a : (x > b) ? b : x;
    }


}
嗯哼,,真的沒了,,end
 詳解Android更改APP語言模式的實現過程
一、效果圖二、描述更改Android項目中的語言,這個作用於只用於此APP,不會作用於整個系統三、解決方案(一)布局文件<LinearLayout xmlns:an
 Android對話框總結
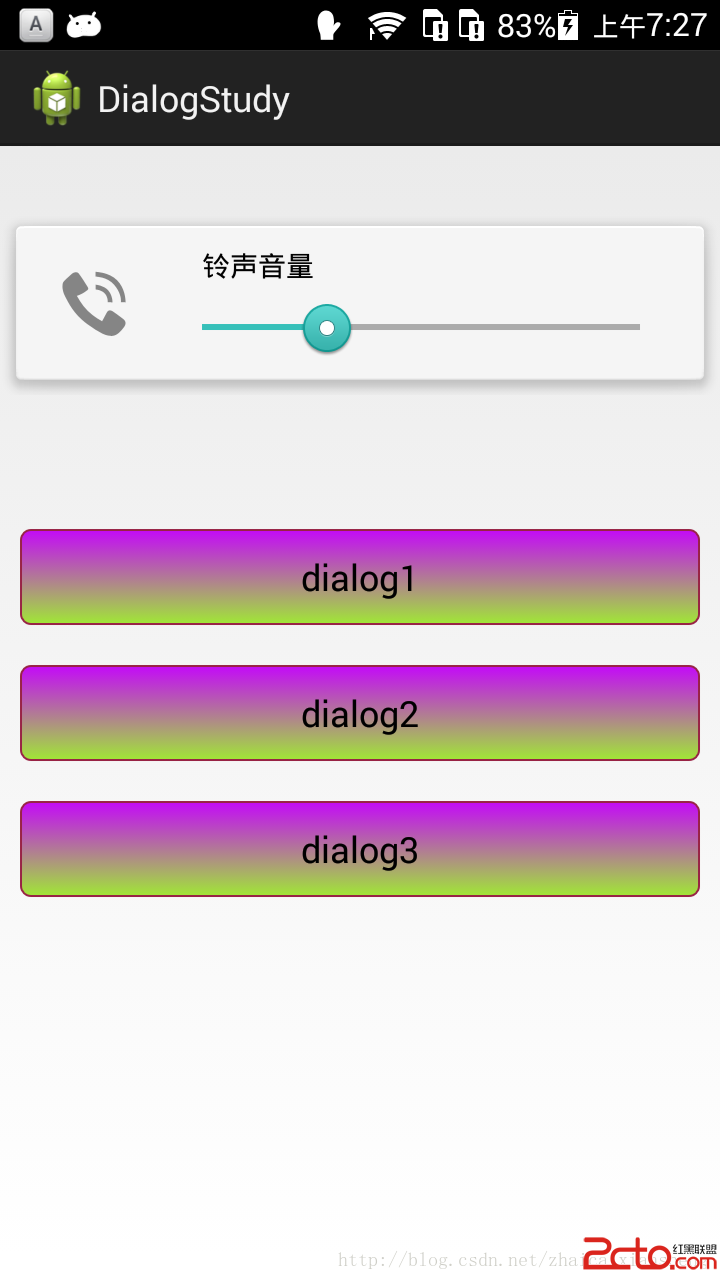
一、什麼是對話框?一種次要窗口,包含按鈕和各種選項,通過它們可以完成特定命令或任務。 查找和替換對話框 對話框與窗口有區別,它沒有最大化按鈕、沒有最小化按鈕、大都不能改變
 Android編程入門之HelloWorld項目目錄結構分析
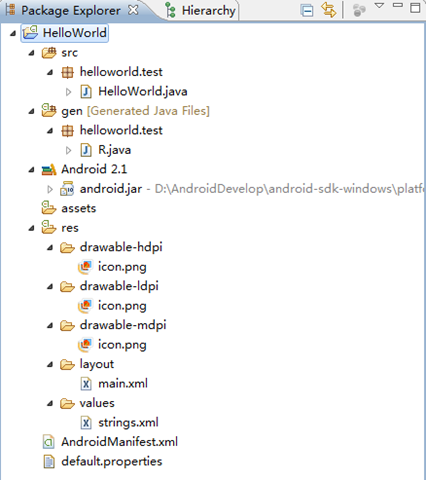
本文實例講述了Android編程入門之HelloWorld項目目錄結構。分享給大家供大家參考,具體如下:我們介紹了如何搭建Android開發環境及簡單地建立一個Hello
 Android利用貝塞爾曲線實現ScrollView滑動到頂部後陰影反饋效果
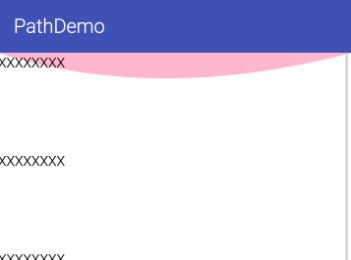
當ScrollView滑動到頂部後,根據手指在屏幕上繼續下拉出現的陰影效果的簡單實現方式,僅供學習參考,在實際項目中引用還需慎重!!!技術點:1、利用Path中的move