編輯:關於Android編程
說到消息機制,我們一定會想到Handler,由於Android系統規定主線程不能阻塞超過5s,否則會出現”Application Not Responding”。也就是說,你不能在主線程中進行耗時操作(網絡請求,數據庫操作等),只能在子線程中進行。下面先來看一下在子線程中訪問UI會出現什麼情況。
  public void click(View v){
    new Thread(new Runnable() {
        @Override
        public void run() {
            mTextView.setText("2");
        }
    }) .start();
}
結果不出意外的報錯:
android.view.ViewRootImpl$CalledFromWrongThreadException: Only the original thread that created a view hierarchy can touch its views.在ViewRootImpl的checkThread()檢查是否是主線程,如果不是拋異常。

那麼這個時候怎麼解決才能在更新UI呢?其實就是用Handler機制啦!
Handler先來看一下如何改進代碼,然後詳細分析Handler機制。
   public void click(View v){
    new Thread(new Runnable() {
        @Override
        public void run() {
            //拿到Message對象
            Message msg = mHandler.obtainMessage();
            msg.arg1 = 2;
            mHandler.sendMessage(msg);
        }
    }) .start();
}
然後在handleMessage中更新UI
   private Handler mHandler =  new Handler(){
    @Override
    public void handleMessage(Message msg) {
        super.handleMessage(msg);
        mTextView.setText(msg.arg1+"");
    }
};
這樣就成功了。
僅僅知道怎麼用那肯定是不夠的,我們還需要知道其背後到底干了什麼。
我們就從 mHandler.sendMessage(msg)開始說起吧。當我們調用sendMessage時候,其實最終調用的是sendMessageAtTime(msg,long)。此方法源碼如下:
    public boolean sendMessageAtTime(Message msg, long uptimeMillis) {
    MessageQueue queue = mQueue;
    if (queue == null) {
        RuntimeException e = new RuntimeException(
                this + " sendMessageAtTime() called with no mQueue");
        Log.w("Looper", e.getMessage(), e);
        return false;
    }
    return enqueueMessage(queue, msg, uptimeMillis);
}
它會調用enqueueMessage()將Message送到MessageQueue中去。那麼MessageQueue是什麼呢?顧名思義是消息隊列,其實在我們創建Handler的時候,它需要與Looper作關聯,Looper類有一個成員變量

MessageQueue mQueue,它就是消息隊列。用來接收Handler發送Message。MessageQueue內部並不是用數組存儲的,而是用鏈表的數據結構,方便添加和刪除。
下面來看一下Looper.looper()源碼,這個方法就是將Message交給Handler.handleMessage去完成的。
   public static void loop() {
    final Looper me = myLooper();
    if (me == null) {
        throw new RuntimeException("No Looper; Looper.prepare() wasn't called on this thread.");
    }
    final MessageQueue queue = me.mQueue;

    // Make sure the identity of this thread is that of the local process,
    // and keep track of what that identity token actually is.
    Binder.clearCallingIdentity();
    final long ident = Binder.clearCallingIdentity();

    for (;;) {
        Message msg = queue.next(); // might block
        if (msg == null) {
            // No message indicates that the message queue is quitting.
            return;
        }

        // This must be in a local variable, in case a UI event sets the logger
        Printer logging = me.mLogging;
        if (logging != null) {
            logging.println(">>>>> Dispatching to " + msg.target + " " +
                    msg.callback + ": " + msg.what);
        }

        msg.target.dispatchMessage(msg);

        if (logging != null) {
            logging.println("<<<<< Finished to " + msg.target + " " + msg.callback);
        }

        // Make sure that during the course of dispatching the
        // identity of the thread wasn't corrupted.
        final long newIdent = Binder.clearCallingIdentity();
        if (ident != newIdent) {
            Log.wtf(TAG, "Thread identity changed from 0x"
                    + Long.toHexString(ident) + " to 0x"
                    + Long.toHexString(newIdent) + " while dispatching to "
                    + msg.target.getClass().getName() + " "
                    + msg.callback + " what=" + msg.what);
        }

        msg.recycleUnchecked();
    }
}
第3,4行:判斷Looper對象是否為空,如果是空,拋出”No Looper; Looper.prepare() wasn’t called on this thread.”異常。換句話說,如果我們在子線程中創建Handler,並調用sendMessage()時候,由於沒有Looper對象,就會拋此異常信息。我們可以通過Looper.prepare()將當前線程轉為Looper線程。該源碼會在下面分析。
主要看 for (;;)那段代碼,它是個死循環,不斷地執行next()方法,如果有新消息,就交給 msg.target.dispatchMessage(msg);這裡msg.target其實就是Handler對象。那麼下面我們看一下Handler.dispatchMessage(msg)到底干了什麼。
    public void dispatchMessage(Message msg) {
    if (msg.callback != null) {
        handleCallback(msg);
    } else {
        if (mCallback != null) {
            if (mCallback.handleMessage(msg)) {
                return;
            }
        }
        handleMessage(msg);
    }
}
其實看到這裡就明白了,它調用的就是handleMessage(),所以我們就可以輕松的更新UI界面了!
那麼mCallback.handleMessage(msg)是什麼呢?
接下來我們看一下這個代碼:
    private Handler mHandler =  new Handler(new Handler.Callback() {
    @Override
    public boolean handleMessage(Message msg) {
        Toast.makeText(getApplicationContext(),"1",Toast.LENGTH_SHORT).show();
        return false;
    }
}){
    @Override
    public void handleMessage(Message msg) {
        Toast.makeText(getApplicationContext(),"2",Toast.LENGTH_SHORT).show();
    }
};
注意:在第5行我return false,結果吐司展現1,展現完之後再展示2.

當return true時,結果吐司只展現1。這樣我們就可以知道,這其實是用來攔截處理消息的。
剛剛提到Looper.prepare()可以將當前線程轉為Looper線程。那看一下Looper.prepare()源碼
    private static void prepare(boolean quitAllowed) {
    if (sThreadLocal.get() != null) {
        throw new RuntimeException("Only one Looper may be created per thread");
    }
    sThreadLocal.set(new Looper(quitAllowed));
}
通過拋出的那個異常我們可以發現一個Handler只能有一個Looper.而一個Looper內部維護者MessageQueue,當有消息時Looper從MessageQueue中取出消息交給Handler處理。這樣它們之間就建立起關系了。
看一下源碼中的這行代碼 sThreadLocal.set(new Looper(quitAllowed)); 關於ThreadLocal可以看一下我的這篇文章
http://blog.csdn.net/qq_31609983/article/details/52094032
要想到Looper不斷的從MessageQueue中取消息,就必須調用Looper.loop()來不斷取消息.
在子線程中發送消息的完整代碼如下:
    public void click(View v){
    final Handler handler =  new Handler();
    new Thread(new Runnable() {
        @Override
        public void run() {
            Looper.prepare();
            handler.sendMessage();
            Looper.loop();
        }
    }) .start();
}
注意 Looper.prepare(); handler.sendMessage();這二個方法順序不能變,我們可以看一下Handler構造方法
  public Handler(Callback callback, boolean async) {
    if (FIND_POTENTIAL_LEAKS) {
        final Class klass = getClass();
        if ((klass.isAnonymousClass() || klass.isMemberClass() || klass.isLocalClass()) &&
                (klass.getModifiers() & Modifier.STATIC) == 0) {
            Log.w(TAG, "The following Handler class should be static or leaks might occur: " +
                klass.getCanonicalName());
        }
    }

    mLooper = Looper.myLooper();
    if (mLooper == null) {
        throw new RuntimeException(
            "Can't create handler inside thread that has not called Looper.prepare()");
    }
    mQueue = mLooper.mQueue;
    mCallback = callback;
    mAsynchronous = async;
}
注意這段代碼 mLooper = Looper.myLooper();如果為空,拋異常,該異常意思是必須調用Looper.prepare().這就是說為什麼順序不能改變!
那麼讀者可能會問,我們在主線程創建Handler對象,並沒有調用Looper.prepare()也出什麼問題啊,的確是這樣的,因為ActivityThread 的main()函數裡面 Looper.prepareMainLooper();已經自動幫我們創建好了Looper對象了。看一下源碼:
 public static void prepareMainLooper() {
    prepare(false);
    synchronized (Looper.class) {
        if (sMainLooper != null) {
            throw new IllegalStateException("The main Looper has already been prepared.");
        }
        sMainLooper = myLooper();
    }
}
注意sMainLooper = myLooper();看一下myLooper()方法:
 public static @Nullable Looper myLooper() {
    return sThreadLocal.get();
}
講了這麼多,估計對於小白來說有點暈了。哈哈。那麼接下來我盜用一張hyman老師的一張圖分析Handler,MessageQueue,Looper之間的關系吧。。。
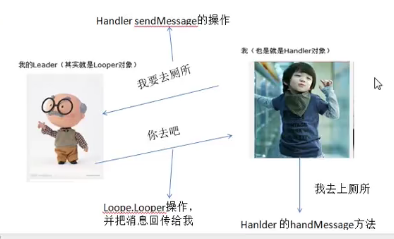 0160904160222603)
一天,老板正在和員工開會,員工想上廁所,出於禮貌,對老板說我要去上廁所(sendMessage 到 MessageQueue中) 老板思考了一會兒,回復到”你去吧”(Looper.loop()) , 最後員工去WC了(handleMessage) ,從詢問到最後WC都是員工做的事,這就是它們之間的關系了。。。哈哈哈。
其實Handler發送消息有多種方式
msg.sendToTarget(); mHandler.sendMessageAtFrontOfQueue(); mHandler.sendEmptyMessage() mHandler.sendEmptyMessageDelayed() mHandler.post() mHandler.postDelayed() 雖然有多種方法,但本質都是通過Handler.handleMessage()實現的。
還有幾個這裡就不一一列舉了,有興趣的讀者可以去Android官網吧。。。
 ListView異步加載與緩存
該例子實現的是從網絡上異步獲取數據,包括圖片與文字,然後顯示在listView中,並對圖片進行內存緩存。程序截圖第一次錄制gif。。。效果很差首先定義布局主界面就一個li
 AndroidStudio Export Jar For Unity
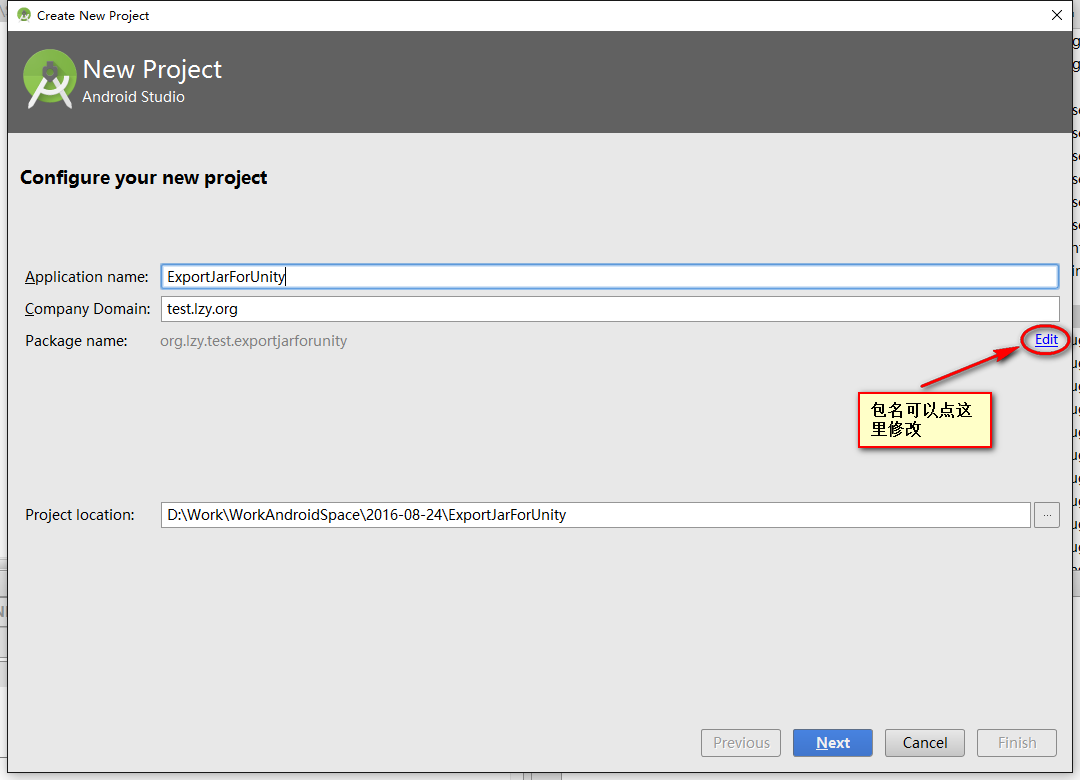
環境:AndroidStudio 2.1.1 + Unity5.4.0f1大體步驟如下:創建AndroidStudio工程 生成jar 將jar導入Unity工程廢話不多
 第5章 全局大喇叭,詳解廣播機制
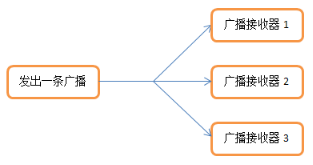
1、廣播機制簡介Android中的每個應用程序都可以對自己感興趣的廣播進行注冊,這樣該程序就只會接收到自己所關心的廣播內容,這些廣播可能是來自於系統的,也可能是來自於其他
 Android-Tips淺析(實用Android開發技巧)
整理本人實際開發中遇到的一些問題以及解決辦法和一些開發技巧,以後會不定時更新。tip:利用“目錄”可快速導航1.追溯sdk中某一個類隨sdk版本升