編輯:關於Android編程
大家可以發現, 原生的Image控件無法實現等比放大後無丟失顯示。
如: 有一張20x10的圖片, 要放入一個40x30的顯示區域內.
1. cover模式(默認),圖片放大為60x30, 然後切成40x30, 會丟失部分顯示的圖片。
2. contain 模式, 圖片分辨率為20x10, 四周都有空白。
3. stretch模式, 圖片放大為40x30, 丟失原始的寬、高比。
但我們無法做到將圖片放大為40*20, 然後再顯示。接下來我們自定義組件ImageEquallyEnlarge:
import React, { Component } from 'react';
import {
    Image
} from 'react-native';

export default class ImageEquallyEnlarge extends Component {
    // 構造
    constructor(props) {
        super(props);
        // 初始狀態
        this.state = {
            //狀態機變量是一個style, 它將被用於定義顯示圖片的樣式
            style: {}
        };
        this.onImageLayout=this.onImageLayout.bind(this);
    }
    //此函數被掛接到組件的onLayout事件上, 當組件布局更新時, 此函數被調用
    //此函數中計算新的寬度與高度並將其保存在組件的狀態機變量中
    //event 對應的值為 : {nativeEvent: {layout: {x, y, width, height}}}
    onImageLayout(event) {
        let layout=event.nativeEvent.layout;//獲取layout
        //按照如果布局比圖片小, 圖片不會放大,不處理
        if(layout.width<=this.props.originalWidth) return;
        if(layout.height<=this.props.originalHeight) return;
        // 圖片寬高比
        let originalAspectRatio=this.props.originalWidth/this.props.originalHeight;
        let currentAspectRatio=layout.width/layout.height;
        // 如果比例一樣 不處理, 圖片會自動放大
        if(originalAspectRatio===currentAspectRatio) return;
        if(originalAspectRatio>currentAspectRatio){// 圖片原寬度相對高略寬
            let newHeight=layout.width/originalAspectRatio; //減少控件高度
            this.setState({
                style:{
                    height:newHeight
                }
            });
            return ;
        }
        //圖片原寬度相對高略窄 減少控件寬度
        let newWidth=layout.height*originalAspectRatio;
        this.setState({
            style:{
                width:newWidth
            }
        });
    }
    // {...this.props} 是JSX語法, 意思是將ImageEquallyEnlarge組件收到的props透傳給Image組件
    render(){
        return(
上面代碼,沒什麼特殊的技巧, 我們都知道在組件開始布局或者布局改變的時候 就會調用組件的onLayout方法, 我們在onLayout方法中, 獲取到了Image組件的實際寬高, 然後再根據傳遞過來圖片真實的寬高計算下組件合適的寬高, 再通過狀態機修改組件的寬高。
測試一下,修改index.android.js或者index.ios.js:
import React, { Component } from 'react';
import {
    AppRegistry,
    StyleSheet,
    View,
    Image
} from 'react-native';
//導入自定義組件
import ImageEquallyEnlarge from './ImageEquallyEnlarge';
class AwesomeProject extends Component {
    render() {
        return (


        );
    }
}
const styles = StyleSheet.create({
    container: {
        backgroundColor: 'blue'
    },
    imageStyle: {
        width: 240,
        height: 360,
        backgroundColor: 'red'
    },
    image2Style: {
        width: 300,
        height: 460,
        backgroundColor: 'red'
    }
});
AppRegistry.registerComponent('AwesomeProject', () => AwesomeProject);
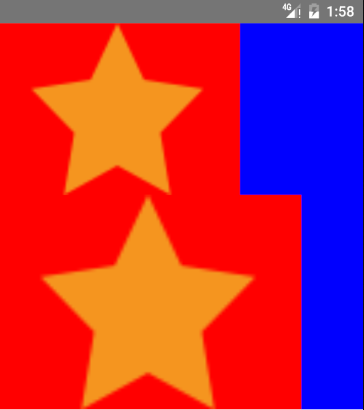
運行結果:

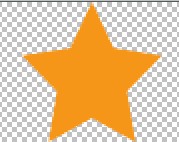
圖片原圖:

根據背景顏色就可以看到 圖片實現了等比放大不丟失。
 如何注銷微信賬號 微信賬號注銷方法
越來越多的用戶覺得在微信上人太雜,在遇到不同的人騷擾之後,有的人就想注銷微信。那麼如何注銷微信賬號呢?小編就為大家帶來這篇微信賬號注銷方法介紹,還不清楚的小
 簡單實現Android驗證碼
安卓驗證碼的簡單實現我們經常在登錄或者注冊的時候要求輸入驗證碼,這裡簡單介紹一下一種方法 效果如下首先是要獲取 隨機的四個字母組合,我這裡是將26個字母存儲到一個數組中,
 swift版QQ音樂播放器(二)
一 完善部分的QQ音樂效果圖二 需要完善點1 歌曲的切換和暫停播放2 歌曲當前播放時間和歌曲總時間的更新3 進度條的處理4 歌手頭像處理5 頭像動畫效果6 歌詞的進度顯示
 華為榮耀note8怎麼使用智能短信功能 榮耀note8設置智能短信
傳統的短信已經逐漸被各種微信、QQ諸如此類的社交軟件所取代,我們能用到的短信最大的功能也無外乎是驗證碼、充值或是購票等等。不過華為榮耀Note8的推出,卻改