編輯:關於Android編程
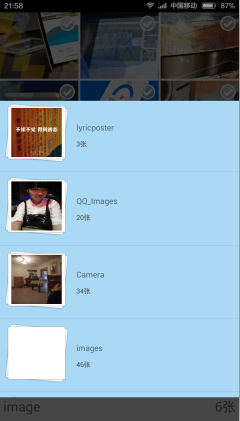
先上幾張效果圖:


在加載多圖片時,我們采用後進先出策略(即滑動到哪裡就先加載哪裡的圖片),節省了內存的使用,也有了更好的用戶體驗。接著我們就先定義自己的ImageLoader。
①首先我們先定義一些基本的變量
private static final int MSG_ADDTASK = 0x001;

private LruCache mLruCache;// 圖片緩存核心對象,LruCache是android提供的一個緩存工具類,其算法是最近最少使用算法

private ExecutorService mThreadPool;// 線程池

private LinkedList mTaskQueue;// 任務隊列

private Thread mPollThread;// 後台輪詢線程

private Handler mUIThread;// UI線程的Handler,將圖片回顯到UI界面上

private Handler mPollThreadHandler;// 後台線程的Handler,給後台線程發送消息

private Semaphore mSemphorePollThreadHandler = new Semaphore(0);// 信號量,用於同步addTask()中與mPollThreadHandler的同步問題

private Semaphore mSemphoreTreadPool;// 控制線程池空閒的時候才去取線程執行

private Type mType = Type.LIFO;// 隊列的調度模式,默認為後進先出

/**
 * 隊列的調度方法,圖片的緩沖模式:先進先出(First In First Out),後進先出(Last In First Out)
  */
 private enum Type {
     FIFO, LIFO
 }
②關於ImageLoader的使用直接調用ImageLoader.getInstance()獲取,我們采用單例模式
private static ImageLoader mInstance;

private ImageLoader(int threadCount, Type type) {
    init(threadCount, type);
}

public static ImageLoader getInstance() {
    if (mInstance == null) {
        synchronized (ImageLoader.class) {
            if (mInstance == null) {
                mInstance = new ImageLoader(3, Type.LIFO);// 設置線程池個數為3個,圖片的加載模式是後進先加載
            }
        }
    }
    return mInstance;
}
③實現第一個init()方法,初始化一些變量以及後台線程
private void init(int threadCount, Type type) {
    mType = type;
    mSemphoreTreadPool = new Semaphore(3);// 設置信號量為3,當有第四個線程進入時就會阻塞

    // 後台輪詢線程
    mPollThread = new Thread() {
        @Override
        public void run() {
            Looper.prepare();// 准備Looper
            mPollThreadHandler = new Handler() {
                @Override
                public void handleMessage(Message msg) {
                    switch (msg.what) {
                        case MSG_ADDTASK:
                            mThreadPool.execute(getTask());// 去線程中取出一個任務進行執行

                            try {
                                mSemphoreTreadPool.acquire();// 此時有三個線程在執行,當進來第四個線程的時候就會被阻塞
                            } catch (InterruptedException e) {
                                e.printStackTrace();
                            }
                            mSemphorePollThreadHandler.release();// 釋放一個信號量,mSemphorePollThreadHandler.acquire的阻塞就會被取消,這裡的作用是防止mPollThreadHandler還沒有創建完畢,就發送消息,見addTask
                            break;
                    }
                }
            };
            Looper.loop();// 開始loop,遍歷消息
        }
    };
    mPollThread.start();// 開啟線程

    int maxMemory = (int) Runtime.getRuntime().maxMemory();// 獲取最大使用內存
    int cacheMemory = maxMemory / 8;// 一般默認使用均為1/8
    mLruCache = new LruCache(cacheMemory) {
        @Override
        protected int sizeOf(String key, Bitmap bitmap) {
            return bitmap.getHeight() * bitmap.getRowBytes();// 每張圖片占用的內存大小
        }
    };

    mThreadPool = Executors.newFixedThreadPool(threadCount);// 設置線程數
    mTaskQueue = new LinkedList();// 設置線程隊列,使用LinkedList,便於獲取任意位置的task
}

 /** 添加一個任務 */
 private synchronized void addTask(Runnable task) {
     mTaskQueue.add(task);

     try {
         if(mPollThreadHandler == null) {
             mSemphorePollThreadHandler.acquire();// 當mPollThreadHandler還沒有建立的時候,此時就會被阻塞,直到mSemphorePollThreadHandler.realase
         }
     } catch (InterruptedException e) {
         e.printStackTrace();
     }
     mPollThreadHandler.sendEmptyMessage(MSG_ADDTASK);
 }

/** 獲取一個任務 */
private Runnable getTask() {
    if(mType == Type.FIFO) {
        return mTaskQueue.removeFirst();
    } else if(mType == Type.LIFO) {
        return mTaskQueue.removeLast();
    }
    return null;
}
④接下來進入我們的核心方法loadImage(imageView,path),根據圖片路徑和imageView控件,把圖片設置到imageView控件上。
public void loadImage(final ImageView imageView, final String path) {
    imageView.setTag(path);// imageView設置一個Tag,防止圖片加載過程中錯亂

    mUIThread = new Handler() {
        @Override
        public void handleMessage(Message msg) {
            // 獲取得到的圖片,給imageView設置圖片
            ImageHolder imageHolder = (ImageHolder) msg.obj;
            ImageView imageView = imageHolder.imageView;
            Bitmap bitmap = imageHolder.bitmap;
            String path = imageHolder.path;

            if(imageView.getTag().toString().equals(path)) {
                imageView.setImageBitmap(bitmap);
            }
        }
    };

    // 根據path從緩存中獲取bitmap
    Bitmap bm = getBitmapFromLruCache(path);
    if (bm != null) {
        sendBitmapToUIHandler(imageView, bm, path);
    } else {
        addTask(new Runnable(){
            @Override
            public void run() {
                // 加載圖片,圖片壓縮,放入緩沖中
                // 獲取圖片的要顯示的大小
                ImageSize imageSize = getImageViewSize(imageView);

                // 壓縮圖片
                Bitmap bitmap = decodeSempledBitmapFromPath(path, imageSize);

                // 把圖片放入LruCache中
                addBitmapToLruCache(bitmap, path);

                // 發送給UIhandlder,刷新圖片
                sendBitmapToUIHandler(imageView, bitmap, path);

                mSemphoreTreadPool.release();// 釋放線程所占用的信號量
            }
        });
    }
}

 /** 發送圖片信息到主線程中,從而更新圖片 */
 private void sendBitmapToUIHandler(ImageView imageView, Bitmap bitmap, String path) {
     ImageHolder imageHolder = new ImageHolder();
     imageHolder.imageView = imageView;
     imageHolder.bitmap = bitmap;
     imageHolder.path = path;

     Message msg = Message.obtain();
     msg.obj = imageHolder;
     mUIThread.sendMessage(msg);
 }

/**
 * 給imageView設置圖片的實體類,便於handler的數據傳輸
 */
private class ImageHolder {
    ImageView imageView;
    Bitmap bitmap;
    String path;
}

/** imageView的大小 */
private class ImageSize {
    int width;
    int height;
}
關於圖片處理的一些方法
/** 獲取圖片要顯示的大小 */
private ImageSize getImageViewSize(ImageView imageView) {
     DisplayMetrics displayMetrics = imageView.getContext().getResources().getDisplayMetrics();
     ViewGroup.LayoutParams layoutParams = imageView.getLayoutParams();

     int width = imageView.getWidth();
     if(width < 0) {
         width = layoutParams.width;
     }
     if(width < 0) {
         width = getFieldValue(imageView, "mMaxWidth");
     }
     if(width < 0) {
         width = displayMetrics.widthPixels;
     }

     int height = imageView.getHeight();
     if(height < 0) {
         height = layoutParams.height;
     }
     if(height < 0) {
         height = getFieldValue(imageView, "mMaxHeight");
     }
     if(height < 0) {
         height = displayMetrics.heightPixels;
     }

     ImageSize imageSize = new ImageSize();
     imageSize.height = height;
     imageSize.width = width;
     return imageSize;
 }

/** 反射獲取字段值 */
private int getFieldValue(Object obj, String fieldName) {
     int value = 0;
     try {
         Field field = ImageView.class.getDeclaredField(fieldName);
         field.setAccessible(true);
         int fieldInt = field.getInt(obj);
         if(fieldInt > 0 && fieldInt < Integer.MAX_VALUE){
             value = fieldInt;
         }
     }catch (Exception e) {
         e.printStackTrace();
     }
     return value;
 }

/** 壓縮圖片 */
private Bitmap decodeSempledBitmapFromPath(String path, ImageSize imageSize) {
    BitmapFactory.Options options = new BitmapFactory.Options();
    options.inJustDecodeBounds = true;// 獲取圖片大小,並不把圖片大小加入到內存中
    BitmapFactory.decodeFile(path, options);

    options.inSampleSize = caculateInSampleSize(options, imageSize);// 設置圖片的壓縮率

    options.inJustDecodeBounds = false;
    Bitmap bitmap = BitmapFactory.decodeFile(path, options);

    return bitmap;
}

/** 計算出圖片的最佳壓縮比例 */
private int caculateInSampleSize(BitmapFactory.Options options, ImageSize imageSize) {
    int width = options.outWidth;
    int height = options.outHeight;

    int inSampleSize = 1;// 設置取樣率

    if(width > imageSize.width || height > imageSize.height) {
        int widthRadio = Math.round(width * 1.0f / imageSize.width);
        int heightRadio = Math.round(height * 1.0f / imageSize.height);
        inSampleSize = Math.max(widthRadio, heightRadio);
    }
    return inSampleSize;
}

/** 把圖片放入到LruCache中 */
private void addBitmapToLruCache(Bitmap bitmap, String path) {
    if(getBitmapFromLruCache(path) == null) {
        if(bitmap != null) {
            mLruCache.put(path, bitmap);
        }
    }
}
================至此我們的ImageLoader定義完============================
MainActivity中獲取手機圖片代碼
private void initData() {
    // 利用ContentProvider掃描手機的照片
    if (!Environment.getExternalStorageState().equals(Environment.MEDIA_MOUNTED)) {
        Toast.makeText(this, "當前儲存卡不可用", Toast.LENGTH_SHORT).show();
        return;
    }
    // 掃描手機中的照片
    new Thread() {
        @Override
        public void run() {
            Uri mUriImg = MediaStore.Images.Media.EXTERNAL_CONTENT_URI;
            ContentResolver contentResolver = MainActivity.this.getContentResolver();

            String selection = MediaStore.Images.Media.MIME_TYPE + "=? or " + MediaStore.Images.Media.MIME_TYPE + "=?";
            String[] selectionArgs = new String[]{"image/jpeg", "image/png"};
            String sortOrder = MediaStore.Images.Media.DATE_MODIFIED;
            Cursor cursor = contentResolver.query(mUriImg, null, selection, selectionArgs, sortOrder);

            Set dirPaths = new HashSet();// 儲存遍歷過的parentPath,防止重復遍歷
            FolderBean bean = null;
            while (cursor.moveToNext()) {
                String path = cursor.getString(cursor.getColumnIndex(MediaStore.Images.Media.DATA));// 拿到圖片路徑
                File parentFile = new File(path).getParentFile();// 拿到父文件夾
                if (parentFile == null) {
                    continue;
                }

                String parentPath = parentFile.getAbsolutePath();
                if (dirPaths.contains(parentPath)) {
                    continue;
                }

                String[] imgNames = parentFile.list(mFilter);// 獲取文件夾下的所有圖片
                if(imgNames == null) {
                    continue;
                }

                dirPaths.add(parentPath);

                bean = new FolderBean();
                bean.setDirPath(parentPath);
                bean.setFirstImgPath(path);
                Log.d(TAG, path + "------------------------------------");
                bean.setDirName(parentFile.getName());
                bean.setImgCount(imgNames.length);

                mFolderBeans.add(bean);
            }
            cursor.close();
            bean = new FolderBean();
            bean.setDirName("所有圖片");
            bean.setFirstImgPath(mFolderBeans.get(0).getFirstImgPath());
            int imgCount = 0;
            String imgDirPath = "";
            for(FolderBean folderBean : mFolderBeans) {
                imgCount += folderBean.getImageCount();
                imgDirPath +=  folderBean.getDirPath() + SEPERATOR;
            }
            bean.setImgCount(imgCount);
            bean.setDirPath(imgDirPath.substring(0, imgDirPath.length() - 1));

            mFolderBeans.add(0, bean);

            initShowImgData(bean);

            // 掃描完畢,發送消息給handler
            Message msg = handler.obtainMessage();
            msg.what = MSG_DATA_LOADED;
            msg.obj = bean;
            handler.sendMessage(msg);
        }
    }.start();
}
 Android自定義星星評分控件
下面為控件的實現歷程: 此控件高效,直接使用ondraw繪制,先亮照: 由於Android自身的星星評分控件樣式可以改,但是他的大小不好調整的缺點,只能用small no
 Android中操作SQLite數據庫快速入門教程
SQLite是Android平台軟件開發中會經常用到的數據庫產品,作為一款輕型數據庫,SQLite的設計目標就是是嵌入式的,而且目前已經在很多嵌入式產品中使用了它,它占用
 Android 自定義控件之可多選課程日歷CalendarView
效果圖開發環境IDE版本:AndroidStudio2.0物理機版本:Win7旗艦版(64位)前言最近的項目中用到了一個課程選擇的日歷View,於是在網上搜了搜自定義日歷
 Android Studio使用小技巧:自定義Logcat
我們都知道Logcat是我們Android開發調試最常用的一個工具,但是Android Studio默認的Logcat調試的顏色是一樣的,我們不好區分verbose、de