編輯:關於Android編程
2,重寫構造方法【1,2,3參數,重寫三參數】
獲取View屬性值,實現基本的布局
    /**
     * 文本
     */
    private String mTitleText;
    /**
     * 文本的顏色
     */
    private int mTitleTextColor;
    /**
     * 文本的大小
     */
    private int mTitleTextSize;

    /**
     * 繪制時控制文本繪制的范圍
     */
    private Rect mBound;
    /**
     * 畫筆
     */
    private Paint mPaint;


    /**
     * 構造方法
     *
     * @param context
     * @param attrs
     */
    public CustomTitleView(Context context, AttributeSet attrs) {
        this(context, attrs, 0);
    }

    /**
     * 構造方法
     *
     * @param context
     */
    public CustomTitleView(Context context) {
        this(context, null);
    }

    /**
     * 獲得我自定義的樣式屬性
     *
     * @param context
     * @param attrs
     * @param defStyle
     */
    public CustomTitleView(Context context, AttributeSet attrs, int defStyle) {
        super(context, attrs, defStyle);
        /**
         * 添加事件【第五步時,把這一塊代碼加入】
         */
        this.setOnClickListener(new OnClickListener() {

            @Override
            public void onClick(View v) {
                mTitleText = randomText();
                postInvalidate();
            }

        });
        /**
         * 獲得我們所定義的自定義樣式屬性
         */
        TypedArray a = context.getTheme().obtainStyledAttributes(attrs, R.styleable.CustomTitleView, defStyle, 0);
        int n = a.getIndexCount();
        for (int i = 0; i < n; i++) {
            int attr = a.getIndex(i);
            switch (attr) {
                case R.styleable.CustomTitleView_titleText:
                    mTitleText = a.getString(attr);
                    break;
                case R.styleable.CustomTitleView_titleTextColor:
                    // 默認顏色設置為黑色
                    mTitleTextColor = a.getColor(attr, Color.BLACK);
                    break;
                case R.styleable.CustomTitleView_titleTextSize:
                    // 默認設置為16sp,TypeValue也可以把sp轉化為px
                    mTitleTextSize = a.getDimensionPixelSize(attr, (int) TypedValue.applyDimension(
                            TypedValue.COMPLEX_UNIT_SP, 16, getResources().getDisplayMetrics()));
                    break;
            }
        }
        a.recycle();

        /**
         * 獲得繪制文本的寬和高
         */
        mPaint = new Paint();
        mPaint.setTextSize(mTitleTextSize);
        mPaint.setColor(mTitleTextColor);
        mBound = new Rect();
        mPaint.getTextBounds(mTitleText, 0, mTitleText.length(), mBound);

    }
3,重寫onDraw()方法,繪制View
paint繪制view到canvas上【將view用筆繪制到畫布上】
    @Override
    protected void onDraw(Canvas canvas) {
        mPaint.setColor(Color.YELLOW);
        canvas.drawRect(0, 0, getMeasuredWidth(), getMeasuredHeight(), mPaint);

        mPaint.setColor(mTitleTextColor);
        canvas.drawText(mTitleText, getWidth() / 2 - mBound.width() / 2, getHeight() / 2 + mBound.height() / 2, mPaint);
    }
4,重寫onMeasure()方法
實現將所有View重新布局【擺放】
    @Override
    protected void onMeasure(int widthMeasureSpec, int heightMeasureSpec) {
        /**
         * 1,不重寫該方法,系統默認填充父窗體
         */
//        super.onMeasure(widthMeasureSpec, heightMeasureSpec);
        /**
         * 2, 重寫當前方法
         */
        int widthMode = MeasureSpec.getMode(widthMeasureSpec);
        int widthSize = MeasureSpec.getSize(widthMeasureSpec);
        int heightMode = MeasureSpec.getMode(heightMeasureSpec);
        int heightSize = MeasureSpec.getSize(heightMeasureSpec);
        int width;
        int height;
        /**
         * 寬度獲取
         */
        if (widthMode == MeasureSpec.EXACTLY) {
            width = widthSize;
        } else {
            mPaint.setTextSize(mTitleTextSize);
            mPaint.getTextBounds(mTitleText, 0, mTitleText.length(), mBound);
            float textWidth = mBound.width();
            int desired = (int) (getPaddingLeft() + textWidth + getPaddingRight());
            width = desired;
        }

        /**
         * 高度獲取
         */
        if (heightMode == MeasureSpec.EXACTLY) {
            height = heightSize;
        } else {
            mPaint.setTextSize(mTitleTextSize);
            mPaint.getTextBounds(mTitleText, 0, mTitleText.length(), mBound);
            float textHeight = mBound.height();
            int desired = (int) (getPaddingTop() + textHeight + getPaddingBottom());
            height = desired;
        }

        setMeasuredDimension(width, height);
    }
5,添加控件的響應事件
添加事件觸發器
實現事件的具體響應
    /**
     * 生成隨機文字【也可以實現其他的事件,管理控件屬性】
     *
     * @return
     */
    private String randomText() {
        Random random = new Random();
        Set set = new HashSet();
        while (set.size() < 4) {
            int randomInt = random.nextInt(10);
            set.add(randomInt);
        }
        StringBuffer sb = new StringBuffer();
        for (Integer i : set) {
            sb.append("" + i);
        }
        return sb.toString();
    }
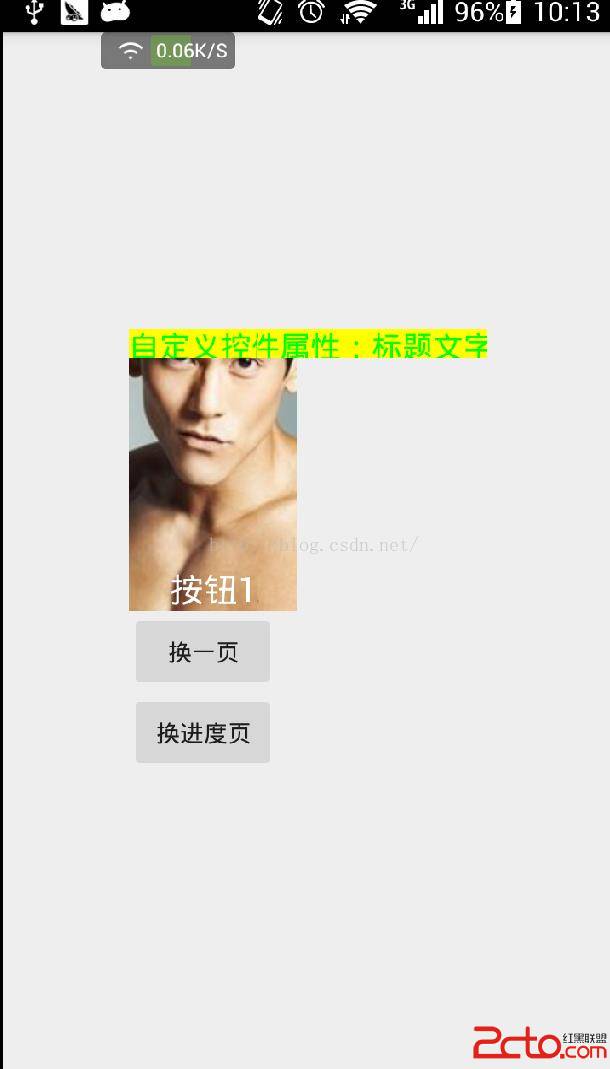
二、自定義控件(二) --- 屬性TextView聯合圖片
自定義控件的基本步驟: 1、自定義View的屬性
/**
 * 類說明:帶圖片說明的ImageView控件
 * 作者:vision
 * 時間:2016/7/15
 */
public class CustomImageView extends View {
    /**
     * 標識圖片當前縮放模式
     */
    private static final int IMAGE_SCALE_FITXY = 0;
    /**
     * 文本
     */
    private String mTitle;
    /**
     * 文本的顏色
     */
    private int mTextColor;
    /**
     * 文本的大小
     */
    private int mTextSize;
    /**
     * 縮放參數
     */
    private int mImageScale;

    /**
     * 繪制時控制文本繪制的范圍
     */
    private Rect mTextBound;
    /**
     * 繪制整體的范圍
     */
    private Rect rect;
    /**
     * 畫筆
     */
    private Paint mPaint;
    /**
     * 圖像內容
     */
    private Bitmap mImage;
    /**
     * 控件寬度
     */
    private int mWidth;
    /**
     * 控件高度
     */
    private int mHeight;
    /**
     * 響應事件監聽器
     */
    private CustomImageViewClickListener listener;

    /**
     * 構造方法
     *
     * @param context
     * @param attrs
     */
    public CustomImageView(Context context, AttributeSet attrs) {
        this(context, attrs, 0);
    }

    /**
     * 構造方法
     *
     * @param context
     */
    public CustomImageView(Context context) {
        this(context, null);
    }

    /**
     * 初始化所特有自定義類型
     *
     * @param context
     * @param attrs
     * @param defStyle
     */
    public CustomImageView(Context context, AttributeSet attrs, int defStyle) {
        super(context, attrs, defStyle);
        this.setOnClickListener(new OnClickListener() {
            @Override
            public void onClick(View view) {
                if (listener != null) {
                    listener.onCustomImageViewClickListener(view);
                }
            }
        });
        TypedArray a = context.getTheme().obtainStyledAttributes(attrs, R.styleable.CustomImageView, defStyle, 0);

        int n = a.getIndexCount();
        for (int i = 0; i < n; i++) {
            int attr = a.getIndex(i);
            switch (attr) {
                case R.styleable.CustomImageView_image:
                    mImage = BitmapFactory.decodeResource(getResources(), a.getResourceId(attr, 0));
                    break;
                case R.styleable.CustomImageView_imageScaleType:
                    mImageScale = a.getInt(attr, 0);
                    break;
                case R.styleable.CustomImageView_titleText:
                    mTitle = a.getString(attr);
                    break;
                case R.styleable.CustomImageView_titleTextColor:
                    mTextColor = a.getColor(attr, Color.BLACK);
                    break;
                case R.styleable.CustomImageView_titleTextSize:
                    mTextSize = a.getDimensionPixelSize(attr, (int) TypedValue.applyDimension(TypedValue.COMPLEX_UNIT_SP,
                            16, getResources().getDisplayMetrics()));
                    break;
            }
        }
        a.recycle();
        rect = new Rect();
        mPaint = new Paint();
        mTextBound = new Rect();
        mPaint.setTextSize(mTextSize);
        // 計算了描繪字體需要的范圍
        mPaint.getTextBounds(mTitle, 0, mTitle.length(), mTextBound);
    }

    @Override
    protected void onMeasure(int widthMeasureSpec, int heightMeasureSpec) {
        // super.onMeasure(widthMeasureSpec, heightMeasureSpec);
        /**
         * 設置寬度
         */
        int specMode = MeasureSpec.getMode(widthMeasureSpec);
        int specSize = MeasureSpec.getSize(widthMeasureSpec);

        if (specMode == MeasureSpec.EXACTLY) {// match_parent , accurate
            Log.e("xxx", "EXACTLY");
            mWidth = specSize;
        } else {
            // 由圖片決定的寬
            int desireByImg = getPaddingLeft() + getPaddingRight() + mImage.getWidth();
            // 由字體決定的寬
            int desireByTitle = getPaddingLeft() + getPaddingRight() + mTextBound.width();

            if (specMode == MeasureSpec.AT_MOST) {// wrap_content
                int desire = Math.max(desireByImg, desireByTitle);
                mWidth = Math.min(desire, specSize);
                Log.e("xxx", "AT_MOST");
            }
        }

        /***
         * 設置高度
         */
        specMode = MeasureSpec.getMode(heightMeasureSpec);
        specSize = MeasureSpec.getSize(heightMeasureSpec);
        if (specMode == MeasureSpec.EXACTLY) {// match_parent , accurate
            mHeight = specSize;
        } else {
            int desire = getPaddingTop() + getPaddingBottom() + mImage.getHeight() + mTextBound.height();
            if (specMode == MeasureSpec.AT_MOST) {// wrap_content
                mHeight = Math.min(desire, specSize);
            }
        }
        setMeasuredDimension(mWidth, mHeight);
    }

    @Override
    protected void onDraw(Canvas canvas) {
        // super.onDraw(canvas);
        /**
         * 邊框
         */
        mPaint.setStrokeWidth(4);
        mPaint.setStyle(Paint.Style.STROKE);
        mPaint.setColor(Color.CYAN);
        canvas.drawRect(0, 0, getMeasuredWidth(), getMeasuredHeight(), mPaint);

        rect.left = getPaddingLeft();
        rect.right = mWidth - getPaddingRight();
        rect.top = getPaddingTop();
        rect.bottom = mHeight - getPaddingBottom();

        mPaint.setColor(mTextColor);
        mPaint.setStyle(Paint.Style.FILL);
        /**
         * 當前設置的寬度小於字體需要的寬度,將字體改為xxx...
         */
        if (mTextBound.width() > mWidth) {
            TextPaint paint = new TextPaint(mPaint);
            String msg = TextUtils.ellipsize(mTitle, paint, (float) mWidth - getPaddingLeft() - getPaddingRight(),
                    TextUtils.TruncateAt.END).toString();
            canvas.drawText(msg, getPaddingLeft(), mHeight - getPaddingBottom(), mPaint);

        } else {
            //正常情況,將字體居中
            canvas.drawText(mTitle, mWidth / 2 - mTextBound.width() * 1.0f / 2, mHeight - getPaddingBottom(), mPaint);
        }

        //取消使用掉的快
        rect.bottom -= mTextBound.height();

        if (mImageScale == IMAGE_SCALE_FITXY) {
            canvas.drawBitmap(mImage, null, rect, mPaint);
        } else {
            //計算居中的矩形范圍
            rect.left = mWidth / 2 - mImage.getWidth() / 2;
            rect.right = mWidth / 2 + mImage.getWidth() / 2;
            rect.top = (mHeight - mTextBound.height()) / 2 - mImage.getHeight() / 2;
            rect.bottom = (mHeight - mTextBound.height()) / 2 + mImage.getHeight() / 2;

            canvas.drawBitmap(mImage, null, rect, mPaint);
        }
    }

    /**
     * 設置監聽器
     *
     * @param listener
     */
    public void setListener(CustomImageViewClickListener listener) {
        this.listener = listener;
    }

    public interface CustomImageViewClickListener {
        void onCustomImageViewClickListener(View v);
    }
}
public class MainActivity extends AppCompatActivity implements CustomView.CustomListener {

    @Override
    protected void onCreate(Bundle savedInstanceState) {
        super.onCreate(savedInstanceState);
        setContentView(R.layout.activity_main);
        ((CustomView) this.findViewById(R.id.custom1)).setCustomListener(this);
    }


    @Override
    public void onCuscomClick(View v, int custom_id) {
        switch (custom_id) {
            case 1:
                Toast.makeText(this, "你點我干嘛?!", Toast.LENGTH_LONG).show();
                break;
            default:
                break;
        }
    }
/**
 * 類說明:CustomImageView 展示頁面
 * 增加:控件點擊事件
 * <p/>
 * 作者:vision
 * 時間:2016/7/15
 */
public class CustomImageViewActivity extends Activity implements CustomImageView.CustomImageViewClickListener {
    /**
     * 第一個控件
     */
    private CustomImageView pengyuyan1;
    /**
     * 第二個控件
     */
    private CustomImageView pengyuyan2;
    /**
     * 第三個控件
     */
    private CustomImageView pengyuyan3;

    @Override
    protected void onCreate(Bundle savedInstanceState) {
        super.onCreate(savedInstanceState);
        setContentView(R.layout.activity_custom_image_view);
        pengyuyan1 = (CustomImageView) findViewById(R.id.pengyuyan1);
        pengyuyan2 = (CustomImageView) findViewById(R.id.pengyuyan2);
        pengyuyan3 = (CustomImageView) findViewById(R.id.pengyuyan3);

        pengyuyan1.setListener(this);
        pengyuyan2.setListener(this);
        pengyuyan3.setListener(this);
    }

    @Override
    public void onCustomImageViewClickListener(View v) {
        switch (v.getId()) {
            case R.id.pengyuyan1:
                Toast.makeText(this, "帥哥彭於晏1", Toast.LENGTH_LONG).show();
                break;
            case R.id.pengyuyan2:
                Toast.makeText(this, "德藝雙馨彭於晏2", Toast.LENGTH_LONG).show();

                break;
            case R.id.pengyuyan3:
                Toast.makeText(this, "超越自己彭於晏3", Toast.LENGTH_LONG).show();
                break;
        }
    }
}


 [Android開發]使用XUtils框架出現的問題記錄
1、首先出現了這樣一個問題:百思不得其解,最後終於找到原因:返回的永遠是 “訪問失敗”我當時的服務器接口是這樣寫的:public static f
 Android 界面開發顏色整理
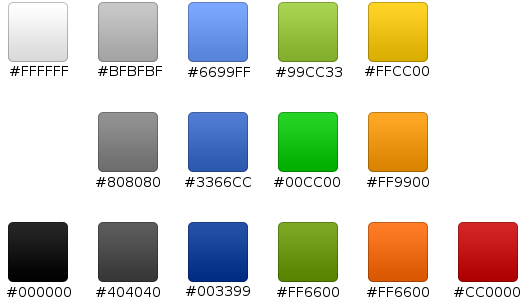
下圖是幫助文檔中的關於界面開發的推薦色值,大家可以參考一下: 補充一些常用的顏色值: <color name=white>#f
 Android項目:App登陸模塊的實現
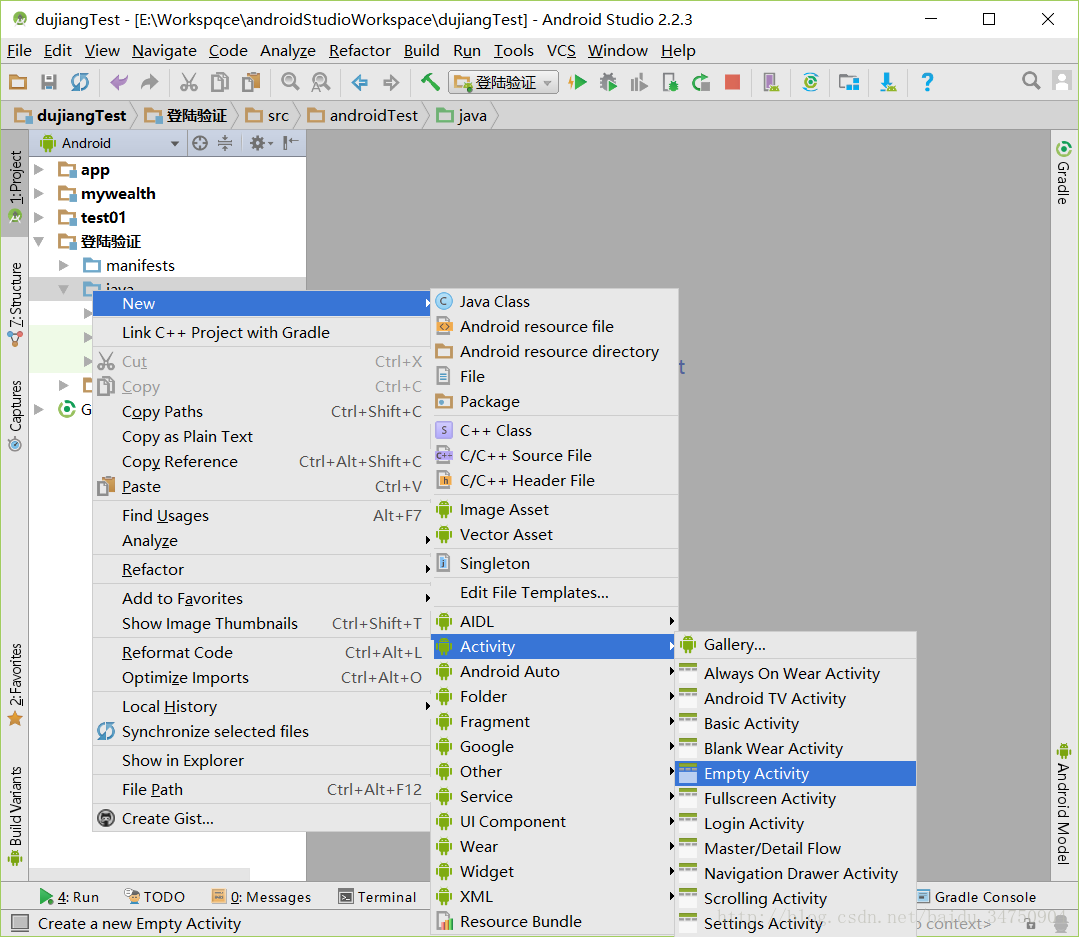
模塊實現前,先說兩點:第一點、登陸模塊的實現,是多數APP的基礎功能。第二點、數據庫用的不是MySQL,Oracle等,Android項目,多數還是會用到SQLite.現
 (一) Android WebView是什麼?
1.Android WebView 一些基本概念 在 Android 手機中內置了一款高性能 webkit 內核浏覽器,在 SDK 中封裝為一個叫做 WebVie