編輯:關於Android編程
Android的消息機制主要值得就是Handler的運行機制,Handler的運行需要底層的MessageQueue和Looper的支撐。
Looper中還有一個特殊概念,那就是ThreadLocal。ThreadLocal並不是線程,它的作用是可以在每個線程中存儲數據。Handler創建的時候會采用當前線程的Looper來構造消息循環系統,Handler內部利用ThreadLocal來獲取當前線程的Looper。
TheadLoacl可以在不同的線程中互不干擾地提供數據。線程默認是沒有ThreadLoacl。如果需要使用Handler就必須為線程創建Looper。而主線程即UI線程,就是ActcivityThread。ActivityThread被創建時會初始化Looper,所以在主線程中默認就可以使用Handler。
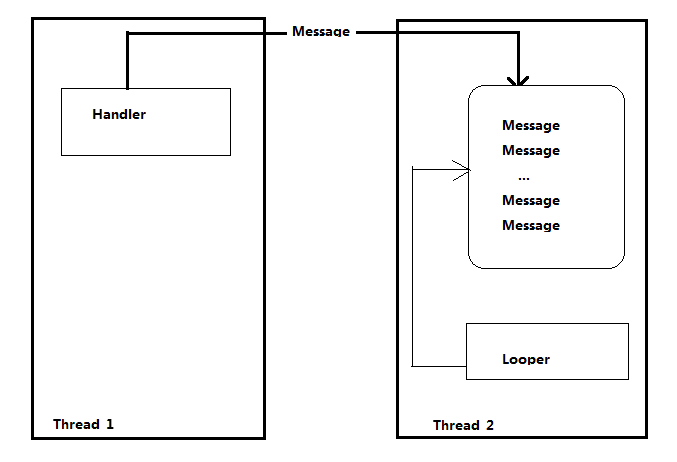
Handler,Looper,MessageQueue三者實際為一體
Handler的主要作用是將一個任務切換到某個指定的的線程中去執行。
Android為何會提供這個功能?因為Android規定UI只能在主線程中進行,在子線程中訪問UI就會拋出異常。ViewRootImpl對UI操作做了驗證,這個驗證由ViewRootImpl的checkThread方法來完成。
void checkThread(){
    if(mThread != Thread.currentThread()){
         throw new CalledFromWrongThreadException(
            "Only the original thread that created a view hierarchy can touch its views"
         );
   }
}
系統為什麼不允許在子線程中訪問UI呢?
Android的UI控件不是線程安全的,如果在多線程中並發訪問可能會導致UI控件處於不可預期的的狀態。
為什麼系統不對UI控件的訪問加上鎖機制?
缺點有兩個:
Handler工作原理概述
Handler創建時會采用當前線程的Looper來構建內部消息循環系統,如果當前線程沒有Looper,會報”java.lang.RuntimeException:Cant’s create handler inside thread that has not called Looper.prepare()”。這個時候需要為當前線程創建Looper。
Handler創建好之後,內部的Looper和MessageQueue就可以和Handler一起協同工作了。通過Handler的post方法將一個Runnable投遞到Handler內部的Looper中去處理,也可以通過Handler的send方法發送一個消息到Looper中去處理。
Handler的post方法最終也是通過send方法來完成的。
當Handler的send方法被調用時,Handler會調用MessageQueue的enqueueMessage方法將這個消息放入消息隊列中,然後Looper發現有新信息到來時,就處理這個消息,最終消息中的Runnable或者Handler的Handler的handleMessage方法會被調用。
注意Looper是運行在創建Handler所在的線程中的,這樣Handler中的業務就被切換到創建Handler所在的線程中去執行了。

ThreadLocal是一個線程內部的數據存儲類,通過它可以在指定的線程中存儲數據,數據存儲以後,只有在指定的線程中可以獲取到存儲的數據,對於其他線程來說則無法獲取到數據。
一般使用到ThreadLocal的地方較少。
ThreadLocal的使用場景:
案例
首先定義一個THreadLocal對象,這裡選擇Booelan類型的,如下:
private ThreadLocal
然後分別在主線程、子線程1和子線程2中設置和訪問它的值,代碼如下。
mBooleanThreadLocal.set(true);
Log.d(TAG,"[Thread#mian]mBooleanThreadLocal="+mBooleanThreadLocal.get());

new Thread("Thread#1"){
    @Override
    puboic void run(){
          mBooleanThreadLoacl.set(false);
          Log.d(TAG,"[Thread#mian]mBooleanThreadLocal="+mBooleanThreadLocal.get());
    }
}.start();

new Thread("Thread#2"){
    @Override
    puboic void run(){
           Log.d(TAG,"[Thread#mian]mBooleanThreadLocal="+mBooleanThreadLocal.get());
    }
}.start();
在上面的代碼中,在主線程中設置mBooleanThreadLocal的值為true,在子線程1中設置mBooleanThreadLocal的值為false,在子線程2中不設置mBooleanThreadLocal的值。然後分別在3個線程中通過get方法獲取mBooleanThreadLocal的值根據前面對ThreadLocal的描述,這個時候,主線程應該是true,子線程1中應該是false,而子線程2中由於沒有設置值,所以應該是null。
運行結果如下:
D/TestActivity(8676):[Thread#main]mBooleanThreadLocal=true
D/TestActivity(8676):[Thread#1]mBooleanThreadLocal=false
D/TestActivity(8676):[Thread#2]mBooleanThreadLocal=null
ThreadLocal之所以有這麼奇妙的用法,是不同的線程中訪問同一個ThreadLocal的get方法,ThreadLocal內部會從各自的線程中取出一個數組,然後再從數組中根據當前ThreadLocal的索引去查找對應的Value值。
ThreadLocal是一個泛型類,它定義為public class ThreadLocal ,內部含有一個set和get方法。
ThreadLoacl的set方法:
public void set(T value){
   ThreadLocal currentThread = Thread.currentThread();
   Values values = values(c);
   if(values == null){
       values = initializeValues(currentThread);
   }
   values.put(this,value);
}
在set方法中,首先會通過values方法來獲取當前線程中的ThreadLoacl數據。在Thread類的內部有一個成員專門用於存儲線程的ThreadLoacl數據:ThreadLoacl.Values。如果localValues為null,那麼需要對其進行
初始化後再將ThreadLoacl的值進行存儲。在localValues內部有一個數組:public Object[] table,ThreadLoacl的值就存在在這個table數組中。
消息隊列在Android中指的是MessageQueue,MessageQueue主要包含兩個操作:插入和讀取。讀取操作本身會伴隨著刪除操作,插入和讀取對應的方法分別enqueueMessage和next,其中enqueueMessage的作用是往消息隊列中插入一個消息,而next的作用是從消息隊列中取出一條消息並將其從消息隊列中移除。盡管MessageQueue叫消息隊列,但是它的內部實現並不是用的隊列,實際上它是通過一個單鏈表的數據結構來維護消息列表,單鏈表在插入和刪除上比較有優勢。
書中的源碼沒看懂,多看幾遍
Looper在Android的消息機制中扮演著消息循環的角色。它會不停從MessageQueue中查看是否有新消息,如果有新消息就會立刻處理,否則就一直阻塞在那裡。
構造方法,在構造方法中會創建一個MessageQueue即消息隊列,然後將當前的對象保存起來。
private Looper(boolean quitAllowed){
        mQueue  = new MessageQueue(quitAllowed);
        mThread = Thread.currentThread();
}
Handler工作需要Looper,沒有Looper的線程就會報錯。Looper.prepare()即可為當前線程創建一個Looper,接著通過Looper.loop()來開啟消息循環。
new Thread("Thread#2"){
      @Override
      public void run(){
      Looper.prepare();
      Handler handler = new Handler();
      Looper.loop();
    }
}.start();
Looper除了prepare方法外,還提供了prepareMainLooper方法,這個方法主要是給主線程ActivityThread創建Looper使用的,其本質也會上通過preare方法來實現的。由於主線程的Looper特殊,Looper提供了一個getMainLooper方法,通過它可以在任何地方獲取到主線程的Looper。
Looper也是可以退出的,Looper提供了quit和quitSafely來退出一個Looper。
區別:
quit會直接退出Looper。而quitSafely只是設定一個退出標記,然後把消息隊列中的已有消息處理完畢後才安全地退出。
Looper退出後,通過Handler發送的消息會失敗,這個時候Handler的send方法會返回false。在子線程中,如果手動為其創建了Looper,那麼在所有的事情完成以後應該調用quit方法來終止消息循環,否則這個子線程就會一直處於一個等待的狀態,而如果退出Looper以後,則這個線程就會立刻終止,所以建議不需要的時候終止Looper。
Looper最重要的一個方法是loop方法,只有調用loop後,消息循環才會真正地起作用。
public void static void loop(){
   final Looper me = myLooper();
   if(me == null){
       throw new RuntimeException("No Looper;Looper.prepare() wasn't called on this thread.");
   }
   final MessageQueue queue = me.mQueue();

   Binder.clearCallingIdentity();
   fianl long ident = Binder.clearCallingIdentity();

   for(;;){
       Message msg = queue.next();
       if(msg == null){
           //No message indicates that the message queue is quitting.
           return;
       }
       //This must be in a local variable,in case a UI event sets the logger
       Printer longging = me.mLogging;
       if(logging != null){
           logging.println(">>>>>Dispatching to"+msg.tartget +" "+msg.callback + ":"+msg.what);
       }

       msg.target.dispatchMessage(msg);
       if(logging != null){
          logging.println("<<<<<
Looper的loop方法的工作過程:

loop方法是一個死循環,唯一跳出循環的方式是MessageQueue的next方法返回了null。當Looper的quit方法調用時,Looper就會調用MessagQueue的quit或者quitSafely方法來通知消息隊列退出,當消息隊列被標記為退出狀態時,它的的next就會返回null。也就是說,Looper必須退出,否則loop方法就會無限循環下去。loop方法會調用MessageQueue的next方法獲取新消息,而next是一個阻塞操作,當沒有消息時,next方法會一直阻塞在那裡。如果MessageQueue的next方法返回了新消息,Looper就會處理這條消息:msg.target.dispatchingMessage(msg),這裡的msg.target是發送這條消息的Handler對象,這樣Handler發送的消息最終又交給它的dispatchMessage方法來處理了。但這裡不同的是,Handler的dispatchMessage方法是在創建Handler時所使用的Looper中執行的,這樣成功地將代碼邏輯切換到指定的線程去執行了。
10.2.4 Handler的工作原理 Handler工作主要包含:消息的發送和接收過程。
消息的發送可以通過post的一系列方法及send的一系列方法來實現,post的一系列方法最終是通過send的一系列方法來實現。
發送一條典型的消息的過程:
public final boolean sendMessage(Message msg){
    return sendMessageDelayed(msg,0);
}

public final boolean sendMessageDelayed(Message msg,long delayMills){
    if(delayMillis < 0){
       delayMills = 0;
    }
    return sendMessageAtTime(msg,SystemClock.uptimeMills() + delayMills);
}

public final sendMessageAtTime(Message msg, long uptimeMills){
      MessageQueue queue = mQueue;
      if(queue == null){
          RuntimeException e = new RuntimeException(this +
                     "sendMessageAtTime() called with no mQueue"
          );
          Log.w("Looper",e.getMessage(),e);
          return false;
      }
      return enqueueMessage(queue,msg,uptimeMills);
}

private boolean enqueueMessage(MessageQueue queue, Message msg, long uptimeMills){
    msg.target = this;
    if(mAsynchronus){
        msg.setAsynchronous(true);
    }
    return queue.enqueueMessage(msg,uptimeMills);
}
Handler發送消息的過程僅僅是向消息隊列中插入一條消息,MessageQueue的next方法就會返回這條消息給Looper,Looper收到消息後就開始處理了,最終消息由Looper交由Handler處理,即Handler的diapatchMessage方法會被調用,這時Handler就進入處理消息的階段。
Handler的diapatchMessage方法:
public void dispatchMessage(Message msg){
     if(msg.callback != null){
          handlerCallback(msg);
     }else{
          if(mCallback != null){
               if(mCallback.handleMessage(msg)){
                    return;
               }
          }
          handleMessage(msg);
     }
}
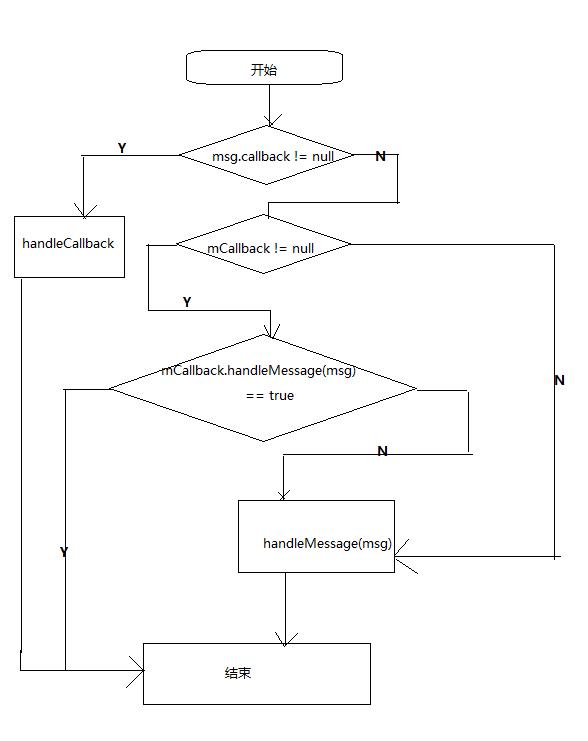
Handler處理消息的過程如下:

首先,檢查Message的callback是否為null,不為null就通過handleCallback來處理消息。Message的callback是一個Runnable對象,實際上就是Handler的post方法所傳遞的Runnable參數。handleCallback的邏輯也是很簡單,如下:
private static void handleCallback(Message msg){
     message.callback().run();
}
其次,檢查mCallback是否為null,不為null就調用mCallback的handleMessage方法來處理消息。CallBack是個接口。
public interface Callback{
    public boolean handleMessage(Message msg);
}
通過Callback可以采用:Handler handler = new Handler(callback);

Callback的意義:可以用來創建一個Handler的實例但並不需要派生Handler的子類。

在日常的開發中,創建Handler最常見的方式就是派生一個Handler的子類並重寫其handlerMessage方法來處理具體的消息,而Callback給我們提供了另一種使用Handler的方式,當我們不想派生子類時,就可以通過Callback來實現。
最後調用Handler的handleMessage方法來處理消息。

流程圖如下:

Handler還有一個特殊的構造方法,那就是通過一個特定的Looper來構造Handler,它的實現如下:
public Handler(Looper looper){
     this(looper,null,false);
}
下面是Handler的一個默認構造方法pubic Handler()。根據方法中的代碼可以看出,如果當前當前線程沒有Looper的話,就會拋出”Can’t create handler inside thread that has not called Looper.prepare()”
public Handler(Callback callback, boolean asyn){
     ···
     mLooper = Looper.myLooper();
     if(mLooper == null){
         throw new RuntimeException(
            "Can't create handler inside thread that has not called Looper.prepare()"
         );
     }
     mQueue = mLooper.mQueue();
     mCallback = callback;
     mAsynchronous = async;
}
10.3主線程的消息循環Android的主線程就是ActivityThread,主線程的入口方法為main,在main方法中系統會通過Looper.loop()來開啟主線程的Looper以及MessageQueue,通過Looper.loop來開啟主線程的消息循環。
public static void main(String[]args){
    ...
    Process.setArgV0("");

    Looper.prepareMainLooper();

    ActivityThread thread = new ActivityThread();
    thread.attach(false);

    if(sMainThreadHandler == null){
       sMainThreaddHandler = thread.getHandler();
    }

    AsyncTask.init();

    if(false){
        Looper.myLooper().setMessageLogging(
            new LogPrinter(Log.DEBUG,"ActivityThread"));
        );
    }

    Looper.loop();
    throw new RuntimeException("Main thread loop unexpectedly exited");
}
主線程的消息循環開始了以後,ActivityThread還需要一個Handler來和消息隊列進行交互,這個Handler就是ActivityThread.H,它內部定義了一組消息類型,主要包含了四大組件的啟動和停止等過程。
ActivityThread通過ApplicationThread和AMS進行進程間通信,AMS以進程間通信的方式完成ActivityThread的請求後回調ApplicationThhread中的Binder方法,然後ApplicationThread會向H發送消息,H收到消息會將ApplicationThread中邏輯切換到ActicvityThread。
 側拉新聞菜單
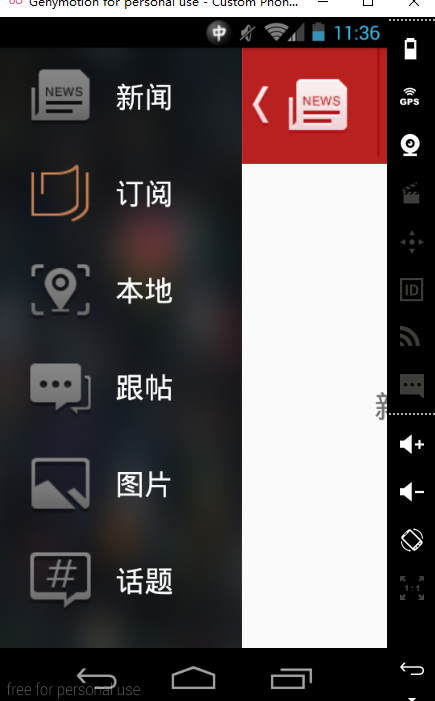
功能描述菜單分左右兩側,整體可以滑動,效果如下功能分析widthMeasureSpec:期望值組成: 32位的010101010101011010101組成 頭2位:代表
 Android 可拖動的seekbar自定義進度值
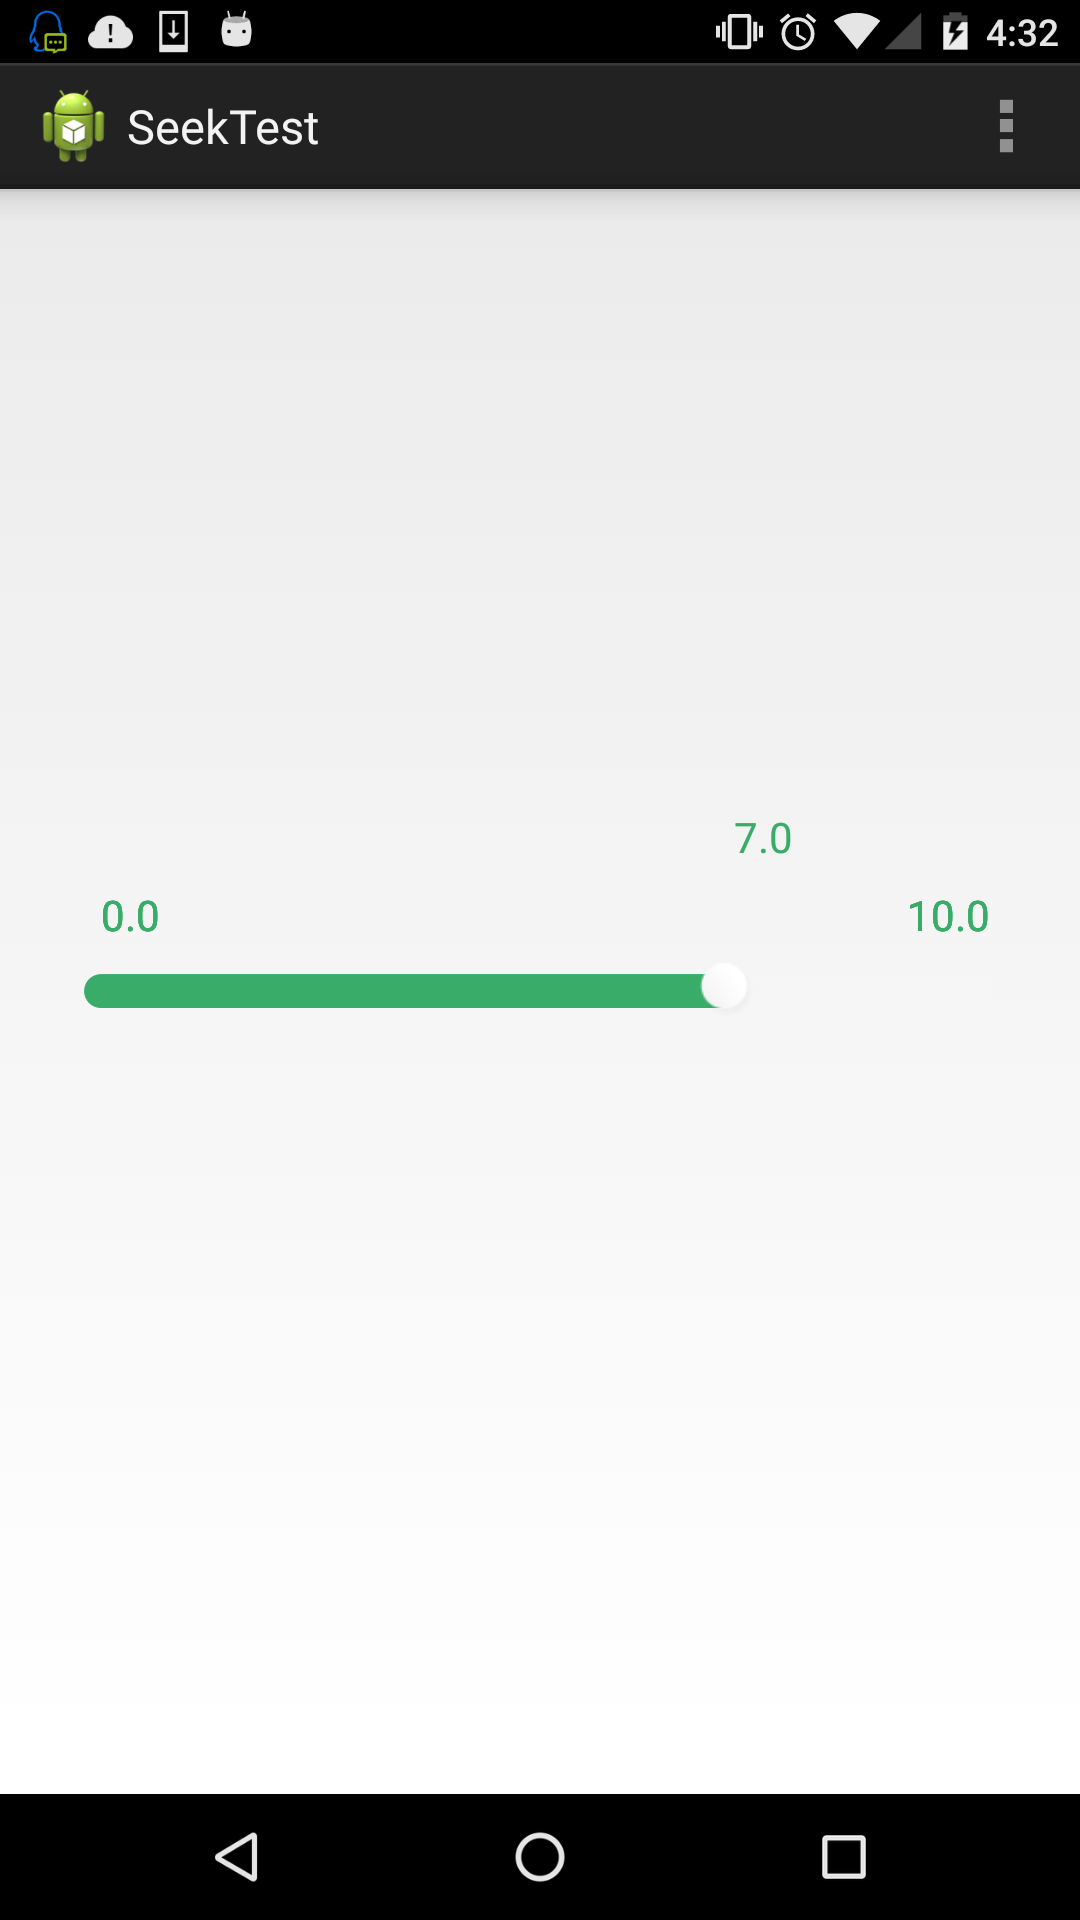
最近接了個項目其中有需要要實現此功能:seekbar需要顯示最左和最右值,進度要跟隨進度塊移動。下面通過此圖給大家展示下效果,可能比文字描述要更清晰。其實實現起來很簡單,
 Android Design Support Library使用詳解
Android Design Support Library使用詳解Google在2015的IO大會上,給我們帶來了更加詳細的Material Design設計規范,同時
 如何刪除小米手機保存的WIFI密碼
小米手機的WIFI設置是在沒有某WIFI熱點的情況下,即使已經保存了的WIFI密碼也是不顯示的,這樣就造成我們沒法將其刪除.只能再回到原來的WIFI熱點下才