編輯:關於Android編程
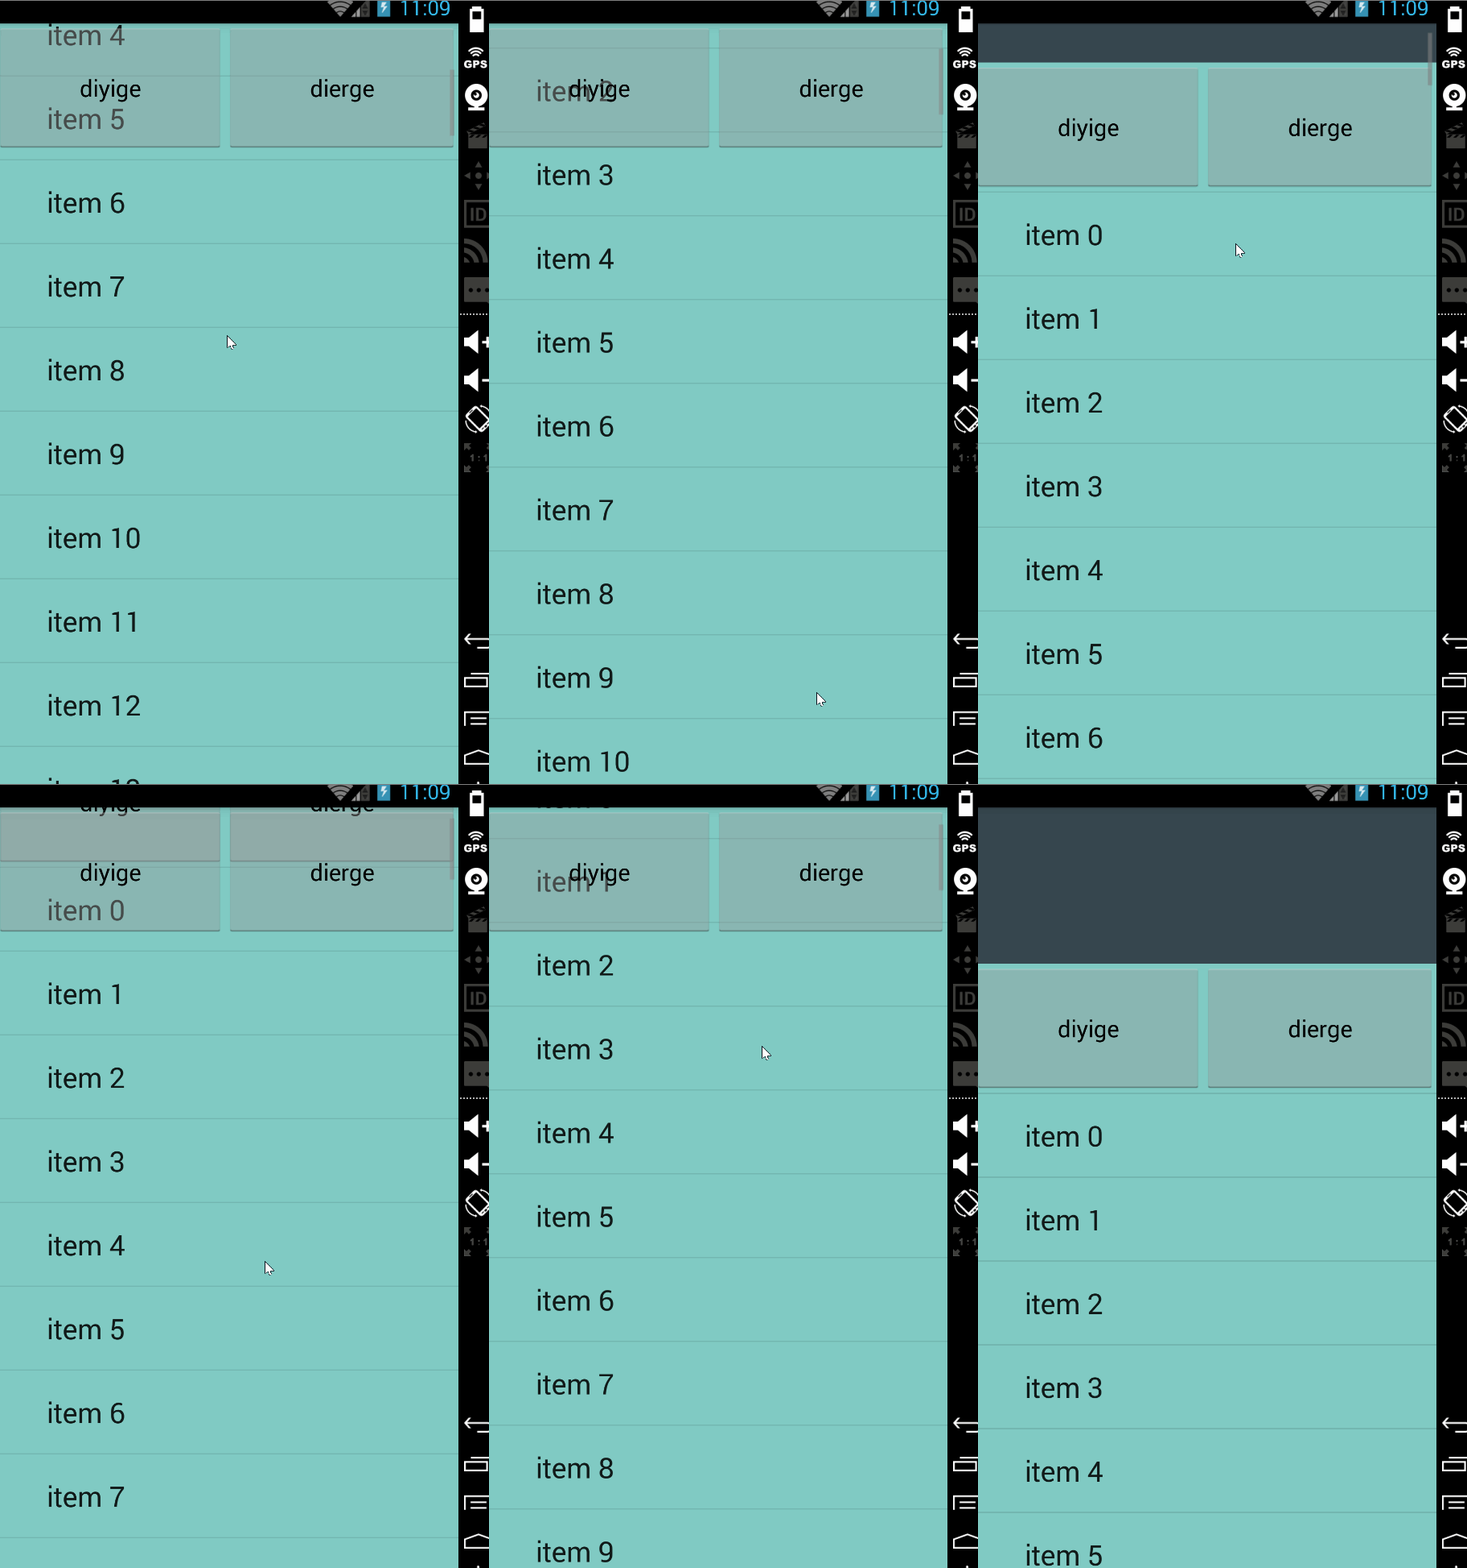
很簡單就是ListView增加一個headView頭部然後根據滑動的距離判斷是否顯示隱藏了的按鈕
效果圖

接下來就是顯示代碼了首先是布局
主布局
<framelayout xmlns:android="http://schemas.android.com/apk/res/android" xmlns:tools="http://schemas.android.com/tools" android:layout_width="match_parent" android:layout_height="match_parent" tools:context=".MainActivity">
    <linearlayout android:id="@+id/contentss" android:layout_width="wrap_content" android:layout_height="wrap_content">
        <listview android:id="@+id/main_list_view" android:layout_width="match_parent" android:layout_height="match_parent" android:background="@color/material_deep_teal_200">
    </listview></linearlayout>

    <linearlayout android:id="@+id/main_section_b_outside" android:layout_width="match_parent" android:layout_height="wrap_content" android:visibility="gone">
        <include layout="@layout/main_section_b" android:layout_width="match_parent" android:layout_height="wrap_content">
    </include></linearlayout>
</framelayout>
第二個布局也就是headView
<linearlayout xmlns:android="http://schemas.android.com/apk/res/android" android:orientation="vertical" android:layout_width="match_parent" android:layout_height="match_parent">
        <textview android:background="@color/material_blue_grey_800" android:clickable="true" android:id="@+id/abc" android:layout_width="match_parent" android:layout_height="300dp" android:textsize="20dp" android:text="hi">
    <include android:id="@+id/main_section_b_inside" android:layout_width="match_parent" android:layout_height="wrap_content" layout="@layout/main_section_b">
</include></textview></linearlayout>
第三個布局是那個按鈕
<linearlayout xmlns:android="http://schemas.android.com/apk/res/android" android:orientation="horizontal" android:layout_width="match_parent" android:layout_height="match_parent"><button android:layout_weight="1" android:id="@+id/first" android:text="diyige" android:layout_width="wrap_content" android:layout_height="100dp"></button></linearlayout></code><button android:layout_weight="1" android:text="dierge" android:id="@+id/two" android:layout_width="wrap_content" android:layout_height="100dp"><code>

</code></button>
接下裡就是編寫邏輯
        public class MainActivity2 extends Activity implements View.OnClickListener{
        private ListView listView;
        private LinearLayout sectionB;
        private int aHeight;
        private View headerView;
        private FragmentManager fr;
        private act1 act1;
        private act2 act2;
        private Boolean isfrist = true;

    @Override
        protected void onCreate(Bundle savedInstanceState) {
            super.onCreate(savedInstanceState);
            setContentView(R.layout.activity_main);
            sectionB = (LinearLayout) findViewById(R.id.main_section_b_outside);
            headerView = LayoutInflater.from(this).inflate(R.layout.main_header,null);

            Button first = (Button) findViewById(R.id.first);
            Button two = (Button) findViewById(R.id.two);
            first.setOnClickListener(this);
            two.setOnClickListener(this);
            fr = getFragmentManager();
            act1 = new act1();
            act2 = new act2();
            initListView(headerView);
        }
        private void initListView(View headerView){
            listView = (ListView) findViewById(R.id.main_list_view);
            listView.addHeaderView(headerView, null, true);
            ArrayAdapter adapter = new ArrayAdapter<>(this, android.R.layout.simple_expandable_list_item_1);
            for (int i = 0; i<100; i++){
                adapter.add("item "+String.valueOf(i));
            }
            listView.setAdapter(adapter);


            listView.setOnScrollListener(new AbsListView.OnScrollListener() {
                @Override
                public void onScrollStateChanged(AbsListView view, int scrollState) {
                }

                @Override
                public void onScroll(AbsListView view, int firstVisibleItem, int visibleItemCount, int totalItemCount) {
                    if (isfrist) {
                        if (listView.getChildAt(0) == null) {
                            isfrist = true;
                        } else {
                            getmyselfheight(listView.getChildAt(0));
                            isfrist = false;
                        }
                    }
                    if (getScrollY() >= aHeight) {
                        if (sectionB.getVisibility() == View.GONE) {
                            sectionB.setVisibility(View.VISIBLE);
                        }
                    } else if (getScrollY() < aHeight) {
                        if (sectionB.getVisibility() == View.VISIBLE) {
                            sectionB.setVisibility(View.GONE);
                        }
                    }
                }
            });
        }
    //    獲取head的高度
    public void getmyselfheight(View v){
        View vx = v.findViewById(R.id.main_section_b_inside);
        aHeight = v.getTop()+v.getHeight()-vx.getHeight();
    }
        //獲取滾動距離
        public int getScrollY() {
            View c = listView.getChildAt(0);
            if (c == null) {
                return 0;
            }
            int firstVisiblePosition = listView.getFirstVisiblePosition();
            int top = c.getTop();
            int headerHeight = 0;
            Log.d("test",top+"top");
            Log.d("test",-top +  c.getHeight() + headerHeight+"");
            Log.d("test", top + "top"+aHeight+"seleteHeight"+"headerHeight"+headerHeight);

            if (firstVisiblePosition >= 1) {
                headerHeight = listView.getHeight();
            }
            return -top +  firstVisiblePosition*c.getHeight() + headerHeight;
        }

    @Override
    public void onClick(View v) {


        switch (v.getId()){
            case R.id.first:
                ArrayAdapter adapter = new ArrayAdapter<>(this, android.R.layout.simple_expandable_list_item_1);
                for (int i = 0; i<100; i++){
                    adapter.add("itemact1 "+String.valueOf(i));
                }
                adapter.notifyDataSetChanged();
                listView.setAdapter(adapter);
                break;
            case R.id.two:
                ArrayAdapter adapter1 = new ArrayAdapter<>(this, android.R.layout.simple_expandable_list_item_1);
                for (int i = 0; i<100; i++){
                    adapter1.add("itemact2 "+String.valueOf(i));
                }
                adapter1.notifyDataSetChanged();
                listView.setAdapter(adapter1);
                break;
        }
    }

    @Override
    protected void onStart() {
        TextView tv = (TextView) findViewById(R.id.abc);
        Button first = (Button) findViewById(R.id.first);
        Button two = (Button) findViewById(R.id.two);
        tv.setOnClickListener(this);
        first.setOnClickListener(this);
        two.setOnClickListener(this);
        super.onStart();

    }
}
這裡寫得比較亂 但是將就著吧
以下說幾個關鍵點就是listView的getScrollY是一個空的方法需要我們自己去寫邏輯然後獲取當前滑動的距離
看了網上的一些資料,才知道ListView沒有提供得到滾動高度的任何方法,必須自己根據getChildAt(0).top和getFirstVisiblePosition()來綜合計算獲得。
代碼如下:
public int getScrollY() {
    View c = mListView.getChildAt(0);
    if (c == null) {
        return 0;
    }
    int firstVisiblePosition = mListView.getFirstVisiblePosition();
    int top = c.getTop();
    return -top + firstVisiblePosition * c.getHeight() ;
但是我們需要將其加工需要隱藏和顯示按鈕
//獲取滾動距離
        public int getScrollY() {
            View c = listView.getChildAt(0);
            if (c == null) {
                return 0;
            }
            int firstVisiblePosition = listView.getFirstVisiblePosition();
            int top = c.getTop();
            int headerHeight = 0;
            if (firstVisiblePosition >= 1) {
                headerHeight = listView.getHeight();
            }
            return -top +  firstVisiblePosition*c.getHeight() + headerHeight;
        }
之後就是獲取兩組按鈕的點擊事件問題
因為一個在主的布局第一個布局另一個在第二個布局那麼注定了不能將他們一次過設置點擊事件需要分開進行設置點擊事件
然後就是獲取headview的高度獲取listview的第0個item所以怪不得listview的item下標都是從1開始
  //    獲取head的高度
    public void getmyselfheight(View v){
        View vx = v.findViewById(R.id.main_section_b_inside);
        aHeight = v.getTop()+v.getHeight()-vx.getHeight();
    }
最後就是出現效果啦 希望對你有幫助
 Android Animation中關於Interpolator的解釋
網上有很多解釋Interpolator屬性的文章,但是基本上都是停留在直接翻譯SDK的意思層面上。Interpolator英文意思是: 篡改者; 分類機;
 Android源碼中的外觀模式
定義外觀模式(Facade Pattern):外部與一個子系統的通信必須通過一個統一的外觀對象進行,為子系統中的一組接口提供一個一致的界面,外觀模式定義了一個高層接口,這
 Listview嵌套Viewpager實現仿淘寶搜狐廣告主頁,並實現listview的下拉刷新
Android實現功能:Listview嵌套viewpager仿淘寶搜狐視頻主頁面,和listview的下拉刷新。直接上圖下面給出我源碼的主要文件構成:MyListVie
 Demo3懸浮的按鈕:FloatActionButton(Design Support Lib)
從Demo3開始,接下來會介紹Design Support組件庫中幾個常用的組件,首先就先從Design Support Library開始說起。Android Des