編輯:關於Android編程
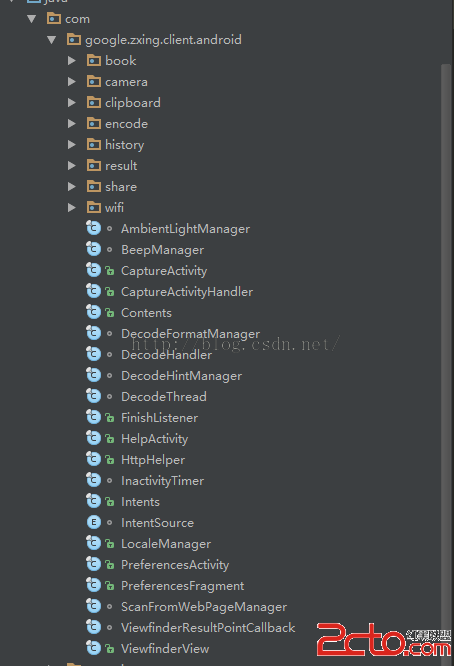
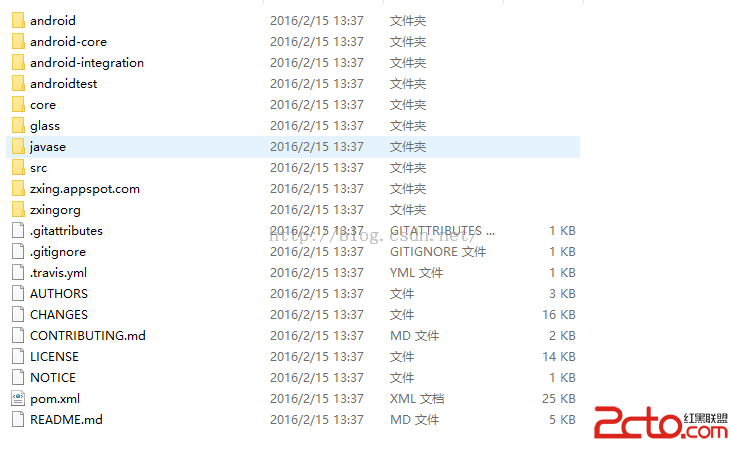 點擊Android下面在src看到源碼復制到工程裡面,在把資源文件拷貝進去,然後就是改一下AndroidMainfest其中的聲明Activityde shihou ,因為都是簡寫,現在包名變了,改一下就好了,然後針對工程的R文件報錯一個一個小心翼翼的改掉就OK了,針對有一個類報錯BookmarkPickerActivity,其中大概在50行左右的時候,Browser.BOOKMARKS_URI這個報錯,我把編譯版本改成22就好了,基本上這樣就算OK了,就像這樣子:
 然後基本運行你就可以開始掃碼了。
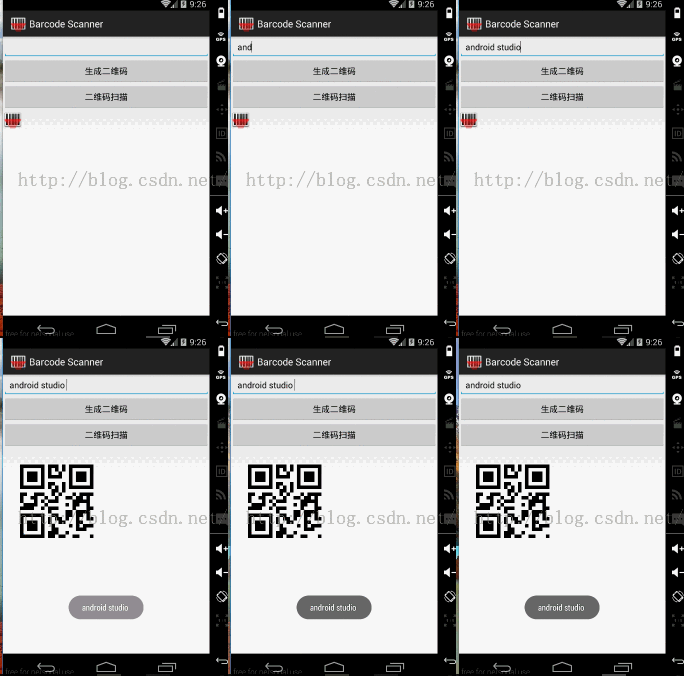 實現二維碼的生成,如下調用即可:
//生成二維碼圖片,第一個參數是二維碼的內容,第二個參數是正方形圖片的邊長,單位是像素
			Bitmap bitmap = null;
			try {
				bitmap = BitmapUtil.createQRCode(msg, 400);
			} catch (WriterException e) {
				// TODO Auto-generated catch block
				e.printStackTrace();
			}
			imageView.setImageBitmap(bitmap);
然後將生成的二維碼放置到相應的位置即可。
現在微信基本上都有長按二維碼識別,這種實現我的思路就是,既然二維碼掃描能夠識別,那麼肯定也是能夠解析圖片的,那麼我們可以長按實現對當前屏幕截屏然後調用相關的類去解析即可:
我們先看下截屏的代碼,都有注釋自己看吧:
	//這種方法狀態欄是空白,顯示不了狀態欄的信息
	private void saveCurrentImage()
	{
		//獲取當前屏幕的大小
		int width = getWindow().getDecorView().getRootView().getWidth();
		int height = getWindow().getDecorView().getRootView().getHeight();
		//生成相同大小的圖片
		Bitmap temBitmap = Bitmap.createBitmap( width, height, Config.ARGB_8888 );
		//找到當前頁面的根布局
		View view =  getWindow().getDecorView().getRootView();
		//設置緩存
		view.setDrawingCacheEnabled(true);
		view.buildDrawingCache();
		//從緩存中獲取當前屏幕的圖片
		temBitmap = view.getDrawingCache();
		SimpleDateFormat df = new SimpleDateFormat("yyyymmddhhmmss");
		time = df.format(new Date());
		if(Environment.MEDIA_MOUNTED.equals(Environment.getExternalStorageState())){
			file = new File(Environment.getExternalStorageDirectory().getAbsolutePath() + "/screen",time + ".png");
			if(!file.exists()){
				file.getParentFile().mkdirs();
				try {
					file.createNewFile();
				} catch (IOException e) {
					// TODO Auto-generated catch block
					e.printStackTrace();
				}
			}
			FileOutputStream fos = null;
			try {
				fos = new FileOutputStream(file);
				temBitmap.compress(Bitmap.CompressFormat.PNG, 100, fos);
				fos.flush();
				fos.close();
			} catch (FileNotFoundException e) {
				e.printStackTrace();
			} catch (IOException e) {
				// TODO Auto-generated catch block
				e.printStackTrace();
			}
		}
	}
上面將屏幕截圖並以當前的時間為名字保存到手機上了,我們解析直接可以將路徑傳遞進入解析就好了,我把相關的類傳遞上來,都有注釋,大家看看吧:
//解析二維碼圖片,返回結果封裝在Result對象中
	private com.google.zxing.Result  parseQRcodeBitmap(String bitmapPath){
		//解析轉換類型UTF-8
		Hashtable hints = new Hashtable();
		hints.put(DecodeHintType.CHARACTER_SET, "utf-8");
		//獲取到待解析的圖片
		BitmapFactory.Options options = new BitmapFactory.Options();
		//如果我們把inJustDecodeBounds設為true,那麼BitmapFactory.decodeFile(String path, Options opt)
		//並不會真的返回一個Bitmap給你,它僅僅會把它的寬,高取回來給你
		options.inJustDecodeBounds = true;
		//此時的bitmap是null,這段代碼之後,options.outWidth 和 options.outHeight就是我們想要的寬和高了
		Bitmap bitmap = BitmapFactory.decodeFile(bitmapPath,options);
		//我們現在想取出來的圖片的邊長(二維碼圖片是正方形的)設置為400像素
		//以上這種做法,雖然把bitmap限定到了我們要的大小,但是並沒有節約內存,如果要節約內存,我們還需要使用inSimpleSize這個屬性
		options.inSampleSize = options.outHeight / 400;
		if(options.inSampleSize <= 0){
			options.inSampleSize = 1; //防止其值小於或等於0
		}
		options.inJustDecodeBounds = false;
		bitmap = BitmapFactory.decodeFile(bitmapPath, options);
		//新建一個RGBLuminanceSource對象,將bitmap圖片傳給此對象
		RGBLuminanceSource rgbLuminanceSource = new RGBLuminanceSource(bitmap);
		//將圖片轉換成二進制圖片
		BinaryBitmap binaryBitmap = new BinaryBitmap(new HybridBinarizer(rgbLuminanceSource));
		//初始化解析對象
		QRCodeReader reader = new QRCodeReader();
		//開始解析
		Result result = null;
		try {
			result = reader.decode(binaryBitmap, hints);
		} catch (Exception e) {
			// TODO: handle exception
		}
		return result;
	}
按照zxing的解碼規則,我們是需要一個BitmapLuminanceSource類的,也是唯一需要去實現的
BitmapLuminanceSource繼承自LuminanceSource這個抽象類,需要實現它的構造方法,其構造方法中需要傳入寬高,這兩個值指的就是圖片的寬和高。getMatrix()方法會返回一個byte數組,這個數組就是圖片的像素數組。getRow(int y, byte[] row)如字面的意義,就是得到圖片像素數組的一行。其中的y就是需要的哪一個行的像素數組。
以下是完整的BitmapLuminanceSource類
public class RGBLuminanceSource extends LuminanceSource {

	private byte bitmapPixels[];

	protected RGBLuminanceSource(Bitmap bitmap) {
		super(bitmap.getWidth(), bitmap.getHeight());

		// 首先,要取得該圖片的像素數組內容
		int[] data = new int[bitmap.getWidth() * bitmap.getHeight()];
		this.bitmapPixels = new byte[bitmap.getWidth() * bitmap.getHeight()];
		bitmap.getPixels(data, 0, getWidth(), 0, 0, getWidth(), getHeight());

		// 將int數組轉換為byte數組,也就是取像素值中藍色值部分作為辨析內容
		for (int i = 0; i < data.length; i++) {
			this.bitmapPixels[i] = (byte) data[i];
		}
	}

	@Override
	public byte[] getMatrix() {
		// 返回我們生成好的像素數據
		return bitmapPixels;
	}

	@Override
	public byte[] getRow(int y, byte[] row) {
		// 這裡要得到指定行的像素數據
		System.arraycopy(bitmapPixels, y * getWidth(), row, 0, getWidth());
		return row;
	}
}
上面獲取圖片像素組內容的byte[]數組是指圖片的像素數組,而不是所謂的Bitmap轉換成byte數組
Bitmap對象的getPixels方法可以取得的像素數組,但它得到是int型數組。根據其api文檔解釋,取得的是color,也就是像素顏色值。每個像素值包含透明度,紅色,綠色,藍色。所以白色就是0xffffffff,黑色就是0xff000000。直接由int型轉成byte型,實現上相當於我們這裡只取其藍色值部分。
getPixels得到的像素數組是一維的,也就是按照圖片寬度逐行取像素顏色值錄入。如果想得到單行的像素數組內容,通過y*width就可以找該行的第一個像素值,拷貝後面width個就可以得到該行的像素內容。
最後一個就是getMatrix()方法,它用來返回我們的圖像轉換成的像素數組。
最後我們將長按存儲的圖片路徑傳遞進去即可,但是注意解析的時候開個線程,不然要ANR,基本上實現了我們需要的大部分生成、讀取、識別大部分功能。
稍後上傳源碼給大家,覺得有用就點個贊吧。。。。。
 Android中事件的分發機制
Android事件構成在Android中,事件主要包括點按、長按、拖拽、滑動等,點按又包括單擊和雙擊,另外還包括單指操作和多指操作。所有這些都構成了Andro
 Android 自定義圓圈進度並顯示百分比例控件(純代碼實現)
首先,感謝公司能給我閒暇的時間,來穩固我的技術,讓我不斷的去探索研究,在此不勝感激。 先不說實現功能,上圖看看效果 這個是續上一次水平變色進度條的有一個全新的控件,理論實
 Android開發之友盟統計
當我們開發好App後就會把它發到應用市場上,但是目前有很的應用市場(如,豌豆莢,應用寶,安卓市場等)那麼問題來了,假如我們想統計我們開發的應用的下載次數,就必須把各個應用
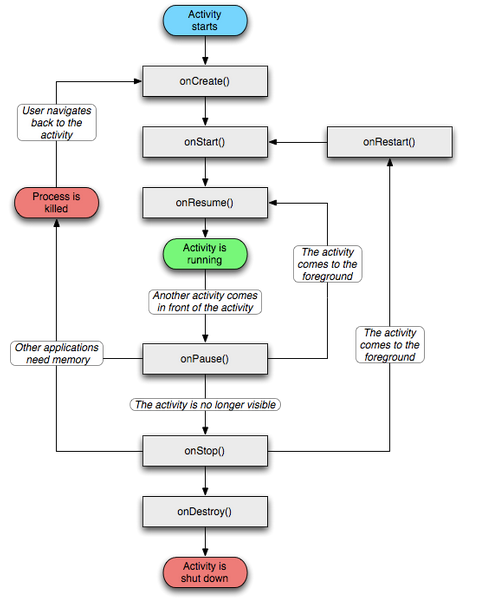 第八章:Activity與Activity調用棧分析
知識點目錄 8.1 Activity 8.1.1 起源 8.1.2 Activity形態 8.1.3 生命周期 8.2 Activity任務棧簡介 8.3 Activit