編輯:關於Android編程
ADT插件:管理Android SDK和相關的開發工具的
NDK插件:用於開發Android NDK的插件,ADT版本在20以上,就能安裝NDK插件,另外NDK集成了CDT插件(所以本文直接針對ADT 20以上版本進行說明)
到Android官網下載最新的NDK,注:NDK版本在r7以上之後就集成了Cygwin,而且還是十分精簡版。比起下載Cygwin要方便多啦(Cygwin以前需要單獨安裝和配置,現在已被集成)!
下載完成之後,解壓搞定。
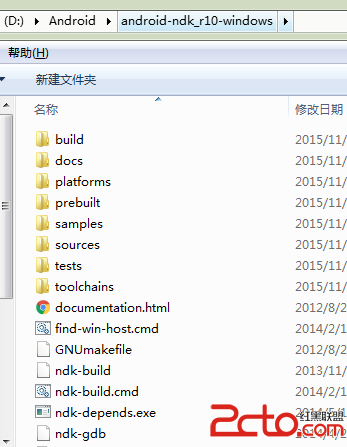
解壓後的目錄結構如下圖所示:
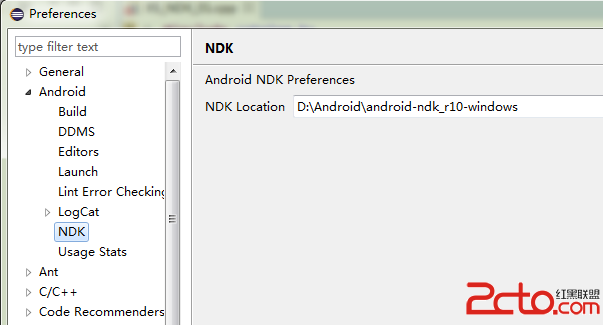
打開Eclipse,點Window->Preferences->Android->NDK,設置NDK路徑,例如我的是:D:Androidandroid-ndk_r10-windows
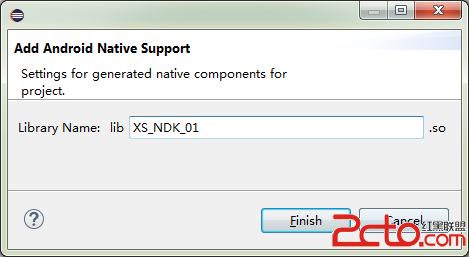
新建一個Android工程,在工程上右鍵點擊Android Tools->Add Native Support… ,然後給我們的.so文件取個名字,例如我的是:XS_NDK_01
這時候工程就會多一個jni的文件夾,jni下有Android.mk和XS_NDK_01.cpp文件。Android.mk是NDK工程的Makefile,XS_NDK_01.cpp就是NDK的源文件。
(關於 Android.mk 的說明可以參考資料:http://www.cnblogs.com/luxiaofeng54/archive/2011/08/13/2137577.html)
JNI接口的命名規范是:Java_ + 調用該方法的包名(包名的點用代替) + + 調用該接口的類名 + _ + 方法名,對於實例方法,有兩個參數是必要的,一個JNI的環境指針JNIEnv *,另一個是調用該方法的Java實例jobject
接下來編輯XS_NDK_01.cpp文件,寫一個HelloWorld的demo,代碼如下:
#include
#include

extern C{
    jstring
    Java_com_shanhy_example_ndk01_MainActivity_getStringFromJNI(JNIEnv* env, jobject thiz)
    {
        //返回一個字符串給Java層
        return env->NewStringUTF(小單 的 JNI HellWorld 程序.);
    }
}
完成了,然後運行。運行之前先編譯NDK,然後在編譯JAVA代碼。編譯也許會遇到Unable to launch cygpath. Is Cygwin on the path?如何解決?
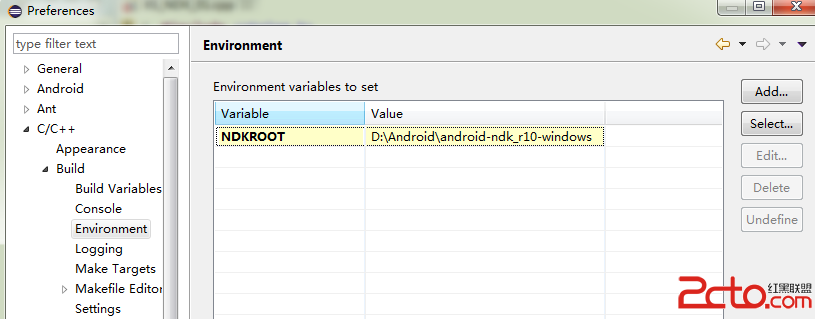
Eclipse -> Window -> Preperences -> C/C++ -> Build -> Environment 添加一個環境變量NDKROOT,如下圖:
再工程右鍵,點Properties->C/C++ Build的Building Settings中去掉Use default build command,然後輸入${NDKROOT}/ndk-build.cmd,如下圖:
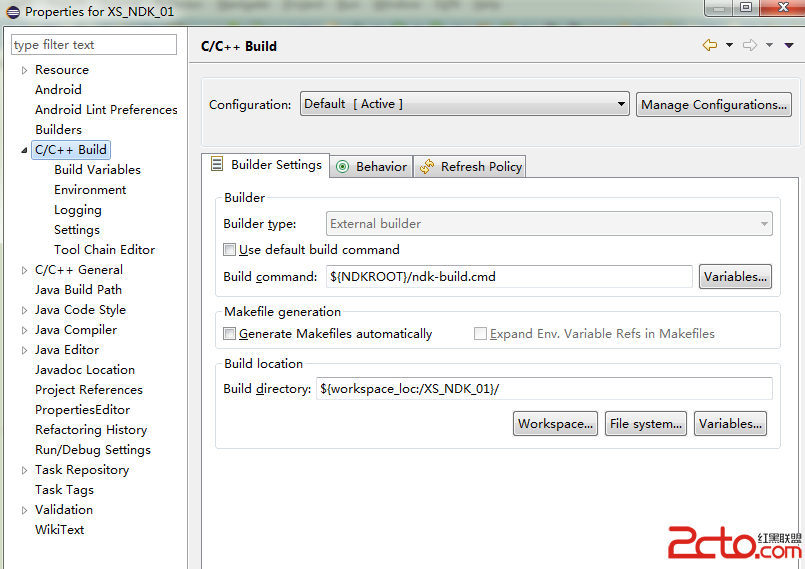
然後創建一個Activity調用我們剛剛編寫的HelloWorld,代碼如下:
package com.shanhy.example.ndk01;

import android.app.Activity;
import android.content.Context;
import android.os.Bundle;
import android.view.View;
import android.view.View.OnClickListener;
import android.widget.Button;

/**
 * HelloWorld NDK 開發
 *
 * @author SHANHY([email protected])
 * @date   2015年11月19日
 */
public class MainActivity extends Activity {

    //也就是你mk配置文件中的  LOCAL_MODULE    := XS_NDK_01
    private static final String libSoName = XS_NDK_01;

    private Context mContext = null;
    private Button btnClick = null;
    private String mStrMSG = null;

    /** Called when the activity is first created. */
    @Override
    public void onCreate(Bundle savedInstanceState) {
        super.onCreate(savedInstanceState);
        setContentView(R.layout.main);
        mContext = this;
        btnClick = (Button) findViewById(R.id.btn_click);
        btnClick.setOnClickListener(new OnClickListener() {

            public void onClick(View v) {

                //調用 JNI 層實現的方法
                mStrMSG = getStringFromJNI();
                if(mStrMSG == null) {
                    mStrMSG = 調用JNI失敗;
                }
                LogUtils.toastMessage(mContext, mStrMSG);
            }
        });

    }

    /**
     * 聲明本地方法
     *
     * 該方法為native方法.由C實現
     *
     * @return  JNI 給出的信息
     */
    public native String  getStringFromJNI();

    /**
     * 載入JNI生成的so庫文件
     */
    static {
        System.loadLibrary(libSoName);
    }

}
至此,我們就完成了一個簡單的例子,如需更進一步對NDK進行開發,請查閱相關資料。
=====================================
下面幾種可能出現的錯誤的解決方案(如果直接按我上面的例子,是不會出現下面的錯誤的):
1、Method ‘NewStringUTF’ could not be resolved 問題(方法“NewStringUTF”無法被解析)
原因:
I had this issue. Based on my solution, it seems to be something funny going on in Eclipse, since I had another project open with (as far as I was able to tell) the exact some properties, paths, etc., besides for being labeled a Library Project.

Just by observing the corresponding struct in jhi.h, the callback prototypes are all there! Ctrl-click the include statement and Eclipse will even link you the reference!

Go to the project's Properties -> C/C++ General -> Code Analysis. Click the Use project settings radio button (or Configure Workspace Settings... button). Disable (uncheck) the Method cannot be resolved checkbox. Click Apply, OK. Then for your project, refresh, clean, refresh, build.

There must have been something I did differently in creating the new project. Or maybe it was because of the locations of the projects, or the fact that the previous was a Library. Maybe it really is an Eclipse bug? For reference, I'm using ADT v21.1.0-569685 and NDK r8e for Windows。
項目右鍵->Properties->C/C++General->Code Analysis,選擇”Use project settings或者Use workspace settings” 中的 Method cannot be resolved(方法無法被解析)取消選擇,應用->保存,然後刷新、清理、刷新、build項目。
2、jni/hellocpp/main.cpp:16:18: error: base operand of ‘->’ has non-pointer type ‘JNIEnv {aka _JNIEnv}’ 問題
這是 android java 調用c++程序時報的錯誤
文件 XS_NDK_01.cpp 文件代碼,按如下方式編寫出現的錯誤:
#include
#include

jstring
Java_com_duicky_MainActivity_getStringFromJNI( JNIEnv* env,jobject thiz )
{
    // 返回一個字符串給Java層
    return (*env)->NewStringUTF(env, HelloWorld from JNI !!);
    // return env->NewStringUTF(小單 的 JNI HellWorld 程序.);
}
錯誤在於:
我開始是 (*env)->NewStringUTF(env, “小單 的 JNI HellWorld 程序.”); 這樣寫的,這是c的寫法(文件應該是.c擴展名),而我的是cpp程序(.cpp擴展名),需要改寫成:
env->NewStringUTF( “小單 的 JNI HellWorld 程序.”);
3、 java.lang.UnsatisfiedLinkError: Native method not found: com.shanhy.example.ndk01.MainActivity.getStringFromJNI:()Ljava/lang/String; 錯誤
有可能是:
1、c++中的方法Java_xxx_xxx 中的Java 首字母一定要大寫
2、如果是 .cpp 文件 則用 extern “C” {“您的方法在這裡”},大括號裡是您的本地方法(如我上面的例子中那樣寫)。
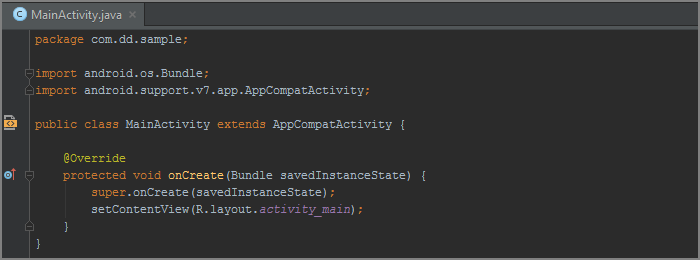 Android Studio 進階詳細配置
小Y使用Android Studio 不短時間了,前陣子看有人總結了一篇AS進階配置,發現總結的不錯,我這裡也總結一下我的AS的配置,各位可以看看是否有你不知道嗎? 衣
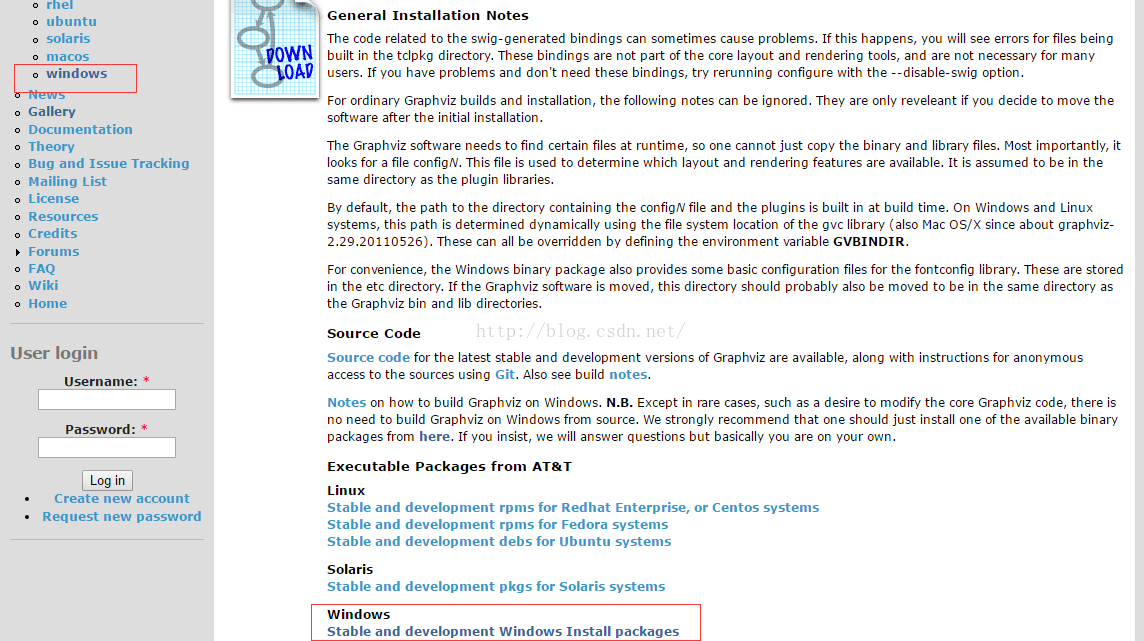 圖解程序員畫流程圖、數據結構圖及各種復雜圖形的Graphviz工具入門
我們畫常規圖形時一般用word上面自帶的插件或visio畫圖。但是我在畫linux內核文件系統結構圖、內存分配以及學習數據結構樹、圖時,發現使用Graphviz非常的方便
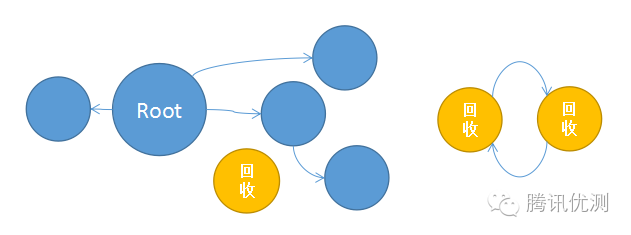 Android內存洩漏的簡單檢查與分析方法
導語內存洩漏問題大約是Android開發者最煩惱的問題之一了,項目中連續遇到幾個內存洩漏問題,這裡簡單總結下檢查分析內存洩漏的一些工具與方法。一、什麼是內存洩漏?大家都知
 Android模擬器接收UDP數據包的若干問題分析
本文實例分析了Android模擬器接收UDP數據包的若干問題。分享給大家供大家參考,具體如下:android模擬器無法接收UDP數據包代碼如下:DatagramPacke