編輯:關於Android編程
Android上的界面展示都是通過Activity實現的,Activity實在是太常用了,我相信大家都已經非常熟悉了,這裡就不再贅述。 但是Activity也有它的局限性,同樣的界面在手機上顯示可能很好看,在平板上就未必了,因為平板的屏幕非常大,手機的界面放在平板上可能會有過分被拉長、控件間距過大等情況。這個時候更好的體驗效果是在Activity中嵌入”小Activity”,然後每個”小Activity”又可以擁有自己的布局。這就是Fragment碎片技術。
Android是在Android 3.0 (API level 11)開始引入Fragment的。可以把Fragment想成Activity中的模塊,這個模塊有自己的布局,有自己的生命周期,單獨處理自己的輸入,在Activity運行的時候可以加載或者移除Fragment模塊。可以把Fragment設計成可以在多個Activity中復用的模塊。當開發的應用程序同時適用於平板電腦和手機時,可以利用Fragment實現靈活的布局,改善用戶體驗。
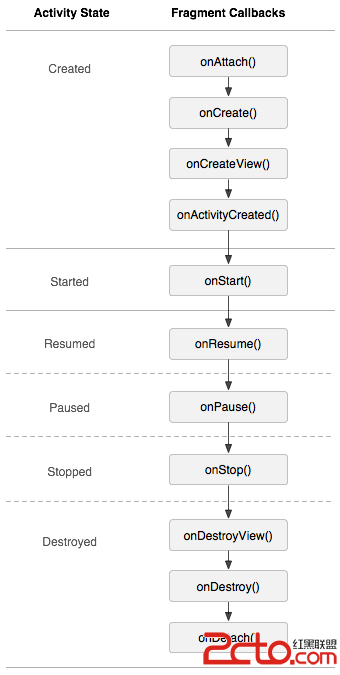
因為Fragment必須嵌入在Acitivity中使用,所以Fragment的生命周期和它所在的Activity是密切相關的。
如果Activity是暫停狀態,其中所有的Fragment都是暫停狀態;如果Activity是stopped狀態,這個Activity中所有的Fragment都不能被啟動;如果Activity被銷毀,那麼它其中的所有Fragment都會被銷毀。但是,當Activity在活動狀態,可以獨立控制Fragment的狀態,比如加上或者移除Fragment。
當這樣進行fragment transaction(轉換)的時候,可以把fragment放入Activity的back stack中,這樣用戶就可以進行返回操作。
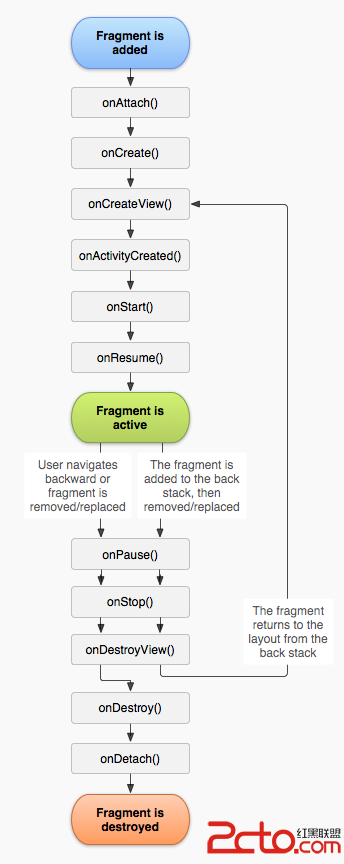
Activity與Fragment生命周期對比圖
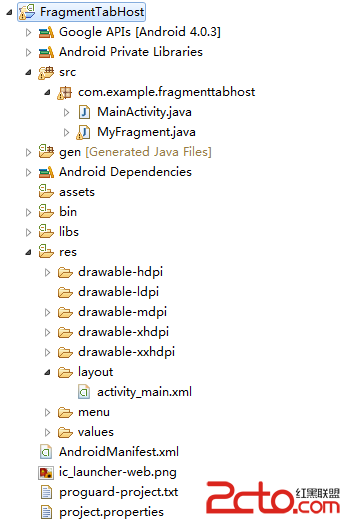
    <framelayout android:id="@+id/content" android:layout_height="0dp" android:layout_weight="1" android:layout_width="wrap_content">
    </framelayout>
Java文件
package com.example.fragmenttabhost;

import android.os.Bundle;
import android.support.v4.app.ListFragment;
import android.widget.ArrayAdapter;
import android.widget.Toast;

public class MyFragment extends ListFragment{

    String show1[] = {"1.1","1.2","1.3","1.4"};
    String show2[] = {"2.1","2.2","2.3","2.4"};
    @Override
    public void onActivityCreated(Bundle savedInstanceState) {
        super.onActivityCreated(savedInstanceState);
        String show[] = null;
        Bundle bundle = getArguments();
        if(bundle == null)
            show = show1;
        else {
            show = show2;
            Toast.makeText(getActivity(), (CharSequence) bundle.get("key"), 1).show();
        }
        setListAdapter(new ArrayAdapter(getActivity(), android.R.layout.simple_list_item_1, show));
    }
}
package com.example.fragmenttabhost;

import android.os.Bundle;
import android.support.v4.app.FragmentActivity;
import android.support.v4.app.FragmentTabHost;

public class MainActivity extends FragmentActivity {

    protected void onCreate(Bundle savedInstanceState) {
        super.onCreate(savedInstanceState);
        setContentView(R.layout.activity_main);

        FragmentTabHost tabHost = (FragmentTabHost) findViewById(R.id.tab);
        tabHost.setup(this, getSupportFragmentManager(), R.id.content);

        tabHost.addTab(tabHost.newTabSpec("tab1").setIndicator("Tab1"), MyFragment.class, null);
        Bundle b = new Bundle();
        b.putString("key", "I am tab2");
        tabHost.addTab(tabHost.newTabSpec("tab2").setIndicator("Tab2",getResources().getDrawable(R.drawable.ic_launcher)), MyFragment.class, b);

    }

}
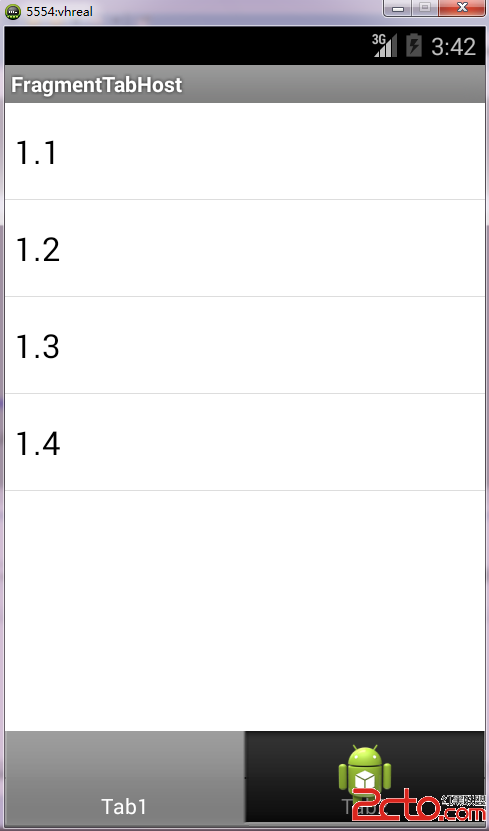
運行結果
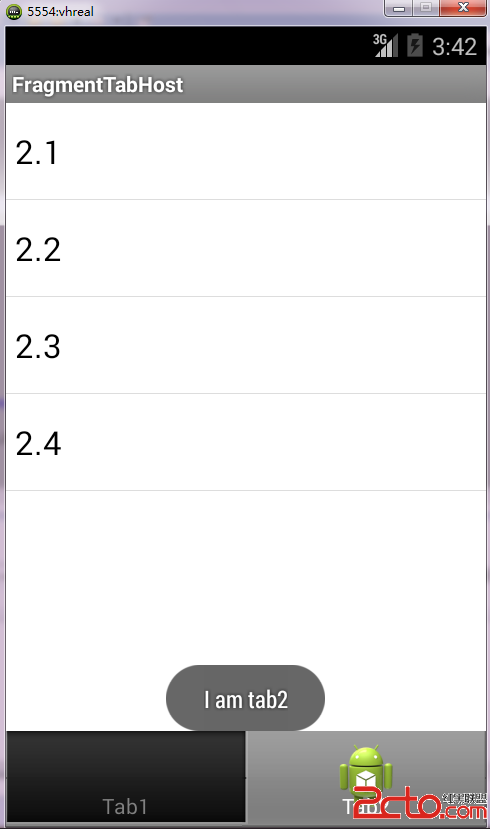 vc+6w7+0tcRkZW1vo6zEo7fCzqLQxdb30rPD5jxiciAvPg0KPGltZyBhbHQ9"這裡寫圖片描述" src="/uploadfile/Collfiles/20150605/20150605084839120.png" title="\" />
碎片布局文件fragment_1,2,3,4,5.xml
tab_item_view.xml按鈕布局
主頁面布局main_tab_layout.xml
    <framelayout android:id="@+id/realtabcontent" android:layout_height="0dip" android:layout_weight="1" android:layout_width="fill_parent">


        <framelayout android:id="@android:id/tabcontent" android:layout_height="0dp" android:layout_weight="0" android:layout_width="0dp">
    </framelayout>

</framelayout>
FragmentPage1,2,3,4,5.java碎片實現
package com.vhreal.myfragmenttest;

import com.vhreal.myfragmenttest.R;

import android.os.Bundle;
import android.support.v4.app.Fragment;
import android.view.LayoutInflater;
import android.view.View;
import android.view.ViewGroup;

public class FragmentPage1 extends Fragment{

    @Override
    public View onCreateView(LayoutInflater inflater, ViewGroup container,
            Bundle savedInstanceState) {

        return inflater.inflate(R.layout.fragment_1, null);
    }
}
主頁面實現MainTabActivity.java
package com.vhreal.myfragmenttest;

import com.vhreal.myfragmenttest.R;

import android.os.Bundle;
import android.support.v4.app.FragmentActivity;
import android.support.v4.app.FragmentTabHost;
import android.view.LayoutInflater;
import android.view.View;
import android.widget.ImageView;
import android.widget.TabHost.TabSpec;
import android.widget.TextView;

/**
 * @author vhreal
 * 功能描述:自定義TabHost
 */
public class MainTabActivity extends FragmentActivity {
    // 定義FragmentTabHost對象
    private FragmentTabHost mTabHost;

    // 定義一個布局
    private LayoutInflater layoutInflater;

    // 定義數組來存放Fragment界面
    private Class fragmentArray[] = { FragmentPage1.class, FragmentPage2.class,
            FragmentPage3.class, FragmentPage4.class, FragmentPage5.class };

    // 定義數組來存放按鈕圖片
    private int mImageViewArray[] = { R.drawable.tab_home_btn,
            R.drawable.tab_message_btn, R.drawable.tab_selfinfo_btn,
            R.drawable.tab_square_btn, R.drawable.tab_more_btn };

    // Tab選項卡的文字
    private String mTextviewArray[] = { "首頁", "消息", "好友", "廣場", "更多" };

    public void onCreate(Bundle savedInstanceState) {
        super.onCreate(savedInstanceState);
        setContentView(R.layout.main_tab_layout);

        initView();
    }

    /**
     * 初始化組件
     */
    private void initView() {
        // 實例化布局對象
        layoutInflater = LayoutInflater.from(this);

        // 實例化TabHost對象,得到TabHost
        mTabHost = (FragmentTabHost) findViewById(android.R.id.tabhost);
        mTabHost.setup(this, getSupportFragmentManager(), R.id.realtabcontent);

        // 得到fragment的個數
        int count = fragmentArray.length;

        for (int i = 0; i < count; i++) {
            // 為每一個Tab按鈕設置圖標、文字和內容
            TabSpec tabSpec = mTabHost.newTabSpec(mTextviewArray[i])
                    .setIndicator(getTabItemView(i));
            // 將Tab按鈕添加進Tab選項卡中
            mTabHost.addTab(tabSpec, fragmentArray[i], null);
            // 設置Tab按鈕的背景
            mTabHost.getTabWidget().getChildAt(i)
                    .setBackgroundResource(R.drawable.selector_tab_background);
        }
    }

    /**
     * 給Tab按鈕設置圖標和文字
     */
    private View getTabItemView(int index) {
        View view = layoutInflater.inflate(R.layout.tab_item_view, null);

        ImageView imageView = (ImageView) view.findViewById(R.id.imageview);
        imageView.setImageResource(mImageViewArray[index]);

        TextView textView = (TextView) view.findViewById(R.id.textview);
        textView.setText(mTextviewArray[index]);

        return view;
    }
}
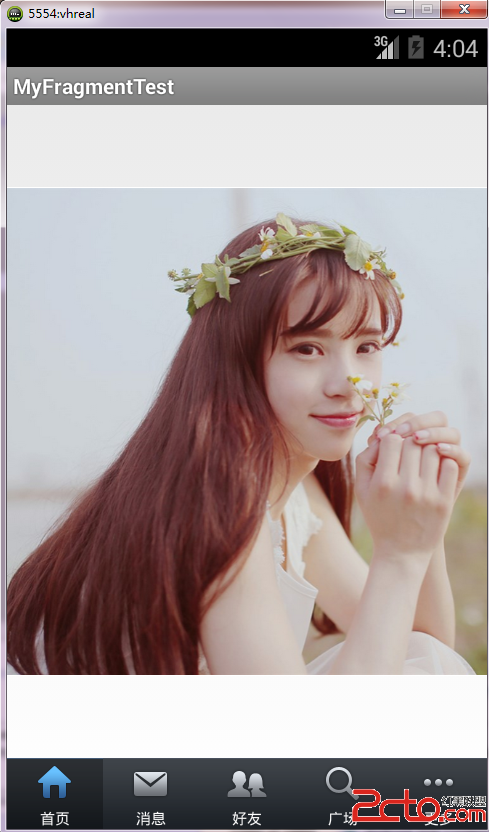
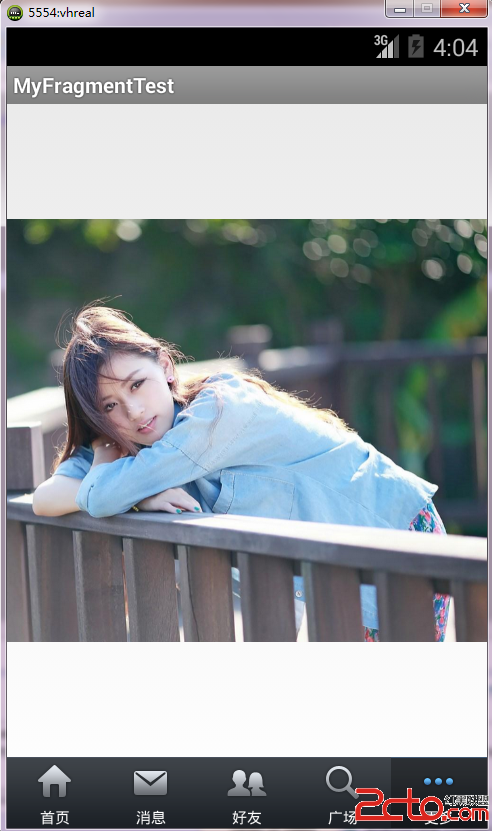
運行結果



 Android應用之——自定義控件ToggleButton
我們經常會看到很多優秀的app上面都有一些很漂亮的控件,用戶體驗非常好,比如togglebutton就是一個很好的例子,IOS系統下面那個精致的togglebutton如
 Android Studio學習筆記(4)----Win10系統下配JDK環境變量問題
Win10系統下配JDK環境變量問題電腦系統win10jdk版本jdk1.8.0_102Jdk安裝在了c盤下 配的環境變量為JAVA_HOME CLA
 Android 關於使用LruCache緩存你想緩存的數據
今天我們來一起學習一下緩存技術,相信大家做開發的時候都知道請求網絡數據的重要,但是有一些只用請求一次就過時性的消息比如某些新聞信息,如果我們每次進入新聞界面
 Android自定義view繪制圓環占比動畫
一、實現效果圖二、核心代碼1.自定義MyProgressView.javapackage com.czhappy.effectdemo.view;import andro