編輯:關於Android編程
我是完全根據這裡仿制了一個作為備忘,可以點擊這裡查看原始版本
代碼如下:
1、res/values/attrs.xml
public class RoundProgressBar extends View {
	private Paint mPaint;
	private int mRoundColor;
	private int mProgressColor;
	private int mTextColor;
	private int mTextSize;
	private float mRounWidth;
	private int mMaxProgress;
	private int mCurrentProgress = 45;
	private boolean mTextIsDisplayable;
	private int mStyle = 1;
	private static final int STROKE = 0;
	private static final int FILL =1;

	public RoundProgressBar(Context context) {
		this(context, null);
	}

	public RoundProgressBar(Context context, AttributeSet attrs) {
		this(context, attrs, 0);
	}

	public RoundProgressBar(Context context, AttributeSet attrs,
			int defStyleAttr) {
		super(context, attrs, defStyleAttr);
		mPaint = new Paint();
		TypedArray typedArray = context.obtainStyledAttributes(attrs, R.styleable.RoundProgressBar);
		mRoundColor = typedArray.getColor(R.styleable.RoundProgressBar_roundColor, Color.RED);
		mProgressColor = typedArray.getColor(R.styleable.RoundProgressBar_roundProgressColor, Color.GREEN);
		mTextColor = typedArray.getColor(R.styleable.RoundProgressBar_textColor, Color.BLUE);
		mTextSize = typedArray.getDimensionPixelSize(R.styleable.RoundProgressBar_textSize, 15);
		mRounWidth = typedArray.getDimensionPixelSize(R.styleable.RoundProgressBar_roundWidth, 5);
		mMaxProgress = typedArray.getInt(R.styleable.RoundProgressBar_max, 100);
		mTextIsDisplayable = typedArray.getBoolean(R.styleable.RoundProgressBar_textIsDisplayable, true);
		mStyle = typedArray.getInt(R.styleable.RoundProgressBar_style, STROKE);
		typedArray.recycle();
	}

	@Override
	protected void onDraw(Canvas canvas) {
		super.onDraw(canvas);
		// Draw outer circle
		int center = getWidth() / 2;
		int radius = (int) (center - mRounWidth / 2);
		mPaint.setColor(mRoundColor);
		mPaint.setStyle(Paint.Style.STROKE);
		mPaint.setStrokeWidth(mRounWidth);
		mPaint.setAntiAlias(true);
		canvas.drawCircle(center, center, radius, mPaint);

		// Draw progress
		mPaint.setStrokeWidth(mRounWidth);
		mPaint.setColor(mProgressColor);
		RectF oval = new RectF(center - radius, center - radius,
				center + radius, center + radius);
		switch (mStyle) {
		case STROKE:
			mPaint.setStyle(Paint.Style.STROKE);
			canvas.drawArc(oval, 0, 360 * mCurrentProgress / mMaxProgress, false, mPaint);
			break;

		case FILL:
			mPaint.setStyle(Paint.Style.FILL_AND_STROKE);
			if (mCurrentProgress != 0) {
				canvas.drawArc(oval, 0, 360 * mCurrentProgress / mMaxProgress, true, mPaint);
			}

			break;

		default:
			break;
		}

		mPaint.setStrokeWidth(0);
		mPaint.setColor(mTextColor);
		mPaint.setTextSize(mTextSize);
		mPaint.setTypeface(Typeface.DEFAULT);
		int percent = (int) (((float) mCurrentProgress / (float) mMaxProgress) * 100);
		float textWidth = mPaint.measureText(percent + "%");
		if (percent != 0 && mTextIsDisplayable) {
			canvas.drawText(percent + "%", center - textWidth / 2, center + mTextSize / 2, mPaint);
		}
	}

	public int getRoundColor() {
		return mRoundColor;
	}

	public void setRoundColor(int roundColor) {
		this.mRoundColor = roundColor;
	}

	public int getProgressColor() {
		return mProgressColor;
	}

	public void setProgressColor(int progressColor) {
		this.mProgressColor = progressColor;
	}

	public int getTextColor() {
		return mTextColor;
	}

	public void setTextColor(int textColor) {
		this.mTextColor = textColor;
	}

	public int getTextSize() {
		return mTextSize;
	}

	public void setTextSize(int textSize) {
		this.mTextSize = textSize;
	}

	public float getRounWidth() {
		return mRounWidth;
	}

	public void setmRounWidth(float mRounWidth) {
		this.mRounWidth = mRounWidth;
	}

	public synchronized int getMaxProgress() {
		return mMaxProgress;
	}

	public synchronized void setMaxProgress(int maxProgress) {
		if (maxProgress < 0) {
			throw new IllegalArgumentException("Max Progress not less than 0");
		}
		this.mMaxProgress = maxProgress;
	}

	public synchronized int getCurrentProgress() {
		return mCurrentProgress;
	}

	public synchronized void setCurrentProgress(int currentProgress) {
		if (currentProgress < 0) {
			throw new IllegalArgumentException("Progress not less than 0");
		}
		if (currentProgress > mMaxProgress) {
			currentProgress = mMaxProgress;
		}
		if (currentProgress <= mMaxProgress) {
			this.mCurrentProgress = currentProgress;
			postInvalidate();
		}
	}

	public boolean isTextIsDisplayable() {
		return mTextIsDisplayable;
	}

	public void setTextDisplayable(boolean displayable) {
		this.mTextIsDisplayable = displayable;
	}

	public int getStyle() {
		return mStyle;
	}

	public void setStyle(int style) {
		this.mStyle = style;
	}

}
3、布局文件中使用
<framelayout android:layout_height="match_parent" android:layout_width="match_parent" tools:context="com.example.gaussianblur.MainActivity" xmlns:android="http://schemas.android.com/apk/res/android" xmlns:android_custom="http://schemas.android.com/apk/res/com.example.demo" xmlns:tools="http://schemas.android.com/tools">


</framelayout>
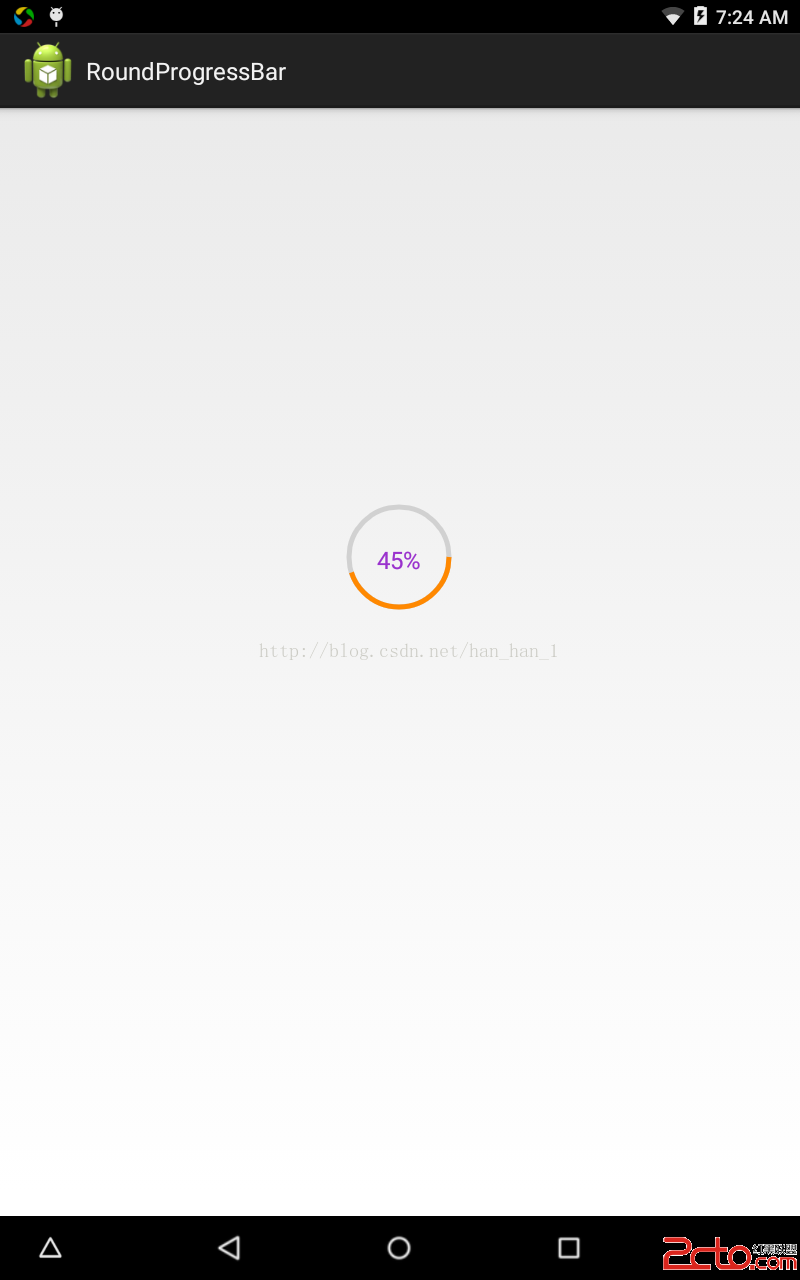
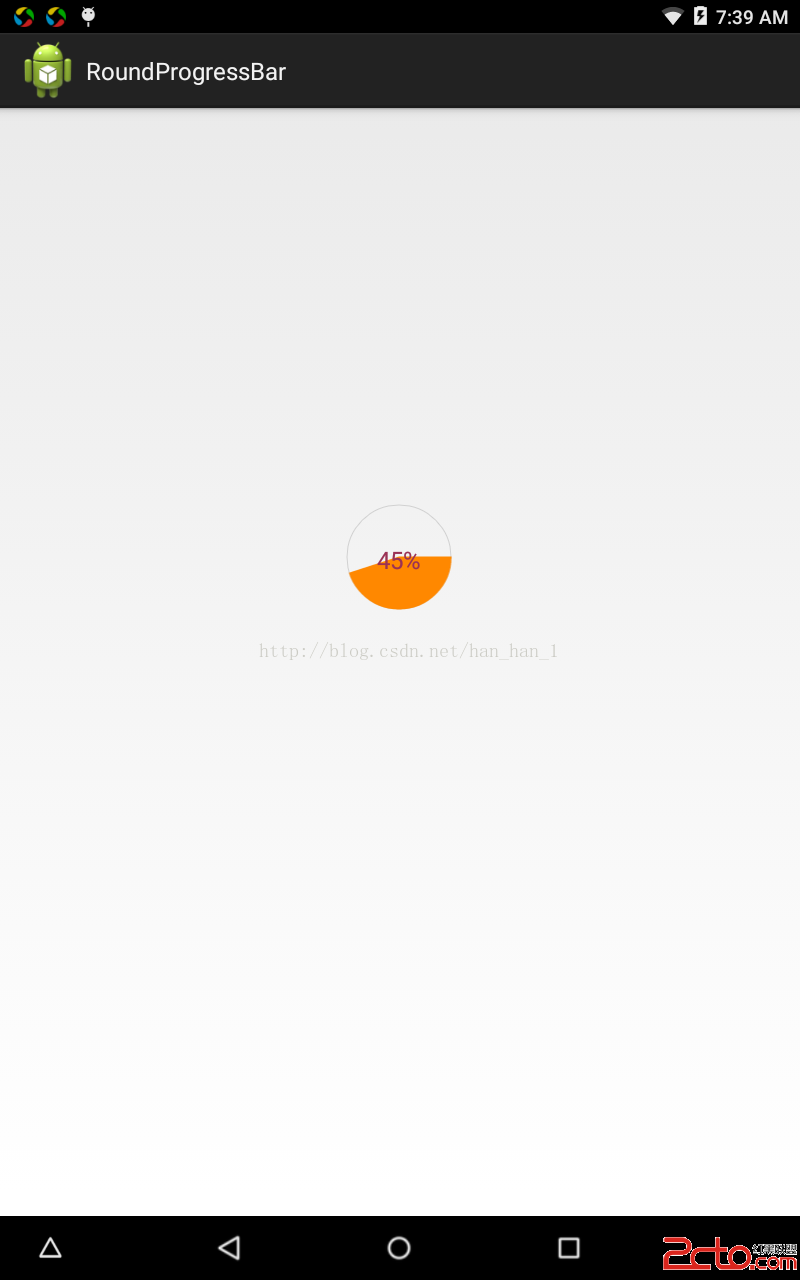
4、效果圖


 淺談Android數據庫版本升級及數據的遷移
概述Android開發涉及到的數據庫采用的是輕量級的SQLite3,而在實際開發中,在存儲一些簡單的數據,使用SharedPreferences就足夠了,只有在存儲數據結
 模糊搜索框 EditText動態過濾Listview並改變顏色(仿微信模糊搜索)
模糊搜索框。APP需要一個該控件,安卓端。先上個圖,看起來不錯的效果。圖一為未點擊狀態,圖二為點擊之後的狀態。圖三為輸入之後的狀態。主要的功能點有 :1、點擊直接懸浮層,
 android使用ItemDecoration給RecyclerView 添加水印
前言項目中有使用到水印效果,如下圖所示。在實現過程中,最終選用ItemDecoration來實現,其中有兩大步驟:自定義Drawable來完成水印圖片、使用ItemDec
 Android混淆心得
最近在做Android應用的混淆,踩了一些坑,這裡記錄分享下個人的心得。混淆介紹首先先簡單說一下什麼是混淆和混淆的作用,其實這個搜索下可以找到一堆官方的說法等等,這裡簡單