編輯:關於Android編程
第一步,
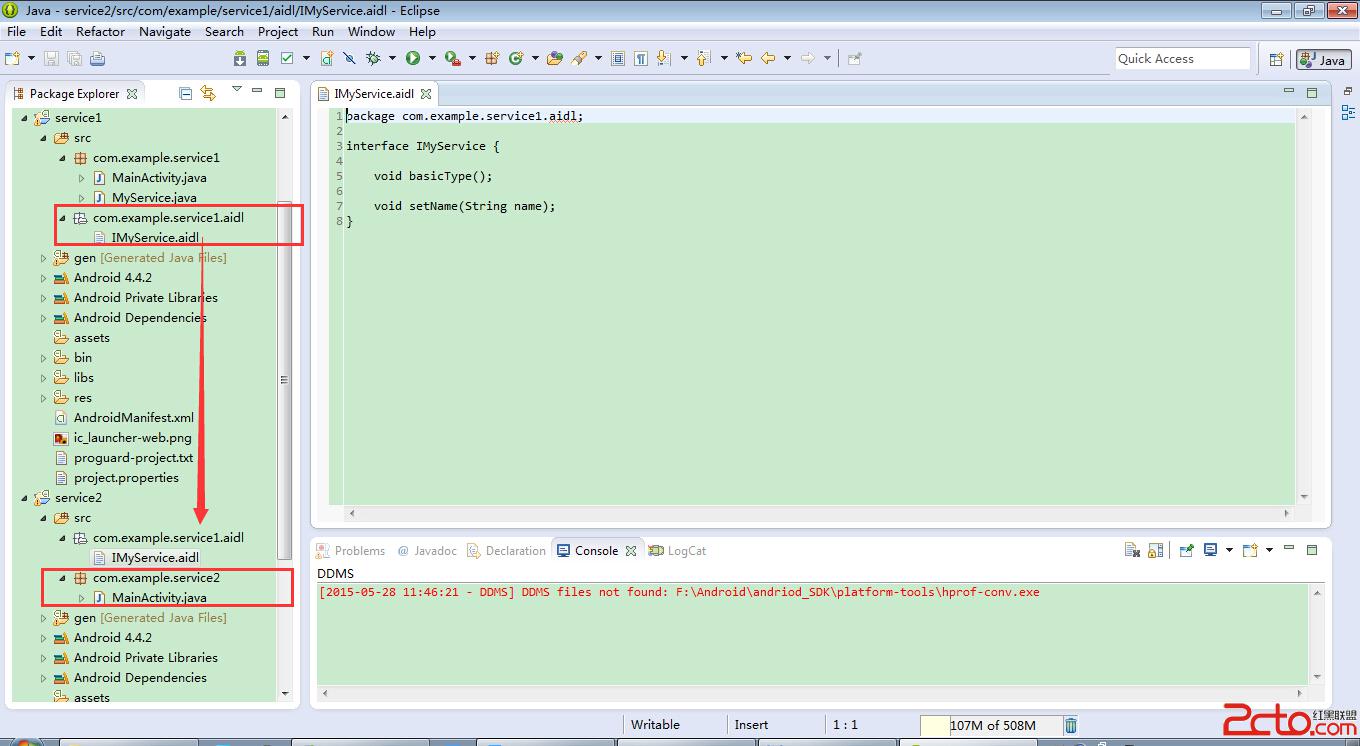
需要修改service1項目中aidl,增加一個方法。
package com.example.service1.aidl;

interface IMyService {

    void basicType();

    void setName(String name);
}
setName用於存儲name的方法。
然後clear項目
第二步,
此時,我們service類中的onBind方法需要實現新接口。
package com.example.service1;

import android.app.Service;
import android.content.Intent;
import android.os.IBinder;
import android.os.RemoteException;

import com.example.service1.aidl.IMyService;

public class MyService extends Service {

    private String serviceName = 默認名字;
    private boolean running;

    @Override
    public IBinder onBind(Intent intent) {
        // TODO Auto-generated method stub
        return new IMyService.Stub() {

            @Override
            public void basicType() throws RemoteException {
                // TODO Auto-generated method stub

            }

            @Override
            public void setName(String name) throws RemoteException {
                serviceName = name;
            }
        };
    }

    @Override
    public void onCreate() {
        running = true;
        new Thread() {
            public void run() {
                while (running) {
                    try {
                        Thread.sleep(1000);
                    } catch (InterruptedException e) {
                        // TODO Auto-generated catch block
                        e.printStackTrace();
                    }
                    System.out.println(serviceName);
                }
            };
        }.start();
        super.onCreate();
    }

    @Override
    public void onDestroy() {
        super.onDestroy();

        running = false;
    }

}
代碼27到29行,接收到name並且放入全局變量中,提供給onCreate方法輸出。
第三步,
將service1項目中aidl拷貝到service2項目中,並且包名要一致,

第四步,
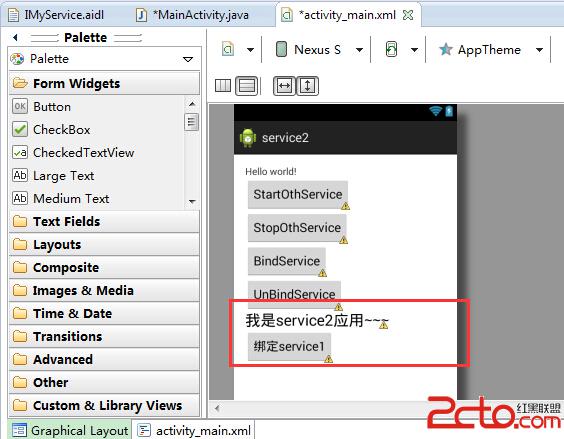
修改service2應用activity布局,增加一個text域,和一個按鈕。用於將text中的信息提交到service1項目的service中。

第五步,
修改service2項目中activity,增加與service1的通信,
package com.example.service2;

import com.example.service1.aidl.IMyService;

import android.app.Activity;
import android.content.ComponentName;
import android.content.Context;
import android.content.Intent;
import android.content.ServiceConnection;
import android.os.Bundle;
import android.os.IBinder;
import android.os.RemoteException;
import android.view.Menu;
import android.view.View;
import android.view.View.OnClickListener;
import android.widget.TextView;

public class MainActivity extends Activity implements OnClickListener,
        ServiceConnection {

    Intent serviceIntent;

    private IMyService imyService = null;

    TextView t;

    @Override
    protected void onCreate(Bundle savedInstanceState) {
        super.onCreate(savedInstanceState);
        setContentView(R.layout.activity_main);

        serviceIntent = new Intent();
        serviceIntent.setComponent(new ComponentName(com.example.service1,
                com.example.service1.MyService));

        findViewById(R.id.button1).setOnClickListener(this);
        findViewById(R.id.button2).setOnClickListener(this);
        findViewById(R.id.button3).setOnClickListener(this);
        findViewById(R.id.button4).setOnClickListener(this);

        findViewById(R.id.button5).setOnClickListener(this);

        t = (TextView) findViewById(R.id.textView1);
    }

    @Override
    public boolean onCreateOptionsMenu(Menu menu) {
        // Inflate the menu; this adds items to the action bar if it is present.
        getMenuInflater().inflate(R.menu.main, menu);
        return true;
    }

    @Override
    public void onClick(View v) {
        switch (v.getId()) {
        case R.id.button1:
            startService(serviceIntent);
            break;
        case R.id.button2:
            stopService(serviceIntent);
            break;
        case R.id.button3:
            bindService(serviceIntent, this, Context.BIND_AUTO_CREATE);
            break;
        case R.id.button4:
            unbindService(this);
            imyService = null;
            break;
        case R.id.button5:
            if (imyService != null) {
                try {
                    imyService.setName(t.getText().toString());
                } catch (RemoteException e) {
                    // TODO Auto-generated catch block
                    e.printStackTrace();
                }
            }
        }

    }

    @Override
    public void onServiceConnected(ComponentName name, IBinder service) {
        imyService = IMyService.Stub.asInterface(service);
        System.out.println(onServiceConnected);
        System.out.println(service);

    }

    @Override
    public void onServiceDisconnected(ComponentName name) {
        // TODO Auto-generated method stub

    }

}
代碼72行,傳輸數據
代碼84行用法imyService = IMyService.Stub.asInterface(service);
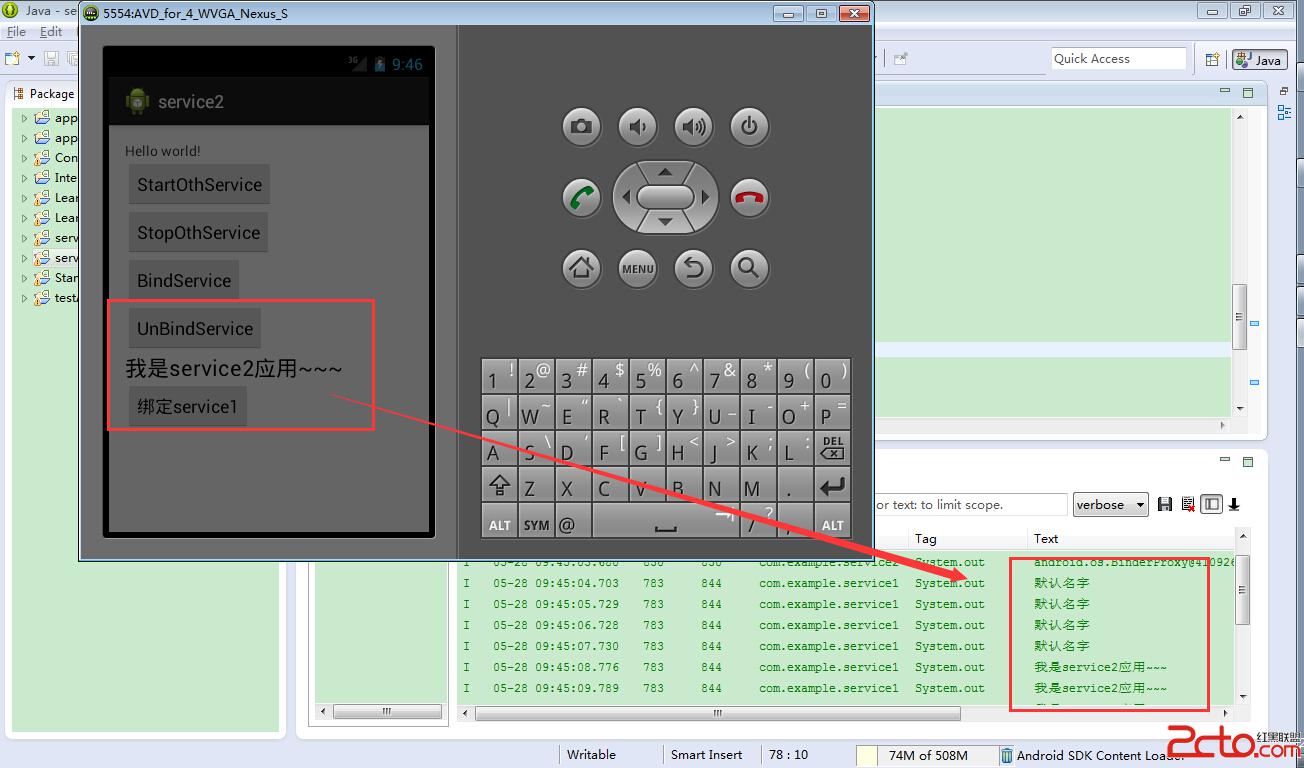
運行結果,如圖,

 Android開發中TextView 實現右上角跟隨文本動態追加圓形紅點
在一個比較坑的需求裡,一段文字右上角需要追加一個圓形紅點。最右側有個金額,紅點動態隨著文字移動,然後各種擺布局,一下午坑死我了。後來果斷放棄。然後就想試試直接自定義vie
 android平台俄羅斯方塊游戲完整代碼
 Android開發筆記(一百二十三)下拉刷新布局SwipeRefreshLayout
SwipeRefreshLayout下拉刷新布局SwipeRefreshLayout是Android又一與時俱進的控件,顧名思義它隨著用戶手勢向下滑動就會觸發刷新操作。從
 Android教你如何一步步打造通用適配器
前言在Android開發中ListView是最為常用的控件之一,基本每個應用都會涉及到它,要使用ListView列表展示,就不可避免地涉及到另外一個東西—&m