編輯:關於Android編程
我們都知道 RecyclerView 可以通過將 LayoutManager 設置為 StaggeredGridLayoutManager 來實現瀑布流的效果。默認的還有 LinearLayoutManager 用於實現線性布局,GridLayoutManager 用於實現網格布局。
然而 RecyclerView 可以做的不僅限於此, 通過重寫 LayoutManager 我們可以按自己的意願實現更為復雜的效果。而且將控件與其顯示效果解耦之後我們就可以動態的改變其顯示效果。
設想有這麼一個界面,以列表形式展示了一系列的數據,點擊一個按鈕後以網格形勢顯示另一組數據。傳統的做法可能是在同一布局下設置了一個 listview 和一個 gridview 然後通過按鈕點擊事件切換他們的 visiblity 屬性。而如果使用 recyclerview 的話你只需通過 setAdapter 方法改變數據, setLayoutManager 方法改變樣式即可,這樣不僅簡化了布局也實現了邏輯上的簡潔。
下面我們就來介紹怎麼通過重寫一個 LayoutManager 來實現一個弧形的 recycylerview 以及另一個會隨著滾動在指定位置縮放的 recyclerview。並實現類似 viewpager 的回彈效果。
項目地址 Github
當你繼承 LayoutManager 之後,有一個必須重寫的方法
generateDefaultLayoutParams()
這個方法指定了每一個子 view 默認的 LayoutParams, 並且這個 LayoutParams 會在你調用 getViewForPosition() 返回子 view 前應用到這個子 view。
@Override
public RecyclerView.LayoutParams generateDefaultLayoutParams() {
    return new RecyclerView.LayoutParams(ViewGroup.LayoutParams.WRAP_CONTENT,
            ViewGroup.LayoutParams.WRAP_CONTENT);
}
接下來我們需要重寫 onLayoutChildren() 這個方法。這是 LayoutManager 的主要入口,他會在初始化布局以及 adapter 數據發生改變(或更換 adapter)的時候調用。所以我們在這個方法中對我們的 item 進行測量以及初始化。
在貼代碼前有必要先提一下,recycler 有兩種緩存的機制,scrap heap 以及 recycle pool。相比之下 scrap heap 更輕量一點,他會直接將當前的 view 緩存而不通過 adapter,當一個 view 被 detach 之後就會暫存進 scrap heap。而 recycle pool 所存儲的 view,我們一般認為裡面存的是錯誤的數據(這個 view 之後需要拿出來重用顯示別的位置的數據),所以這裡面的 view 會被傳給 adapter 進行數據的重新綁定,一般,我們將子 view 從其 parent view 中 remove 之後會將其存入 recycler pool 中。
當界面上我們需要顯示一個新的 view 時,recycler 會先檢查 scrap heap 中 position 相匹配的 view,如果有,則直接返回,如果沒有 recycler 會從 recycler pool 中取一個合適的 view,將其傳遞給 adapter, 然後調用 adapter 的 bindViewHolder() 方法,綁定數據之後將其返回。
@Override
    public void onLayoutChildren(RecyclerView.Recycler recycler, RecyclerView.State state) {
        if (getItemCount() == 0) {
            detachAndScrapAttachedViews(recycler);
            offsetRotate = 0;
            return;
        }

        //calculate the size of child
        if (getChildCount() == 0) {
            View scrap = recycler.getViewForPosition(0);
            addView(scrap);
            measureChildWithMargins(scrap, 0, 0);
            mDecoratedChildWidth = getDecoratedMeasuredWidth(scrap);
            mDecoratedChildHeight = getDecoratedMeasuredHeight(scrap);
            startLeft = contentOffsetX == -1?(getHorizontalSpace() - mDecoratedChildWidth)/2: contentOffsetX;
            startTop = contentOffsetY ==-1?0: contentOffsetY;
            mRadius = mDecoratedChildHeight;
            detachAndScrapView(scrap, recycler);
        }

        //record the state of each items
        float rotate = firstChildRotate;
        for (int i = 0; i < getItemCount(); i++) {
            itemsRotate.put(i,rotate);
            itemAttached.put(i,false);
            rotate+= intervalAngle;
        }

        detachAndScrapAttachedViews(recycler);
        fixRotateOffset();
        layoutItems(recycler,state);
    }
getItemCount() 方法會調用 adapter 的 getItemCount() 方法,所以他獲取到的是數據的總數,而 getChildCount() 方法則是獲取當前已添加了的子 View 的數量。
因為在這個項目中所有 view 的大小都是一樣的,所以就只測量了 position 為 0 的 view 的大小。itemsRotate 用於記錄初始狀態下,每一個 item 的旋轉角度,offsetRotate 是旋轉的偏移角度,每個 item 的旋轉角加上這個偏移角度便是最後顯示在界面上的角度,滑動過程中我們只需對應改變 offsetRotate 即可,itemAttached 則用於記錄這個 item 是否已經添加到當前界面。
private void layoutItems(RecyclerView.Recycler recycler,
                             RecyclerView.State state){
        if(state.isPreLayout()) return;

        //remove the views which out of range
        for(int i = 0;imaxRemoveDegree
                    || itemsRotate.get(position) - offsetRotate< minRemoveDegree){
                itemAttached.put(position,false);
                removeAndRecycleView(view,recycler);
            }
        }

        //add the views which do not attached and in the range
        for(int i=0;i= minRemoveDegree){
                if(!itemAttached.get(i)){
                    View scrap = recycler.getViewForPosition(i);
                    measureChildWithMargins(scrap, 0, 0);
                    addView(scrap);
                    float rotate = itemsRotate.get(i) - offsetRotate;
                    int left = calLeftPosition(rotate);
                    int top = calTopPosition(rotate);
                    scrap.setRotation(rotate);
                    layoutDecorated(scrap, startLeft + left, startTop + top,
                            startLeft + left + mDecoratedChildWidth, startTop + top + mDecoratedChildHeight);
                    itemAttached.put(i,true);
                }
            }
        }
    }
prelayout 是 recyclerview 繪制動畫的階段,因為這個項目不需要處理動畫所以直接 return。這裡先是將當前已添加的子 view 中超出范圍的那些 remove 掉並添加進 recycle pool,(是的,只要調用 removeAndRecycleView 就行了),然後將所有 item 中還沒有 attach 的 view 進行測量後,根據當前角度運用一下初中數學知識算出 x,y 坐標後添加到當前布局就行了。
private int calLeftPosition(float rotate){
        return (int) (mRadius * Math.cos(Math.toRadians(90 - rotate)));
    }
private int calTopPosition(float rotate){
        return (int) (mRadius - mRadius * Math.sin(Math.toRadians(90 - rotate)));
    }
現在我們的 LayoutManager 已經能按我們的意願顯示一個弧形的列表了,只是少了點生氣。接下來我們就讓他滾起來!
@Override
    public boolean canScrollHorizontally() {
        return true;
    }
看名字就知道這個方法是用於設定能否橫向滾動的,對應的還有 canScrollVertically() 這個方法。
@Override
    public int scrollHorizontallyBy(int dx, RecyclerView.Recycler recycler, RecyclerView.State state) {
        int willScroll = dx;

        float theta = dx/DISTANCE_RATIO; // the angle every item will rotate for each dx
        float targetRotate = offsetRotate + theta;

        //handle the boundary
        if (targetRotate < 0) {
            willScroll = (int) (-offsetRotate*DISTANCE_RATIO);
        }
        else if (targetRotate > getMaxOffsetDegree()) {
            willScroll = (int) ((getMaxOffsetDegree() - offsetRotate)*DISTANCE_RATIO);
        }
        theta = willScroll/DISTANCE_RATIO;

        offsetRotate+=theta; //increase the offset rotate so when re-layout it can recycle the right views

        //re-calculate the rotate x,y of each items
        for(int i=0;i<getchildcount();i++){ view="" float="" newrotate="view.getRotation()" -="" int="" offsetx="calLeftPosition(newRotate);" offsety="calTopPosition(newRotate);" startleft="" starttop="" different="" direction="" child="" will="" overlap="" way="" return="" pre="">
如果是處理縱向滾動請重寫 scrollVerticallyBy 這個方法。
在這裡將滑動的距離按一定比例轉換成滑動對應的角度,按滑動的角度重新繪制當前的子 view,最後再調用一下 layoutItems 處理一下各個 item 的回收。
到這裡一個弧形 (圓形) 的 LayoutManager 就寫好了。滑動放大的 layoutManager 的實現與之類似,在中心點 scale 時最大,距離中心 x 坐標做差後取絕對值再轉換為對應 scale 即可。
private float calculateScale(int x){
        int deltaX = Math.abs(x-(getHorizontalSpace() - mDecoratedChildWidth) / 2);
        float diff = 0f;
        if((mDecoratedChildWidth-deltaX)>0) diff = mDecoratedChildWidth-deltaX;
        return (maxScale-1f)/mDecoratedChildWidth * diff + 1;
}如果想實現類似於 viewpager 可以鎖定到某一頁的效果要怎麼做?一開始想到對 scrollHorizontallyBy() 中的 dx 做手腳,但最後實現的效果很不理想。又想到重寫並實現 smoothScrollToPosition 方法,然後給 recyclerview 設置滾動監聽器在 IDLE 狀態下調用 smoothScrollToPosition。但最後滾動到的位置總會有偏移。 最後查閱 API 後發現 recyclerView 有一個 smoothScrollBy 方法,他會根據你給定的偏移量調用 scrollHorizontallyBy 以及 scrollVerticallyBy。 所以我們可以重寫一個 OnScrollListener,然後給我們的 recyclerView 添加滾動監聽器就可以了。
public class CenterScrollListener extends RecyclerView.OnScrollListener{
    private boolean mAutoSet = true;

    @Override
    public void onScrollStateChanged(RecyclerView recyclerView, int newState) {
        super.onScrollStateChanged(recyclerView, newState);
        final RecyclerView.LayoutManager layoutManager = recyclerView.getLayoutManager();
        if(!(layoutManager instanceof CircleLayoutManager) && !(layoutManager instanceof ScrollZoomLayoutManager)){
            mAutoSet = true;
            return;
        }

        if(!mAutoSet){
            if(newState == RecyclerView.SCROLL_STATE_IDLE){
                if(layoutManager instanceof ScrollZoomLayoutManager){
                    final int scrollNeeded = ((ScrollZoomLayoutManager) layoutManager).getOffsetCenterView();
                    recyclerView.smoothScrollBy(scrollNeeded,0);
                }else{
                    final int scrollNeeded = ((CircleLayoutManager)layoutManager).getOffsetCenterView();
                    recyclerView.smoothScrollBy(scrollNeeded,0);
                }

            }
            mAutoSet = true;
        }
        if(newState == RecyclerView.SCROLL_STATE_DRAGGING || newState == RecyclerView.SCROLL_STATE_SETTLING){
            mAutoSet = false;
        }
    }
}
recyclerView.addOnScrollListener(new CenterScrollListener());
還需要在自定義的LayoutManager添加一個獲取滾動偏移量的方法
public int getCurrentPosition(){
        return Math.round(offsetRotate / intervalAngle);
    }

public int getOffsetCenterView(){
        return (int) ((getCurrentPosition()*intervalAngle-offsetRotate)*DISTANCE_RATIO);
    }
完整代碼已上傳 Github
 Android布局----詳解
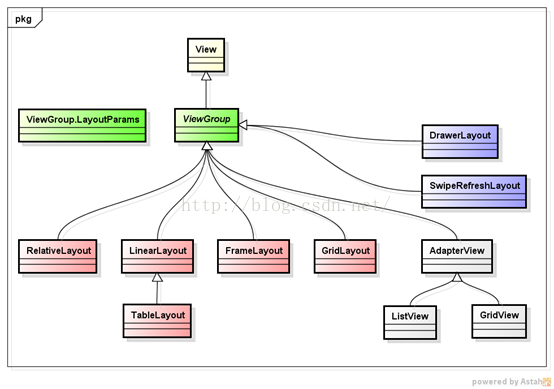
引言--概述布局是不可見的容器(ViewGroup)定義 UI 的可視化結構通過布局參數(LayoutParams)定義子元素的尺寸、位置Android的界面是有布局和組
 Android傳遞Bitmap對象在兩個Activity之間
通過內部存儲方式實現了在兩個Activity之間傳遞Bitmap對象以及其它支持串行化的Java對象,關鍵點有如下:1. HTTP客戶端下載圖片,通過Imag
 白話開發——Android Studio代碼調試技巧篇
Android Studio目前已經成為開發Android的主要工具,用熟了可謂相當順手。作為開發者,調試並發現bug,進而解決,可是我們的看家本領。正所謂,工欲善其事必
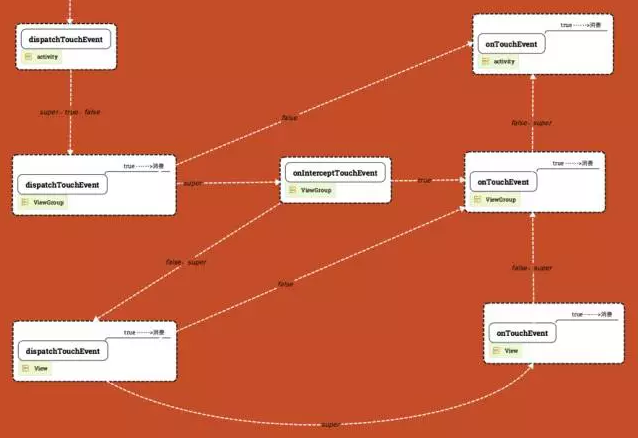
 Android 中的事件分發和流程
在Android開發中,事件分發機制是一塊Android比較重要的知識體系,了解並熟悉整套的分發機制有助於更好的分析各種點擊滑動失效問題,更好去擴展控件的事件功能和開發自