編輯:關於Android編程
基於Android的設備有內置的傳感器,測量運動,方向,和各種環境條件。這些傳感器能夠提供原始數據的高精度和准確度,並且是有用的如果你想要監測裝置、定位的三維運動,或者你想監控在設備周圍環境的變化。例如,一個可能的軌道的讀數裝置的重力傳感器來推斷用戶的手勢和身體的動作復雜,如傾斜、搖晃、旋轉、擺動或。同樣,一個天氣應用程序可能使用的設備的溫度傳感器和濕度傳感器來計算和報告。
Android平台支持的傳感器三大類:
運動傳感器
這些傳感器測量加速度的力和旋轉力沿三軸。這一類包括加速度傳感器、重力傳感器、陀螺儀、旋轉矢量傳感器。
環境傳感器
這些傳感器測量各種環境參數,如空氣溫度、壓力、光照、濕度。這一類包括氣壓計、光度計、溫度計。
位置傳感器
這些傳感器測量設備的物理位置。這一類包括定位傳感器和磁力計。
你可以訪問設備提供傳感器和利用android sensor框架獲得原始傳感器數據。傳感器框架提供了一些類和接口,幫助你完成各種傳感器相關的任務。傳感器的具體類型稍後源碼中再來了解,我們可以訪問這些傳感器利用Android傳感器框架獲得原始傳感器數據。傳感器框架的一部分android.hardware包我們可以直接訪問,包括相關的類和接口:
SensorManager
Sensor
SensorEvent
SensorEventListener
獲取SensorManager的實例通過Context.getSystemService獲取
private SensorManager mSensorManager;
...
mSensorManager=(SensorManager)getSystemService(Context.SENSOR_SERVICE);
傳感器並不是所有手機都支持的,在原生android系統4.0以後才基本完全支持,我們該如何判斷手機設備支持哪些傳感器呢?且看下列代碼塊獲取所有支持傳感器和判斷是否支持某個傳感器
List deviceSensors = mSensorManager.getSensorList(Sensor.TYPE_ALL);

//....................處女分割線.........................

private SensorManager mSensorManager;
  ...
  mSensorManager = (SensorManager) getSystemService(Context.SENSOR_SERVICE);
  if (mSensorManager.getDefaultSensor(Sensor.TYPE_PRESSURE) != null){
  // Success! There's a pressure sensor.
  }
  else {
  // Failure! No pressure sensor.
  }
Sensor的使用需要對應的Activity在對應的聲明周期進行注冊和取消注冊,官方提供示例代碼如下
public class SensorActivity extends Activity implements SensorEventListener{
  private SensorManager mSensorManager;
  private Sensor mLight;

  @Override
  public final void onCreate(Bundle savedInstanceState){
    super.onCreate(savedInstanceState);
    setContentView(R.layout.main);

    mSensorManager=(SensorManager)getSystemService(Context.SENSOR_SERVICE);
    mLight=mSensorManager.getDefaultSensor(Sensor.TYPE_LIGHT);
  }

  @Override
  public final void onAccuracyChanged(Sensor sensor,int accuracy){
    // Do something here if sensor accuracy changes.
  }

  @Override
  public final void onSensorChanged(SensorEvent event){
    // The light sensor returns a single value.
    // Many sensors return 3 values, one for each axis.
    //event.value數組對應的值 value[0] x軸**值,value[1] y軸**值,value[2] z軸**值
    floatlux=event.values[0];
    // Do something with this sensor value.
  }

  @Override
  protected void onResume(){
    super.onResume();
    mSensorManager.registerListener(this,mLight,SensorManager.SENSOR_DELAY_NORMAL);
  }

  @Override
  protected void onPause(){
    super.onPause();
    mSensorManager.unregisterListener(this);
  }
}
SensorListener定義的兩個方法分別是精度發生變化和xyz軸上的對應值發生變化執行對應函數回調(官方源碼一個類一堆英文注釋目的是為了讓我們看不懂麼,漢語多麼掉渣天,一句話的事兒)
public interface SensorListener {

    public void onSensorChanged(int sensor, float[] values);

    public void onAccuracyChanged(int sensor, int accuracy);
}
SensorManager通過getSystemService獲取,具體實現原理可以參考我以前根據愛哥和何紅輝編寫的設計模式書籍學習記錄的博客:http://blog.csdn.net/analyzesystem/article/details/50054163以及個人關注羅升陽博客收藏一篇http://blog.csdn.net/luoshengyang/article/details/6578352,最好實操對照浏覽,看完助你超神。
廢話過後我們接著跑SensorMananger源碼(在通過android studio查閱源碼過程遇到英文注釋,如果你感覺很棘手,可以使用翔哥提供的插件,相關博文地址:http://blog.csdn.net/lmj623565791/article/details/51548272)SensorManager源碼內部定義了許多常量多數是個各種傳感器相關的初始化參數以及傳感器的類型等,內部方法對我們有用處的也就是上面的注冊於取消注冊。以及傳感器的響應延遲的默認值配置getDelay方法
SensorManager提供的register和unRegistern方法迭代,跟蹤發現核心類LegacySensorManager,通過其構造函數發現,旋轉傳感器的速率與屏幕旋轉的關聯,通過LegacySensorManager.onRotationChanged(rotation)同步旋轉的值,代碼如下
 public LegacySensorManager(SensorManager sensorManager) {
        mSensorManager = sensorManager;

        synchronized (SensorManager.class) {
            if (!sInitialized) {
                sWindowManager = IWindowManager.Stub.asInterface(
                        ServiceManager.getService("window"));
                if (sWindowManager != null) {
                    // if it's null we're running in the system process
                    // which won't get the rotated values
                    try {
                        sRotation = sWindowManager.watchRotation(
                                new IRotationWatcher.Stub() {
                                    public void onRotationChanged(int rotation) {
                                        LegacySensorManager.onRotationChanged(rotation);
                                    }
                                }
                        );
                    } catch (RemoteException e) {
                    }
                }
            }
        }
    }
ServiceManager在我上面提到的博客有提及,IWindowManager屬於IPC通信范疇的AIDL模塊,稍後會有專門博客介紹。由於篇幅關系這裡直接看register相關流程,unRegister略過
private boolean registerLegacyListener(int legacyType, int type,
            SensorListener listener, int sensors, int rate) {
        boolean result = false;
        // Are we activating this legacy sensor?
        if ((sensors & legacyType) != 0) {
            // if so, find a suitable Sensor
            //獲取默認Sensor流程先查出所有Sensor集合,根據匹配type值的結果,如果有則返回相應Sensor
            Sensor sensor = mSensorManager.getDefaultSensor(type);
            if (sensor != null) {
                // We do all of this work holding the legacy listener lock to ensure
                // that the invariants around listeners are maintained.  This is safe
                // because neither registerLegacyListener nor unregisterLegacyListener
                // are called reentrantly while sensors are being registered or unregistered.
                synchronized (mLegacyListenersMap) {
                    // If we don't already have one, create a LegacyListener
                    // to wrap this listener and process the events as
                    // they are expected by legacy apps.
                    LegacyListener legacyListener = mLegacyListenersMap.get(listener);
                    if (legacyListener == null) {
                        // we didn't find a LegacyListener for this client,
                        // create one, and put it in our list.
                        //如果Sensor根據type匹配到了,但是緩存Map裡面沒有需要重新緩存
                        legacyListener = new LegacyListener(listener);
                        mLegacyListenersMap.put(listener, legacyListener);
                    }

                    // register this legacy sensor with this legacy listener
                    if (legacyListener.registerSensor(legacyType)) {
                        // and finally, register the legacy listener with the new apis
                        // 再回到SensorMananger注冊的抽象方法
                        result = mSensorManager.registerListener(legacyListener, sensor, rate);
                    } else {
                        result = true; // sensor already enabled
                    }
                }
            }
        }
        return result;
    }
上例代碼中提到的靜態類LegacyListener實現了SensorEventerListener接口,重寫onAccuracyChanged和onSensorChanged方法在一定條件下執行相應回調,而回掉函數的參數values在調用mapSensorDataToWindow方法根據Type賦值
public void onAccuracyChanged(Sensor sensor, int accuracy) {
            try {
                mTarget.onAccuracyChanged(getLegacySensorType(sensor.getType()), accuracy);
            } catch (AbstractMethodError e) {
                // old app that doesn't implement this method
                // just ignore it.
            }
        }

        public void onSensorChanged(SensorEvent event) {
            final float v[] = mValues;
            v[0] = event.values[0];
            v[1] = event.values[1];
            v[2] = event.values[2];
            int type = event.sensor.getType();
            int legacyType = getLegacySensorType(type);
            mapSensorDataToWindow(legacyType, v, LegacySensorManager.getRotation());
            if (type == Sensor.TYPE_ORIENTATION) {
                if ((mSensors & SensorManager.SENSOR_ORIENTATION_RAW)!=0) {
                    mTarget.onSensorChanged(SensorManager.SENSOR_ORIENTATION_RAW, v);
                }
                if ((mSensors & SensorManager.SENSOR_ORIENTATION)!=0) {
                    v[0] = mYawfilter.filter(event.timestamp, v[0]);
                    mTarget.onSensorChanged(SensorManager.SENSOR_ORIENTATION, v);
                }
            } else {
                mTarget.onSensorChanged(legacyType, v);
            }
        }
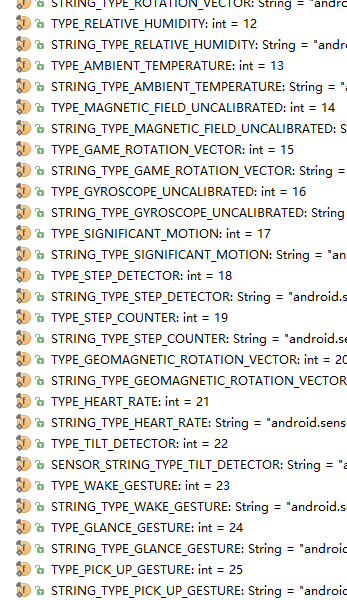
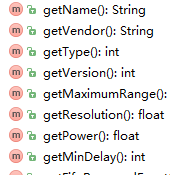
Sensor的具體Type定義參照源碼裡面的常量字段定義太多了不細說。提供的基本方法獲取設備相關信息


SensorEvent對象內部封裝value數組以及速率等相關參數,紀錄的數據在LegacySensorManager調用onSensZ喎?/kf/ware/vc/" target="_blank" class="keylink">vckNoYW5nZWS3vbeosbu0q8jr08PT2rzGy+NvblNlbnNvckNoYW5nZWS3vbeou9i199Do0qq1xLLOyv2hozwvcD4NCjxociAvPg0KPGg0IGlkPQ=="知識拓展">知識拓展‘
需求如果在搖一搖,取到結果非空需要震動效果,這時需要用到Vibrator,首先震動需要相應的權限
特別注意市面上已有部分手機支持android6.0,用戶可以拒絕權限請求,這裡我們需要兼容適配,可以參考我之前的一篇博文 Android開發之6.0運行時權限處理,我們為什麼一定要給權限呢?VibratorService源碼中進行了權限檢查,沒有權限會拋出異常
  @Override // Binder call
  public void vibrate(int uid, String opPkg, long milliseconds, int usageHint,
          IBinder token) {
      if (mContext.checkCallingOrSelfPermission(android.Manifest.permission.VIBRATE)
                != PackageManager.PERMISSION_GRANTED) {
          throw new SecurityException("Requires VIBRATE permission");
      }
     ..................................
  }
Vibrator為我們提供兩個直接操作方法vibrate(long[] pattern, int repeat)和cancel();pattern指代震動模式,repeat指代震動重復次數,對於傳入參數的限制條件請參照下例代碼
 if (pattern == null || pattern.length == 0
                    || isAll0(pattern)
                    || repeat >= pattern.length || token == null) {
                return;
            }
為了開發方便封裝了一個VibratorHelper類
/**
 * Created by idea on 2016/6/6.
 * Must have permissions :
 */
public class VibratorHelper {

    /**
     * 默認震動模式以及默認不重復震動
     * @param applicationContext
     */
    public static void startVibratorWithDefultPatternRepeat(Context applicationContext) {
        startVibratorWithDefultPattern(applicationContext, -1);
    }

    /**
     * 默認震動模式
     * @param applicationContext
     * @param repeatCount
     */
    public static void startVibratorWithDefultPattern(Context applicationContext, int repeatCount) {
        long[] pattern = {100,500,100,300,100,300,100,500};
        startVibrator(applicationContext,pattern,repeatCount);
    }

    /**
     * 不重復震動
     * @param applicationContext
     * @param pattern
     */
    public static void startVibratorWithNoRepeat(Context applicationContext, long[] pattern) {
        startVibrator(applicationContext,pattern,-1);
    }

    /**
     * 重復多次Vibrator設置repeatCount 如果只想震動一次,index設為-1
     * 想設置震動大小可以通過改變pattern來設定,如果開啟時間太短,震動效果可能感覺不到
     * @param applicationContext 用於獲取震動服務
     * @param pattern 自定義震動模式
     * @param repeatCount 自定義震動重復次數
     */
    public static void startVibrator(Context applicationContext, long[] pattern, int repeatCount) {
        Vibrator vibrator = (Vibrator) applicationContext.getSystemService(Context.VIBRATOR_SERVICE);
        vibrator.vibrate(pattern,repeatCount);
    }

    /**
     * 取消震動
     * @param vibrator
     */
    public static void cancelVibrator(Vibrator vibrator) {
        vibrator.cancel();
    }

}
關於Vibrator的深入源碼層不再敘述不是本篇重點,如果你感興趣可以查看VibratorService源碼和InputDevice、InputManager相關源碼,這裡奉上VibratorService源碼地址(其他類Android Studio內可以直接查看)https://github.com/android/platform_frameworks_base/blob/master/services/core/java/com/android/server/VibratorService.java
微信的搖一搖,檢索到附近的人你會聽“咔咔”的聲音提示,類似這種效果是要使用到MediaPlayer.MediaPlayer的實例創建方法有好幾種迭代,可以直接new 一個無參的對象,設置播放資源,也可以調用create方法傳入路徑等相關參數,播放流程:create>prepare>start 播放結束需要調用release釋放,終斷播放stop,下面是相關方法的具體含義:
isLooping():是否循環播放
isPlaying():是否正在播放
pause():暫停
prepare():准備(同步)
prepareAsync():准備(異步)
release():釋放MediaPlayer對象
reset():重置MediaPlayer對象
seekTo(int msec):指定播放的位置(以毫秒為單位的時間)
start():開始播放
stop():停止播放
setOnCompletionListener(MediaPlayer.OnCompletionListener listener): 播放監聽,播放結束回調onCompletion
界面結束注意釋放資源,如果音視頻還在播放注意stop然後釋放(stop只是針對搖一搖,像qq音樂那種後台也可以播放,更能需求不同!!),setDataSource方法切換/設置播放資源,在設置資源後要重新調用prepare方法>start
世面上的手機多數為定制機非原生,很多手機都提供了一些定制化的輔助功能,比如甩動手機熄滅屏幕,那麼在我們搖一搖的時候需要保持屏幕常量,老臣就辦不到了(一開始尋找了幾種方案代碼攔截都不成功),最後只有老實的手動關掉手機的搖一搖輔助功能,同時提供一篇不鎖屏幕相關的博客,需要push 到 system/app 安裝,地址http://blog.csdn.net/chenyafei617/article/details/6575621
在開發門禁app時需要搖一搖開門功能,不開app照樣開門,這裡就需要用到常駐進程,核心要素兩點:
首先開機自啟動服務
保證服務存活不被殺死
開機自啟動服務只需要注冊接收系統廣播,添加對應的權限,接收到系統廣播立即啟動服務
public class XXXReceiver extends BroadcastReceiver {

    @Override
    public void onReceive(Context context, Intent intent) {
        // TODO Auto-generated method stub
        Log.d("LibraryTestActivity", "recevie boot completed ... ");
        context.startService(new Intent(context, XXXService.class));
    }
}
android 開機自啟動的幾種方法,監聽不到RECEIVE_BOOT_COMPLETED的處理辦法,參考下面鏈接:http://www.itnose.net/st/6178717.html至於如何保證Service的存活,聽過FM蜻蜓麼,多個Service相互守護,普通的Service守護不能滿足你的需求時,可以考慮AIDL 搞個進程通信配合Service完成殺不死的服務,不得不說這是非常流氓的軟件,不到迫不得已不建議這樣搞。
上述知識點demo暫無,只作知識儲備。如果你有興趣可以仿寫京東搖一搖和微信搖一搖,以及撥號鍵盤左右晃動讓控件左右對齊、搖一搖開鎖屏幕(PowerManager核心),慕課網有京東搖一搖實現視頻
 Android動態加載框架DL的架構與基本原理解析
轉載請注明出處,本文來自【 Mr.Simple的博客 】。 我正在參加博客之星,點擊這裡投我一票吧,謝謝~ 前言 最近這一兩年,Android App使用插件化技術
 Android開發之基本控件和四種布局方式詳解
Android中的控件的使用方式和iOS中控件的使用方式基本相同,都是事件驅動。給控件添加事件也有接口回調和委托代理的方式。今天這篇博客就總結一下Android中常用的基
 Android App 內存洩露之Handler
Android App 內存洩露之Handler Handler也是造成內存洩露的一個重要的源頭,主要Handler屬於TLS(Thread Local Storage
 Android Notes 之 Activity生命周期的探索
Activity:作為四大組件之一,也是與用戶交互最多的組件,因此為了更好的交互效果,了解Activity的生命周期,正確分配每個階段該完成的工作就顯得十分必要,例如: