編輯:關於Android編程
吼,花了2天最後做出了一個類似於藍牙串口助手功能的小程序,其實也是實習公司的要求---有一個藍牙無線掃描槍,要求終端可以通過藍牙連接到該設備,並且藍牙無線掃描槍掃描二維碼或者條形碼的時候可以將二維碼或者條形碼的數據輸出到TextView中。
聽效果是不是感覺很好做。說明下藍牙掃描器的功能,有2中常用的模式--普通模式,SPP模式。 普通模式的話就是相當於藍牙連接後,掃描器就相當於一個外接的鍵盤,可以掃碼然後將數據輸出到EditText(必須獲得焦點)。SPP模式則是用於模擬串口通信的,在我看來就相當於開發者模式。。。
主要代碼就是Edittext的setOnKeyListener裡設置就好了。
et.setOnKeyListener(new EditText.OnKeyListener()

       {

       @Override

       publicboolean onKey(View v, int keyCode, KeyEvent event)

       {

           tv.setText(et.getText());

           returnfalse;

       }

       });
操作簡單,思路清晰,簡單粗暴!但是問題也很多,萬一你一個界面好多個EditText,比如登陸界面,除了你的那個自己知道別人看不到的EditText,還得有兩個EditText,一旦某一個獲得光標,你的掃描器就失去了作用,還會嚇使用者一跳。所以這種方案不適合用在需要推送的APP上。
https://segmentfault.com/a/1190000004899799
http://www.cnblogs.com/wenjiang/p/3200138.html
具體的解釋我會在代碼裡說,光說理論本人菜的摳腳。首先說說布局,超級簡單。一個TextView,一個EditText(測試用的) , 一個Button(可以根據自己的需要去掉)。碼就不貼了,到時候直接發項目吧!
說說Button的點擊事件(可以根據自己的需求進行修改),點擊進入一個Activity顯示所有的掃描到的藍牙設備--DeviceListAcitivty
DeviceListActivity裡面需要做的事情就是將能掃描到的藍牙設備顯示在ListView中,如果你確定你只要連接一種設備的話並且知道設備的Address的話你大可省略這個操作。這裡當學習用。
import android.app.Activity;
import android.bluetooth.BluetoothAdapter;
import android.bluetooth.BluetoothDevice;
import android.content.BroadcastReceiver;
import android.content.Context;
import android.content.Intent;
import android.content.IntentFilter;
import android.os.Bundle;
import android.util.Log;
import android.view.View;
import android.view.Window;
import android.view.View.OnClickListener;
import android.widget.AdapterView;
import android.widget.ArrayAdapter;
import android.widget.Button;
import android.widget.ListView;
import android.widget.TextView;
import android.widget.AdapterView.OnItemClickListener;


public class DeviceListActivity extends Activity {
    // 調試用
    private static final String TAG = "DeviceListActivity";
    private static final boolean D = true;

    // 返回時數據標簽
    public static String EXTRA_DEVICE_ADDRESS = "設備地址";

    // 成員域
    private BluetoothAdapter mBtAdapter;
    private ArrayAdapter mPairedDevicesArrayAdapter;
    private ArrayAdapter mNewDevicesArrayAdapter;

    @Override
    protected void onCreate(Bundle savedInstanceState) {
        super.onCreate(savedInstanceState);

        // 創建並顯示窗口
        requestWindowFeature(Window.FEATURE_INDETERMINATE_PROGRESS);  //設置窗口顯示模式為窗口方式
        setContentView(R.layout.device_list);

        // 設定默認返回值為取消
        setResult(Activity.RESULT_CANCELED);

        // 設定掃描按鍵響應
        Button scanButton = (Button) findViewById(R.id.button_scan);
        scanButton.setOnClickListener(new OnClickListener() {
            public void onClick(View v) {
                doDiscovery();
                v.setVisibility(View.GONE);
            }
        });

        // 初使化設備存儲數組
        mPairedDevicesArrayAdapter = new ArrayAdapter<>(this, R.layout.device_name);
        mNewDevicesArrayAdapter = new ArrayAdapter<>(this, R.layout.device_name);

        // 設置已配隊設備列表

        ListView pairedListView = (ListView) findViewById(R.id.paired_devices);
        pairedListView.setAdapter(mPairedDevicesArrayAdapter);
        pairedListView.setOnItemClickListener(mDeviceClickListener);

        // 設置新查找設備列表
        ListView newDevicesListView = (ListView) findViewById(R.id.new_devices);
        newDevicesListView.setAdapter(mNewDevicesArrayAdapter);
        newDevicesListView.setOnItemClickListener(mDeviceClickListener);

        // 注冊接收查找到設備action接收器
        IntentFilter filter = new IntentFilter(BluetoothDevice.ACTION_FOUND);
        this.registerReceiver(mReceiver, filter);

        // 注冊查找結束action接收器
        filter = new IntentFilter(BluetoothAdapter.ACTION_DISCOVERY_FINISHED);
        this.registerReceiver(mReceiver, filter);

        // 得到本地藍牙句柄
        mBtAdapter = BluetoothAdapter.getDefaultAdapter();

        // 得到已配對藍牙設備列表
        //Set pairedDevices = mBtAdapter.getBondedDevices();

        // 添加已配對設備到列表並顯示
        // if (pairedDevices.size() > 0) {
        // findViewById(R.id.title_paired_devices).setVisibility(View.VISIBLE);
        //    for (BluetoothDevice device : pairedDevices) {
        //         mPairedDevicesArrayAdapter.add(device.getName() + "\n" + device.getAddress());
        //     }
        // } else {
        //     String noDevices = "No devices have been paired";
        //     mPairedDevicesArrayAdapter.add(noDevices);
        // }
    }

    @Override
    protected void onDestroy() {
        super.onDestroy();

        // 關閉服務查找
        if (mBtAdapter != null) {
            mBtAdapter.cancelDiscovery();
        }

        // 注銷action接收器
        this.unregisterReceiver(mReceiver);
    }

    public void OnCancel(View v){
        finish();
    }
    /**
     * 開始服務和設備查找
     */
    private void doDiscovery() {
        if (D) Log.d(TAG, "doDiscovery()");

        // 在窗口顯示查找中信息
        setProgressBarIndeterminateVisibility(true);
        setTitle("查找設備中...");

        // 顯示其它設備(未配對設備)列表
        findViewById(R.id.title_new_devices).setVisibility(View.VISIBLE);

        // 關閉再進行的服務查找
        if (mBtAdapter.isDiscovering()) {
            mBtAdapter.cancelDiscovery();
        }
        //並重新開始
        mBtAdapter.startDiscovery();
    }

    // 選擇設備響應函數
    private OnItemClickListener mDeviceClickListener = new OnItemClickListener() {
        public void onItemClick(AdapterView av, View v, int arg2, long arg3) {
            // 准備連接設備,關閉服務查找
            mBtAdapter.cancelDiscovery();

            // 得到mac地址
            String info = ((TextView) v).getText().toString();
            String address = info.substring(info.length() - 17);

            // 設置返回數據
            Intent intent = new Intent();
            intent.putExtra(EXTRA_DEVICE_ADDRESS, address);

            // 設置返回值並結束程序
            setResult(Activity.RESULT_OK, intent);
            finish();
        }
    };

    // 查找到設備和搜索完成action監聽器
    private final BroadcastReceiver mReceiver = new BroadcastReceiver() {
        @Override
        public void onReceive(Context context, Intent intent) {
            String action = intent.getAction();

            // 查找到設備action
            if (BluetoothDevice.ACTION_FOUND.equals(action)) {
                // 得到藍牙設備
                BluetoothDevice device = intent.getParcelableExtra(BluetoothDevice.EXTRA_DEVICE);
                // 如果是已配對的則略過,已得到顯示,其余的在添加到列表中進行顯示
                if (device.getBondState() != BluetoothDevice.BOND_BONDED) {
                    mNewDevicesArrayAdapter.add(device.getName() + "\n" + device.getAddress());
                }else{  //添加到已配對設備列表
                    mPairedDevicesArrayAdapter.add(device.getName() + "\n" + device.getAddress());
                }
                // 搜索完成action
            } else if (BluetoothAdapter.ACTION_DISCOVERY_FINISHED.equals(action)) {
                setProgressBarIndeterminateVisibility(false);
                setTitle("選擇要連接的設備");
                if (mNewDevicesArrayAdapter.getCount() == 0) {
                    String noDevices = "沒有找到新設備";
                    mNewDevicesArrayAdapter.add(noDevices);
                }
                //   if(mPairedDevicesArrayAdapter.getCount() > 0)
                //  	findViewById(R.id.title_paired_devices).setVisibility(View.VISIBLE);
            }
        }
    };


}
代碼貼在上面,具體的代碼解釋也寫在代碼上了,其實我後面是不打算做這部操作的,因為針對只需要連接一個藍牙設備的程序來說,當我知道了藍牙設備的Mac地址我就可以直接找到設備,根本不需要查詢。但不得不說回來, 當廠家沒有給你藍牙設備的Mac地址的時候。你就不得不做這步操作了!所以推薦的話還是把這步操作給做了的好,具體怎麼操作還是得看項目的要求。至於如何查找藍牙設備以及藍牙設備的狀態,上面的代碼寫的很詳細,結合我之前推薦的兩篇文章就很好懂了。
但由於它寫的代碼過於復雜也不是一個框架可以直接利用,所以就沒有深究。https://github.com/hzjerry/BluetoothSppPro。
沒辦法了,實踐是檢驗真理的唯一標准那就只能開始自己測試了,接下來第二篇文章就發揮了作用,可能我不需要實現ServerSocket服務端的編程,在使用藍牙串口助手測試的時候,你配對上加連接上就可以直接用了,說明我只需要和它(藍牙槍)能連接上就好了。連接的做法步驟如下:
首先你得獲取到你需要連接的設備。(這裡就需要你得設備的Mac地址)你需要建立與服務端通信的Socket,看我之前的博客客戶端都是通過IP和端口來獲得的通信的socket,服務端是通過accept()的方式獲取的,
 btn.setOnClickListener(new View.OnClickListener() {
            @Override
            public void onClick(View v) {
                mBluetoothDevice = mBluetoothAdapter.getRemoteDevice(address);

                try{
                    mBluetoothSocket = mBluetoothDevice.
                            createRfcommSocketToServiceRecord
                                    (UUID.fromString(MY_UUID));
                }catch (IOException e){
                    Toast.makeText(MainActivity.this, "配對失敗,原因是:" + e.getMessage(), Toast.LENGTH_SHORT)
                            .show();
                    Log.e("過程", "失敗的原因是:" + e.getMessage());
                }
                //與設備進行連接
                try{
                    mBluetoothSocket.connect();
                    Toast.makeText(MainActivity.this, "連接"+ mBluetoothDevice.getName()
                            + "成功", Toast.LENGTH_SHORT).show();
                    Log.e("TAGGGAGGAGGHG","連接過程");
                } catch (IOException e) {
                    try{
                        Toast.makeText(MainActivity.this, "連接失敗,原因是:" + e.getMessage(), Toast.LENGTH_SHORT).show();
                        mBluetoothSocket.close();
                        mBluetoothSocket = null;
                        Log.e("連接失敗", "連接失敗的原因是:" + e.getMessage());
                    } catch (IOException e1) {
                        e1.printStackTrace();
                    }
                    return;
                }

                //與設備進行數據傳輸
                try{
                    is = mBluetoothSocket.getInputStream();
                }catch (IOException e){
                    Toast.makeText(MainActivity.this, "接收數據失敗", Toast.LENGTH_SHORT).show();
                    return;
                }

                if(ready_receive == false){
                    ReadThread.start();
                    ready_receive = true;
                }else {
                    isReceiving = true;
                }
            }
        });
Thread ReadThread = new Thread(){
        public void run(){
            int num = 0;
            byte[] buffer = new byte[1024];
            byte[] buffer_new = new byte[1024];

            int n = 0;
            isReceiving= true;
            while(true){
                try {
                    while (is.available() == 0){
                        while (isReceiving == false){}
                    }
                    while(true){
                        num = is.read(buffer);
                        n = 0;

                        String s0 = new String(buffer, 0, num);
//                        fmsg += s0;
                        for (int i = 0; i < num; i++ ){
                            if((buffer[i] == 0x0d) && (buffer[i + 1] == 0x0a)){
                                buffer_new[n] = 0x0a;
                                i++;
                            }else{
                                buffer_new[n] = buffer[i];
                            }
                            n++;
                        }
                        String s = new String(buffer_new, 0, n);
                        receive_msg += s;
                        if (is.available() == 0) break;
                    }
                    handler.sendMessage(handler.obtainMessage());
                }catch (IOException e){

                }
            }
        }
    };
 跟我學Android之十一 列表和適配器
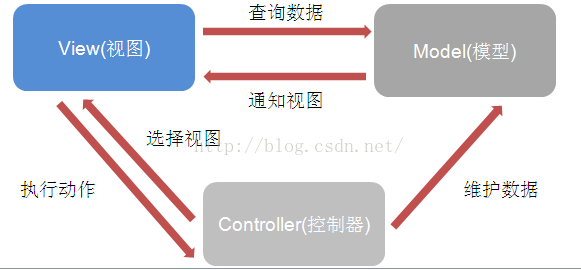
本章內容第1節 列表類視圖概述第2節 列表視圖ListView第3節 下拉視圖Spinner本章目標 理解MVC模式的設計思想。了解Adapter
 [Android測試] AS+Appium+Java+Win 自動化測試之八:使用PageObject模式和重封裝
一、 What? 什麼是PageObject?簡稱PO,這是一個設計模式,其實設計模式就是代碼的架構,一個整體的框架。例如mvc 就是模型-視圖-控制的一個代碼架構,mv
 如何寫一個通用的列表控件
絕大多數項目總都會有各種形形色色的列表界面,但其實這些界面的區別就在於列表子項的布局不同和點擊事件的響應不同而已,然而每次有個新的列表界面從適配器到Activity都需要
 Android 仿Win8的metro的UI界面
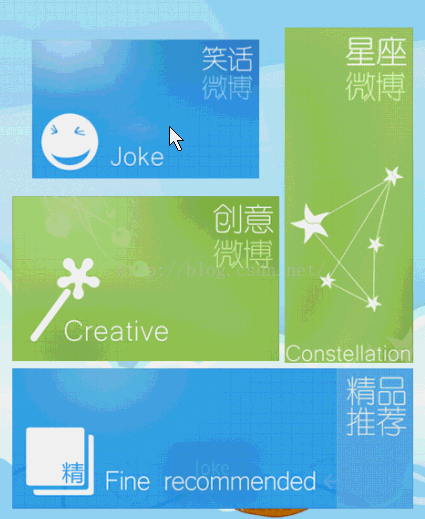
效果圖如下(笑話收縮效果):view的一個類(自定義布局類)public class MyImageView extends ImageView{ private s